Editing stock in the Stock editor in the product view
About this article
Stock levels can be edited from two different views. One view is the Stock View where you will be able to set a new stock level by overriding the current level. However, if you would like to add or remove a certain amount of inventory to the current levels, this is easily done using the Stock Editor which you can access by editing the Variant in the product view or by Edit stock in stock view.
Stock editor on Product level
To work with your stock inventory inside the Product view, follow the steps below:
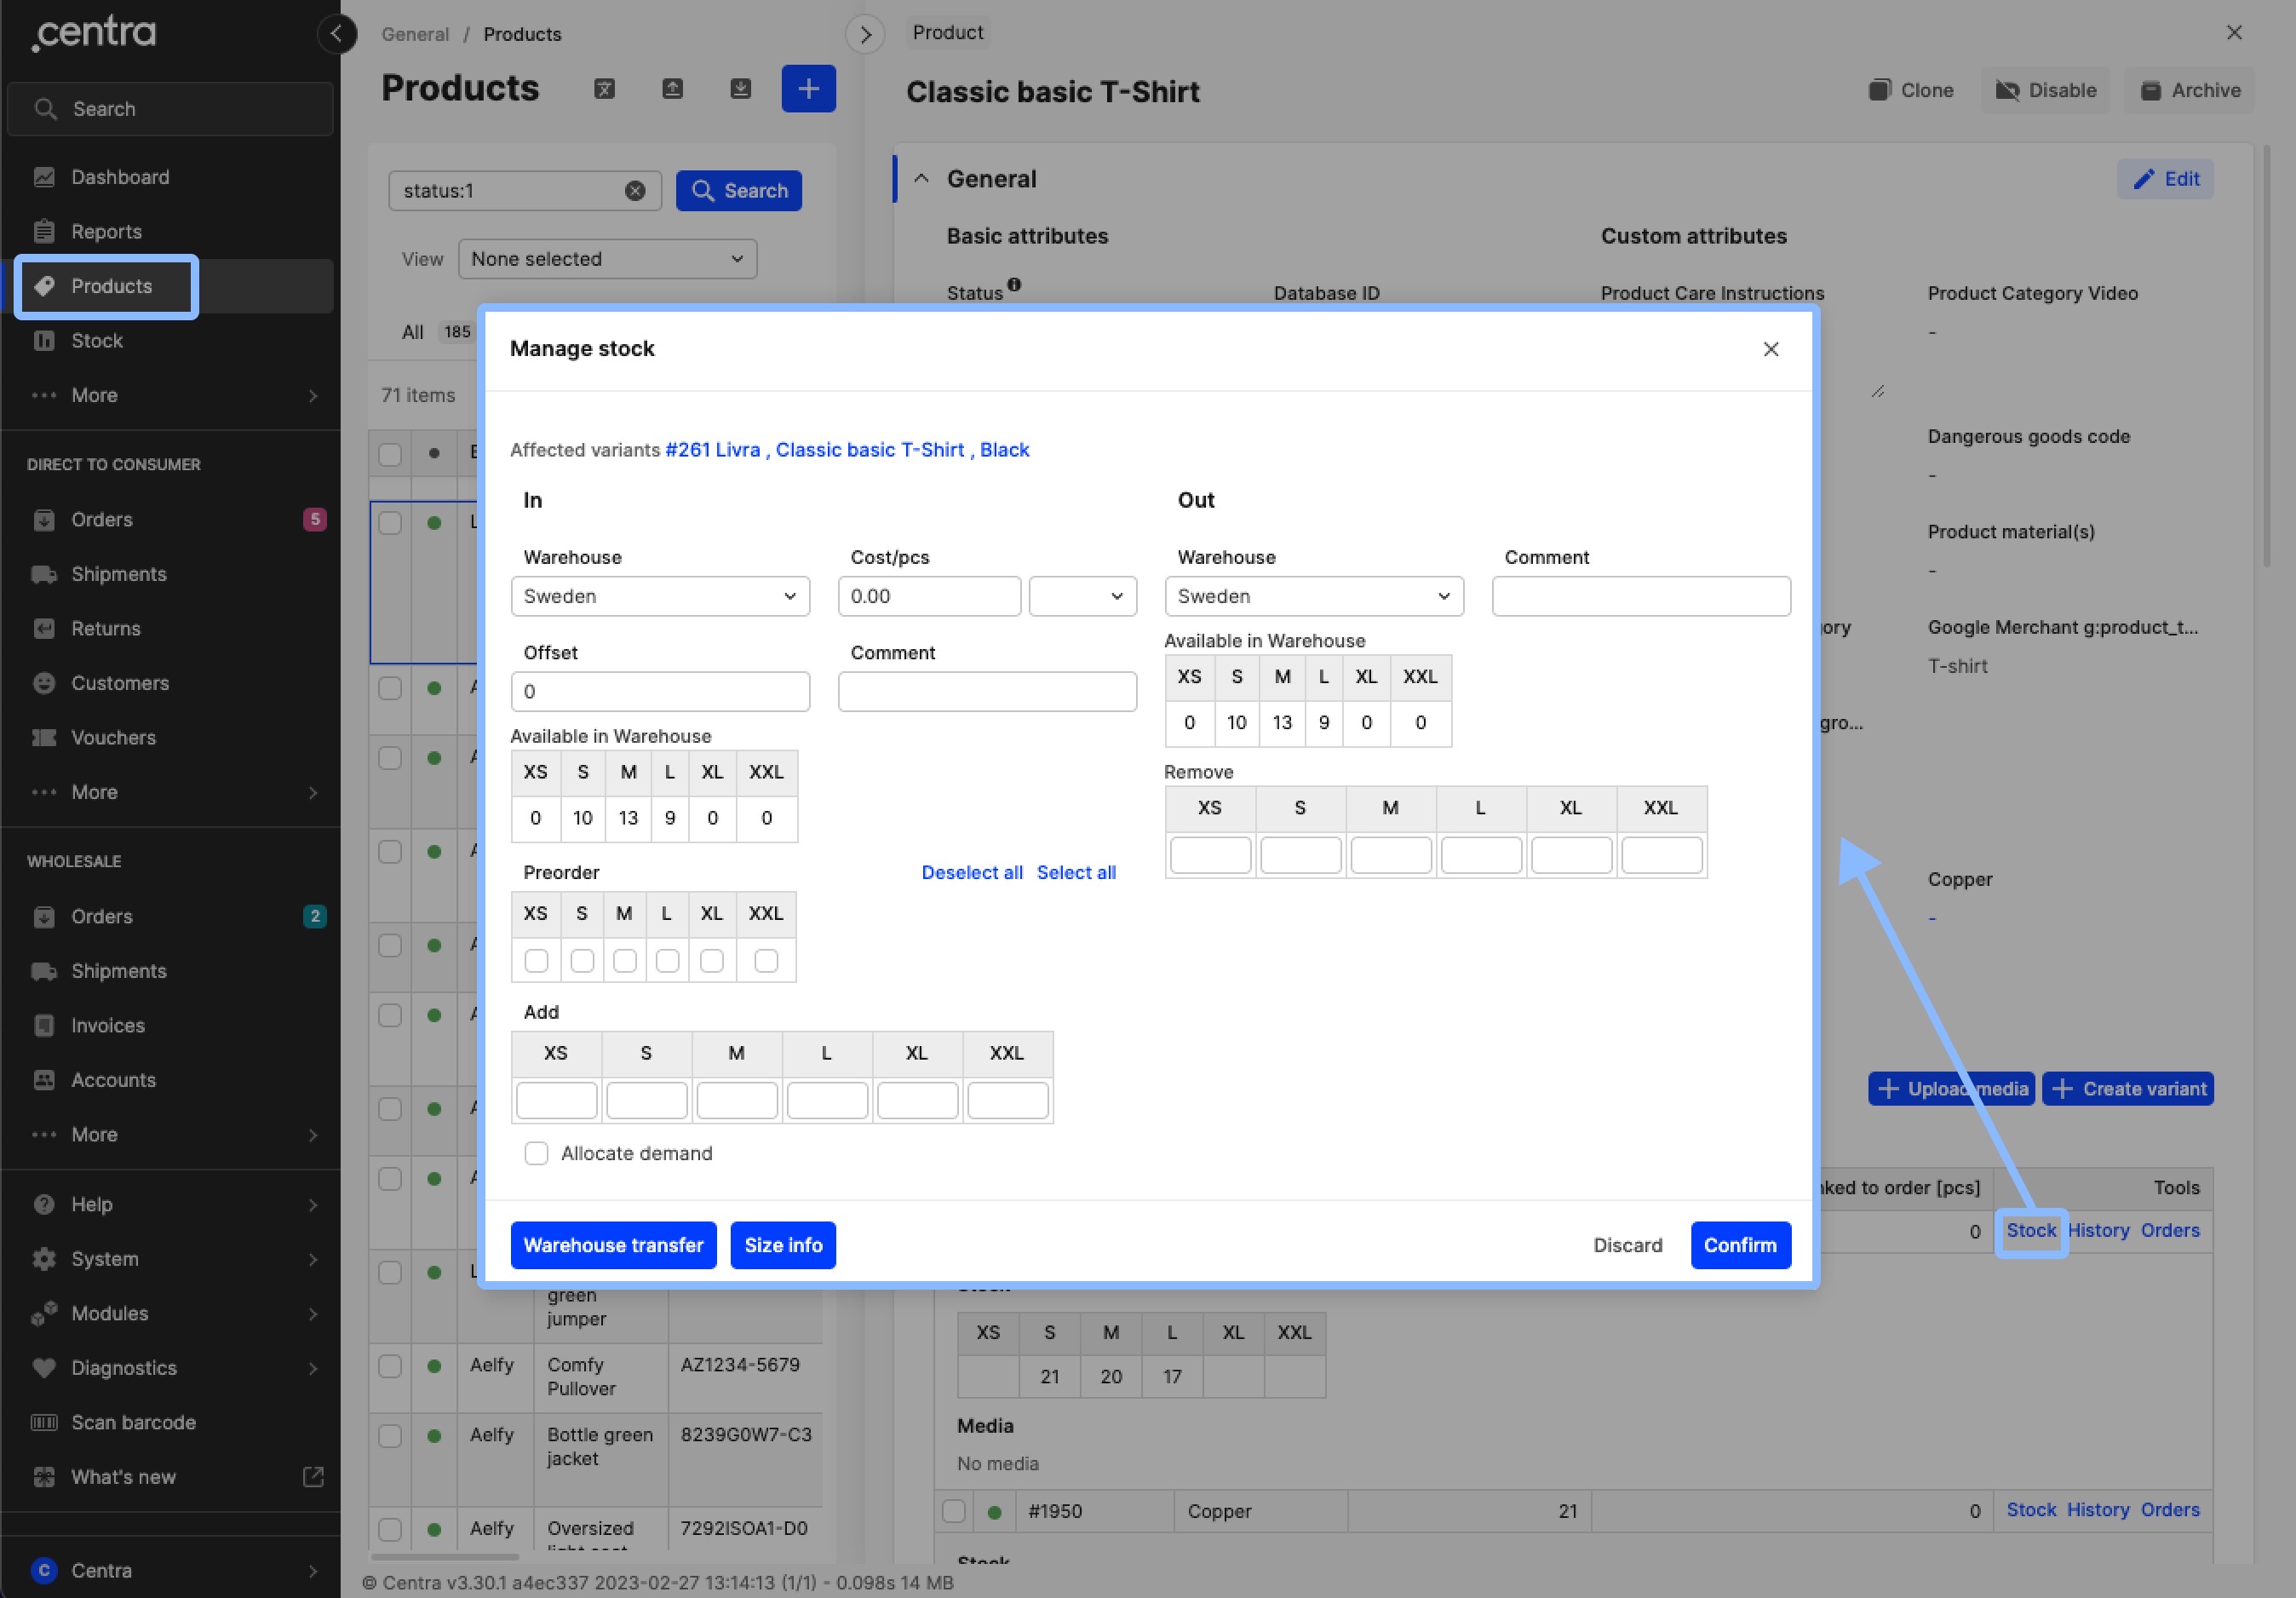
- Click 'Products' in the menu
- Select a product of your choice
- Within the General section, scroll down to the Variants and under Tools click on 'Stock' on the desired variant
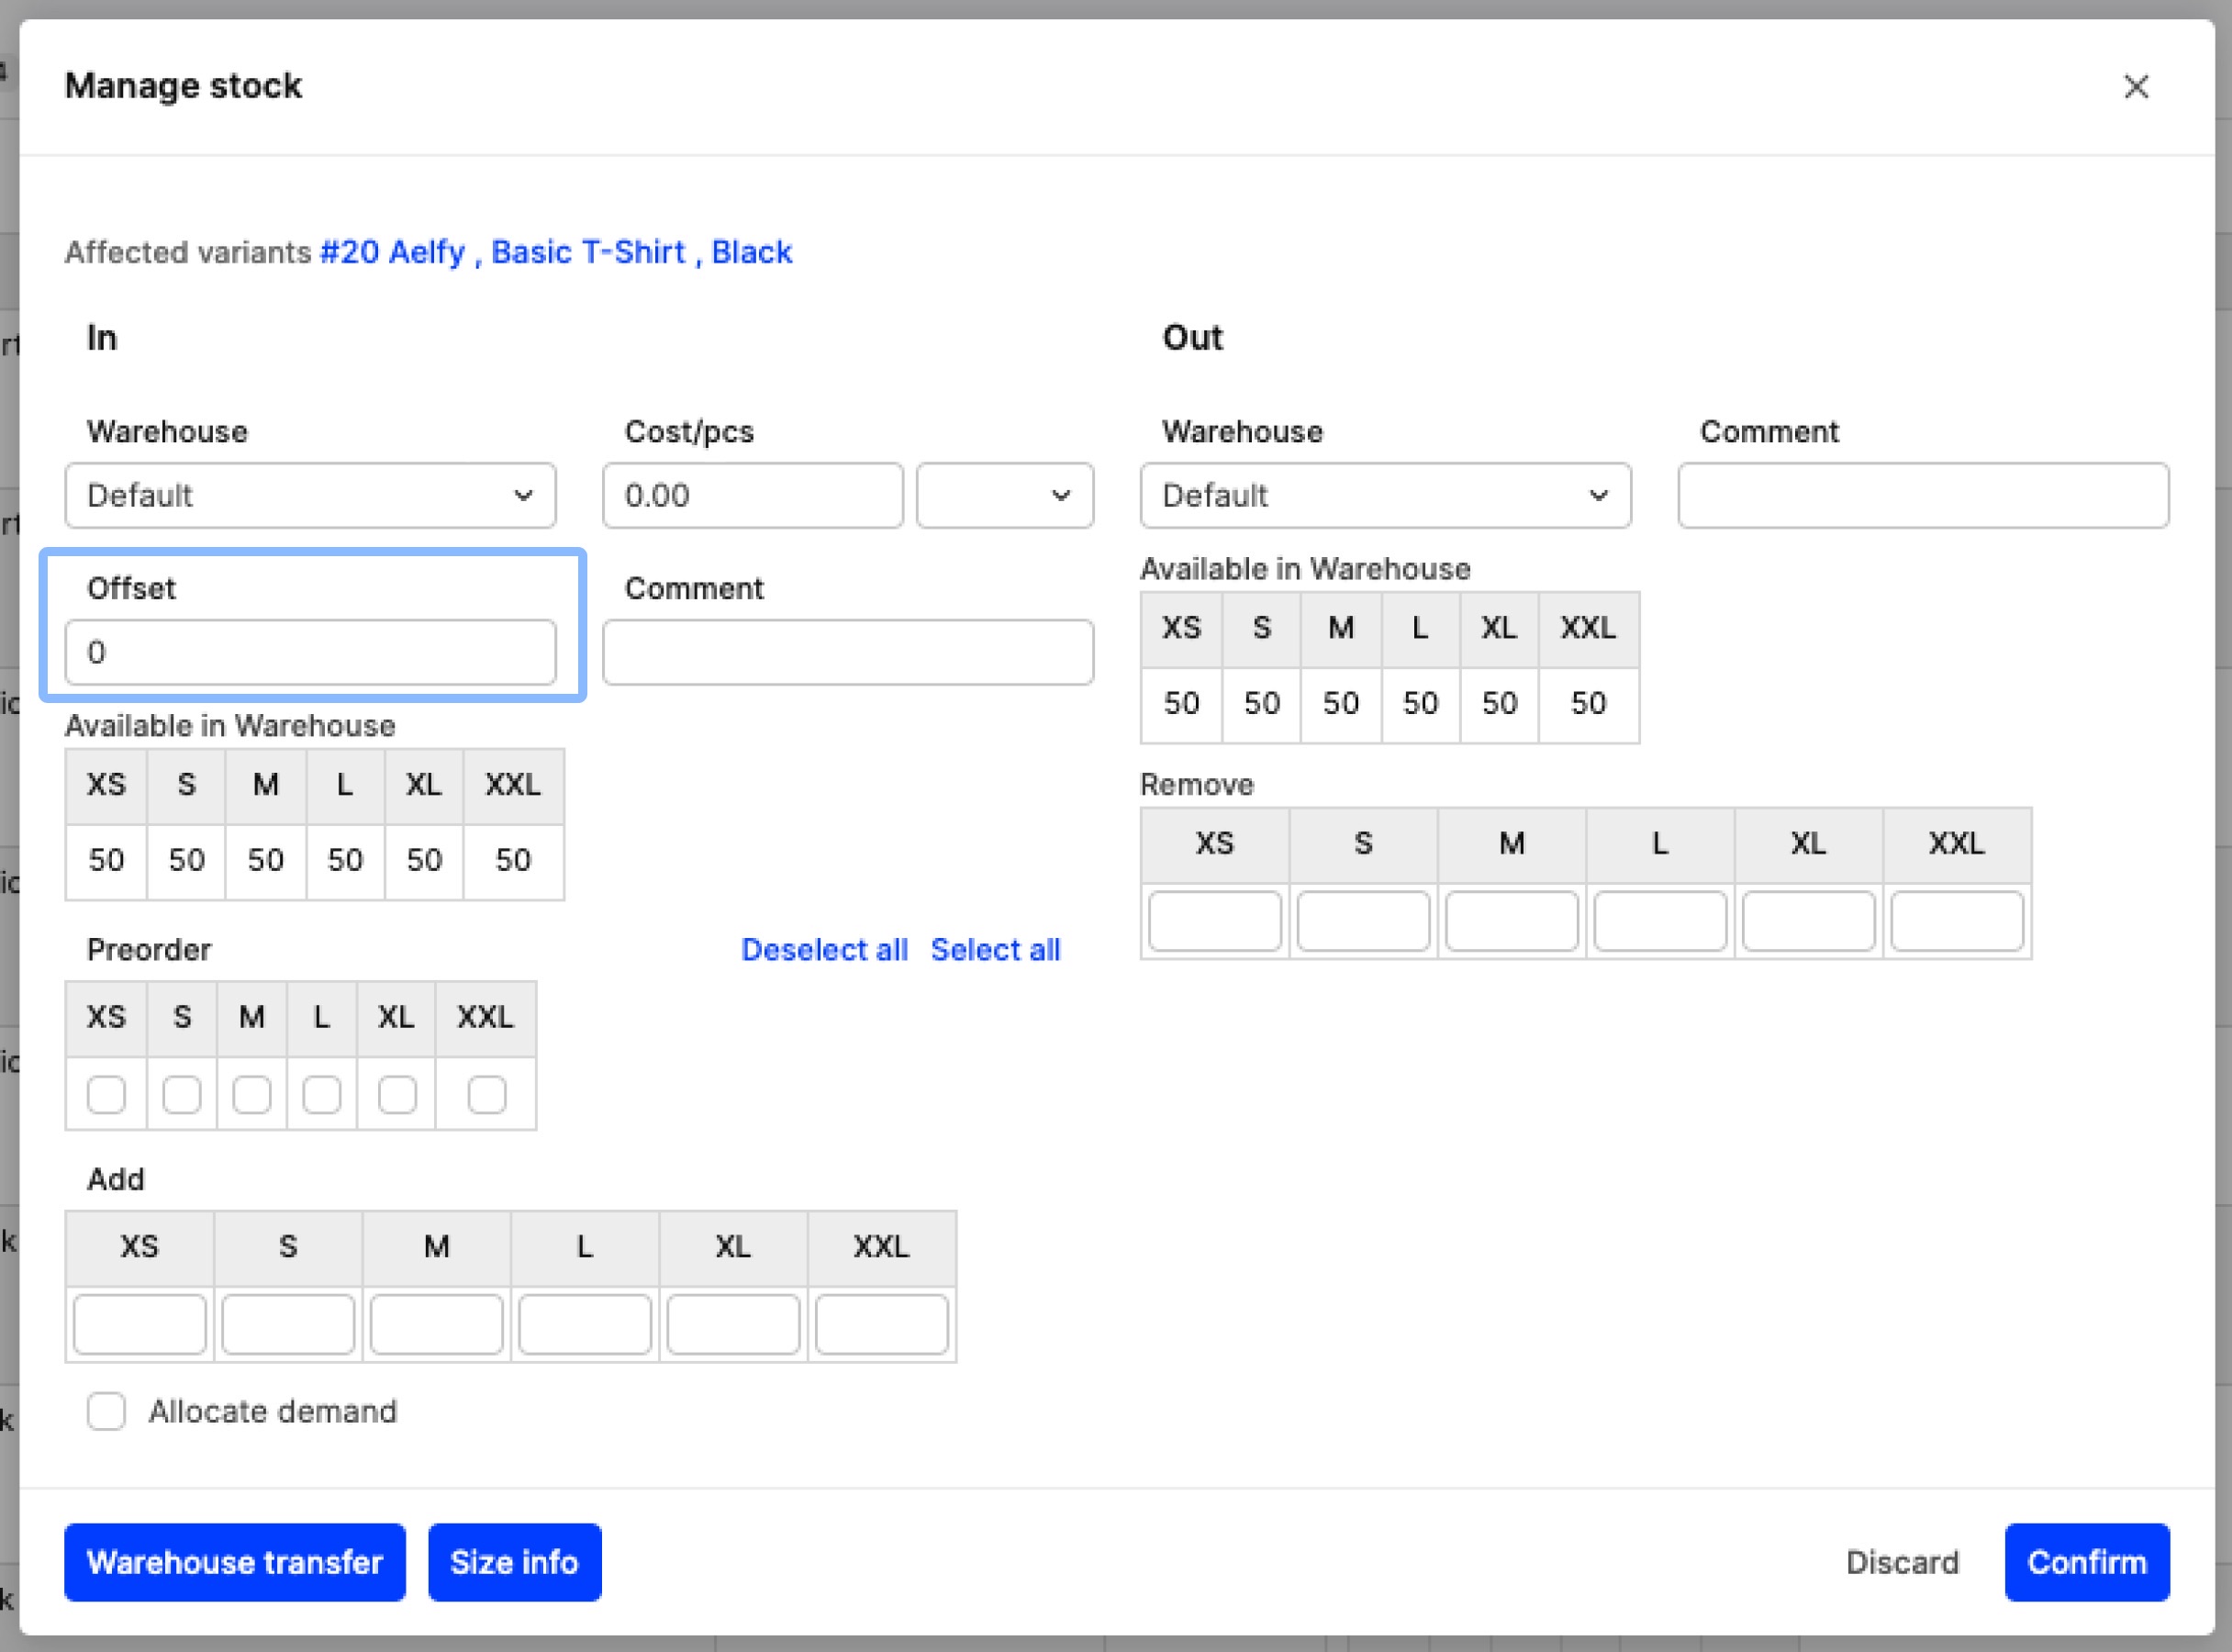
- The Stock editor pop-up appears:
Stock editor on Stock page
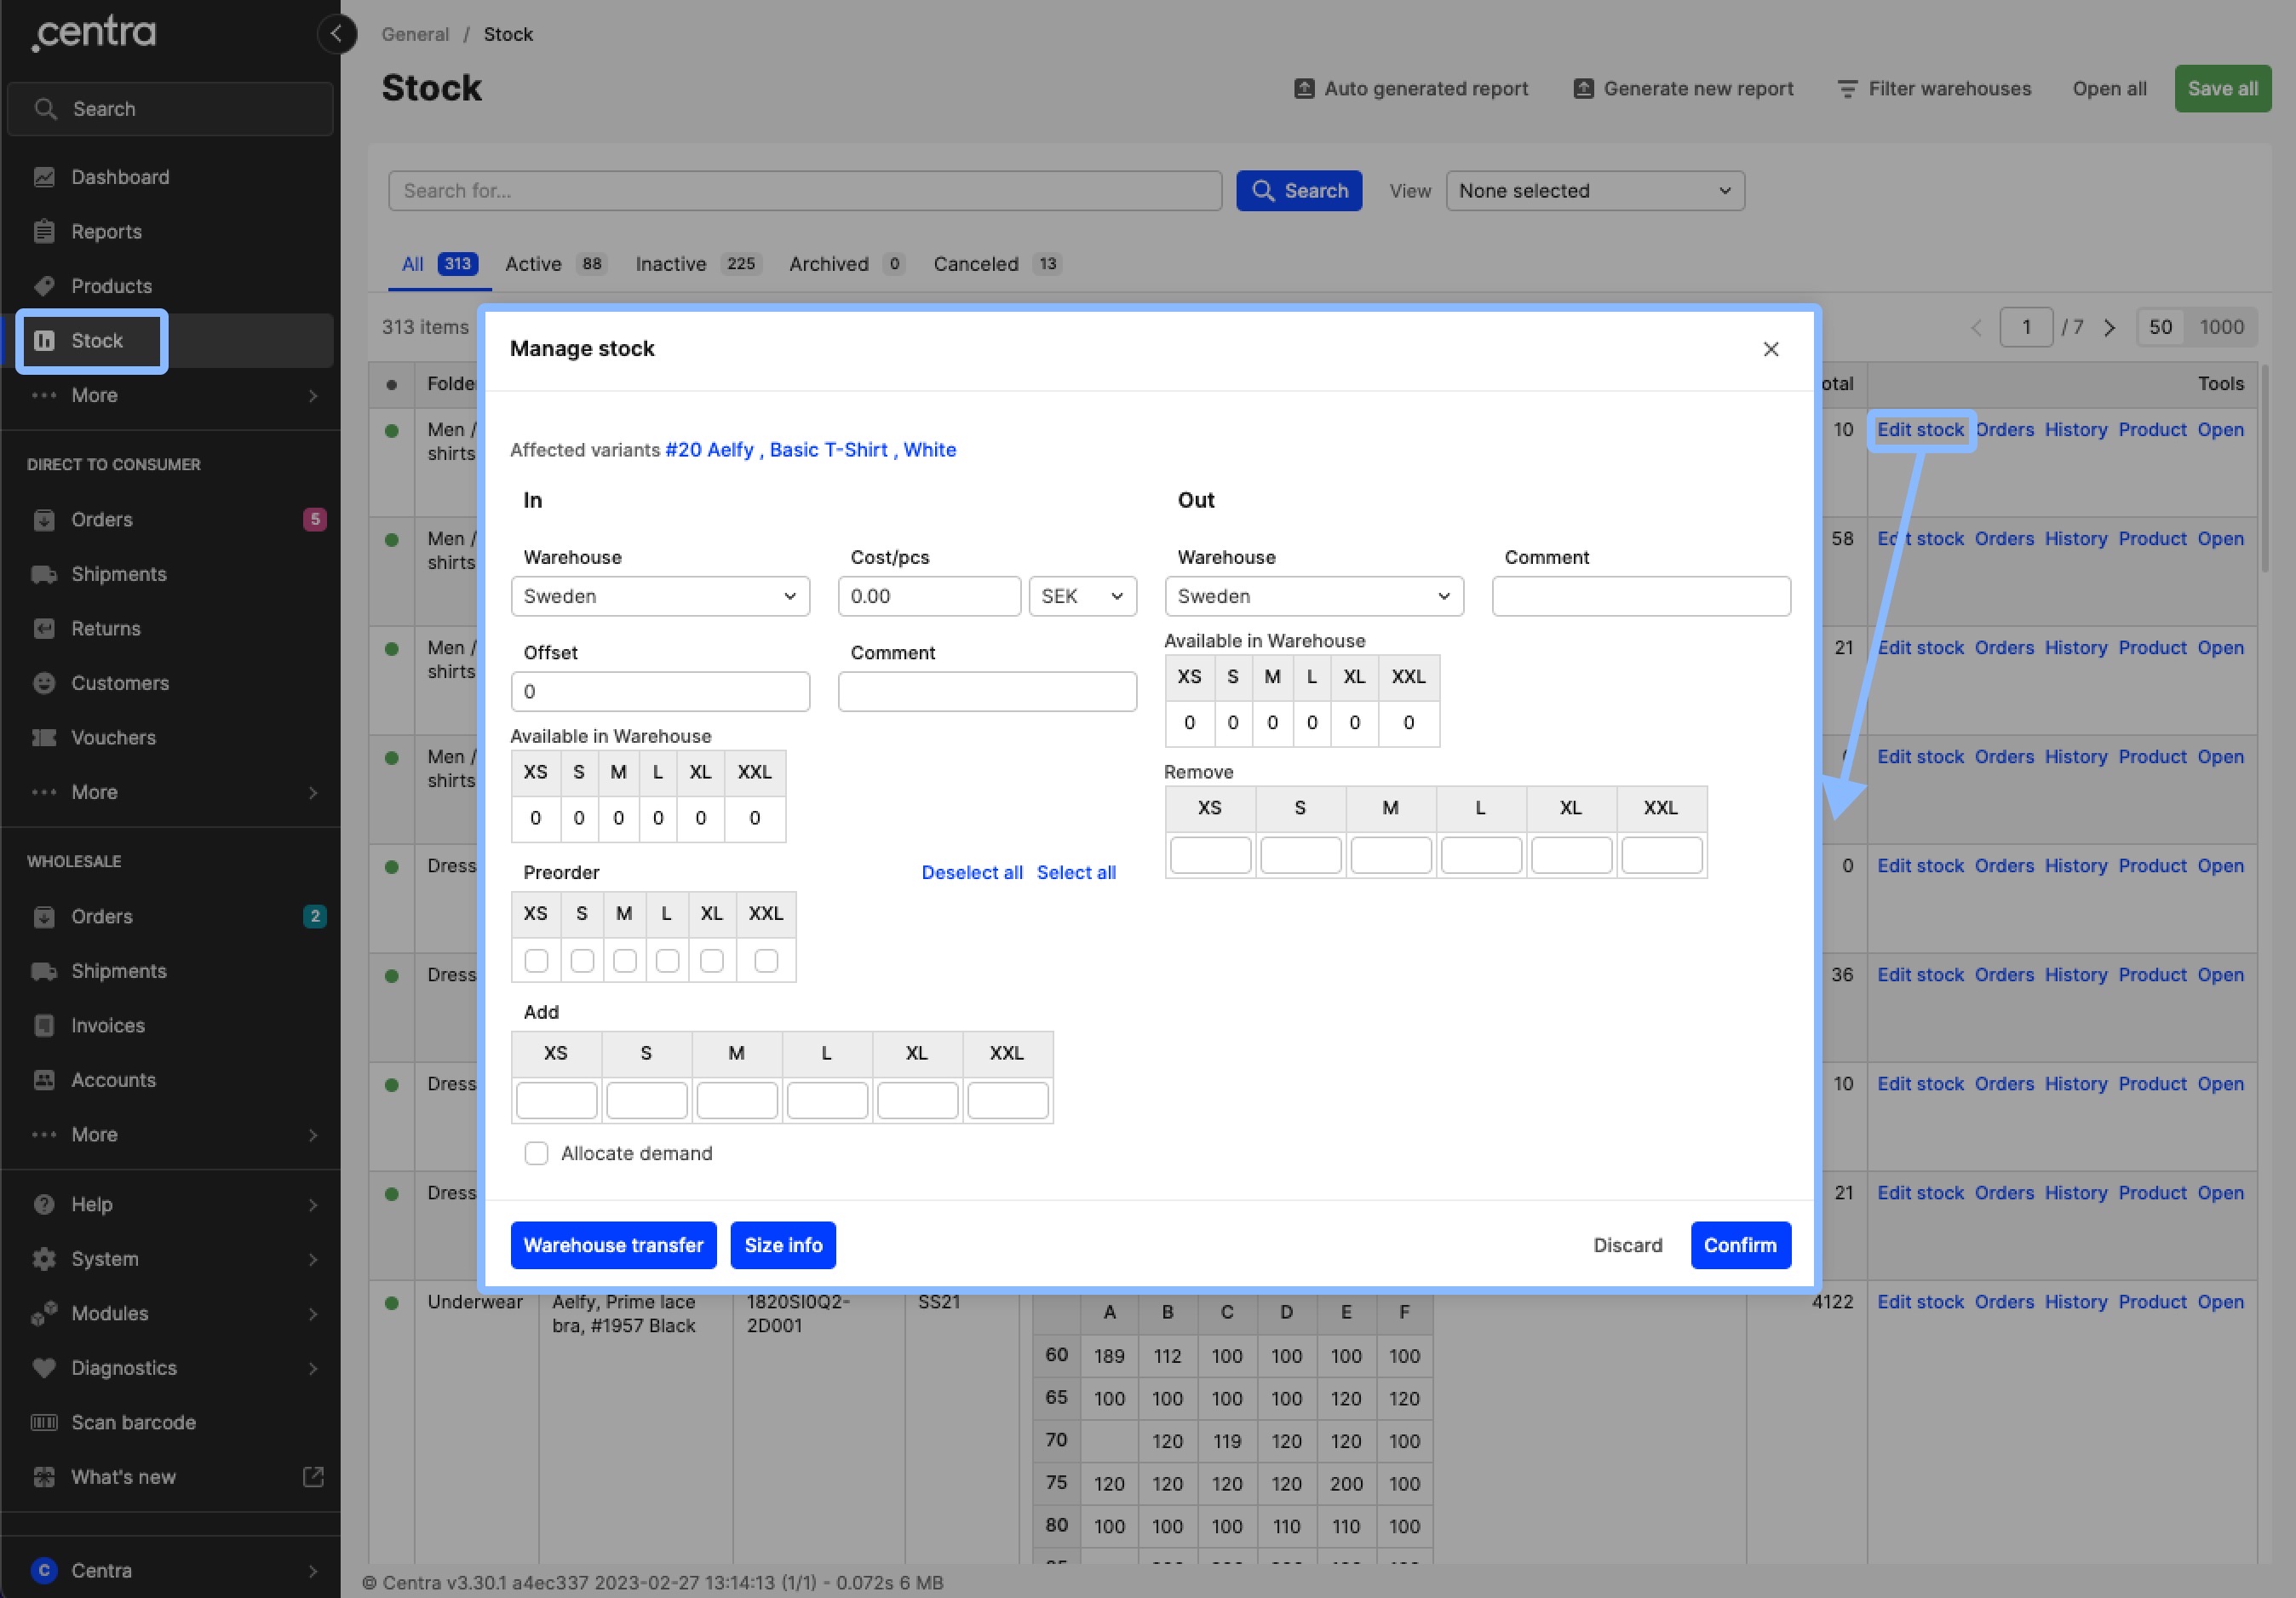
- Click on 'Stock' in the menu
- On the row of your desired product, click on 'Edit stock' under Tools
- You can now make stock changes through the Stock editor pop-up:
Stock editor layout
The Stock editor can be separated into 4 parts: Affected variants (1), In (2), Out (3), CTA buttons (4):
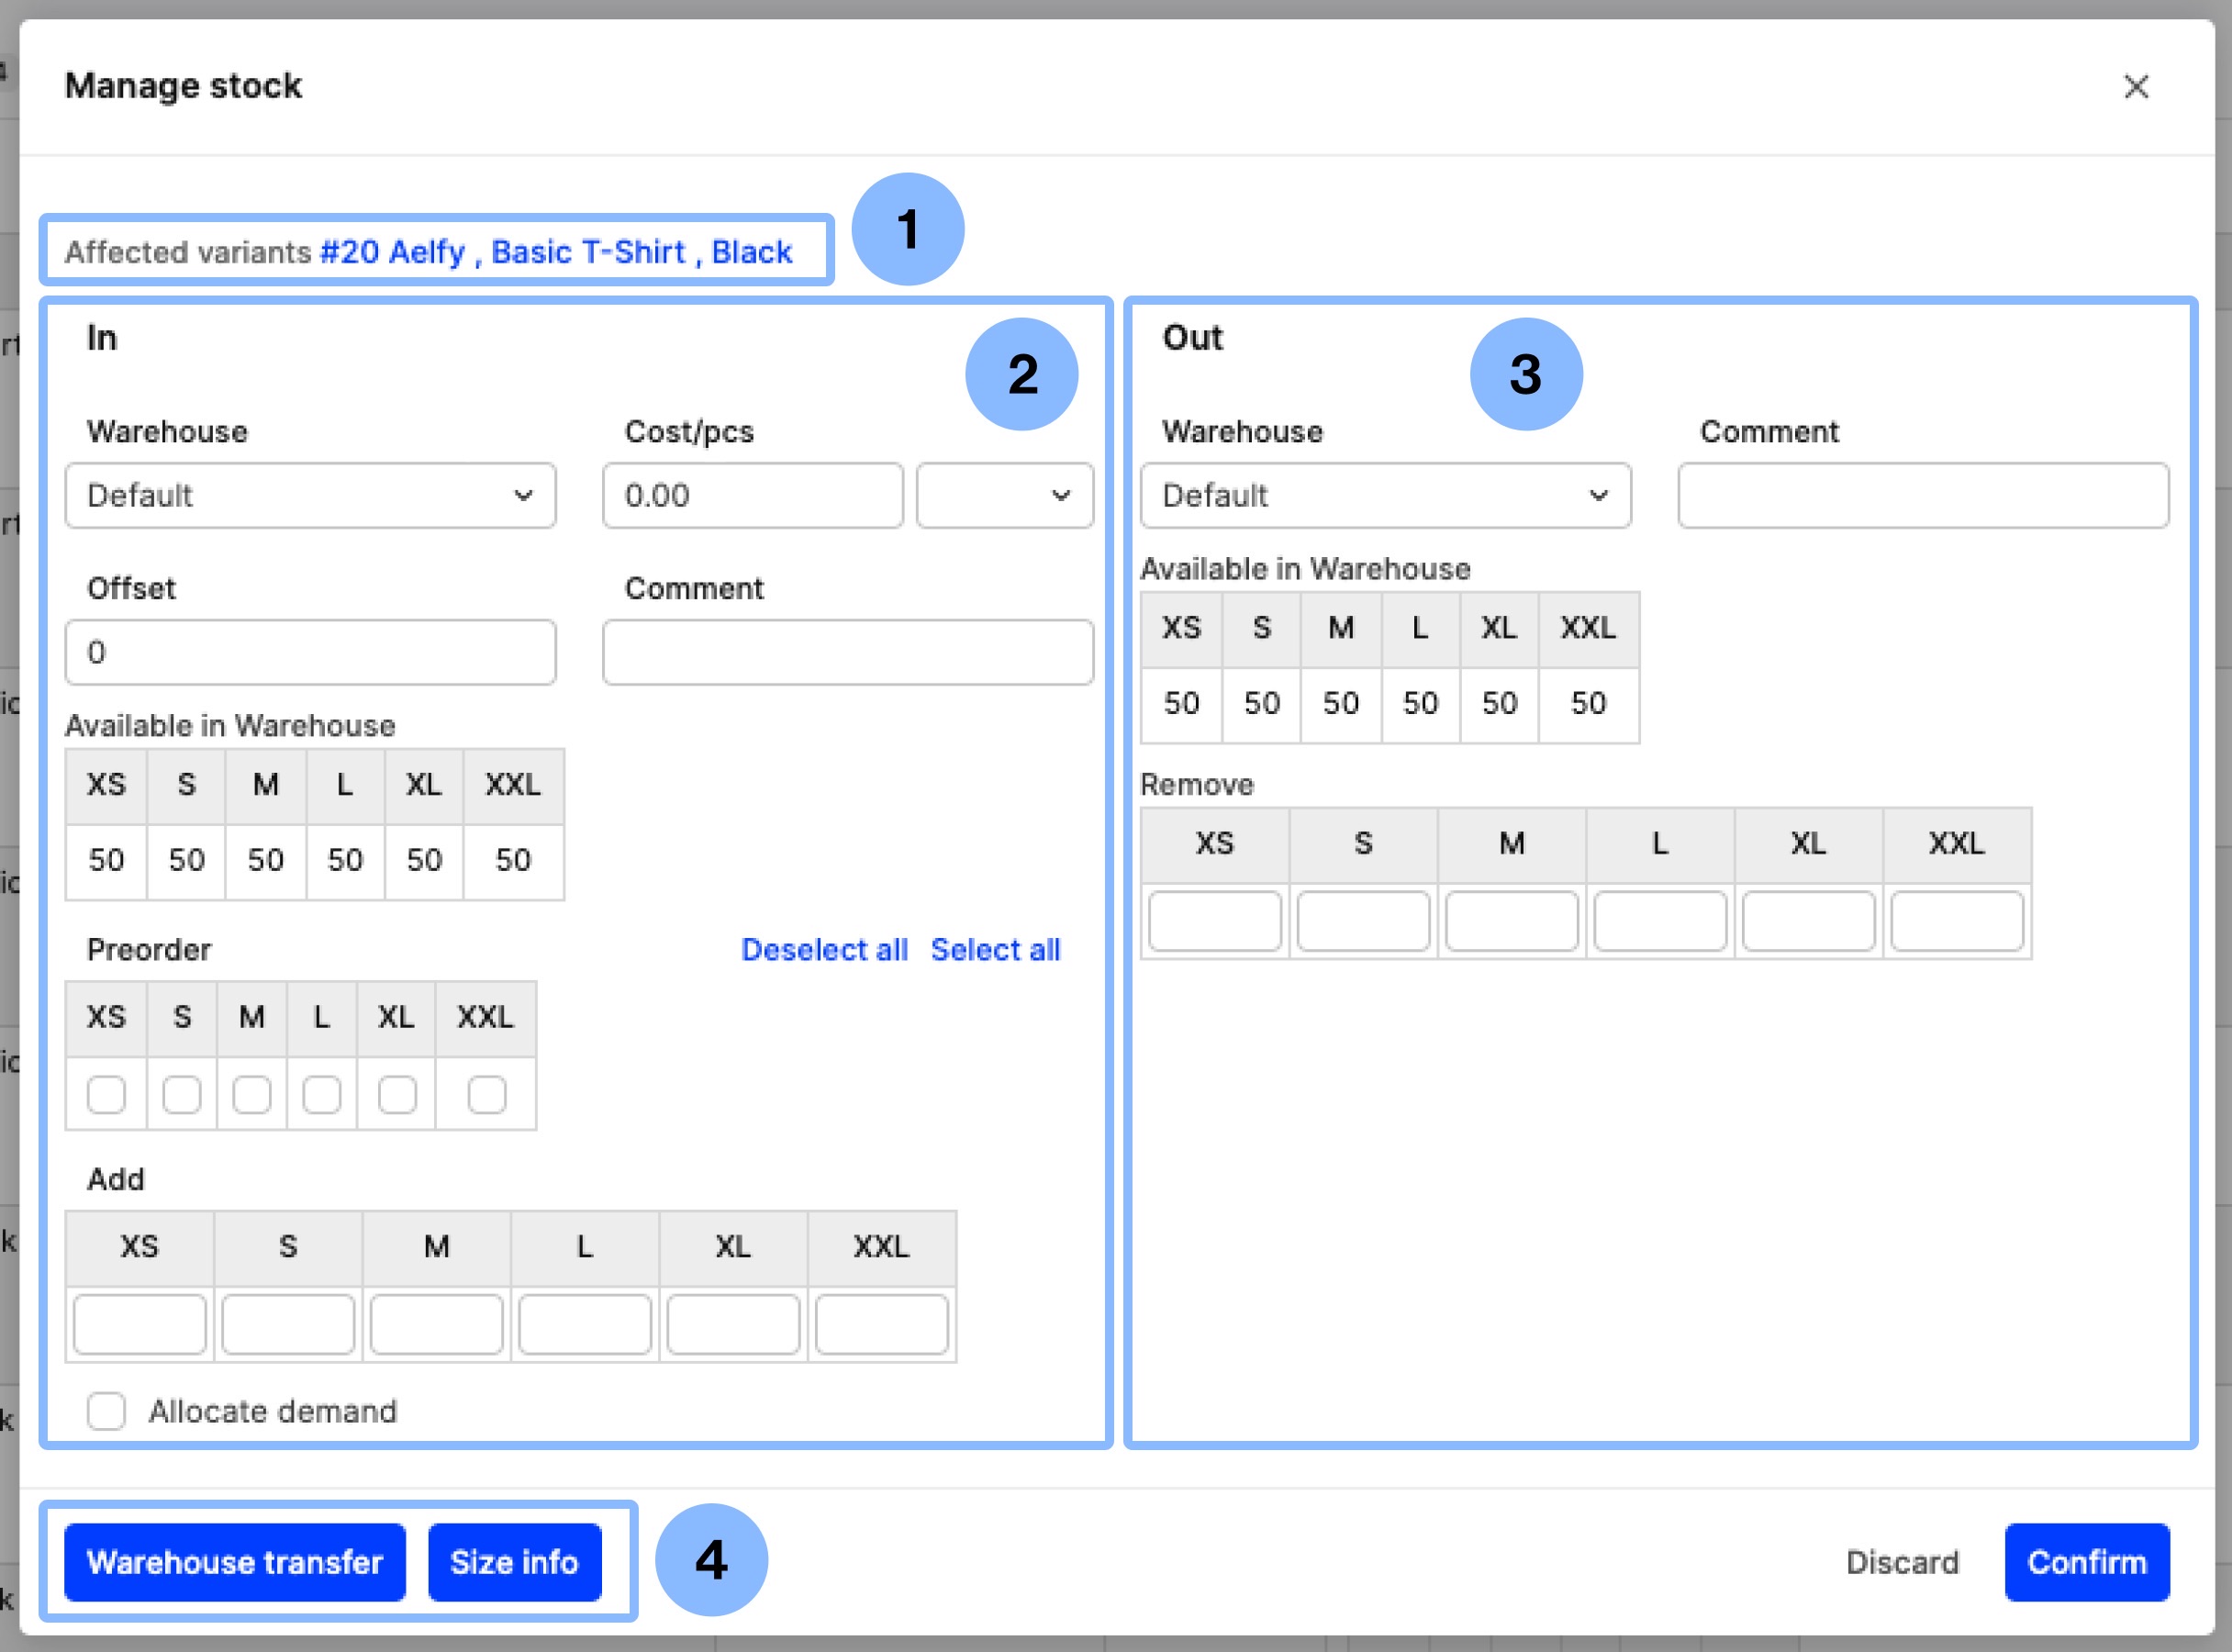
- Affected variants – This part showcases which variants are affected when stock changes are made. This is a great feature to use when you have products that share stock (more info on that here.
- In – In this section you can add stock to a selected warehouse, set the product to preorder, and assign an Offset value
- Out – Here you can remove stock from a selected warehouse
- CTA buttons – Here you can access the Warehouse transfer functionality or find more details regarding the Size info of this product
How to use the Stock editor
The Stock editor can be used to perform the following actions: View stock details, Add stock, Remove stock, Set product to pre-order, Set an offset. More info on each can be found below
View stock details
Note that both sides of the 'In' and 'Out' functionalities of the Stock editor can be used to view stock values in the following way:
- Choose the warehouse in which you would like to review stock values from the respective dropdown menu
- Under 'Available in Warehouse' you can see the size chart of the chosen variant along with its FTA stock values:

Add stock
- In the 'In' part of the Stock editor, select the warehouse where you would like to make changes from the drop-down menu
- You can add or edit the Cost/pcs values and currency in the respective fields if you wish. Note that this is the Cost/pcs info that will be seen in the Stock history records (Optional)
- If you want, you can use the Comment field to enter specific details regarding this stock entry (i.e. why this stock addition was made). This will also be registered in the Stock history (Optional)
- In the 'Add' field you can insert the amount of stock you would like to be added to this warehouse

- Click 'Confirm'.
Remove stock
- Select the warehouse where you would like to have stock removed from by clicking on 'Warehouse' in the 'Out' part of the Stock editor
- If you want, you can use the Comment field to enter specific details regarding this stock entry (i.e. why this stock addition was made). This will also be registered in the Stock history (Optional)
- Insert the number of pieces you would like to be removed in the 'Remove' field of the respective size:
- Click 'Confirm'.
Set product to preorder
The preorder status grants unlimited stock to the selected sizes. To learn more about preorder status click here.
- In the Preorder field you will find the size chart of the selected variant. You can tick the boxes of the sizes you would like to be on preorder. You can also use the 'Select all' or 'Deselect all' buttons to do each respective action that allows for marking/unmarking all tick boxes in the preorder field

- Click 'Confirm'.
If you would like to undo that or remove the preorder status of a product, please untick the relevant boxes and click 'Confirm'.
Offset
The offset feature can be used to indicate how many pieces should remain unpurchasable (read more here).
Example: Let’s say that you have five pieces left in your stock and your offset has been set to two. A customer will be able to buy three pieces, since the other two have been marked as unpurchasable.
- Insert the number of pieces in the 'Offset' field
-
Click 'Confirm' to save your changes.
Note that the Offset is variant specific. This means that it applies to all sizes of the selected variant and to all warehouses. If you would like to set a warehouse-specific limit, use the Threshold feature instead.