Creating a Brick & Mortar
About this article
A Brick and mortar can be used to add all the information regarding a physical shop, such as address, name, opening hours etc. This data can be used to send to your front-end and display on your website. If you wish to connect the Brick and mortar to a Warehouse or Allocation rule you can also share on your website how much stock is left for a particular item. This article includes details about how to set up a Brick and mortar and how all respective settings function.
How to create a Brick and mortar
To create a Brick and mortar, follow the steps below:
-
Go to 'System' > 'Brick and mortars' in the main menu to the left
-
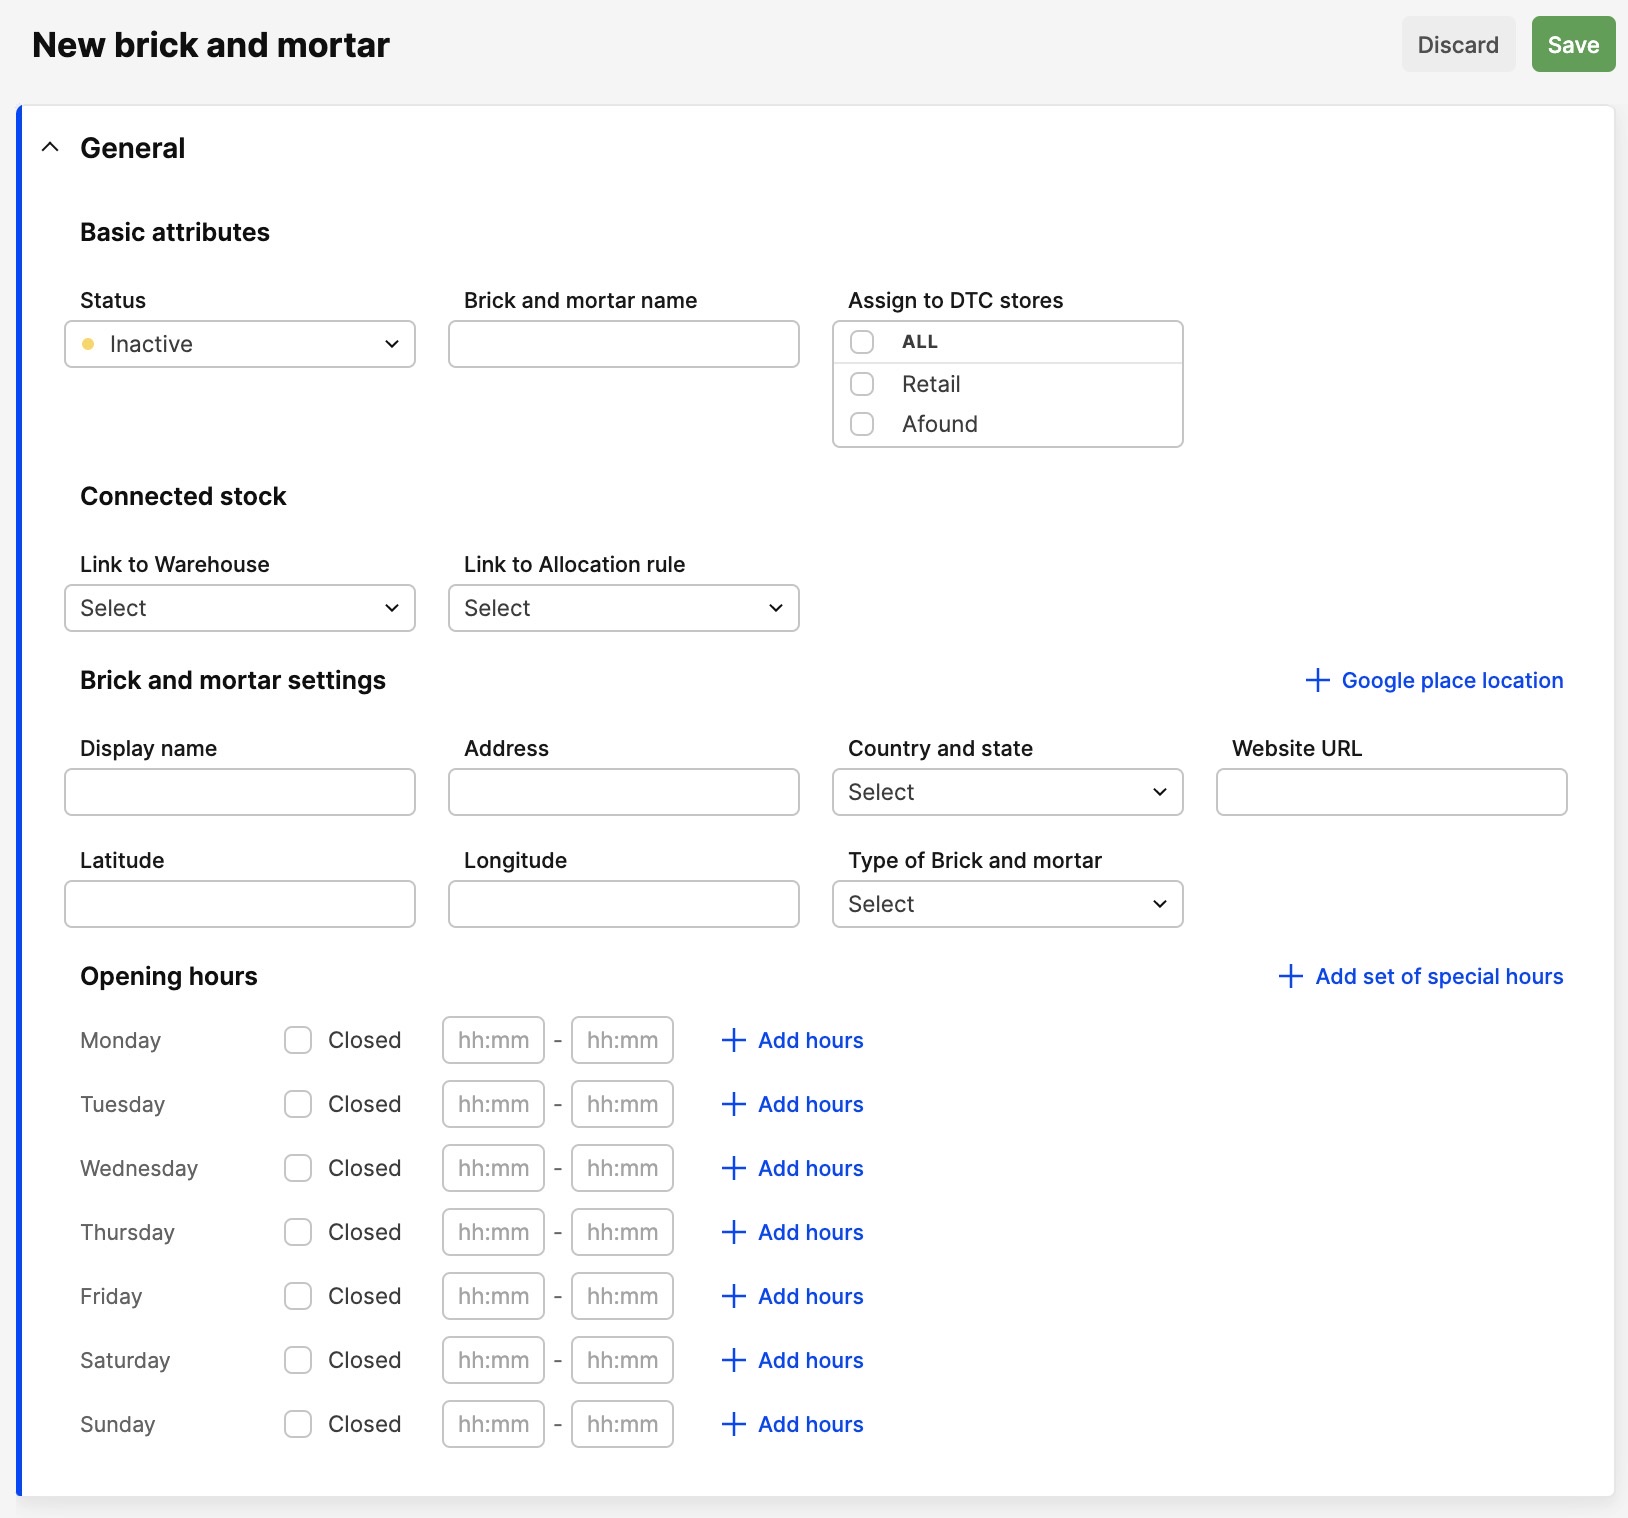
Click '+Create brick and mortar' in the upper-right corner and you will be redirected to this view:
-
In this view you will find three sections: a) General attributes, b) Connected stock, and c) Brick and mortar settings. Below you can see more details the fields that can be filled out in each section:
General attributes
- Status - This can be set to Active (green), Inactive (yellow) or Disabled (red)
- Brick and mortar name - Name your Brick and mortar
- Assign to DTC stores - Select which Retail store(s) the Brick and mortar should be active in
Connected stock
In this section you can control whether or not your Brick and mortar should be connected to a Warehouse and/or a Allocation rule, and in this case decide what stock figures will be shared on your website.
- Link to Warehouse - By selecting a warehouse, you can ensure your Brick and mortar will be connected to stock
Only Warehouses that are not connected to another Brick and mortar will be shown in this selector
- Link to Allocation rule - This allows you to connect your Brick and mortar to a Allocation rule
This specific Allocation rule can be used by an external Shipping entity (i.e. Ingrid) or your Front-end when placing an order, and in this case override the Allocation rule setup in Centra. Example: You can create a Allocation rule that includes the Check first warehouse that is connected to your Brick and mortar. You will also need to add a Direct warehouse to define which warehouse should be used in case the Check first cannot accept the order.
Brick and mortar settings
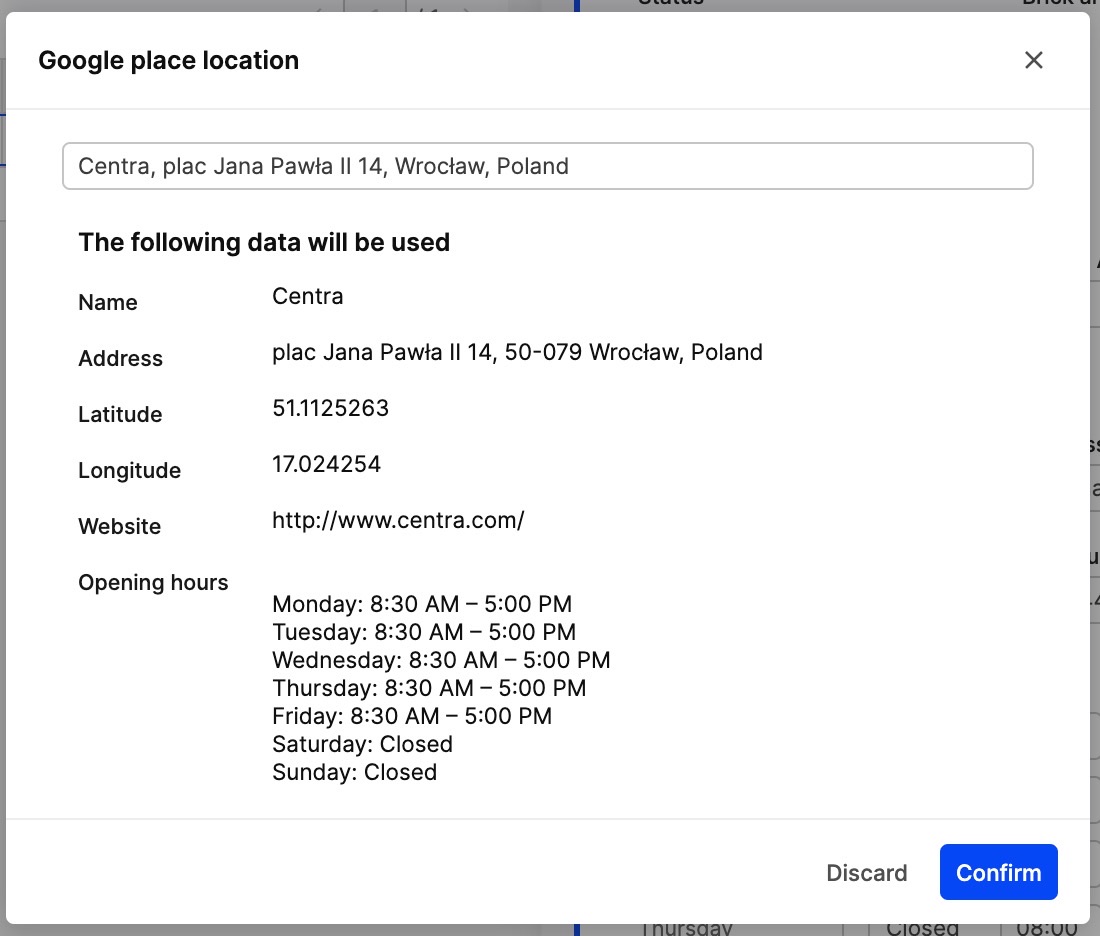
Here you can input data that you would like to show on your Front-end. Note that all these fields can be shared through the API to display on your website. This can be used as a store locator function. If you want, you can pre-fill the fields below by clicking the '+Google place location'. The data will then be fetched from Google and can be adjusted afterwards by clicking 'Edit' in Centra. If the Brick and mortar data is changed in Google the fields in Centra will not be automatically updated.
- Display name - Type in the name you wish to be shown on your website
- Address - Add the address of your Brick and mortar
- Country and state - Specify the Country and state your Brick and mortar is located in
- Website URL - Input the link to your website
- Latitude - Fill out the latitude coordinates of your Brick and mortar
- Longitude - Insert the longitude coordinates of your Brick and mortar
- Type of Brick and mortar - Here you can choose if your Brick and mortar is an Own store, Franchise/partner or Multi brand Retailer
- Opening hours - In this part you can showcase when your Brick and mortar is open and closed. By clicking '+Add hours' you can input another set of opening timeframes. If you click '+Add set of special hours', you can choose extra days and input the timeframes as needed. You can also tick the 'Closed' tick box to demonstrate that your Brick and mortar is closed on that day.
-
Click 'Save' in the upper-right corner.