How to set up Donation functionality
About this article
At some point you might want to make it possible for customers to donate money for a good cause in your checkout. Centra has built off-the-shelf functionality for donations and the article below will describe how to activate it.
How to set up a Donation product
-
Create a product in Centra. In this article you can read more about how to create a product in Centra. This is an example of how the product can look like:
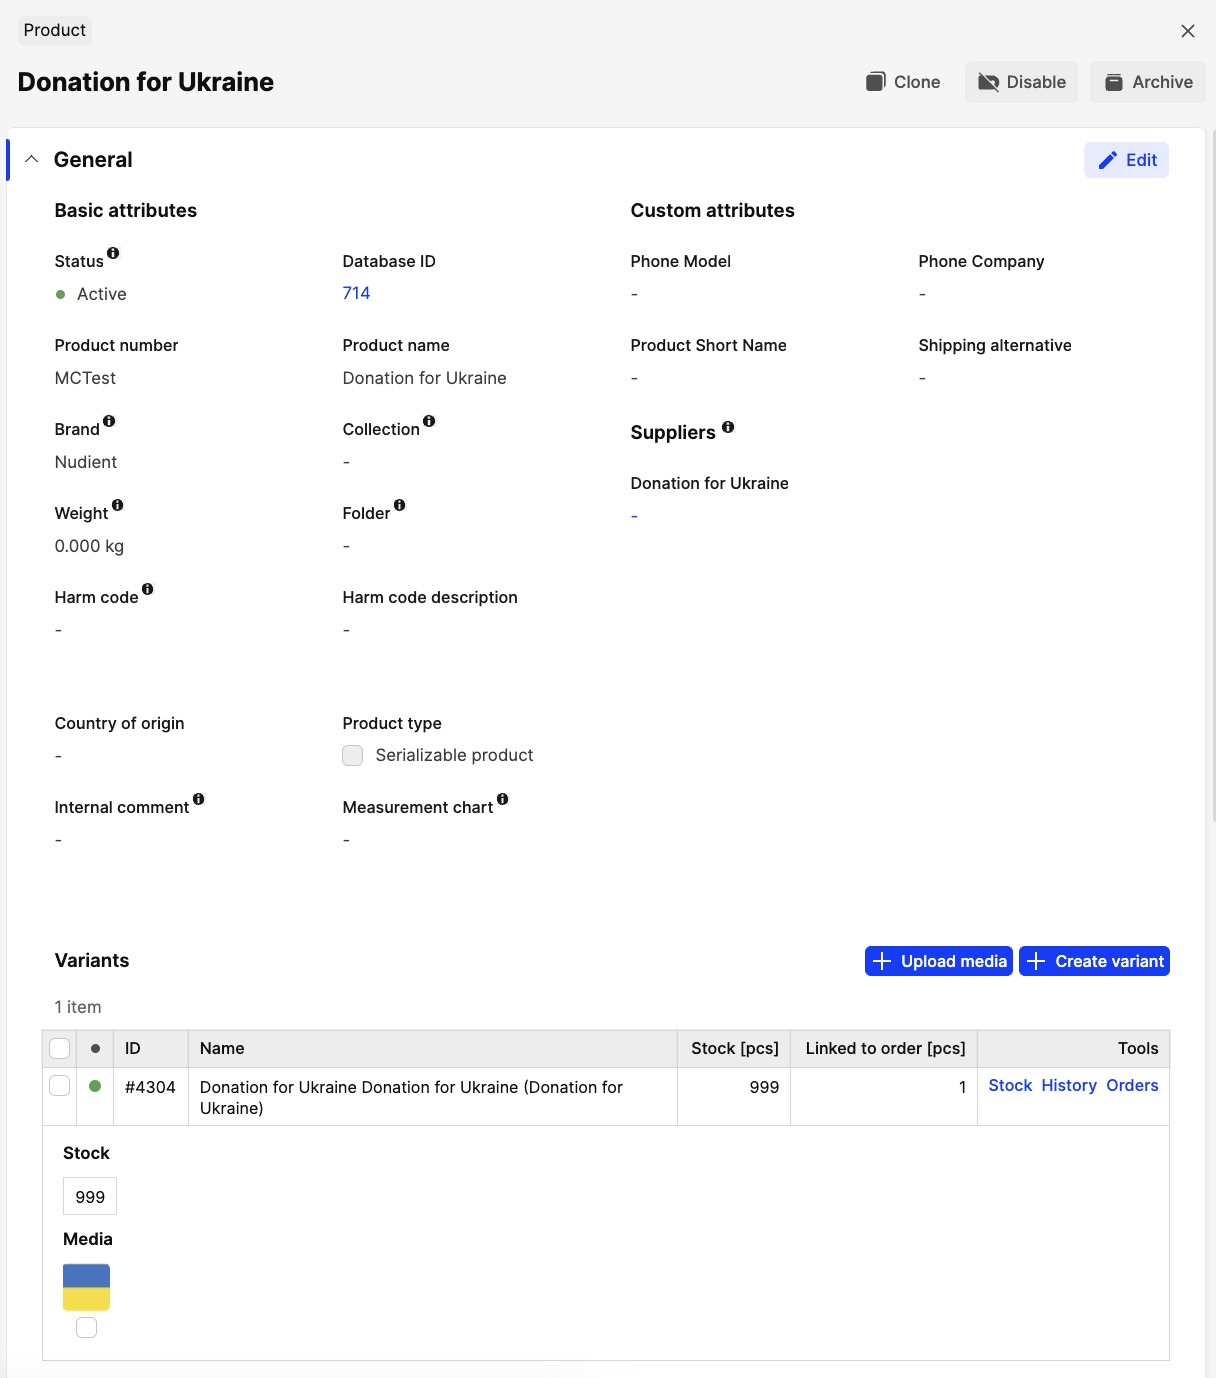
This product should be configured in the same way as any other product is configured for it to work properly: the status of product/variant/display should be active, size chart (one size) in place, stock (or tick the preorder checkbox), there should be a "price" set for each pricelist (it could be 0 but not blank), the variant should be activated in the display etc.
-
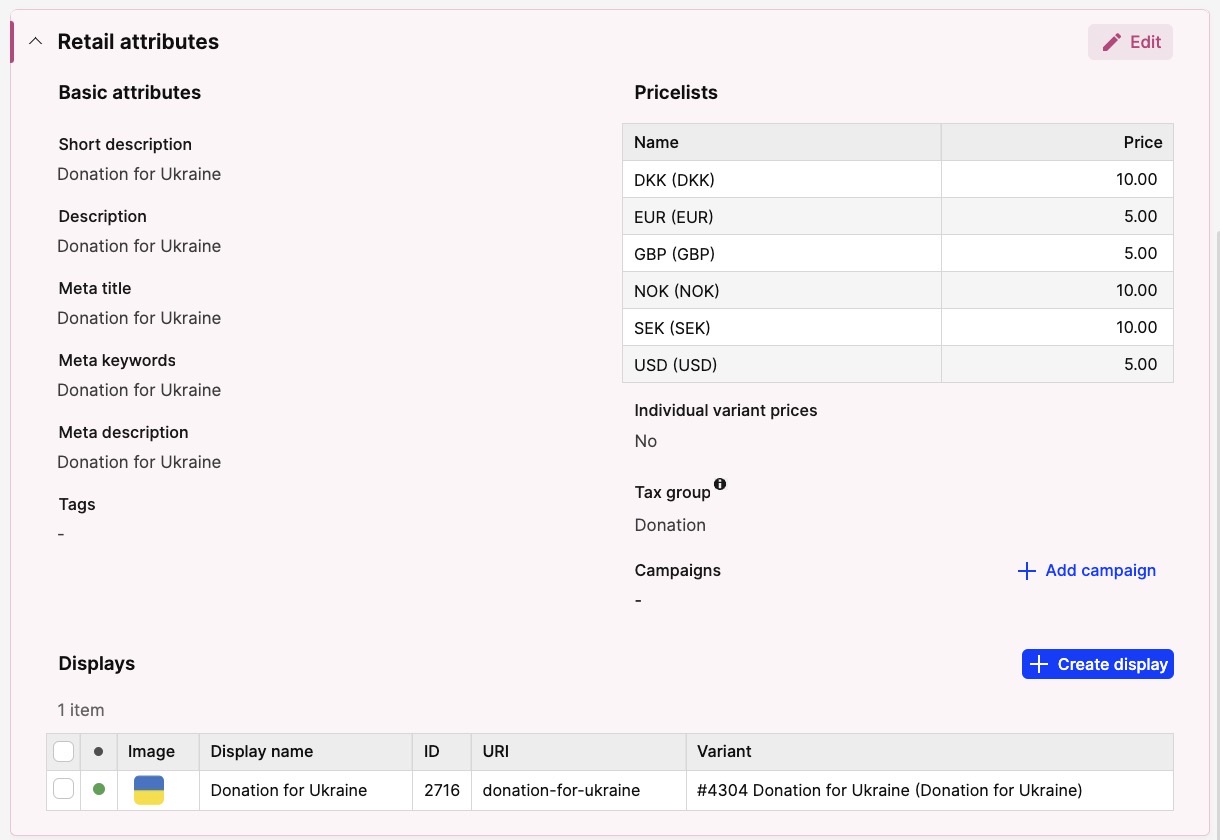
The main difference here is the tax group for your Donation product. Taxes don’t apply to donations, so you’ll need to create a separate tax group for it. Read more about how to set up tax groups here. It could look something like this:

Important to NOT set this tax group as the default one for any Store:

-
Then you select this tax group on the Donation product display:
How to make it possible to “sell” the Donation product
Once the product is configured you have several options for how the product can be added to the cart by your customers.
-
You make the Donation product a sellable product. To do so, you need to activate all markets on display level for the Donation product, select an active category for it. If you have an UPSELL section somewhere in your Frontend store, we think it's a good idea to add this Donation product there. Contact your Frontend partner if you need further assistance with adding the product to such section
-
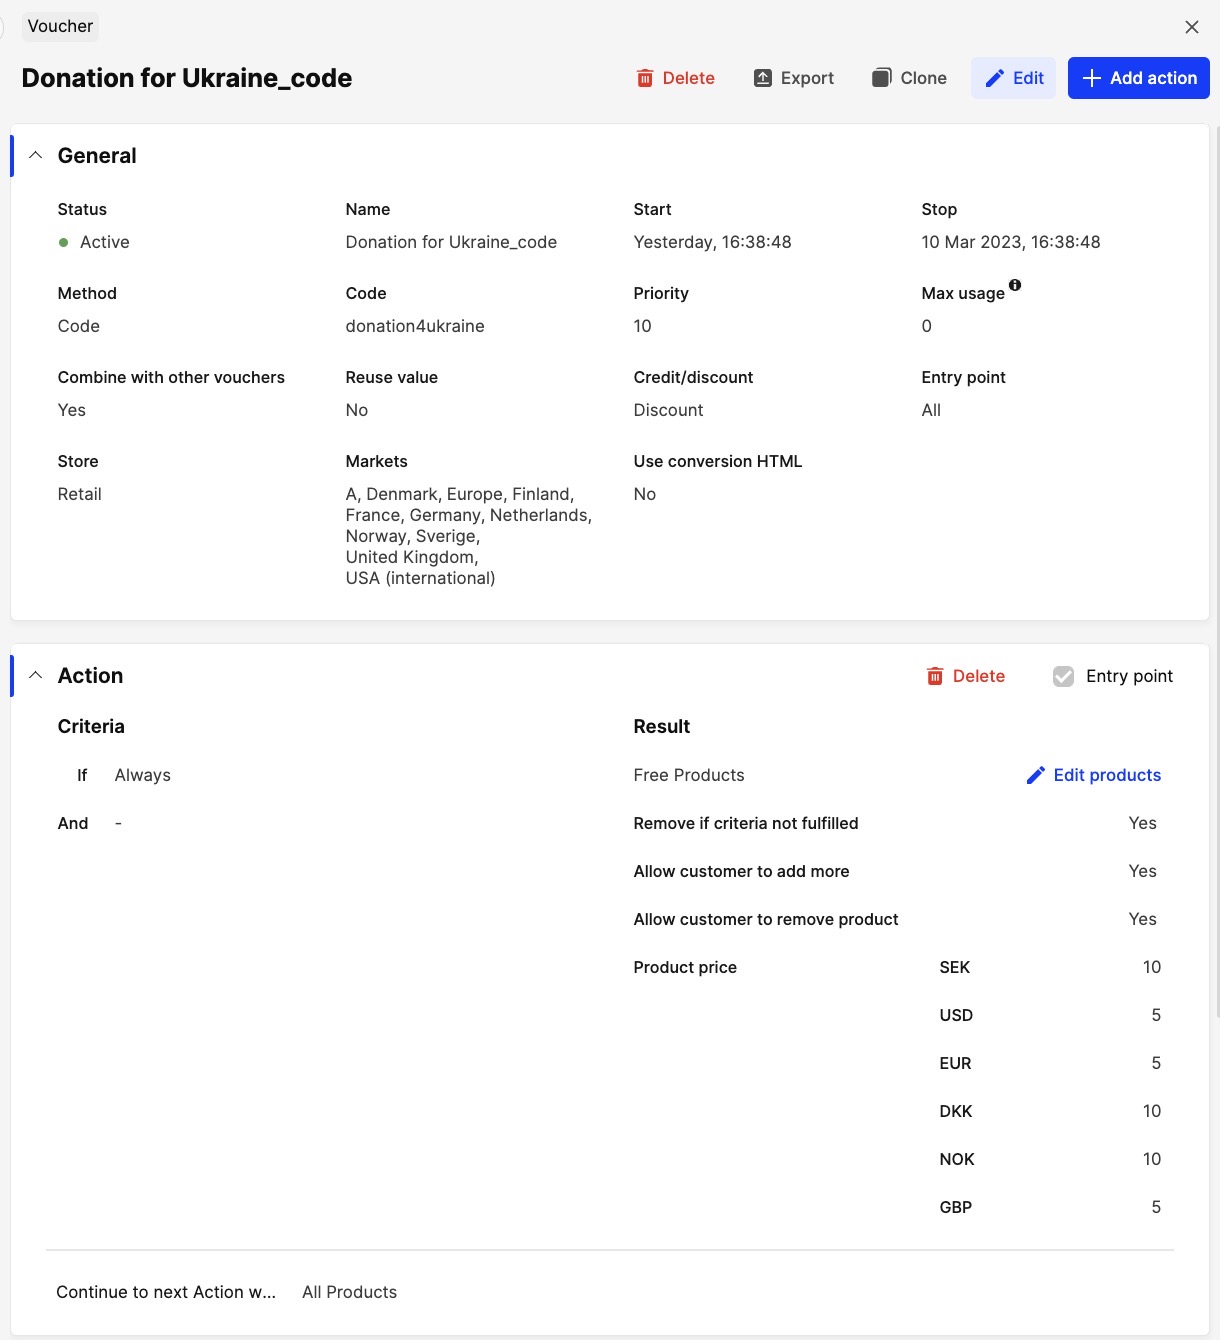
If you don’t want the Donation product to show up as a sellable product on your site, and instead make it possible for your customers to be able to add the product to the cart in the checkout, you may instead create a voucher code with the criteria "always", and with result “Free product”. The Donation product then needs to be added as the “free product” with the donation value added to the value fields, per currency. For this to work, the Donation product display doesn't need to be active in any markets, and doesn’t need to have a category selected either. Read more about how to create vouchers here. It could look something like this:
 This way you would also be able to create multiple voucher codes with different values and let your customers find the codes by adding banners in the Frontend. You might need to ask your Frontend partner for help with adding the banners. The banners should also include information about how they can use the codes to make a donation in their cart.
 -
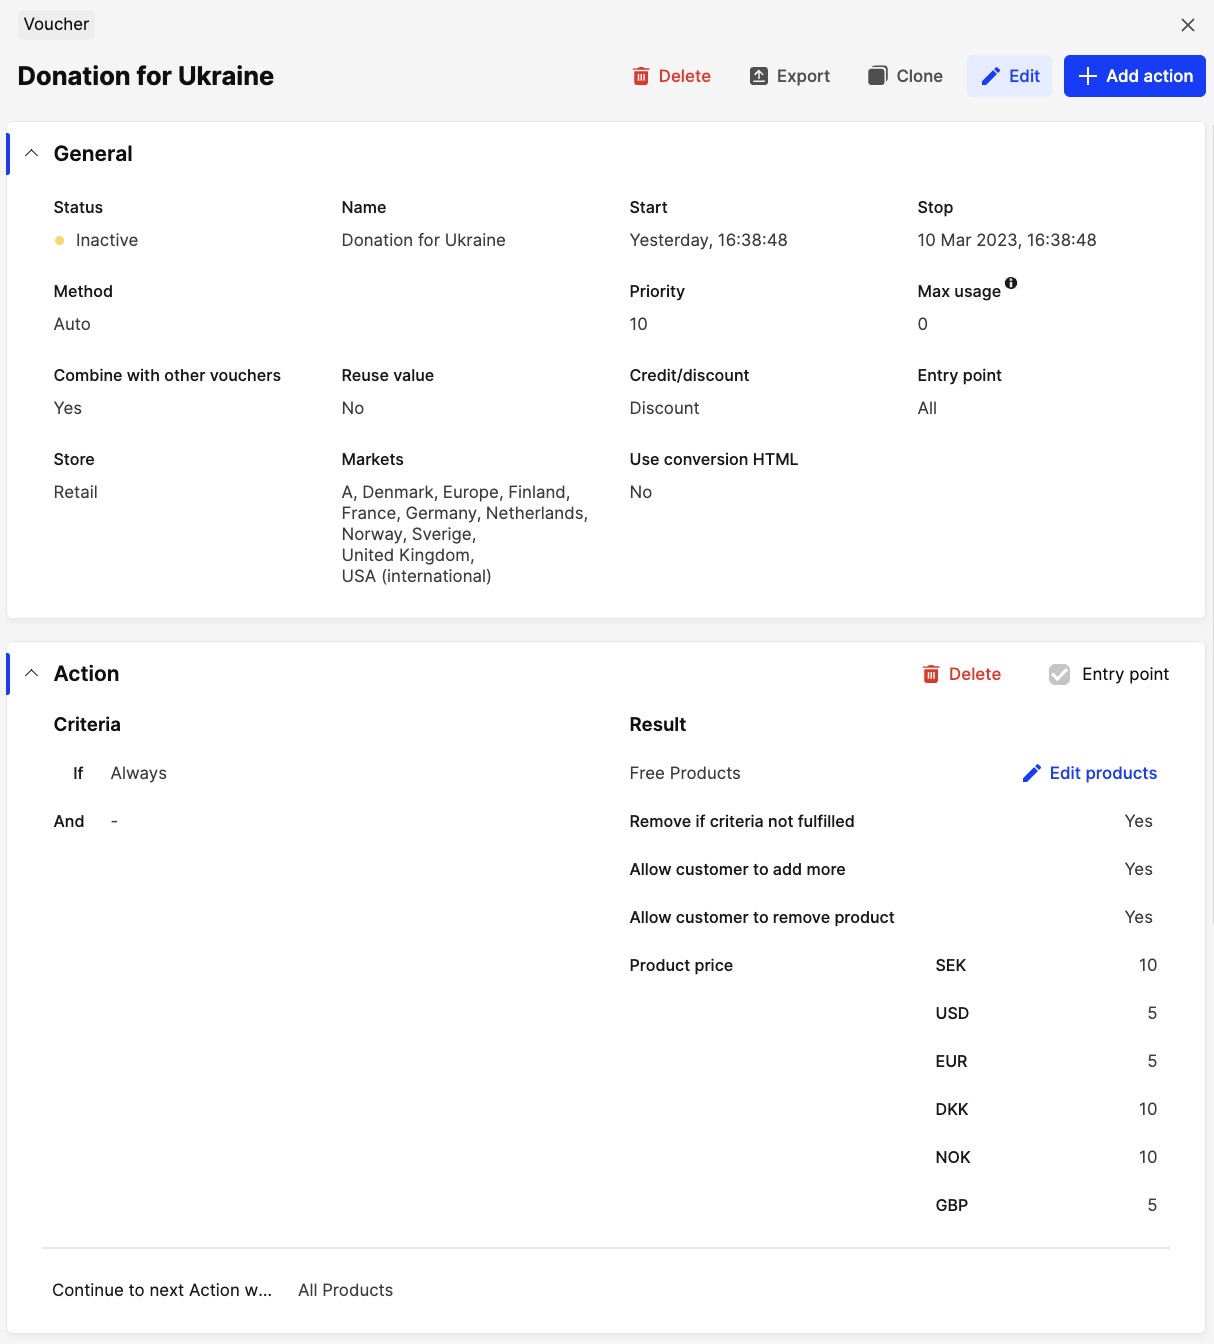
You may create an auto-voucher with the setting that allows customers to remove the "free product" from the cart if they like. It's completely up to the customer to decide whether they want to donate or not. This means that the Donation product will automatically be added to each cart. For this to work, the Donation product display doesn't need to be active in any markets and not have any category selected either.
Having the donation setup as a product in Centra will enable easy tracking of the orders which contain it by using a Transaction Report for example. Read more here about how to create reports.