Serializable products
About this article:
The serializable products functionality in Centra can be used if you are selling products with serial numbers. The serial numbers can be added on order and shipment level. This allows you to trace back a specific product with its unique serial number to the order/shipment it was sold through. The serial number information can be manipulated in store settings, so you control how they are shown. This information is also included in reports, exports and APIs.
Setting up a serializable product
The first step to set up a product as serializable is performed on product level.
- Go to ‘Products’
- Select a product of your choice
- In the ‘General’ section of the product click ‘Edit’
- Tick the ‘Serializable product’ box under the ‘Product type’ section:
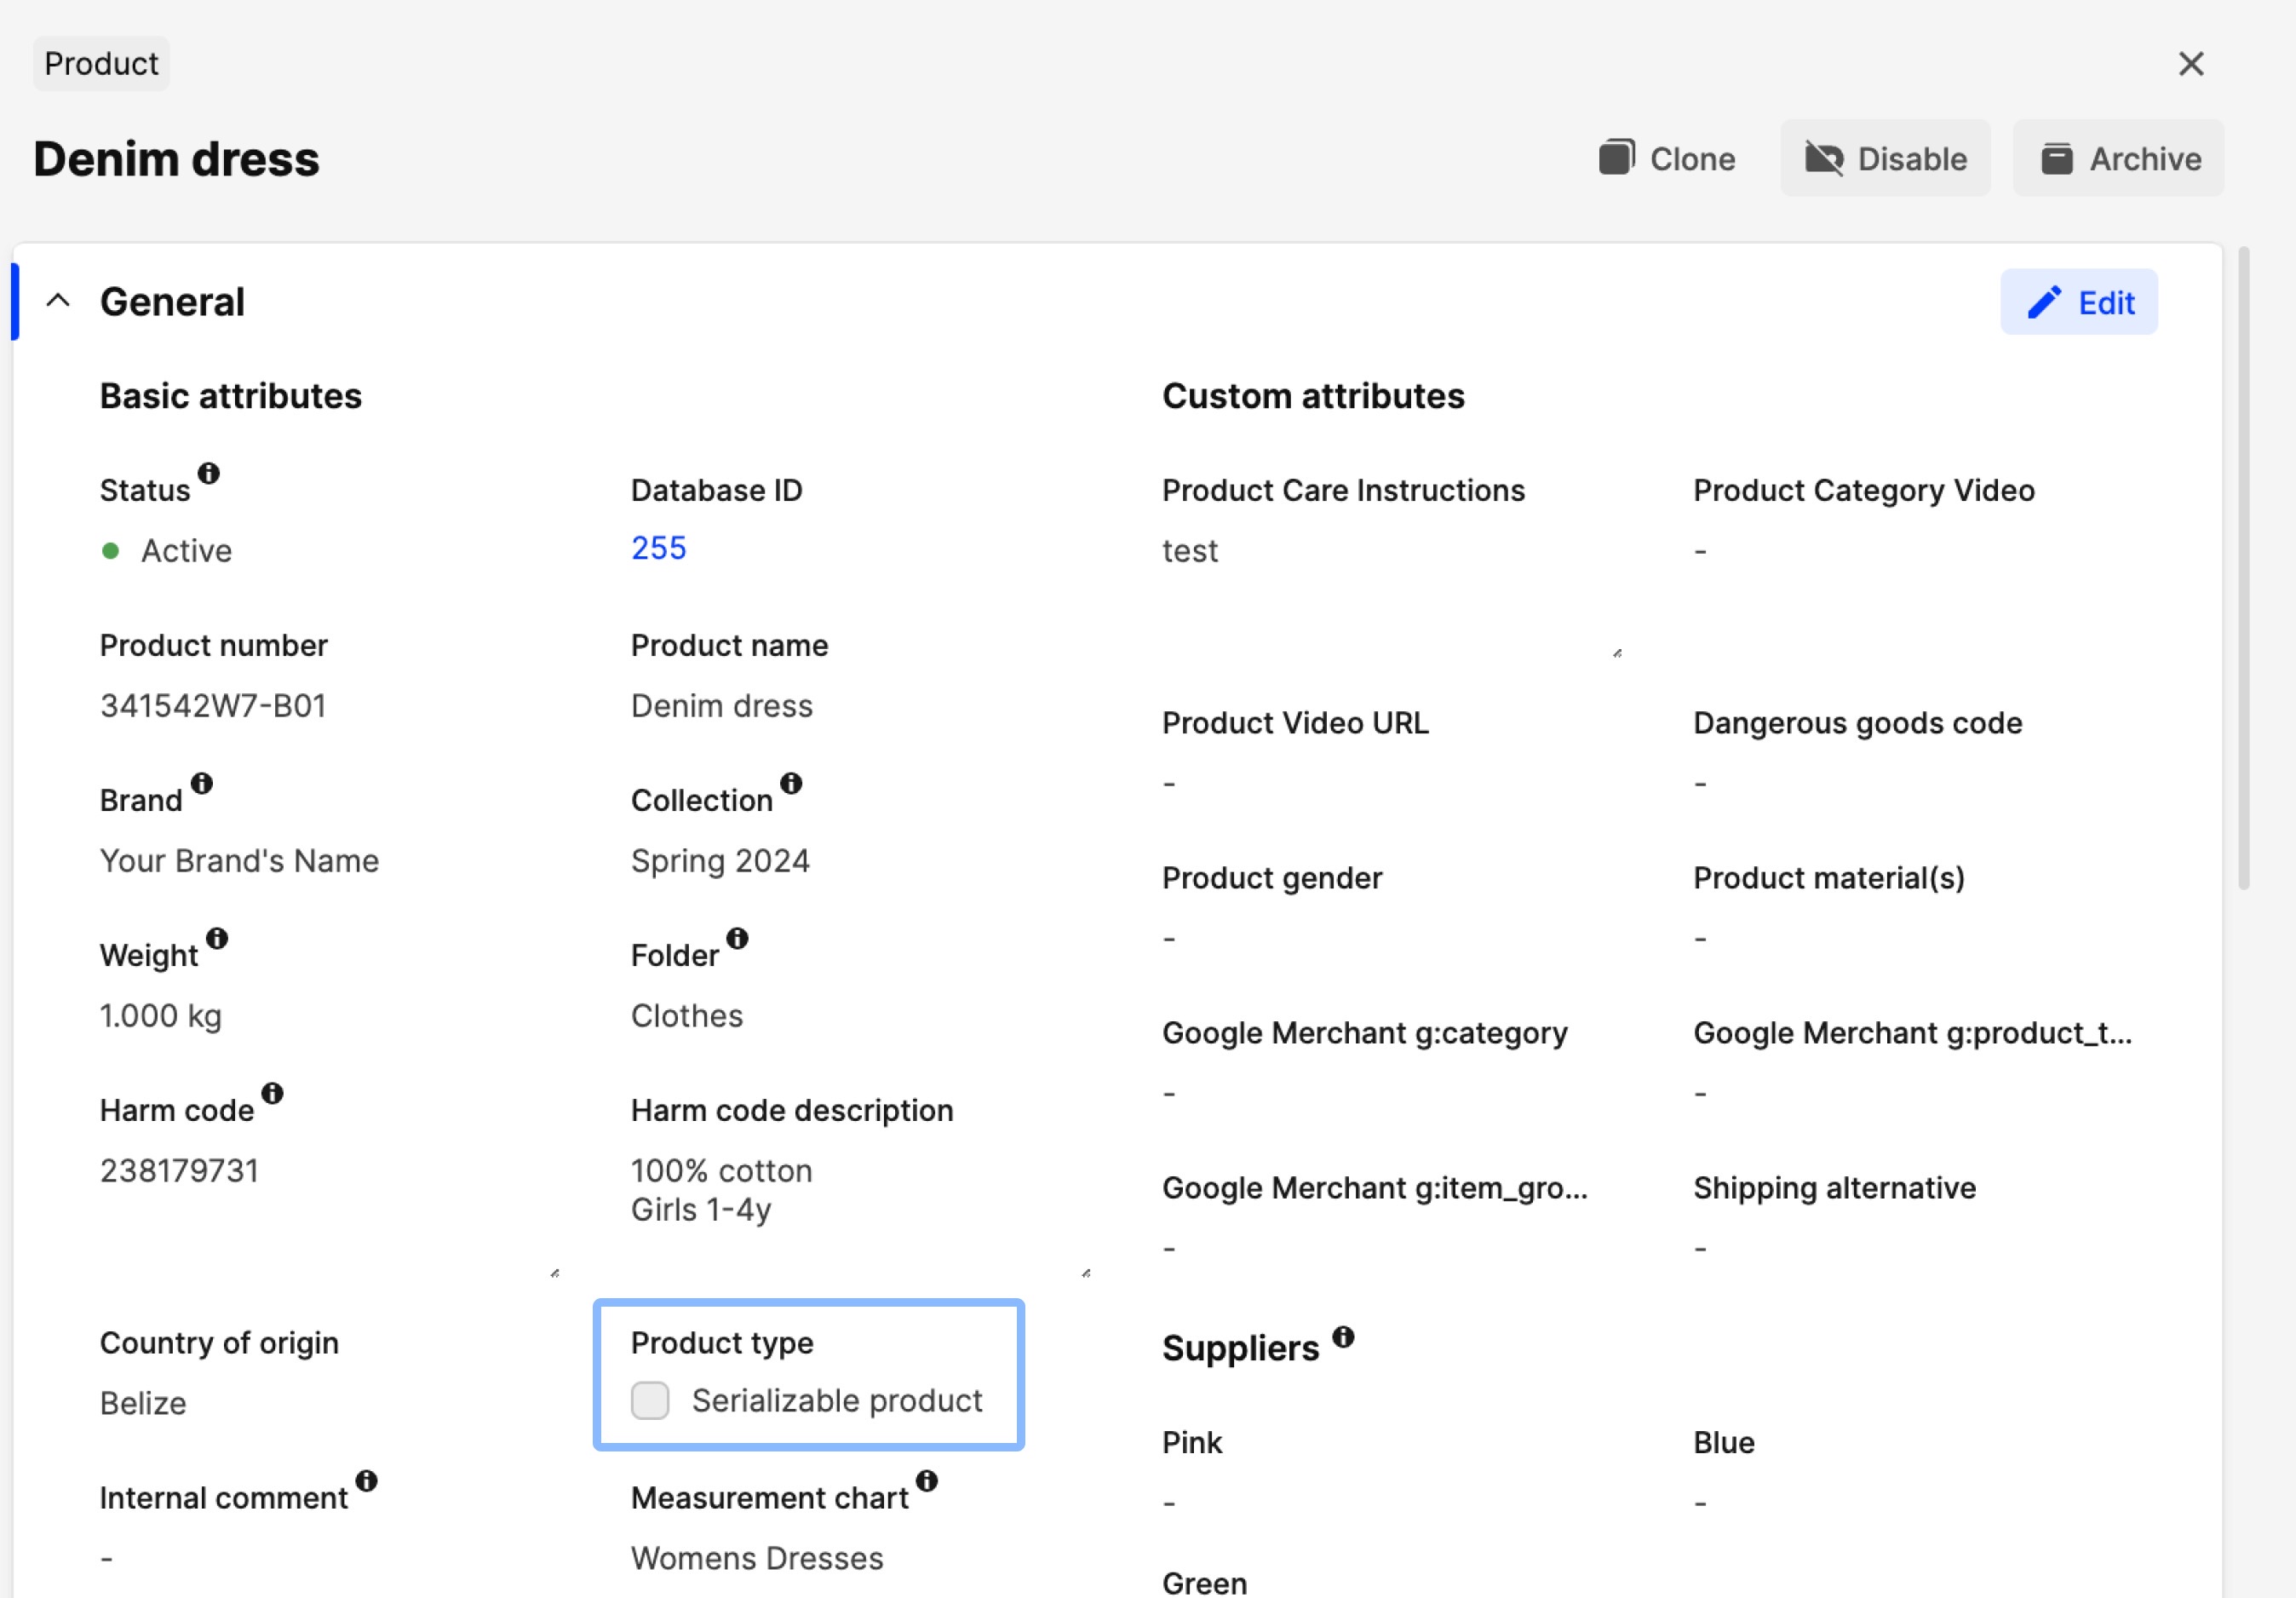
- Click ‘Save’.
Information about serializable products on orders
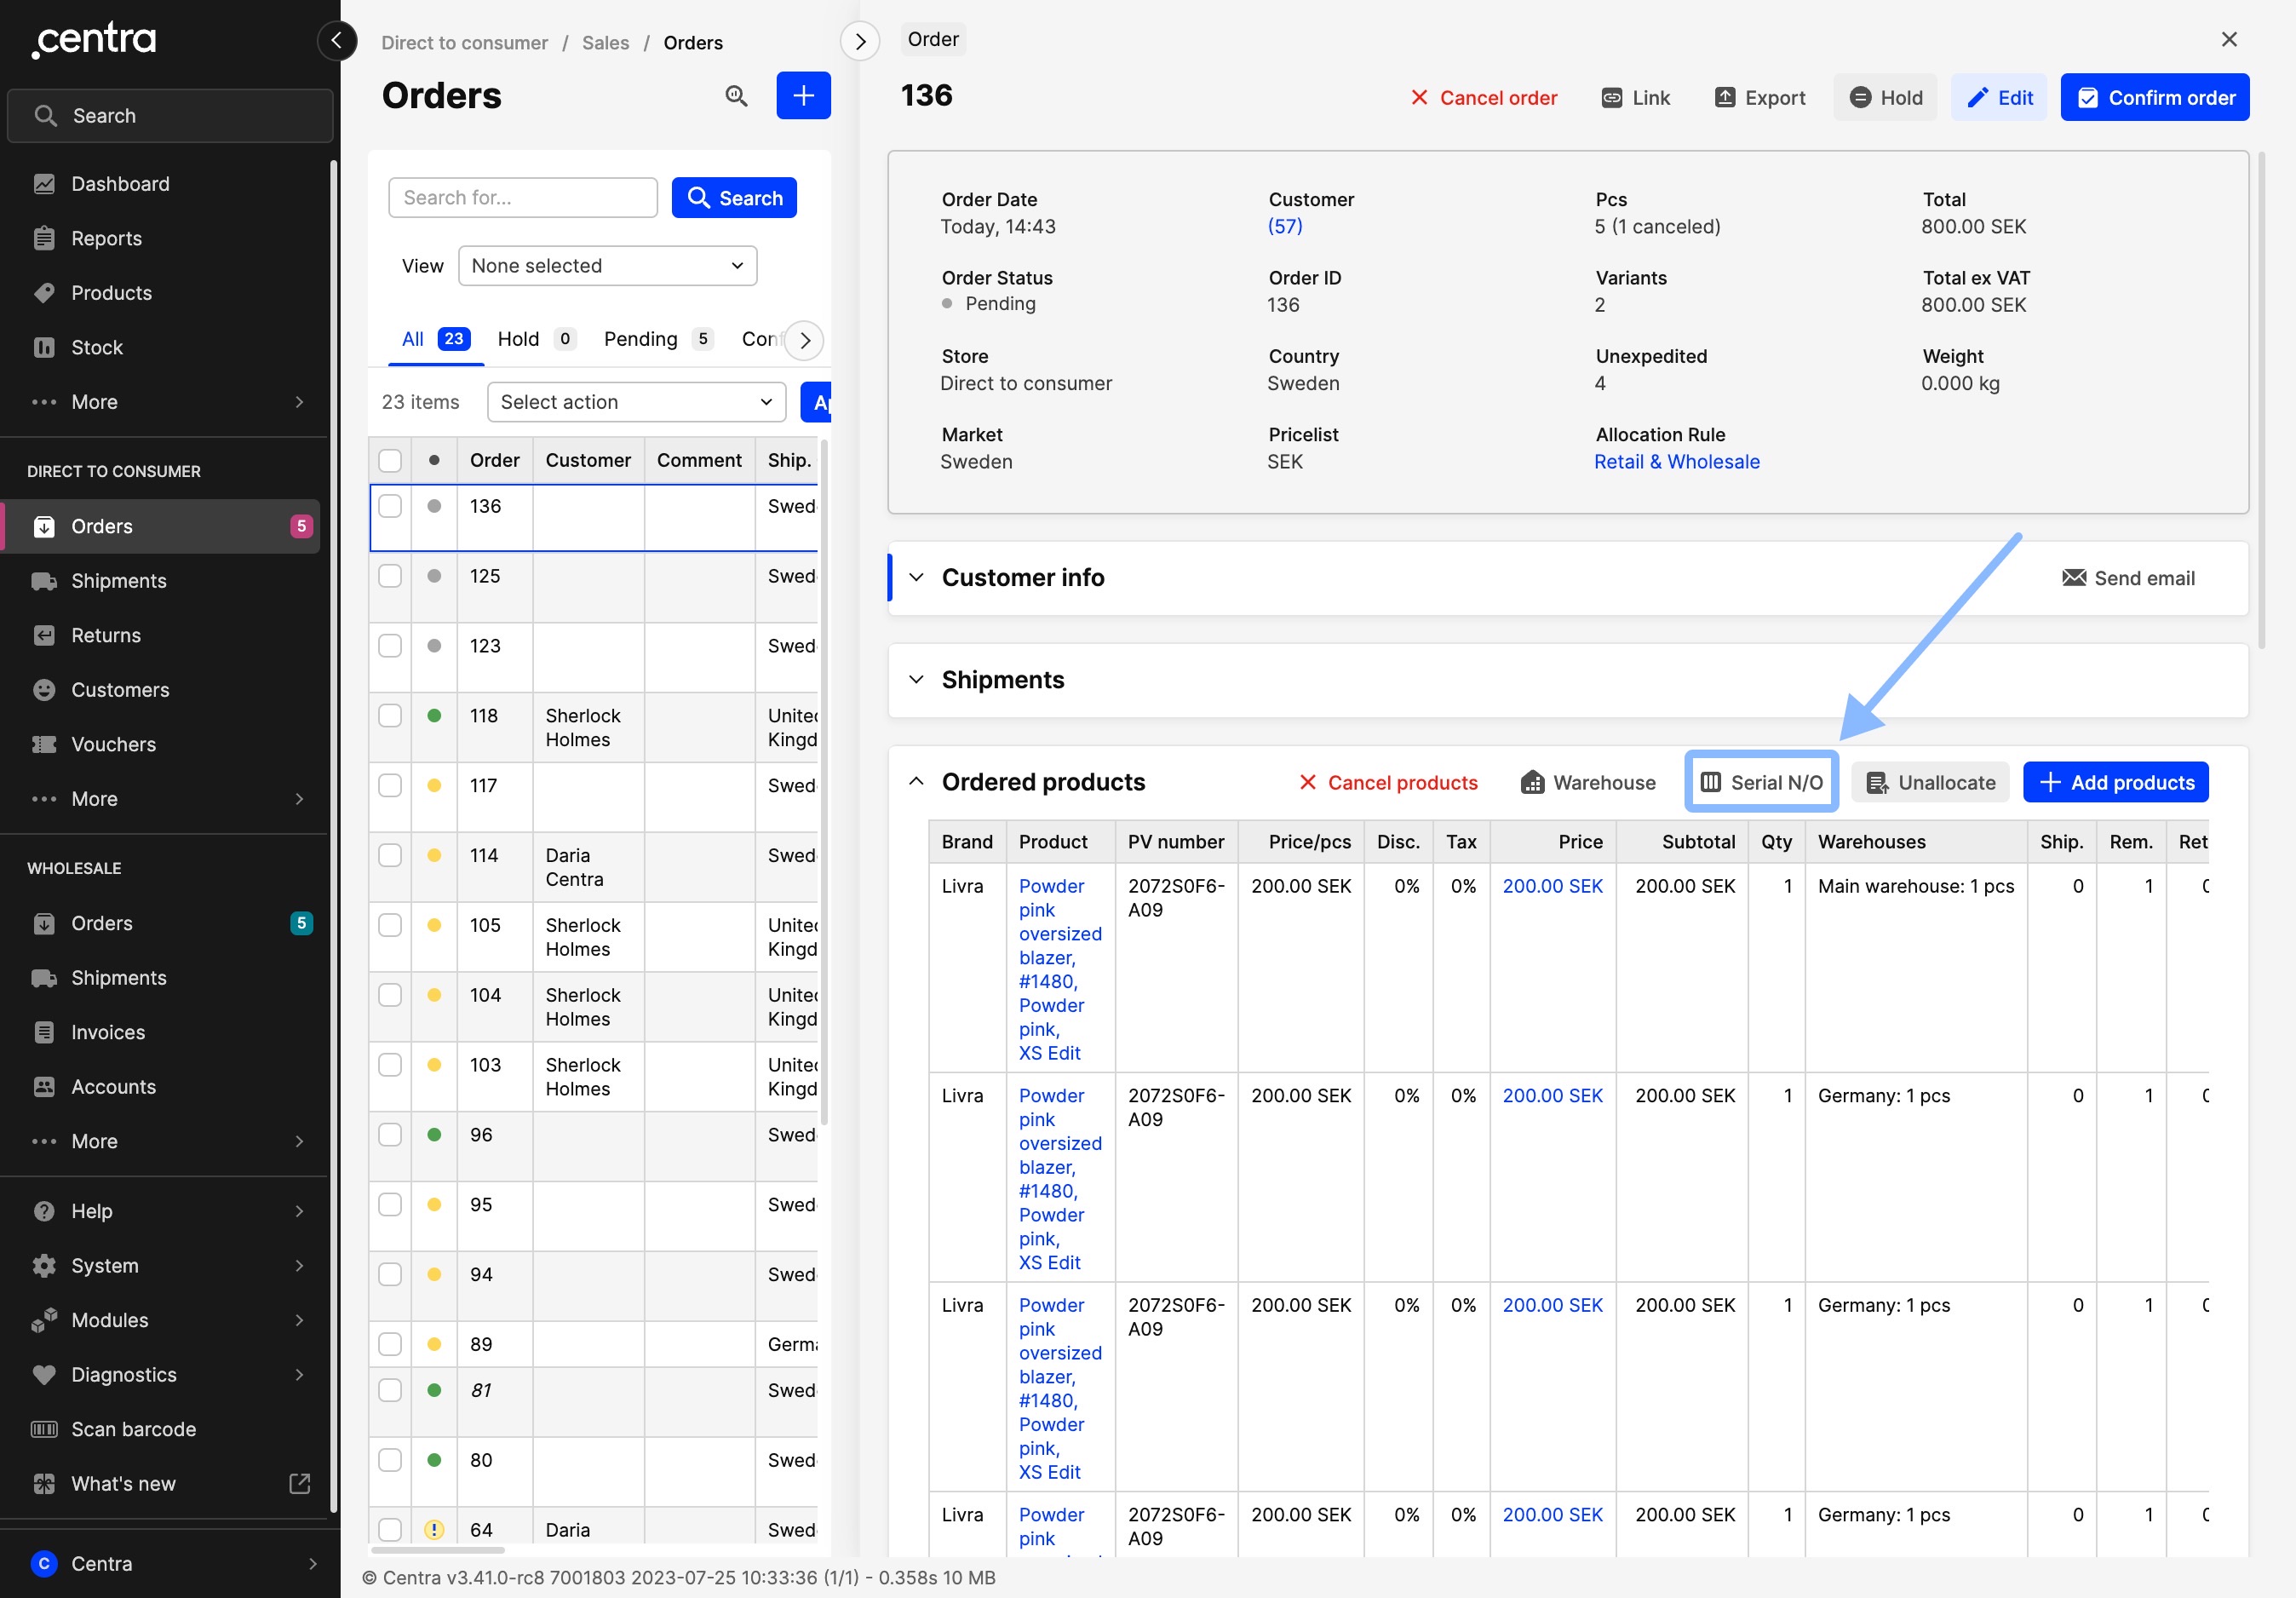
Once the product has been set as serializable, you can go to orders that include this product and add the serial number as shown below:
- In DTC or B2B, click on ‘Orders’
- Select an order with a serializable product
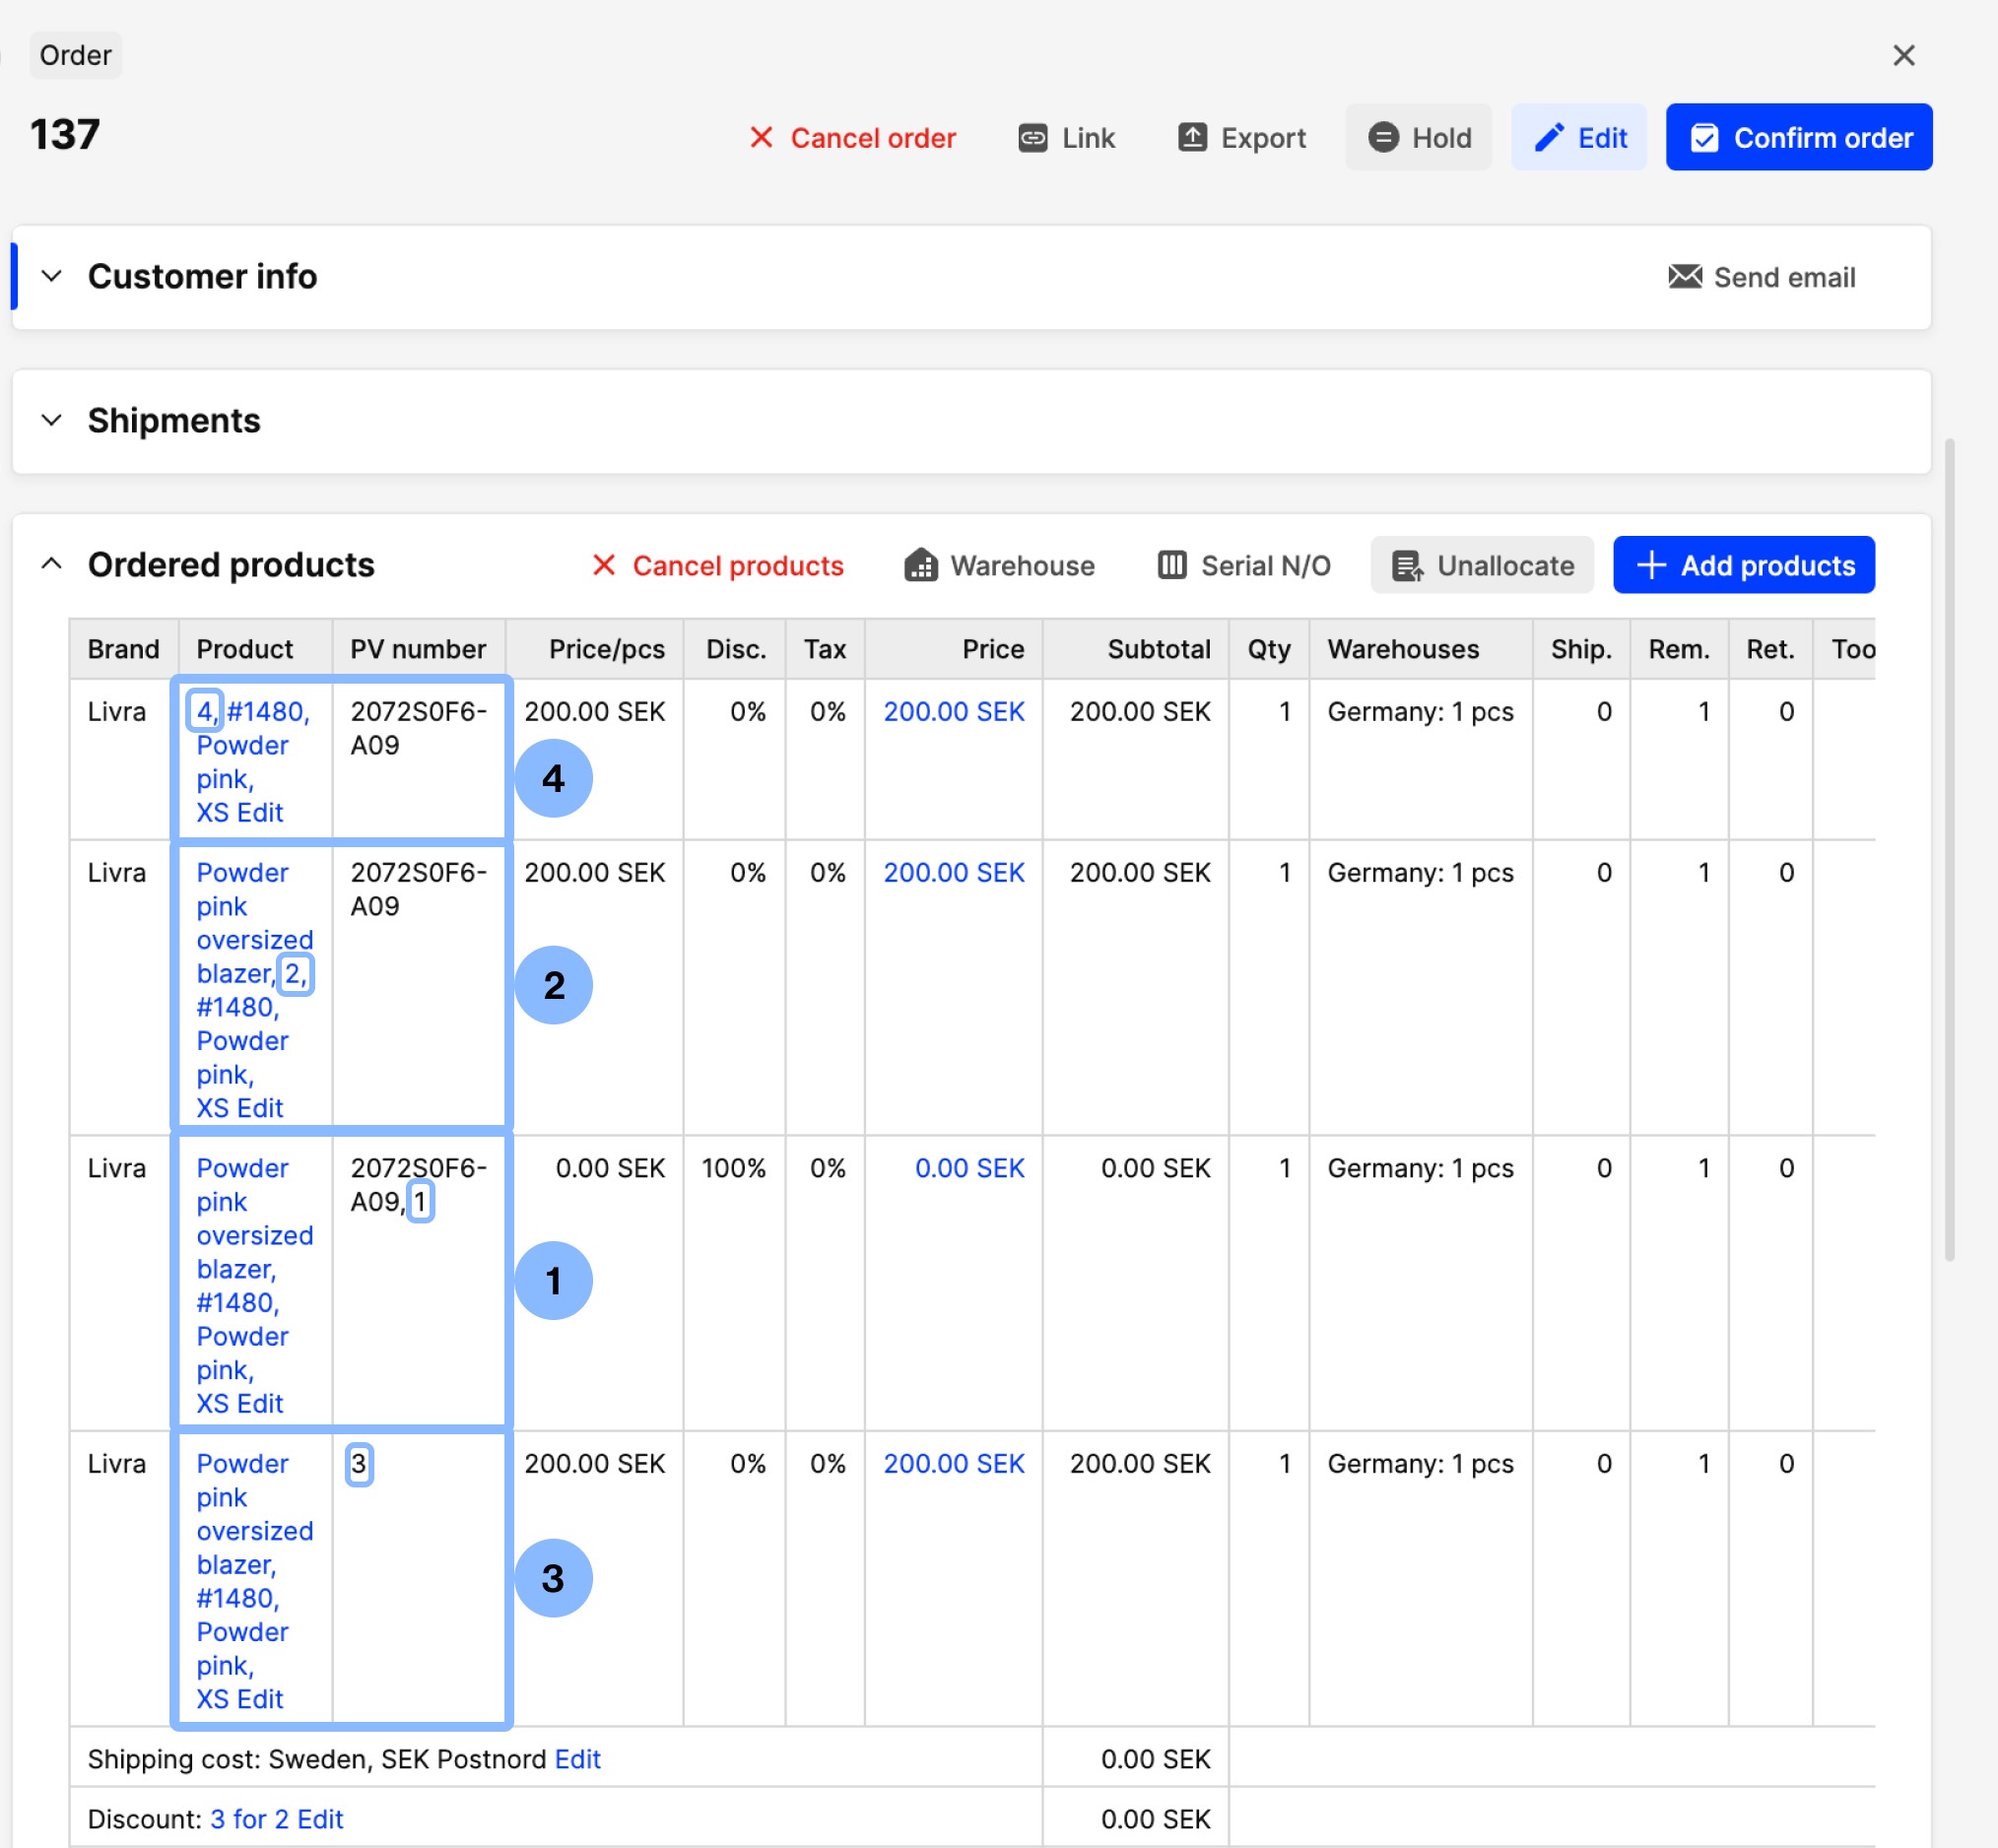
- Scroll down to the ‘Ordered products’ section and click ‘Serial N/O’:
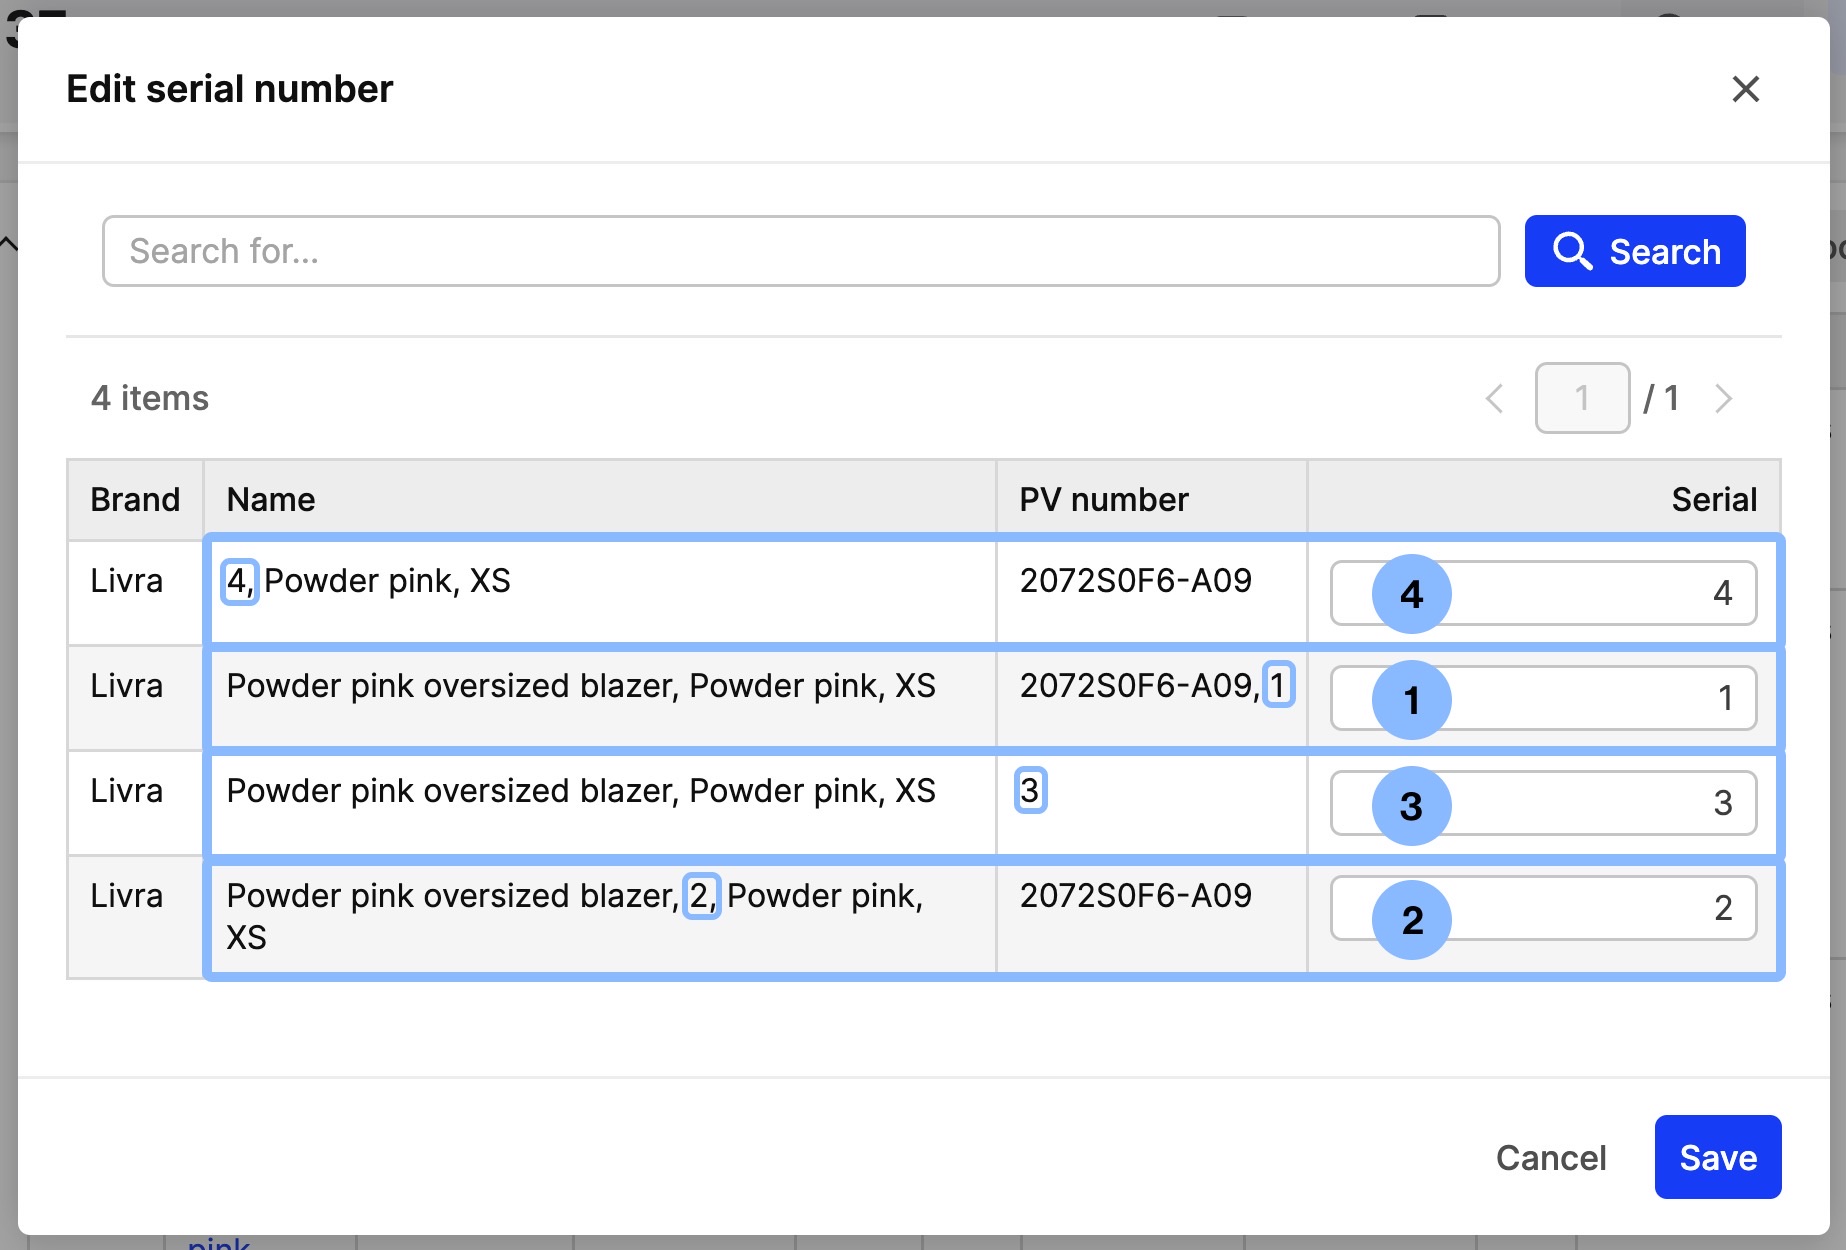
- The following pop-up appears, where you can add the serial number for each item:
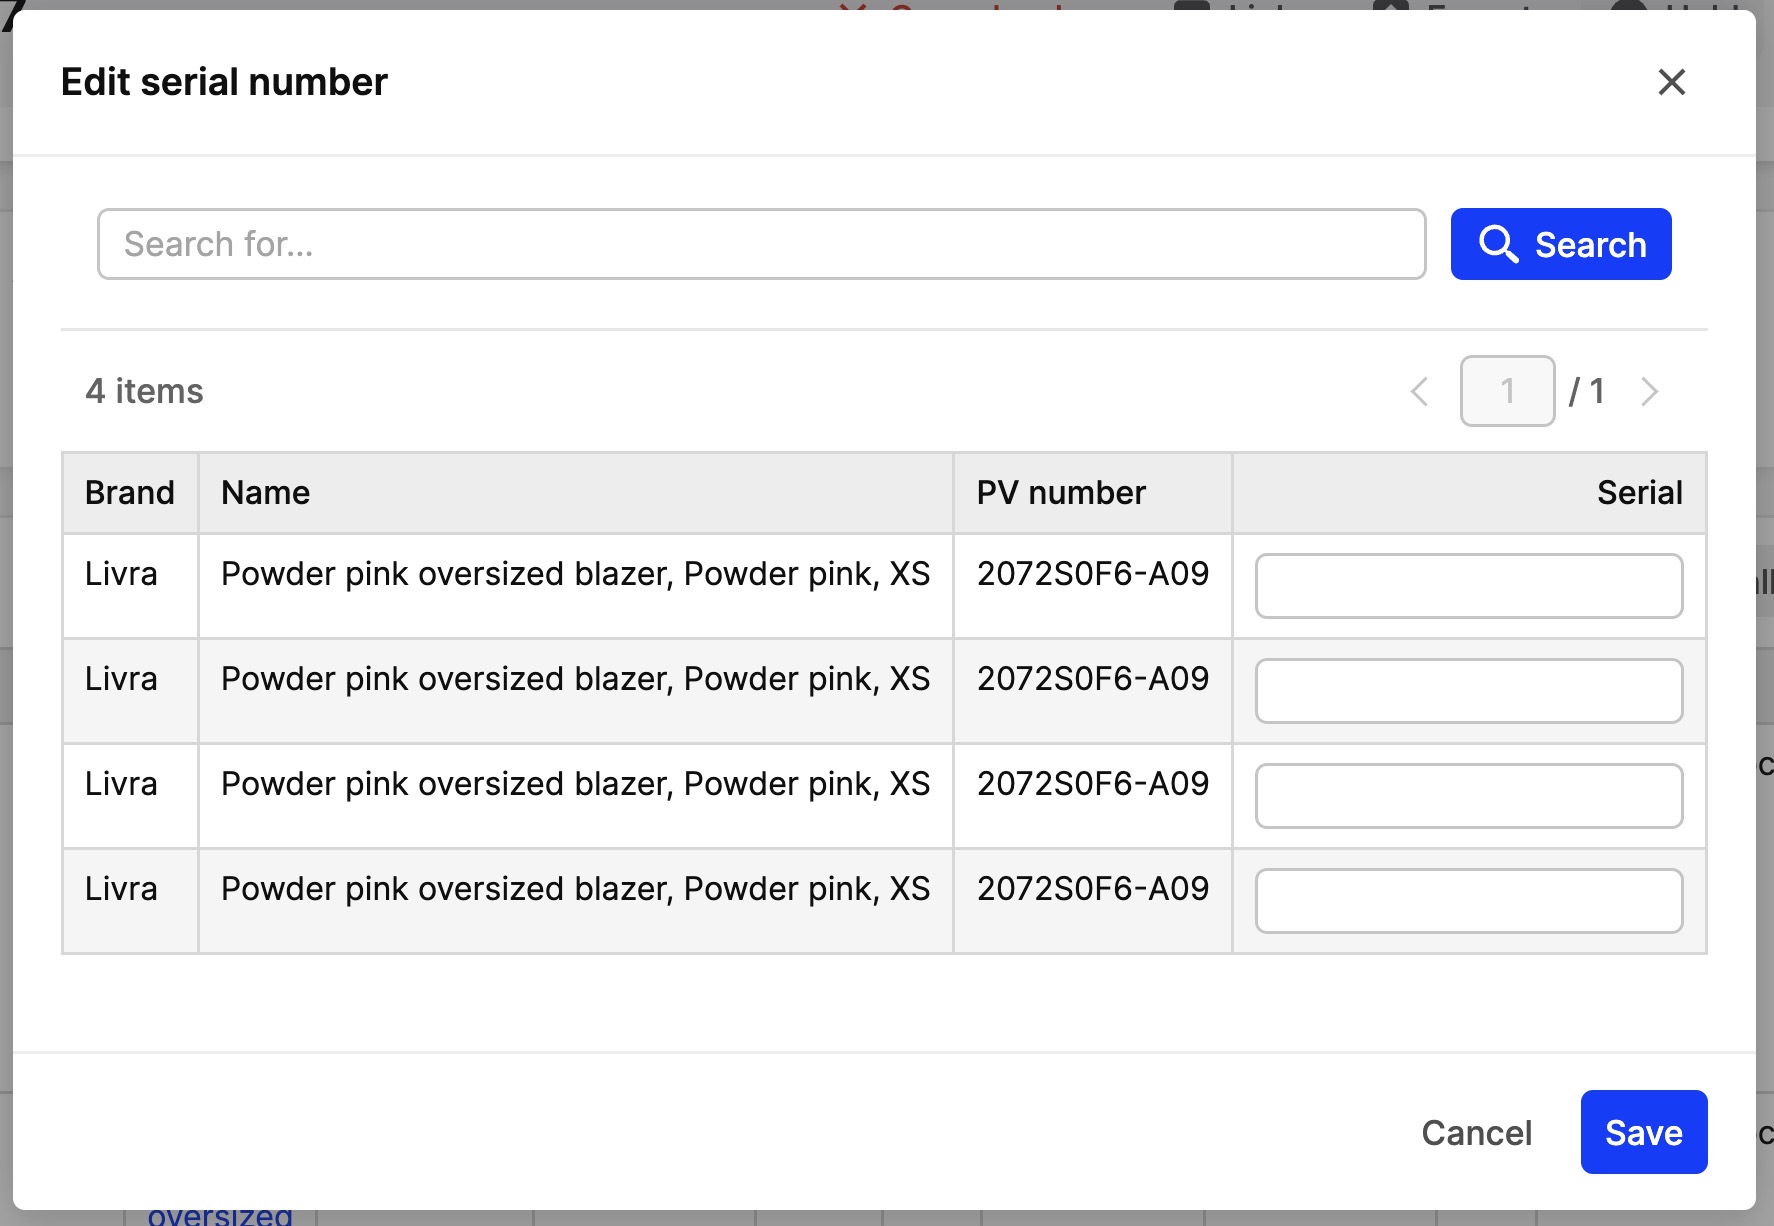
- Click ‘Save’ to ensure the serial numbers are added to the order.
Remember, despite the fact that many pieces of the same product might be ordered, these will be showcased in separate order lines within the order. The reason for that is the serializable nature of the product.
How do the store settings impact the order view?
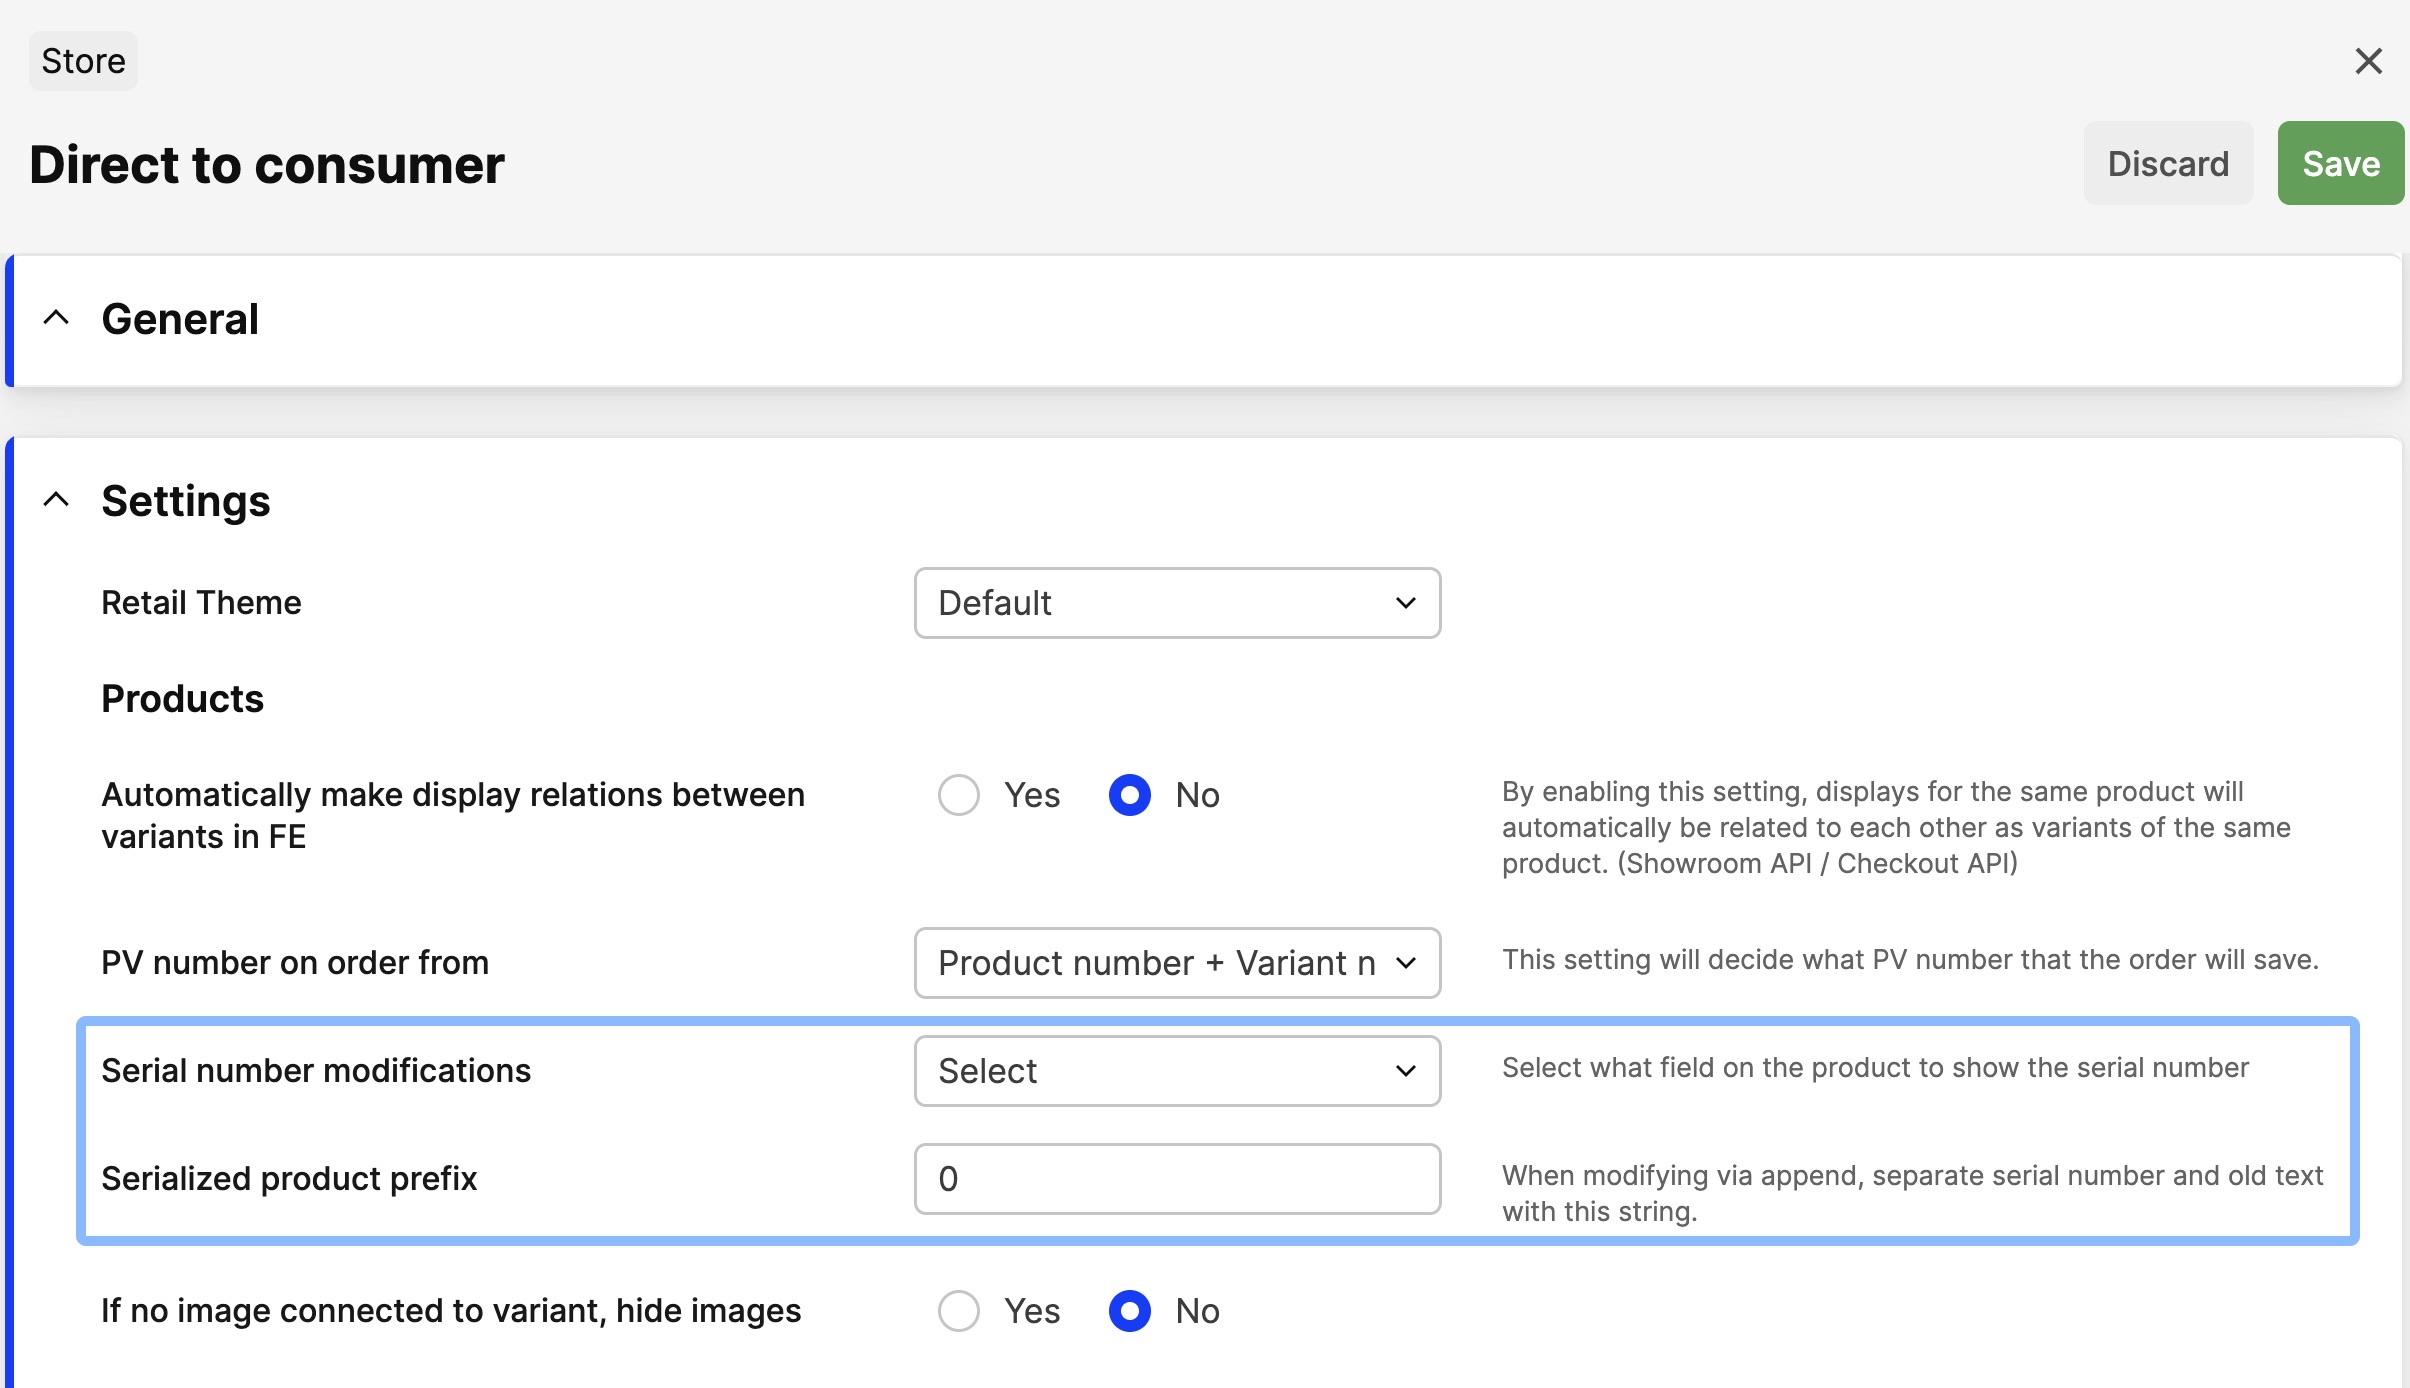
Click on ‘System’ and then choose ‘Retail’ or ‘Wholesale’ - there are two store settings related to serializable products, as explained below:
-
Serial number modifications: This setting allows you to choose where the serial number should be showcased in the ‘Ordered products’ section. The following options can be found in this drop-down menu:
- Append to Product number: This adds the serial number added in the ‘Serial N/O’ pop-up after the product number. See an example in the screenshot below, marked as 1
- Append to Product description: This setting keeps the product description and adds the content you inserted for the serial number in the ‘Serial N/O’ pop-up right after. See an example in the screenshot below, marked as 2
- Replaced Product number: This replaces the product number information with the serial number added in the ‘Serial N/O’ pop-up. See an example in the screenshot below, marked as 3
- Replace Product description: This replaces the existing product description with the serial number you insert in the ‘Serial N/O’ pop-up. See an example in the screenshot below, marked as 4
- None: This ensures that the serial number is not showcased on the ‘Ordered products’ section
-
Serialized product prefix: This is useful when one of the ‘Append’ options is selected in the setting above. You can input the symbol that will be used to separate the serial number with the existing content (product/variant number/SKU or product description).
Information about serializable products on shipments
Similar to the Orders section, the Shipments section also includes the ‘Serial N/O’ button. This is found in the ‘Shipped products’ section on the shipment itself, as seen below:
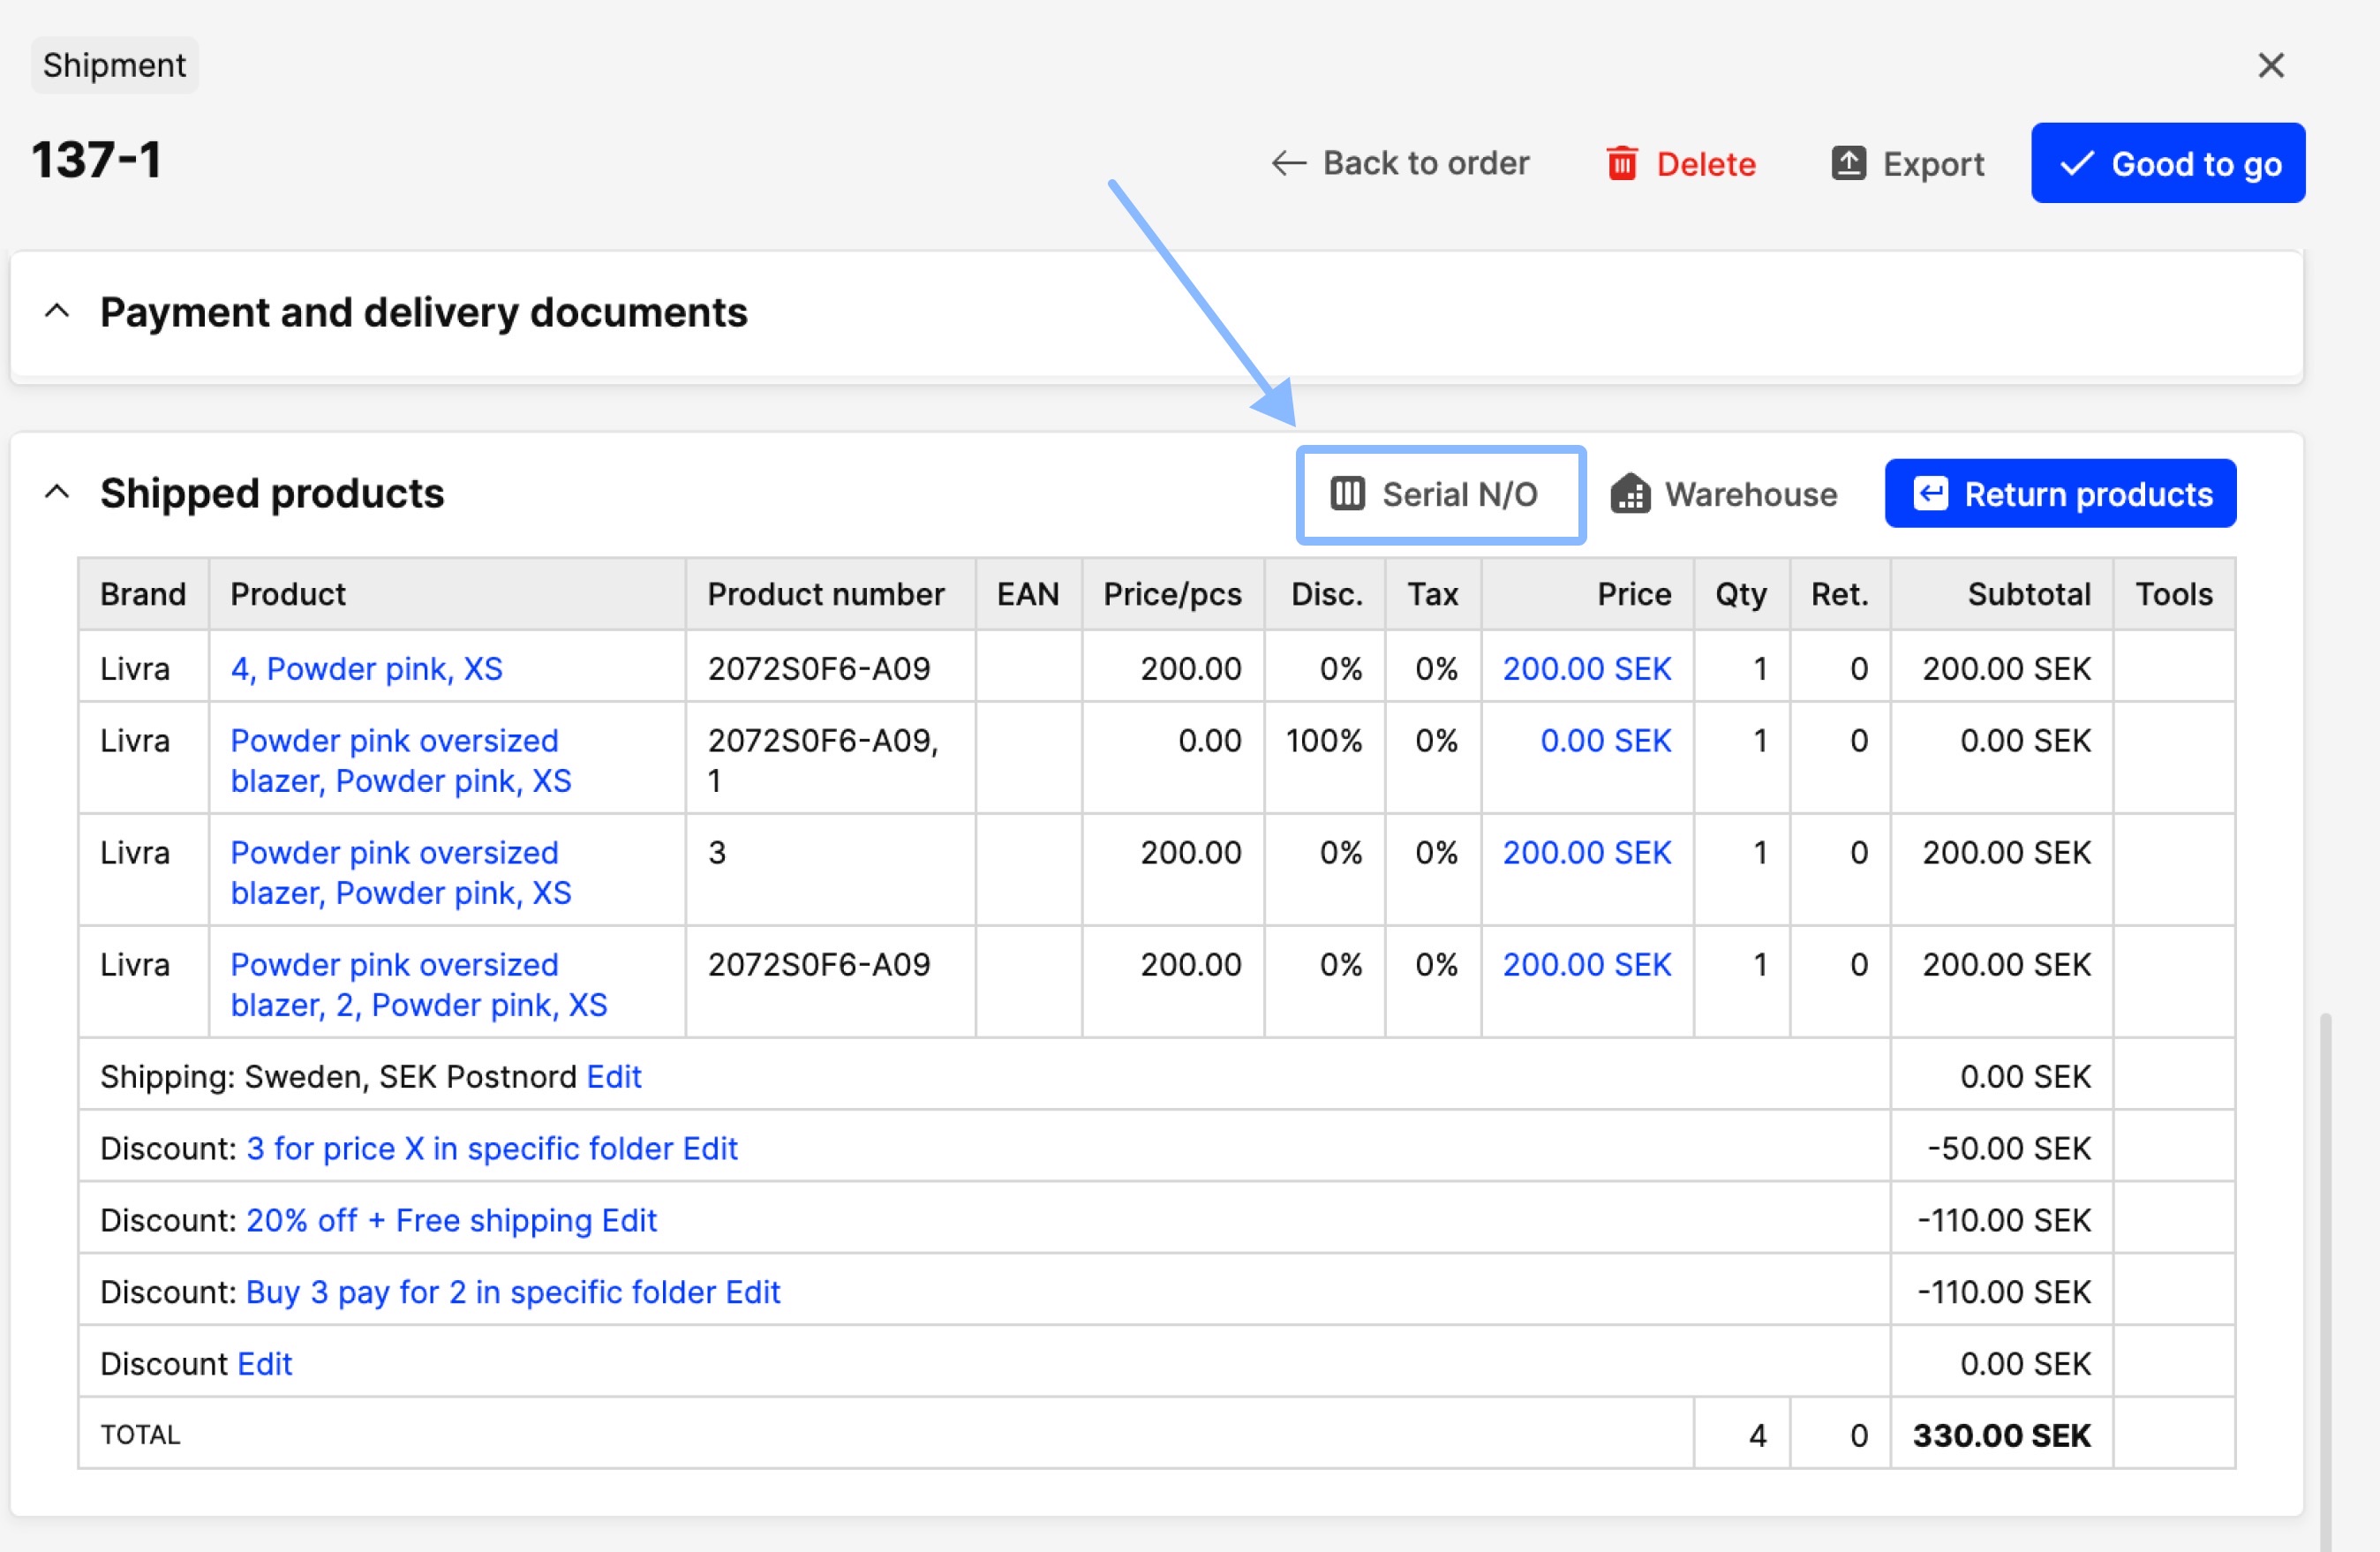 The same pop-up can be accessed and analogous changes can be made to the serial numbers as on order level (discussed above). Note also that the store settings influence the way the serial numbers are viewed/created on shipment level as on order level.
Reports, exports, and APIs
As mentioned above, the serial number either replaces the SKU or the product name, or it is appended after this content. Therefore, serial numbers can be found in reports, exports, and APIs in these two specific fields (product/variant SKU/number, product name).