Size charts & Sizes
About this article
Size charts and sizes are important parts of the product setup. Stock is stored on size level so understanding how to manage sizes is crucial. In this article, you can learn more about the Size chart settings and how to add Size charts in your Centra. Once a Size chart is created and assigned on a variant, you can choose which sizes to activate in this Size chart. This can be done manually or in bulk. Lastly, you can also learn how to add Size info, how to delete sizes and what actions are possible when a Size chart change is needed.
Size chart fields
Below you can see a list of all fields found in a Size chart along with explanations:
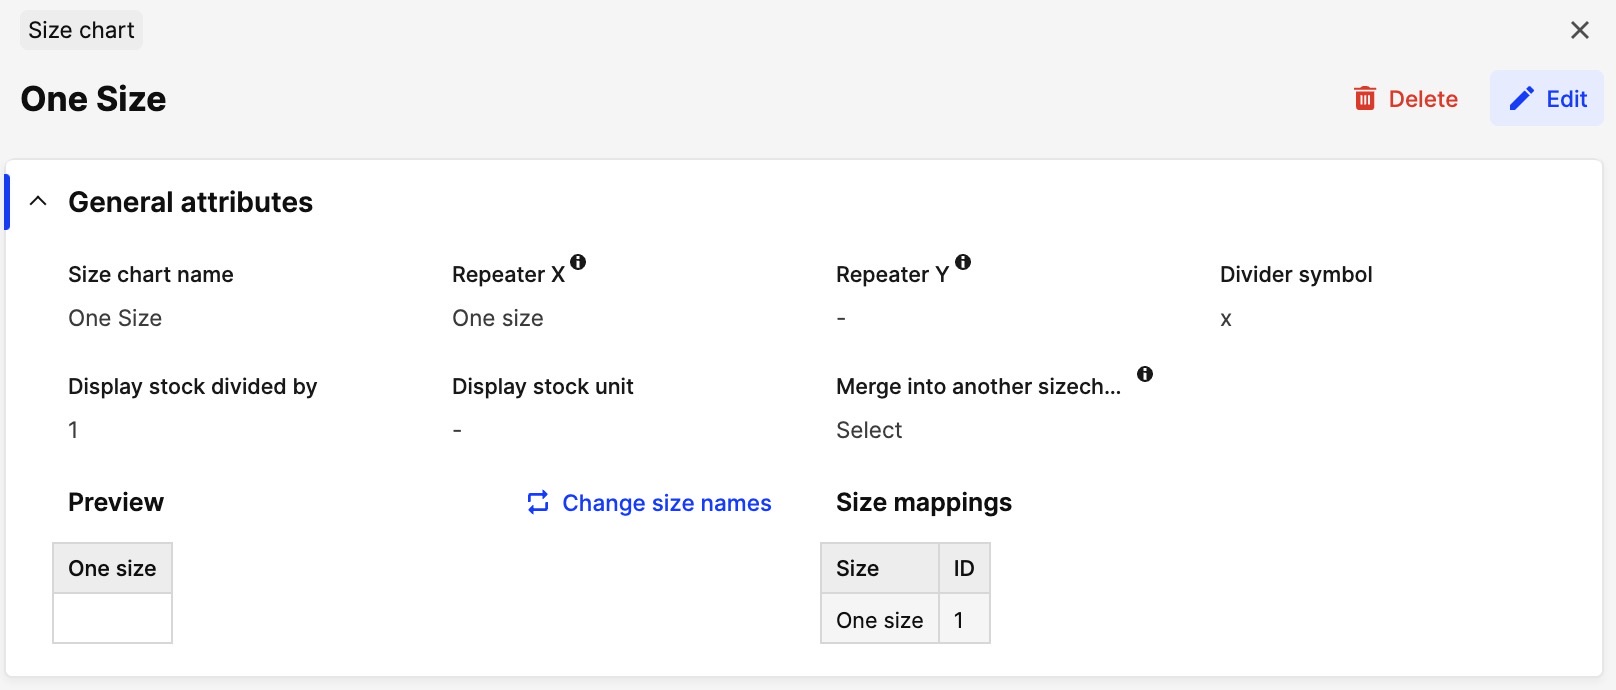
- Size chart name - This is the name of the Size chart
- Repeater X - This is essentially the ‘size name’. For example: S, M, and L. You can input all the sizes needed for the Size chart and separate them by a semicolon
- Repeater Y - Similar to above, however, these size names will be shown in a vertical way, and therefore used for two-dimensional charts (i.e. for trousers)
- Divider symbol - This is the symbol used between Repeater X and Repeater Y in a two-dimensional Size chart
- Display stock divided by - This setting is usually set to ‘1’. The function is to be able for example to sell fabric on a roll that could be 1.75 meters
- Display stock unit - Here you can input ‘St’, ‘Pcs’, ‘Pack’, or something else that will be used to display the unit of your choice
- Merge into another Size chart - This allows you to merge Size charts
If you use the setting ‘Merge into another sizechart’, the Size localization connection is removed from the Size chart you are merging from and only the one you are merging it to is left. Read more about Size chart localization here.
- Preview - You can use this to see how your Size chart will be displayed
- Size mappings - Here you can see the IDs of each size of this Size chart. Note that this information can also be found in the ‘Size localization’ section, which can be used as a way of translating your Size charts for different countries. Read more about Size localization here
- Edit size names - You can use this to change the names of existing sizes
Adding a Size chart
In Centra you can create one-dimensional or multidimensional Size charts. Adding a Size chart to a product is part of the variant creation. You can read more about it by following the link.
One-dimensional Size chart
- Click on 'Create Size chart'
- If you want to create a one-dimensional size chart, just fill out the fields as below ('Size chart name' and 'Repeater X'):
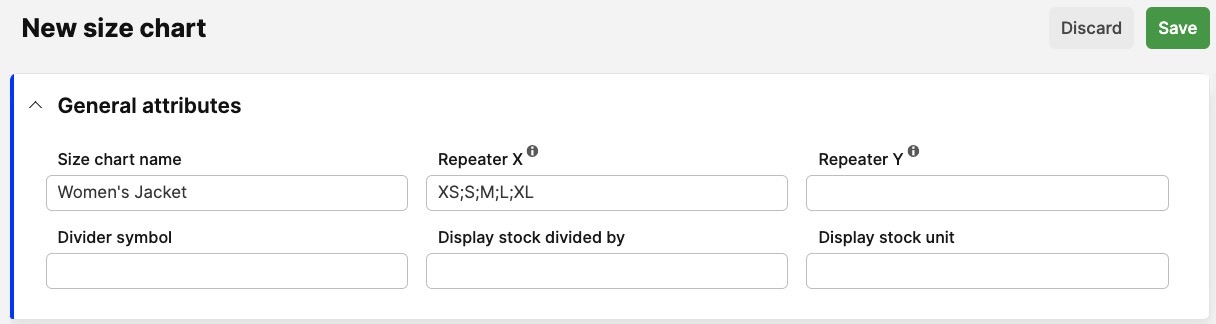
- Click 'Save', and you receive a one-dimensional Size chart that looks like this:

- Once you click 'Save', 'x' will automatically be entered in the 'Divider Symbol' field. 'x' is the default divider symbol but you are free to change it as you like. Divider symbols are only used in multi-dimensional Size charts.
Multidimensional Size chart:
- If you want to create a multidimensional Size chart, complete the fields as in the picture below ('Size chart name', 'Repeater X' which in this case is the waist of the jeans, and 'Repeater Y' - the length)
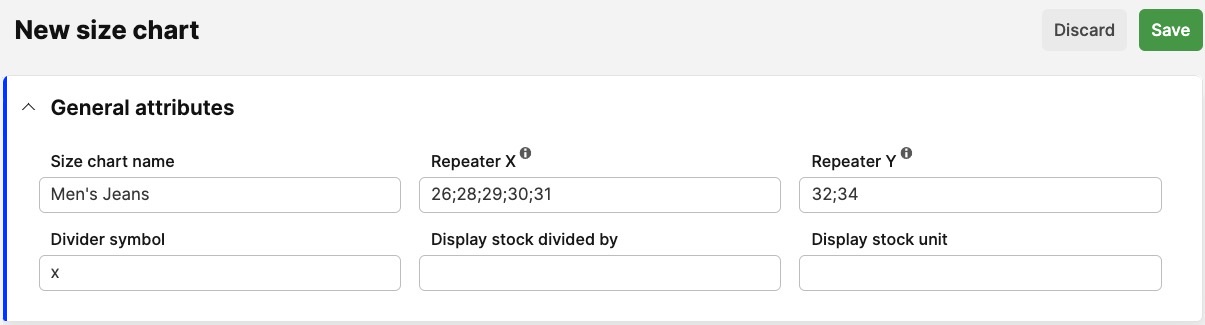
- Click 'Save', and your multidimensional Size chart looks like this:

How to activate sizes
Once a Size chart is selected on a variant, you need to choose which sizes to activate. This step is very important for the following reasons:
- It makes your products available for purchase
- You can decide which sizes to activate and therefore sell. With this in mind, if you have some products sold in sizes XS-L and others sold in S-XL, you can create one Size chart with sizes XS-XL and activate each size combination on the respective product
Read below how to activate sizes manually or in bulk.
Activate sizes manually
To activate a size, you need to add stock. If the stock values are not yet known, insert 0 instead. See below examples of activated (XS-L) and not activated sizes (XL-XXL):
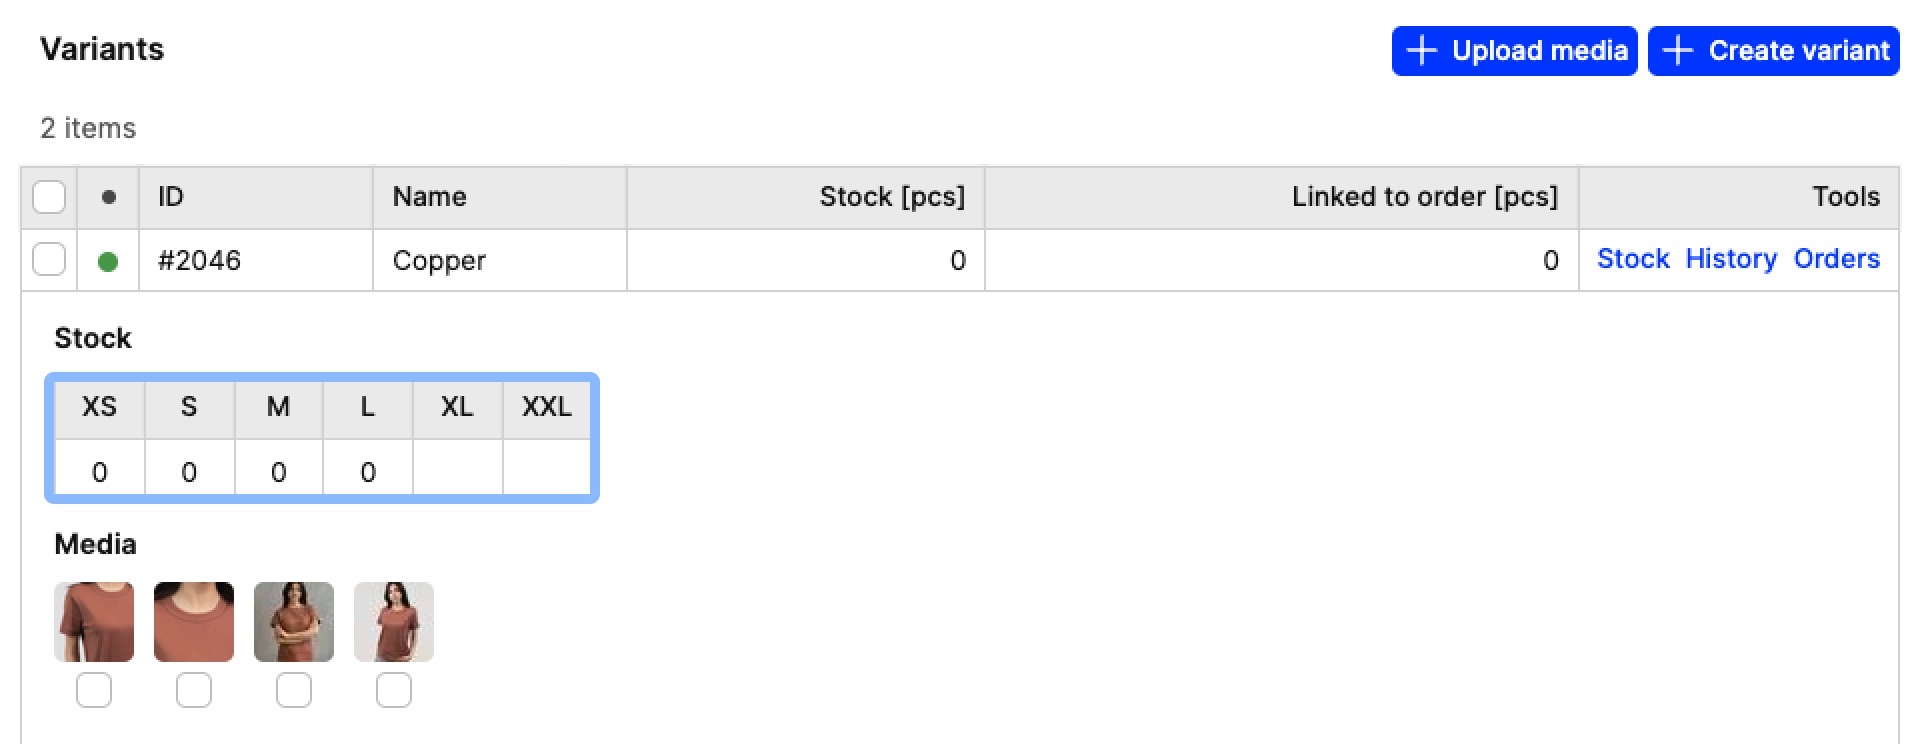
- Sizes XS-L show stock 0 and therefore are activated
- Sizes XL-XXL are empty and therefore are not activated
Activate sizes in bulk
To activate sizes in bulk you need to use the Product batch actions. Read more here.
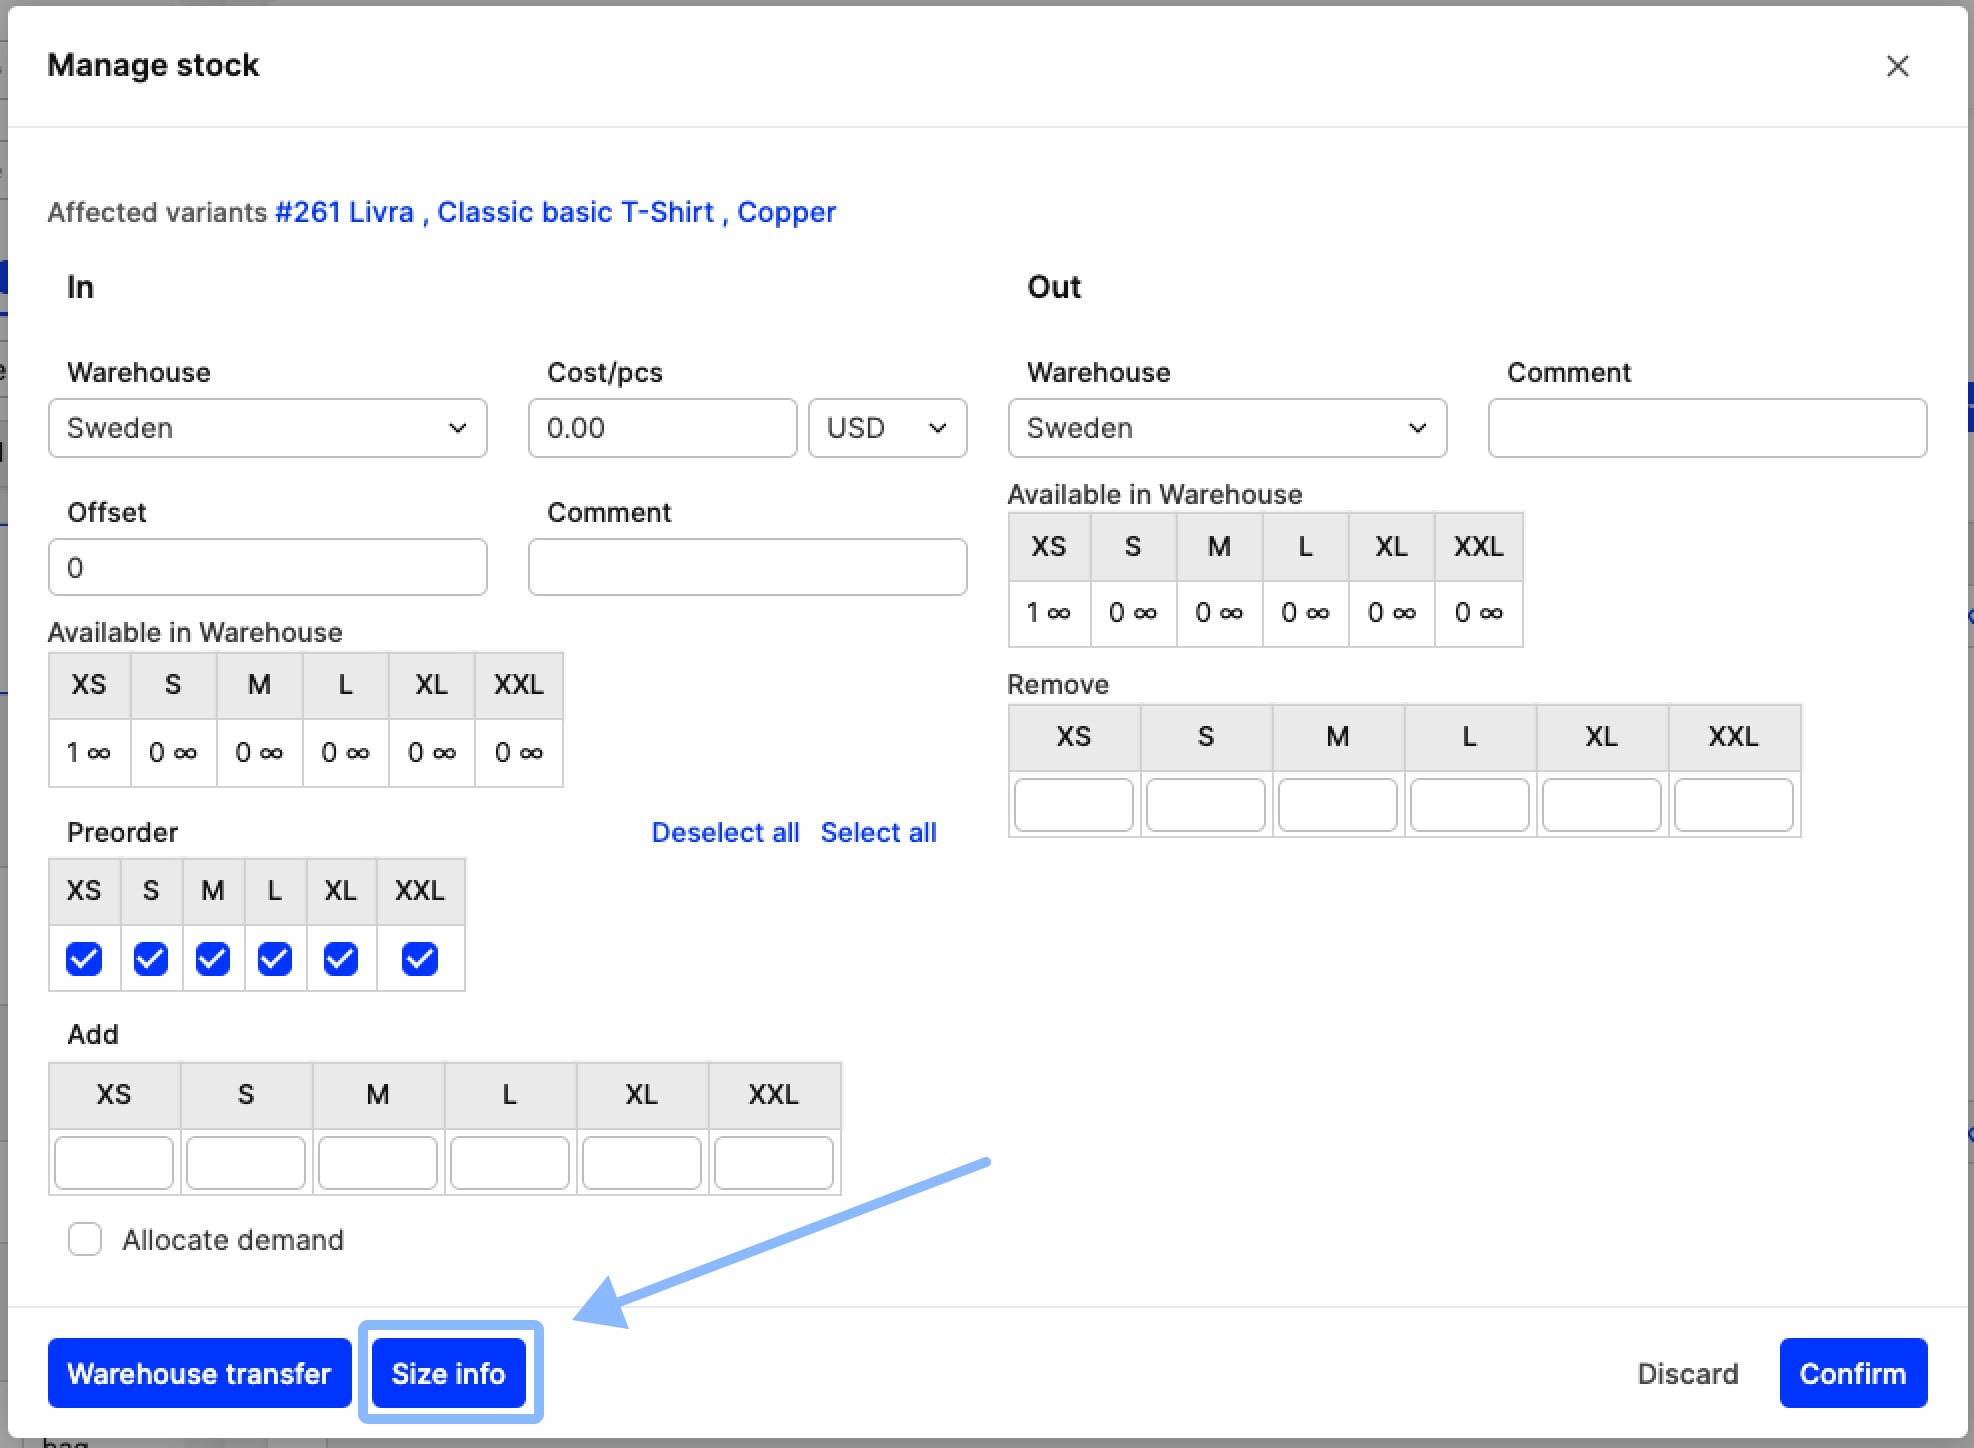
Adding Size info
- To access size-specific information, you need to use the Stock editor pop-up. Find out how in this article.
- In this pop-up, click on 'Size info'
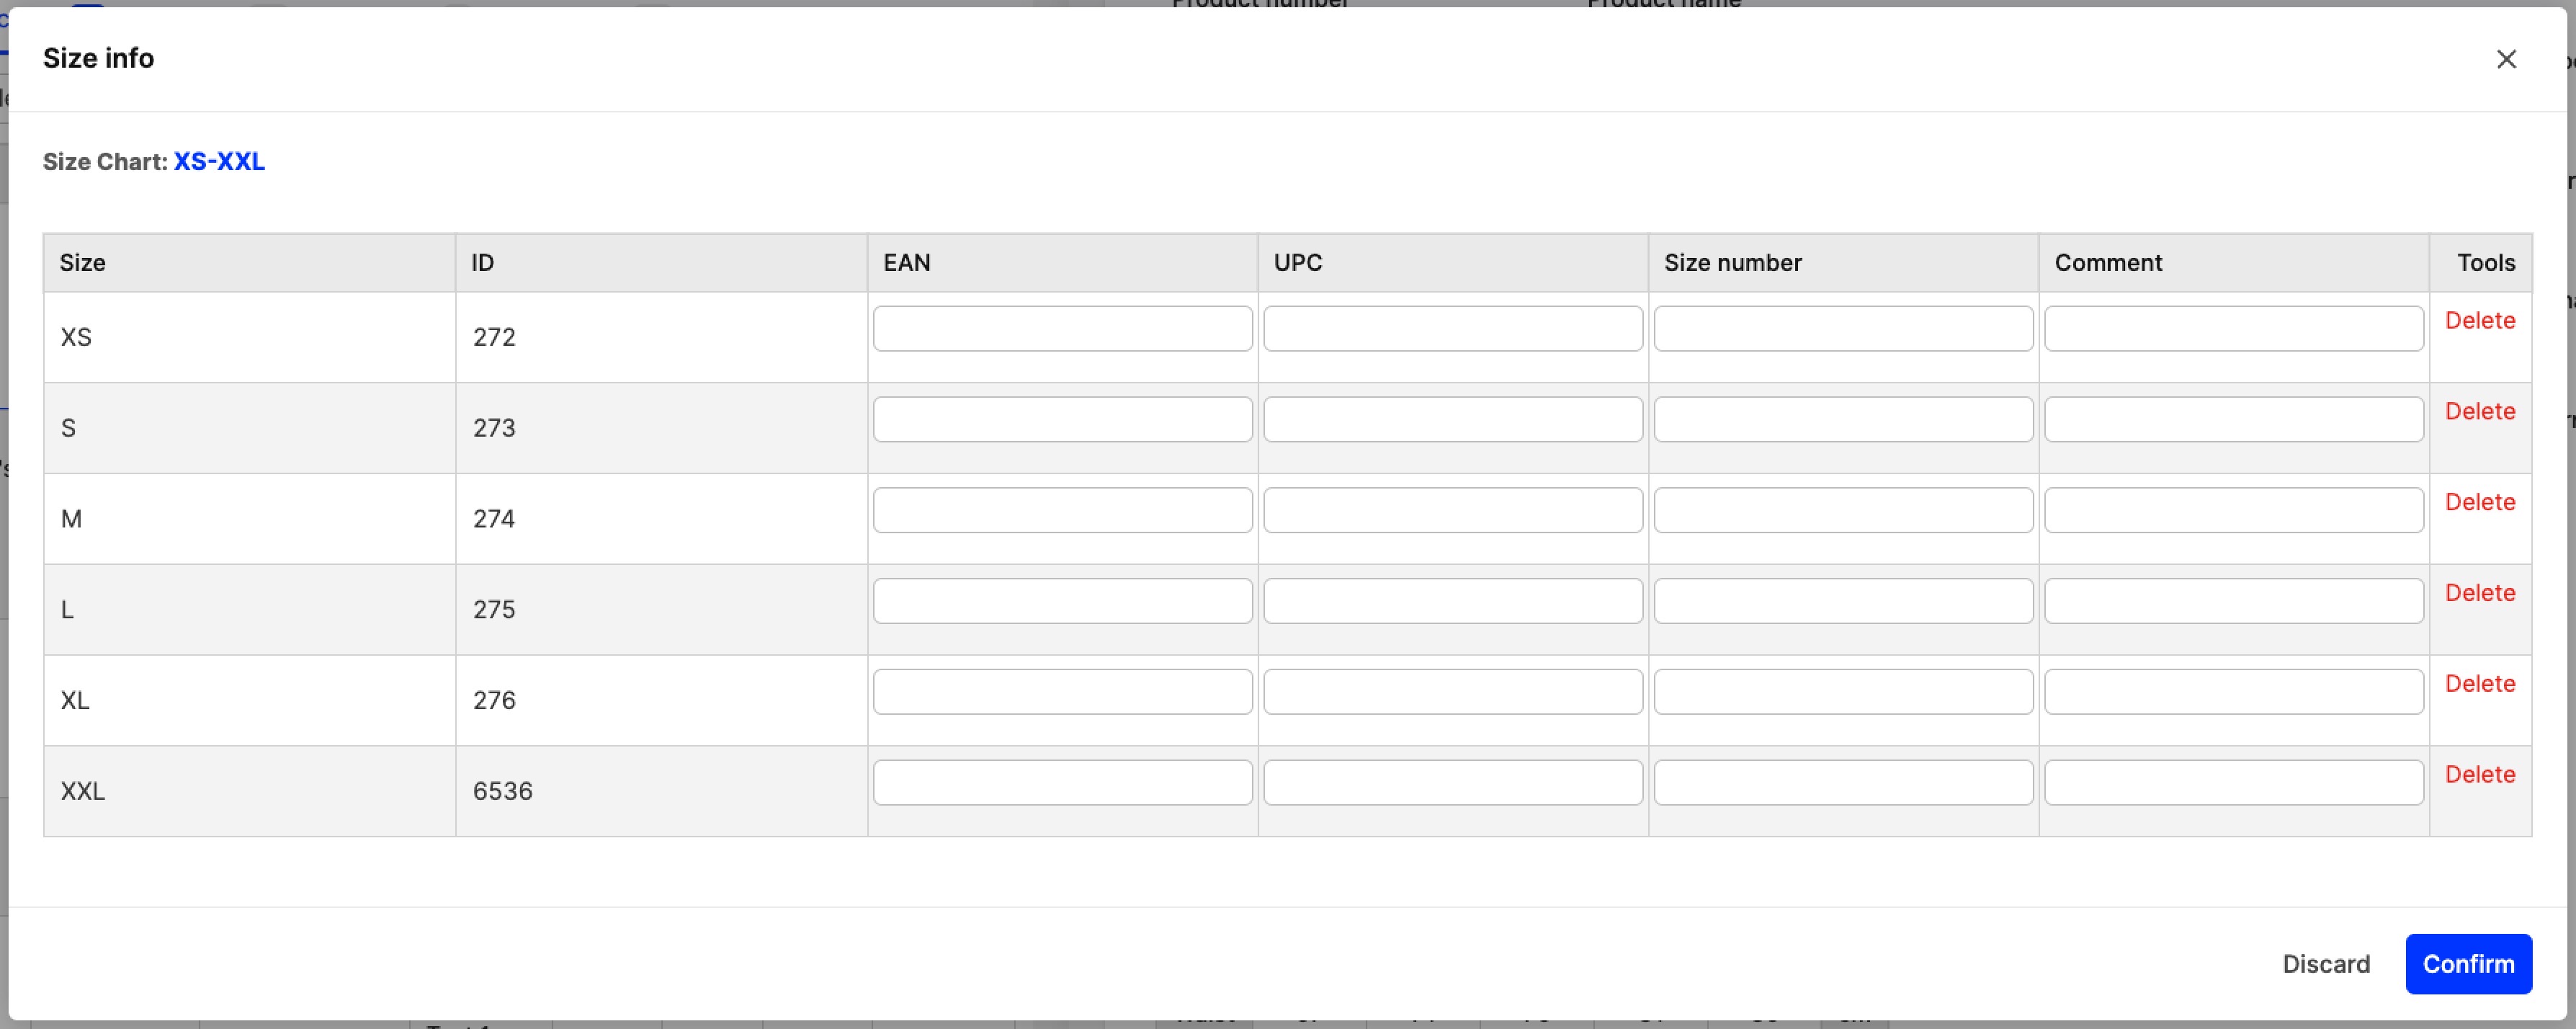
- You are redirected to the Size info pop-up, where you can see all sizes and their IDs, EAN codes, UPC, Size SKU and Comments:
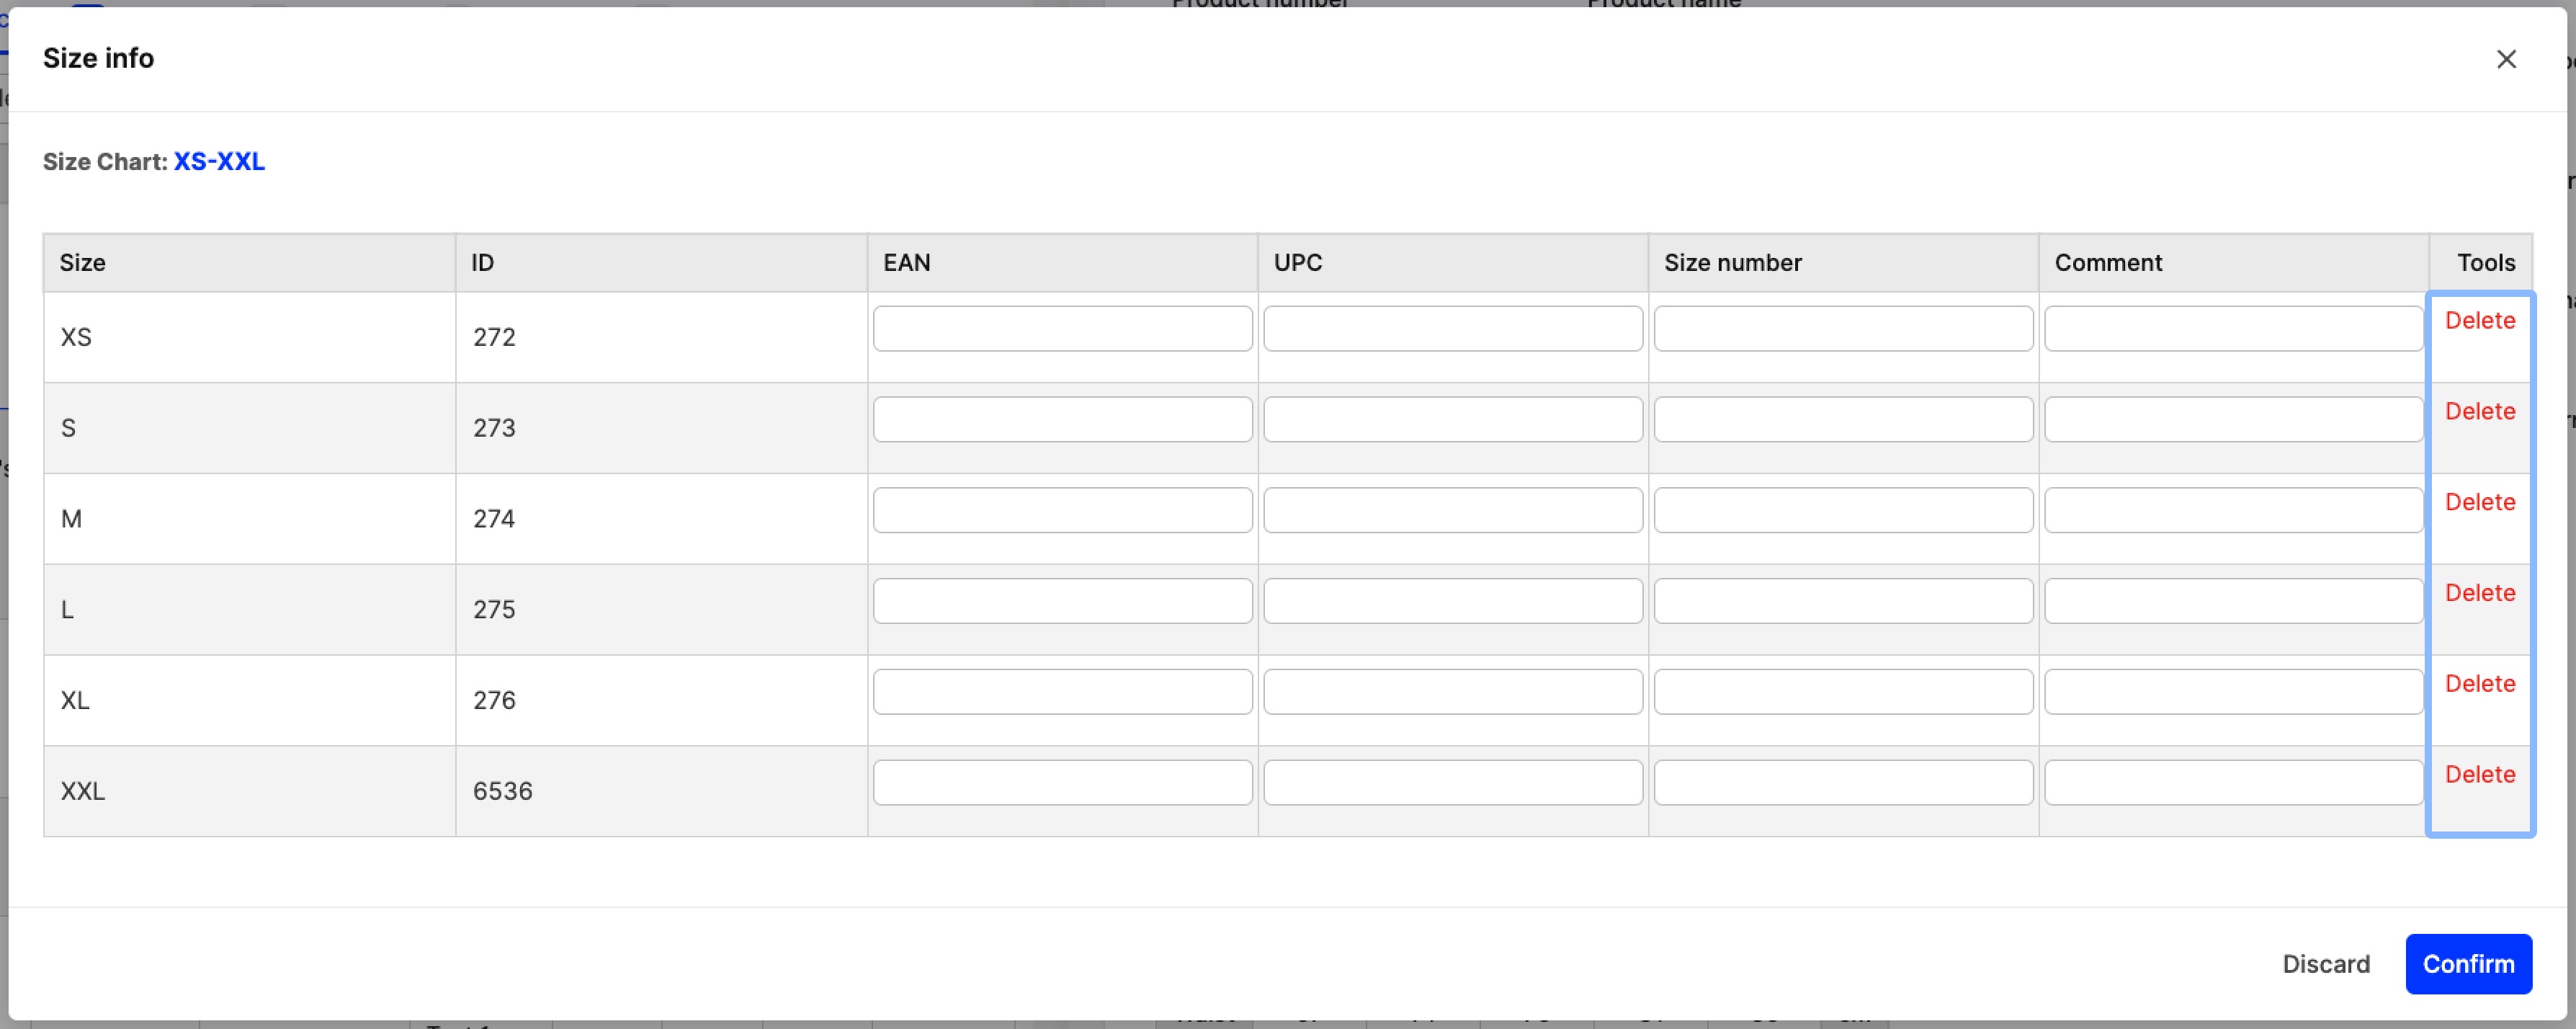
How to delete sizes
To delete a size, you need to open the 'Size info' pop-up and click 'Delete' on the corresponding size under the 'Tools' column:
How to edit a used Size chart
Once a Size chart is selected on a variant and saved, the Size chart cannot be changed. As seen in the screen recording below the Size chart field is not available once this action is taken:
 If you have selected the wrong Size chart by mistake, the variant needs to be deleted and a new one created with the right Size chart. Below we go through two scenarios:
Wrong Size chart selected
If you selected the wrong Size chart when creating your variant, follow these steps:
- Tick the box on the left side of the variant you wish to delete and click 'Delete'
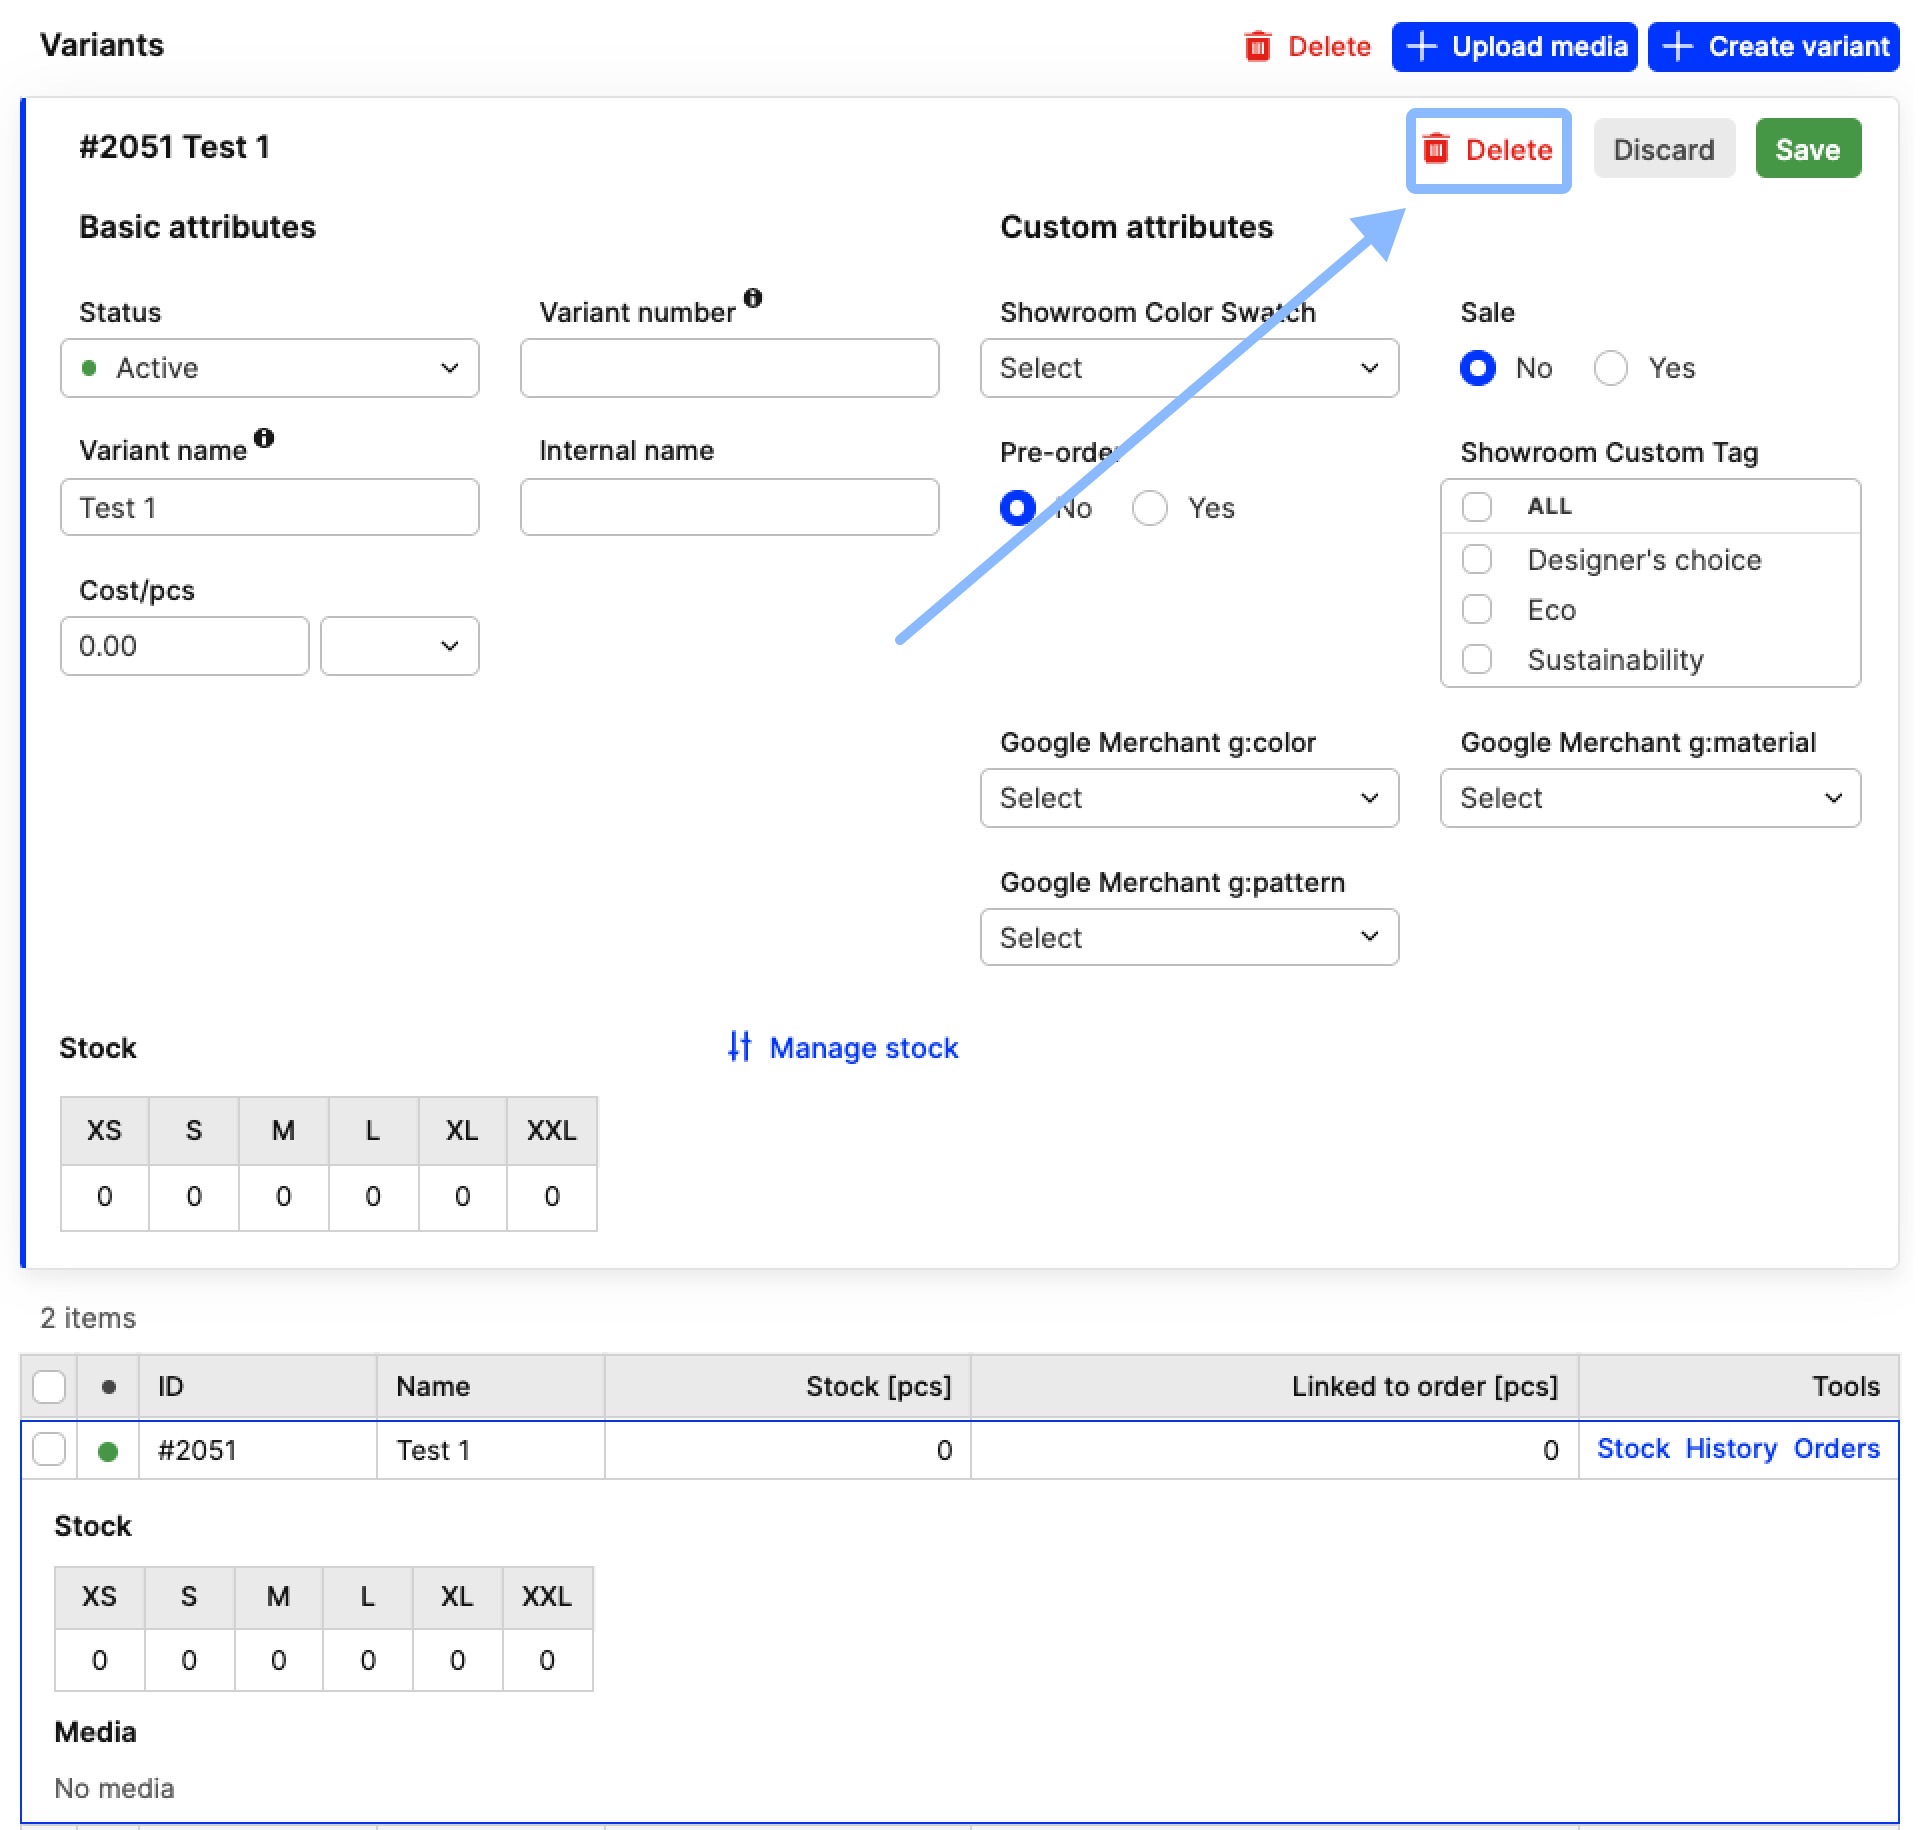
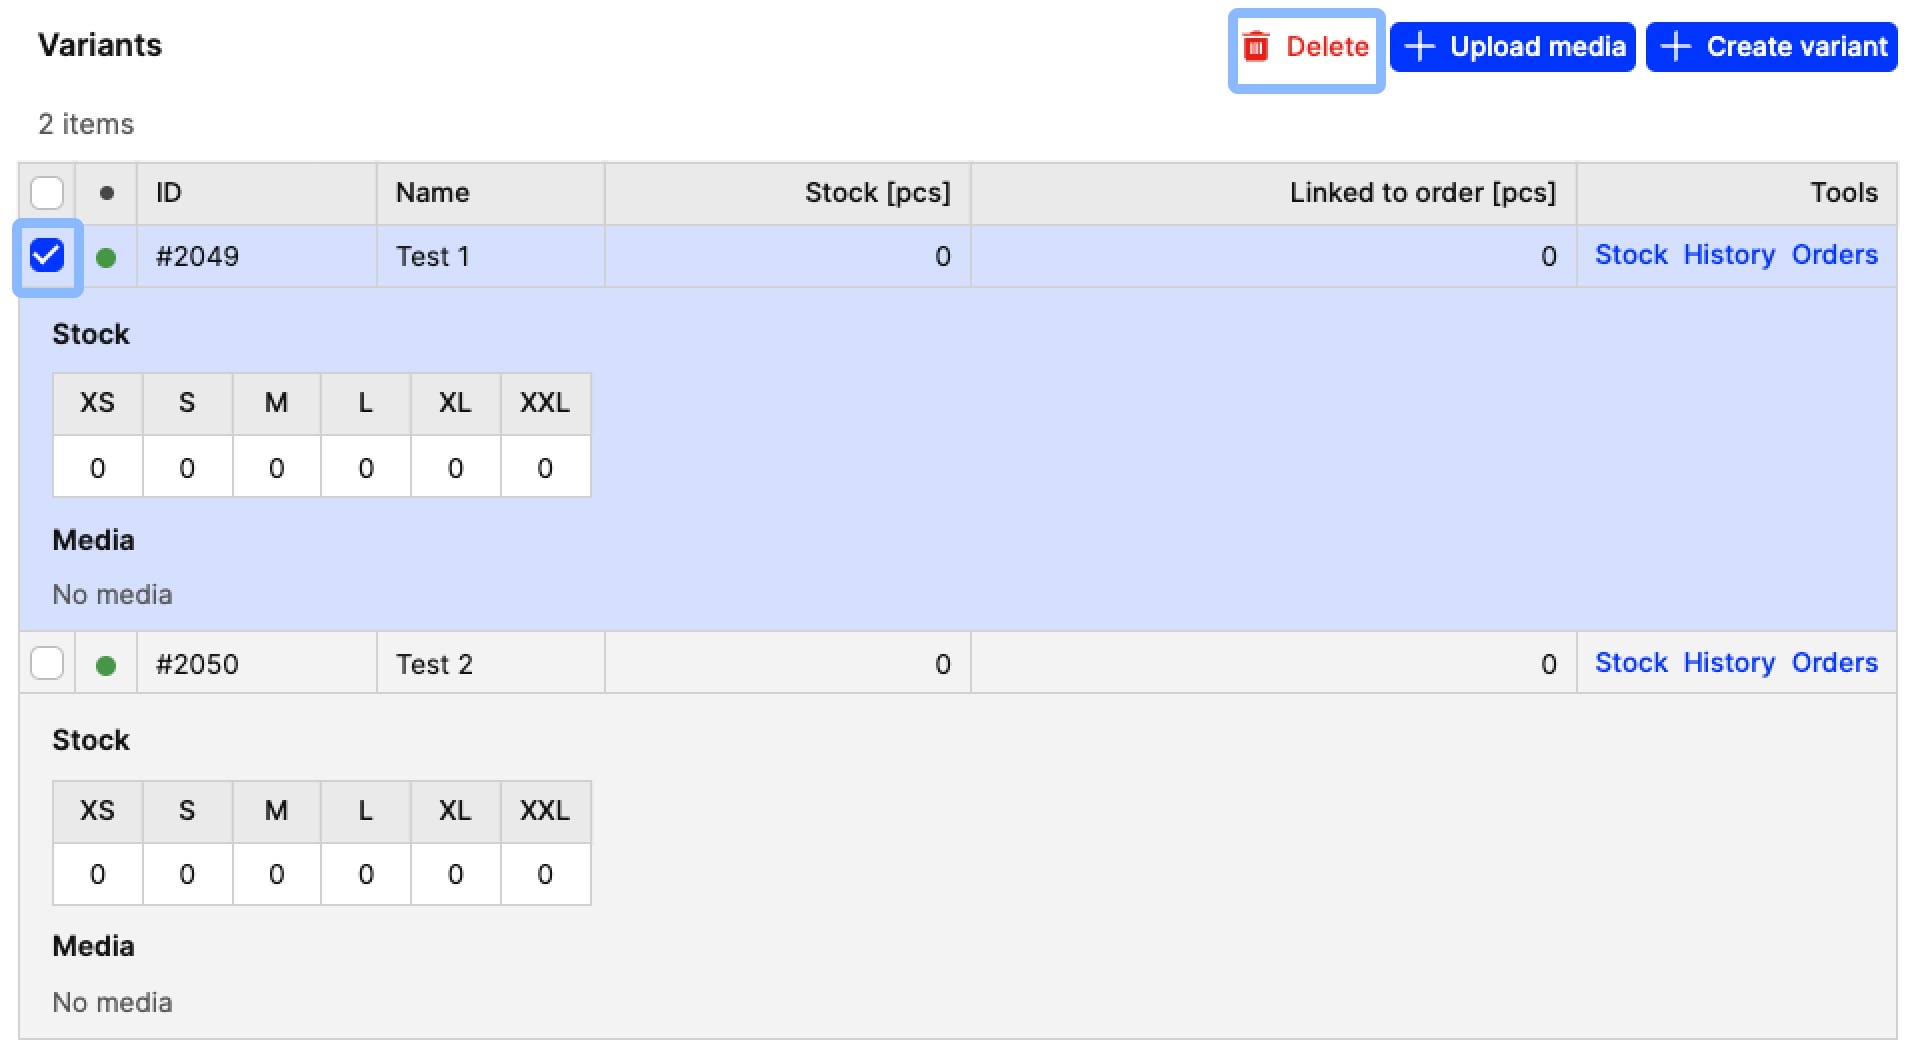 Alternatively, select the variant you wish to delete, and click 'Delete' within its settings section:
- The following pop-up appears:
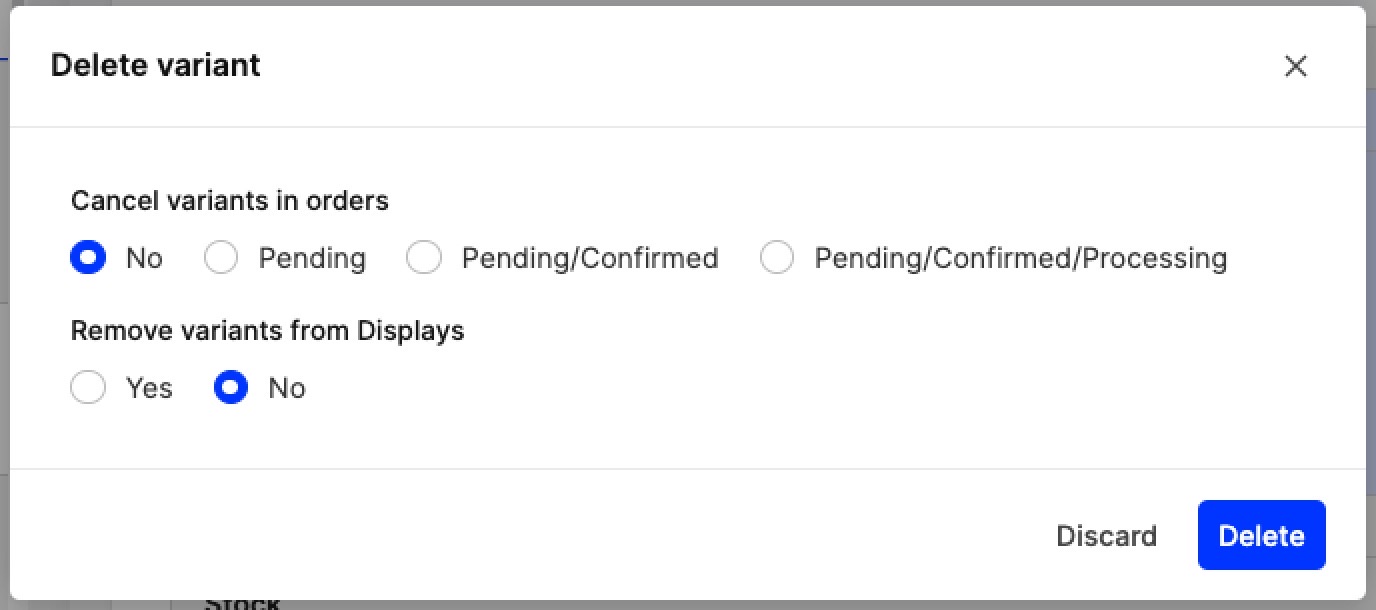 Here you can choose:
- Whether you want to cancel the variant in orders. You can also control which orders should be affected: Pending, Pending/Confirmed, Pending/Confirmed/Processing
- Whether you want variants to be removed from Displays Read more about this pop-up here.
- Repeat Steps 1-2. The first time you delete, the status is changed to ‘Disabled’. The second time, the variant is removed from Centra
- Create a new variant and select the right Size chart.
My Size chart needs changes
If your Size chart is wrong (i.e. missing sizes, wrong name) or you are introducing new sizing to already existing products, you need to change the Size chart. First you need to determine whether a Size chart is being used or not. To do this, review the ‘Used’ column in the Size charts Listing page:
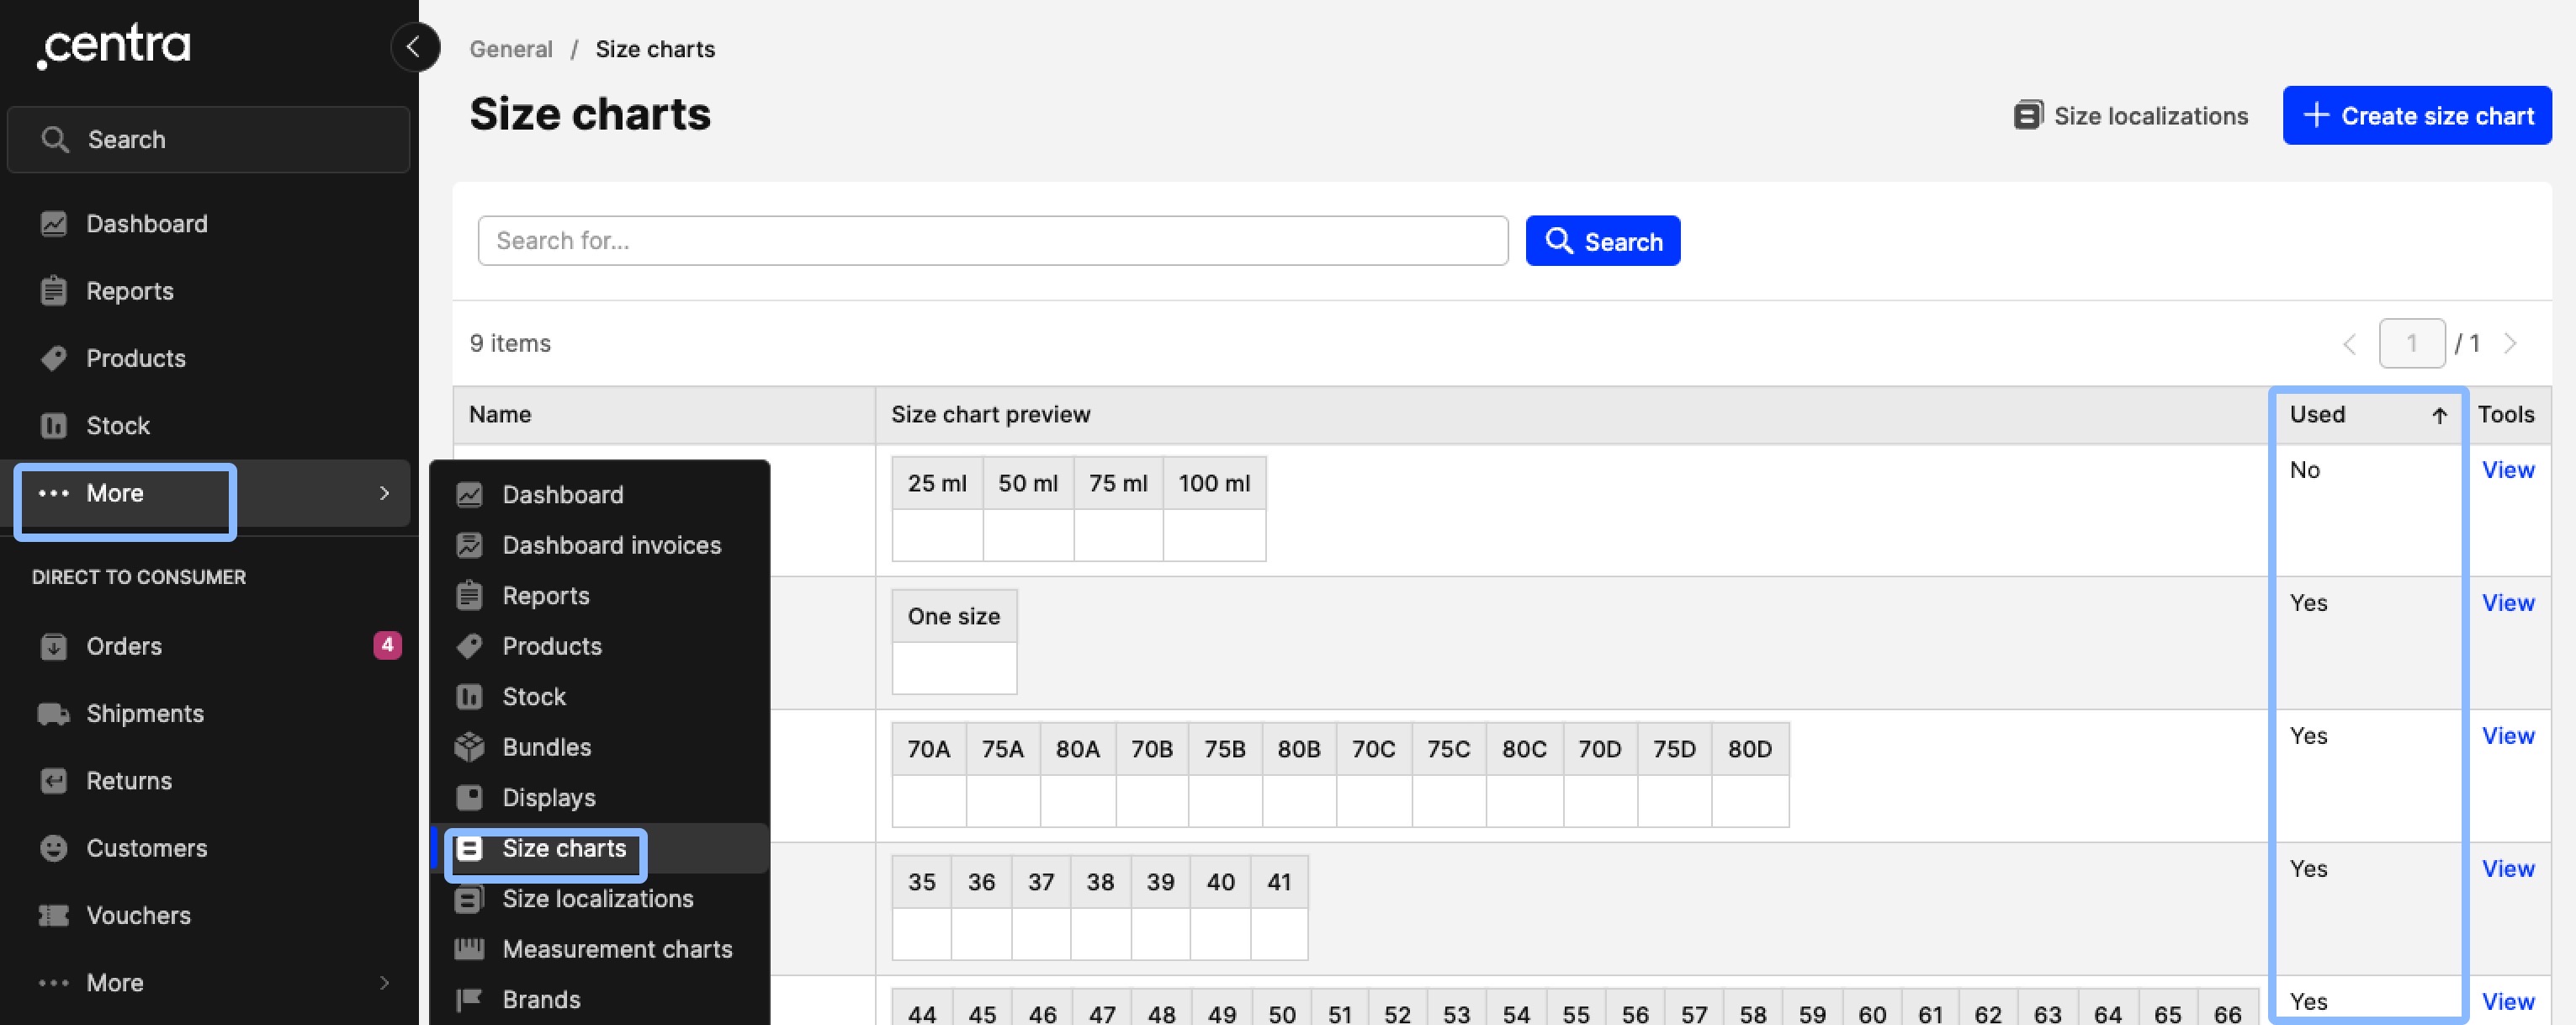 What does it mean when a Size is used or not?
- Used - This Size chart is selected on at least one variant, and has at least one size activated
- Not used - This Size chart is not selected on any variants. If selected on variants no sizes are activated
Size charts that are not Used can be edited freely. However, editing Size charts that are in use is restricted - see below:
- You can:
- Add new size(s)
- Edit the size names by using 'Change size names'
- You cannot:
- Remove sizes that are in use (i.e. with stock or order transactions)
- Edit the value in 'Repeater X' and 'Repeater Y' - use 'Change size names' instead
- Add data in the 'Repeater Y' field in a one-dimensional Size chart in use (i.e. that has 'Repeater X' data)
In cases where you need to make edits that are not allowed, create a new Size chart first, then follow the steps in the previous section to assign this new Size chart to the variant.
Size chart changes through an ERP
If you use an ERP to sync your products to Centra through the SOAP API, Size chart changes need to be done in a different way. In this scenario, edits cannot be performed directly in Centra, as they will be overridden by the data found in the ERP. Instead, changes should be made in the ERP.
Additionally, as mentioned earlier in this article, in Centra it is not possible to change a Size chart on a variant once selected. Therefore, if a Size chart change is synced from the ERP to Centra, the following error message will appear:
<ns1:message>Cannot rename existing size ONE_SIZE|-108 from to One Size (silk ID 1)</ns1:message>
<ns1:message>Cannot change sizetable on variation #3456 98239999134999134, product #169 98239999134 from sizechart #15 to #13, because it already has sizes.</ns1:message>
Instead, in order to fix this, follow the steps described below:
- Inactivate the variant with the wrong size chart in Centra
- Rename that variant to something like ‘OLD-variant name’
- Copy the Product number
- Go to 'Modules' > 'Soap api' > and open the 'Conversion' tab
- Search for the product by using the copies Product number
- Delete the variation(s) that have the wrong Size chart
- Ask your ERP to sync the product/variant again with the correct Size chart. That is how you change a Size chart on an incorrectly synced product.
Next steps
You have now learned how to create a chart based on the products sizes. You may also add measurement charts, which are based on the products measurements. To read more about how to add a measurement chart, click here.