Creating folders
About this article
Folders are created for internal use only and they are not displayed in the front end. They can be used to sort and easily display your products in the back end, to use in batch actions in order to select multiple products simultaneously and make changes. They can also be used to review sales statistics based on custom parameters. Use case examples include: product type based structure (i.e. clothing/pants, furniture/chair, footwear/sandals) or same as categories (i.e. website navigation).
How to create a new Folder
To create a Folder, follow the steps below:
- Under 'More' in the main menu at the left, go to 'Folders' and click '+Create Folder' in the top-right corner
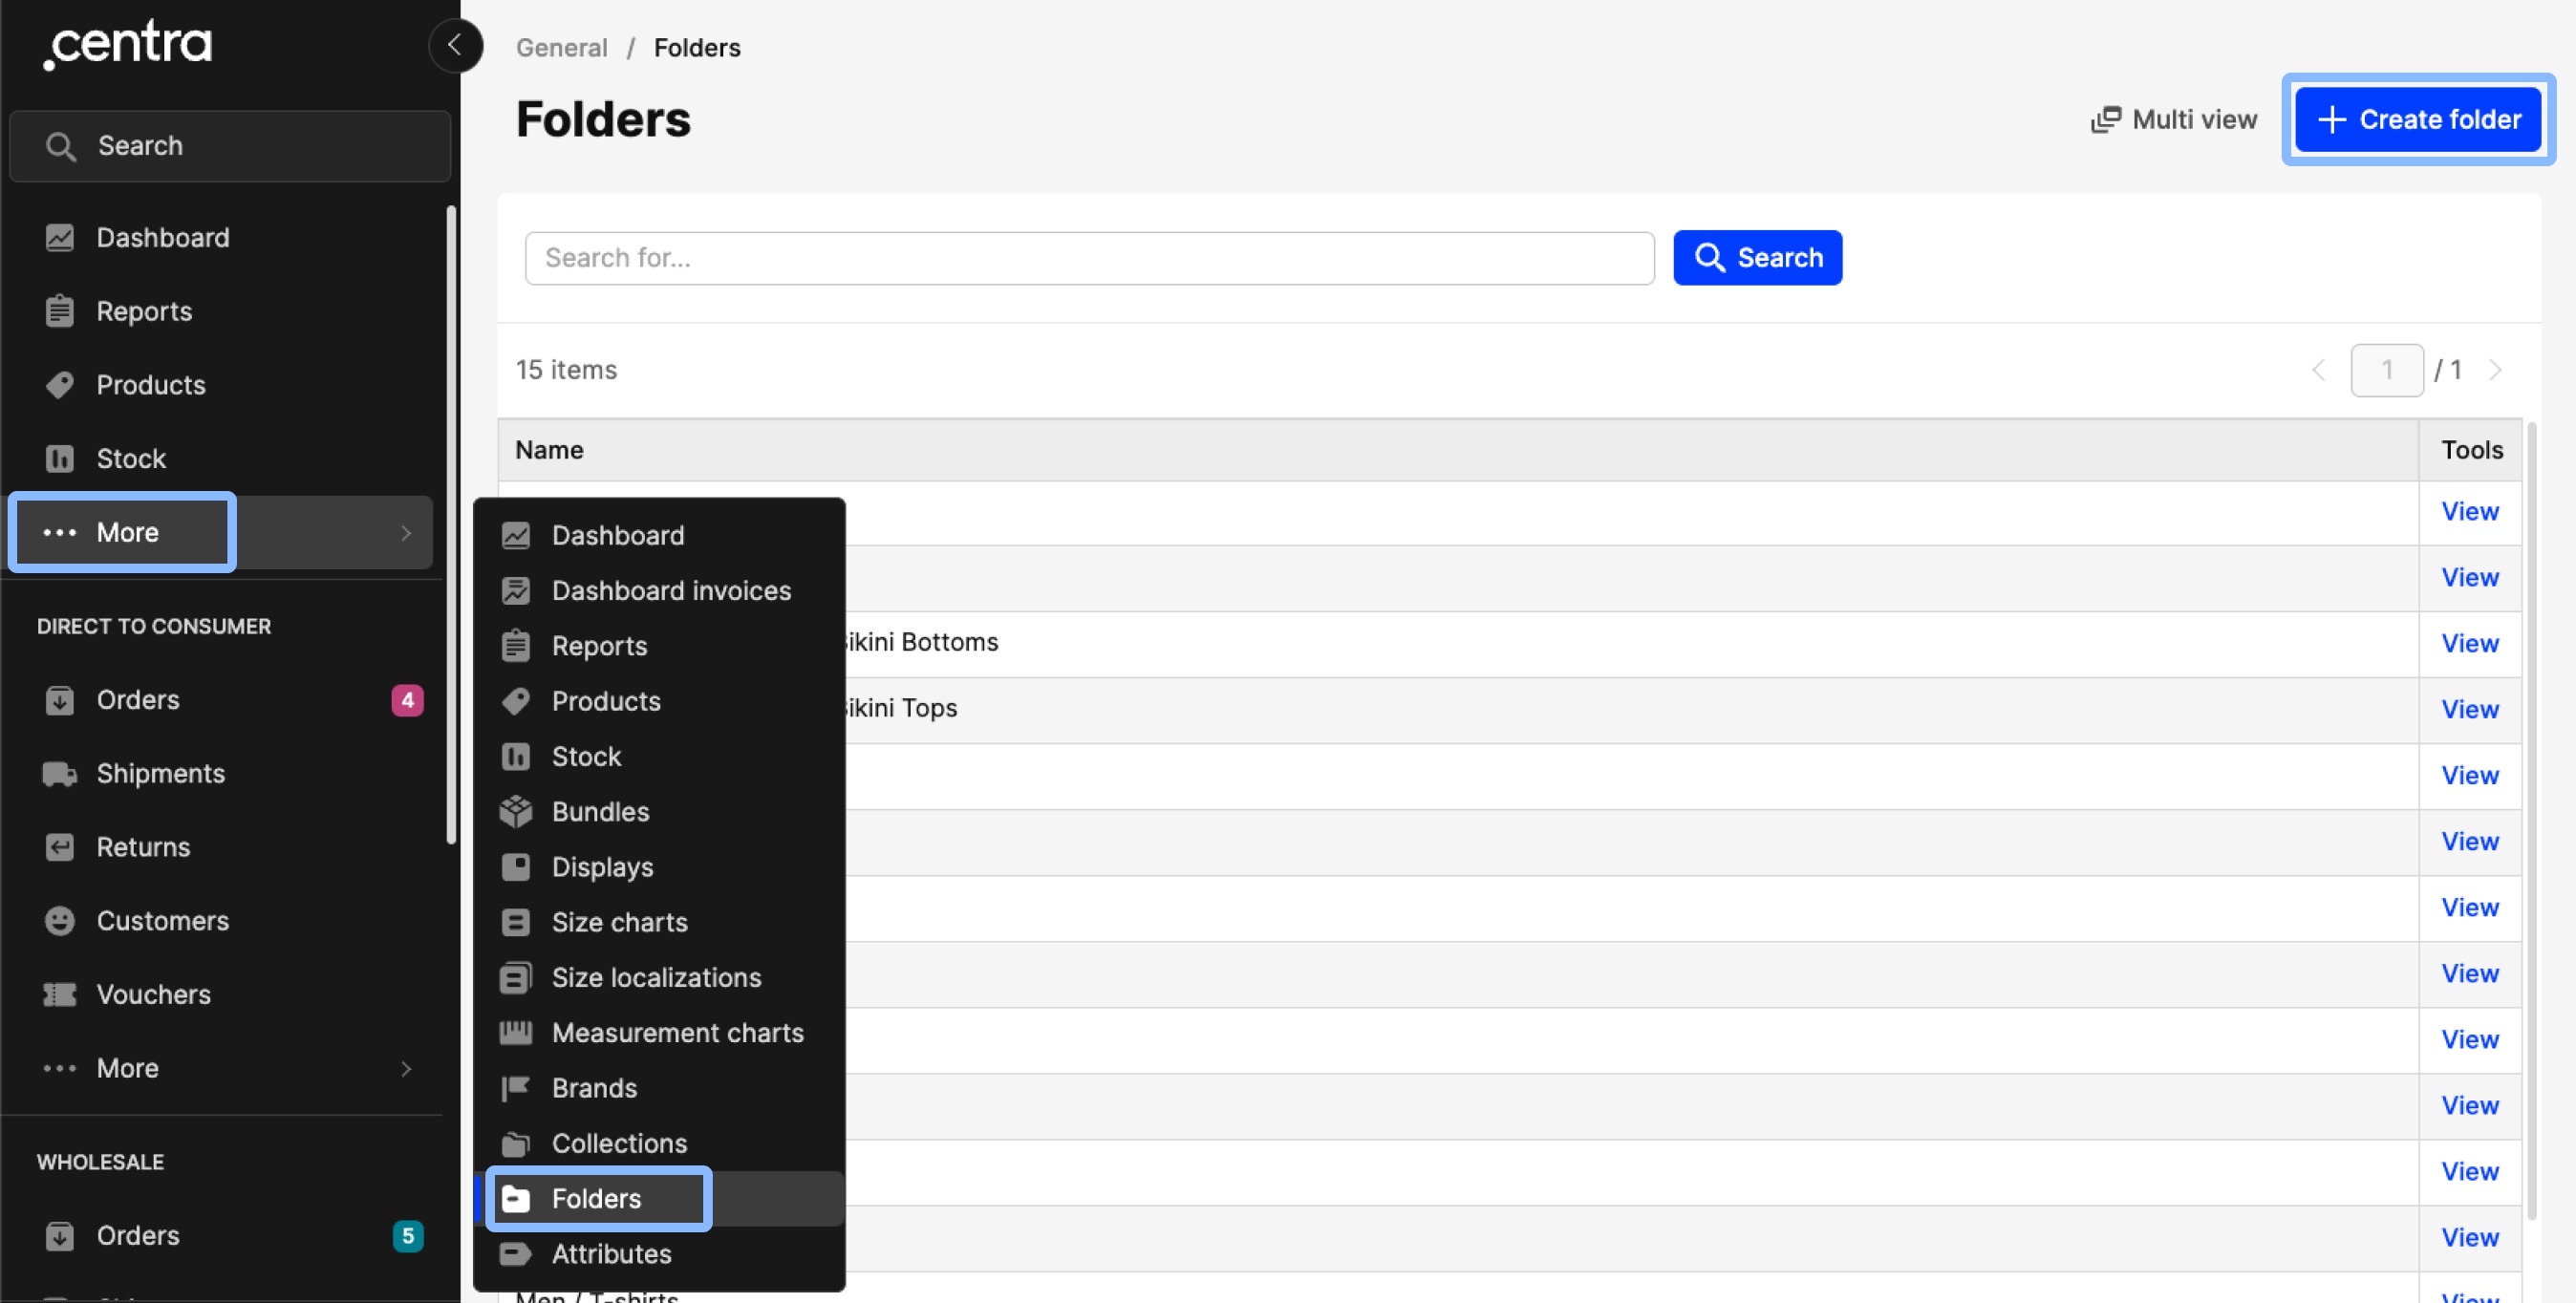
- Enter the name of the Folder and choose whether it should have a parent Folder or not. The 'Parent folder' drop-down menu will show all the Folders you have created
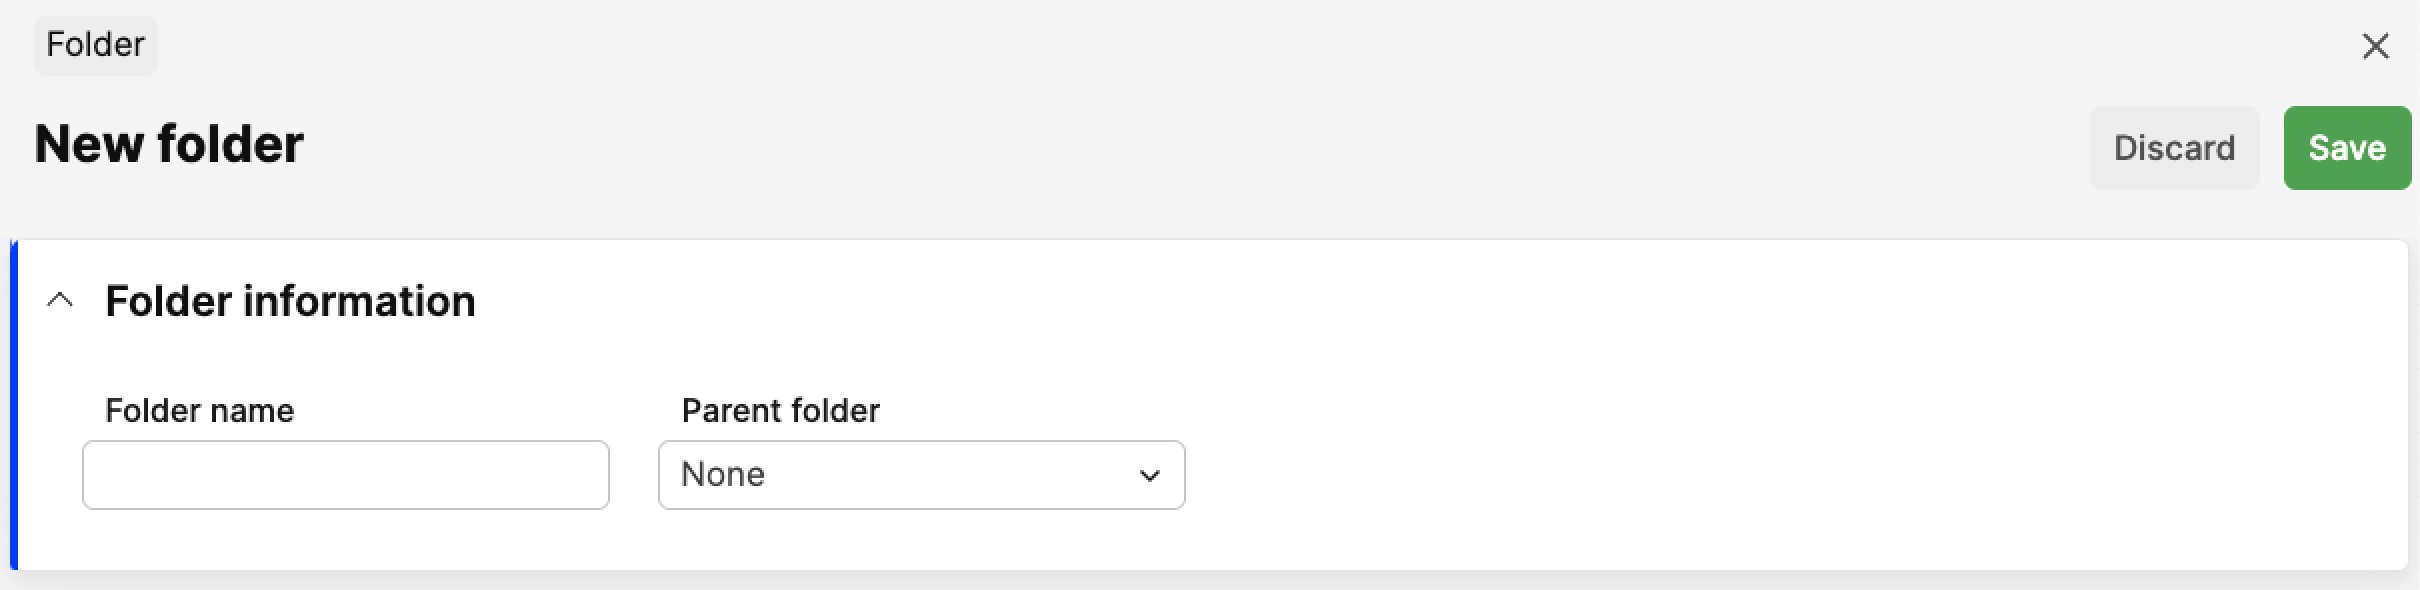
Note that Folders in Centra have three levels: Parent, Child, Grandchild. These are best visualized and edited in the Folder Multi view page described below. - Click 'Save' in the top-right corner.
Folder Multi view
The Multi view page for Folders displays them in a tree structure. It is great to use when you need to see an overview of all the Folders, change their relations to each other, and for sorting. Below you can learn how to access and use this page:
Accessing the Folder Multi view
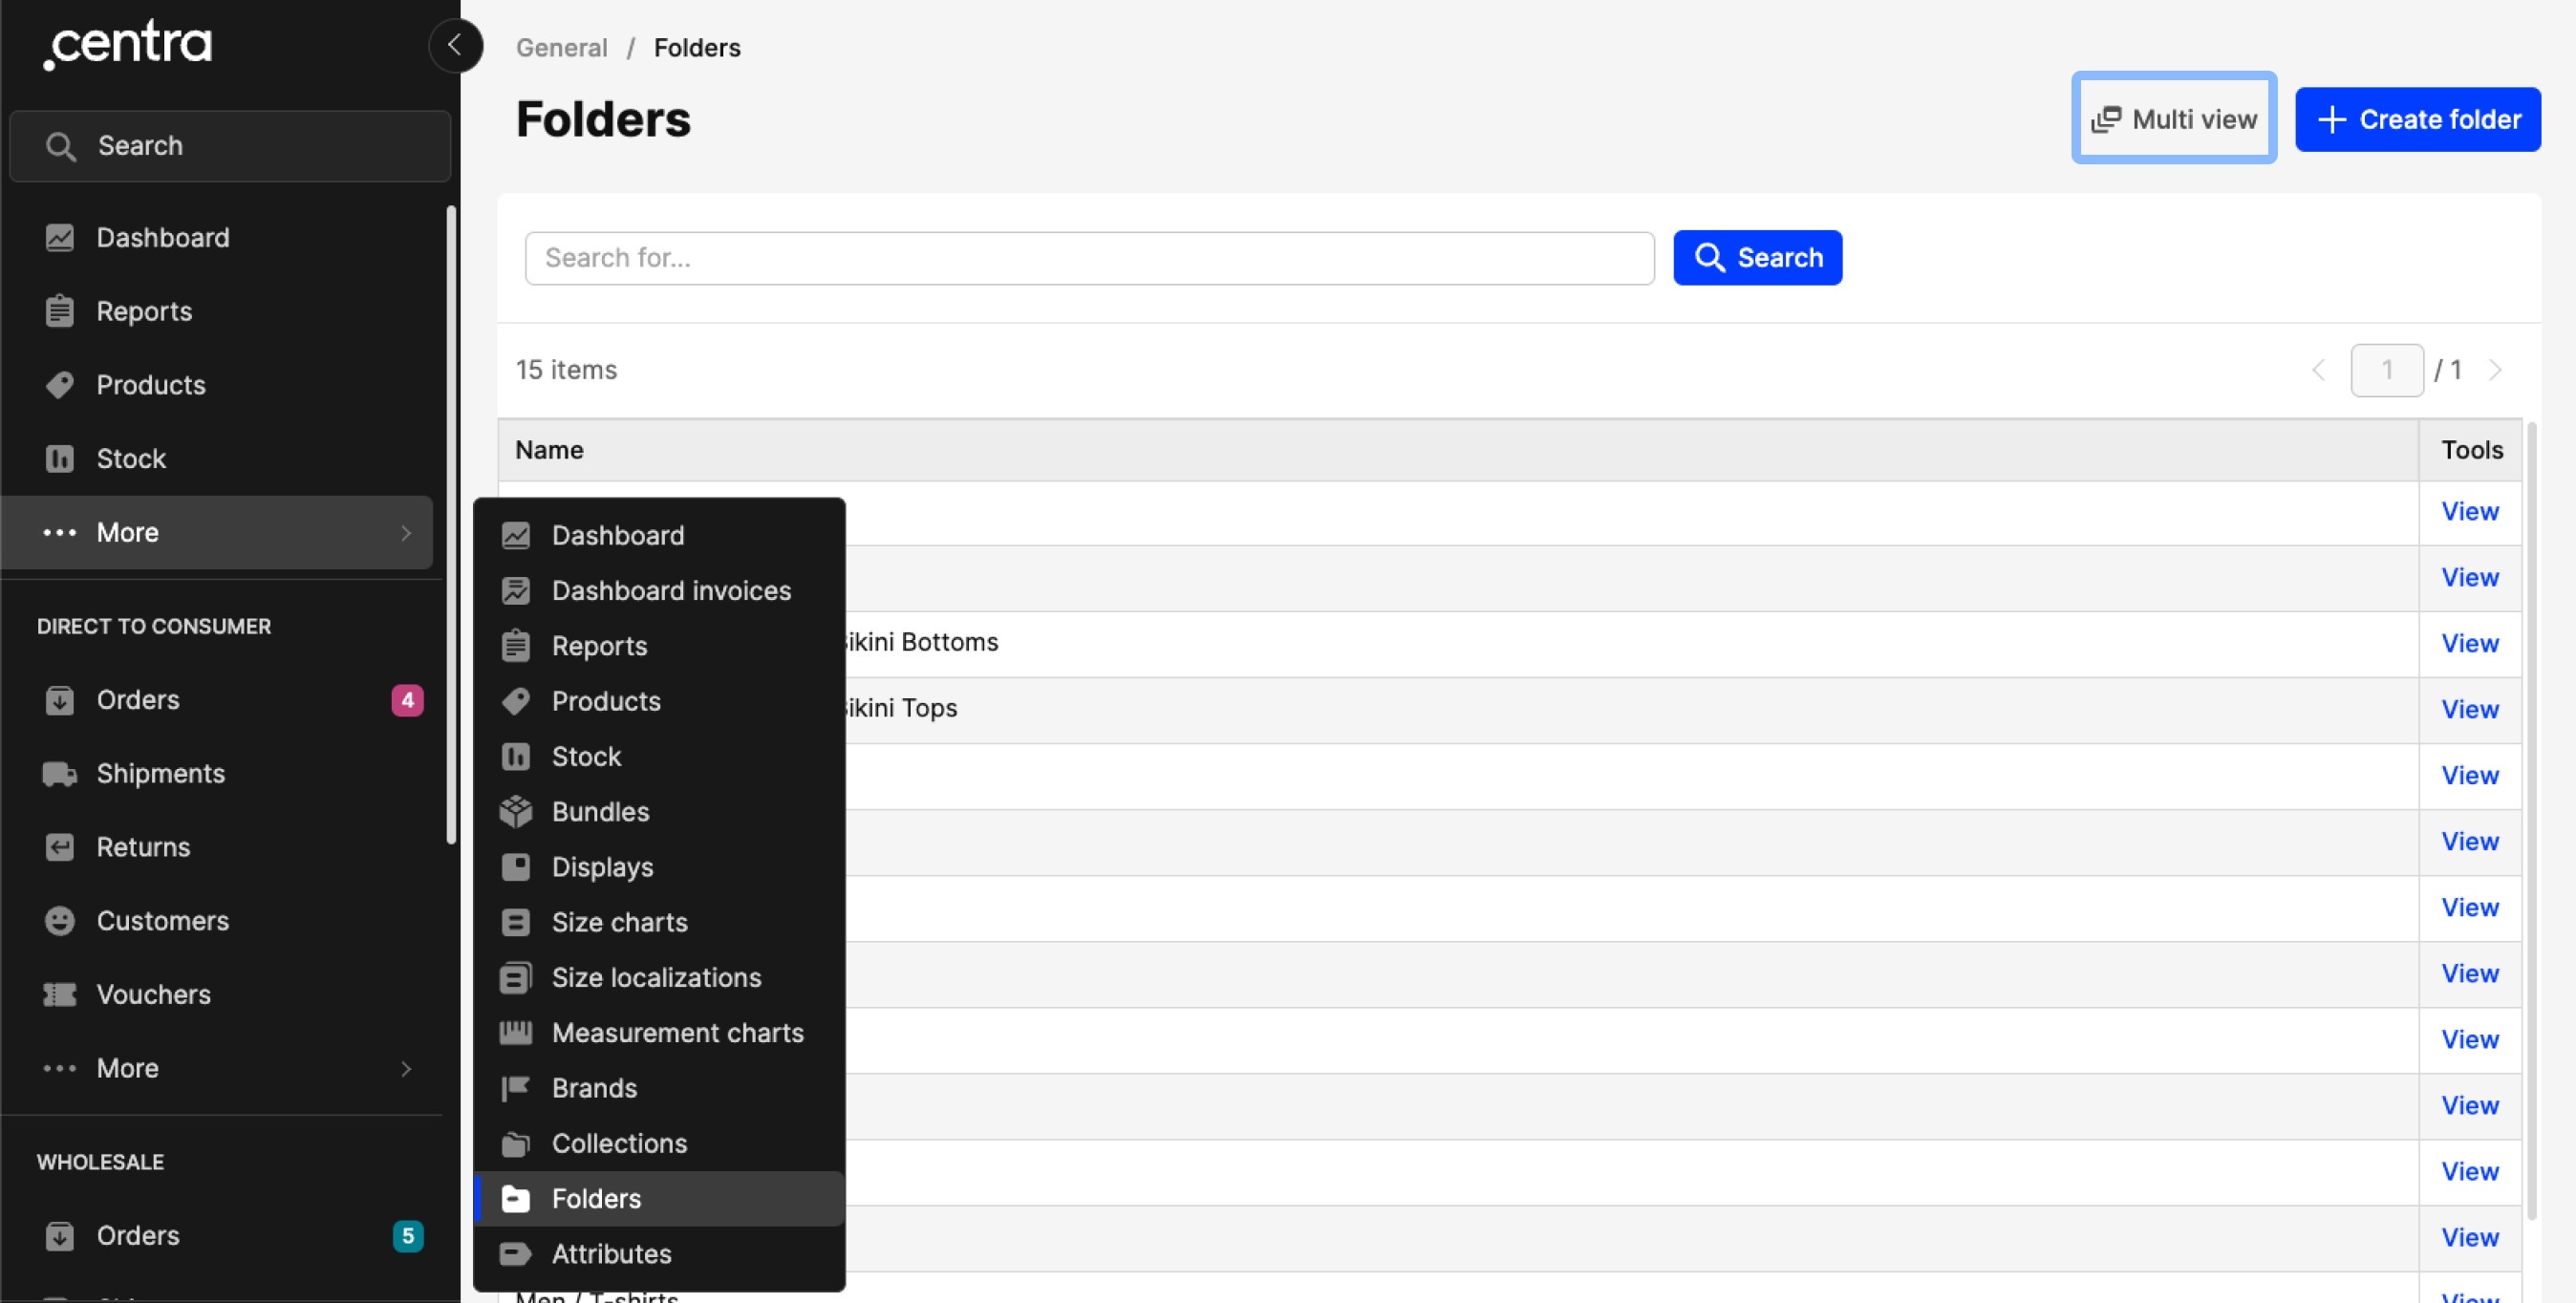
You can access the Folder Multi view through the Folders page, by clicking 'Multi view':
Using the Folder Multi view
Within the Multi view page, you can find the following:
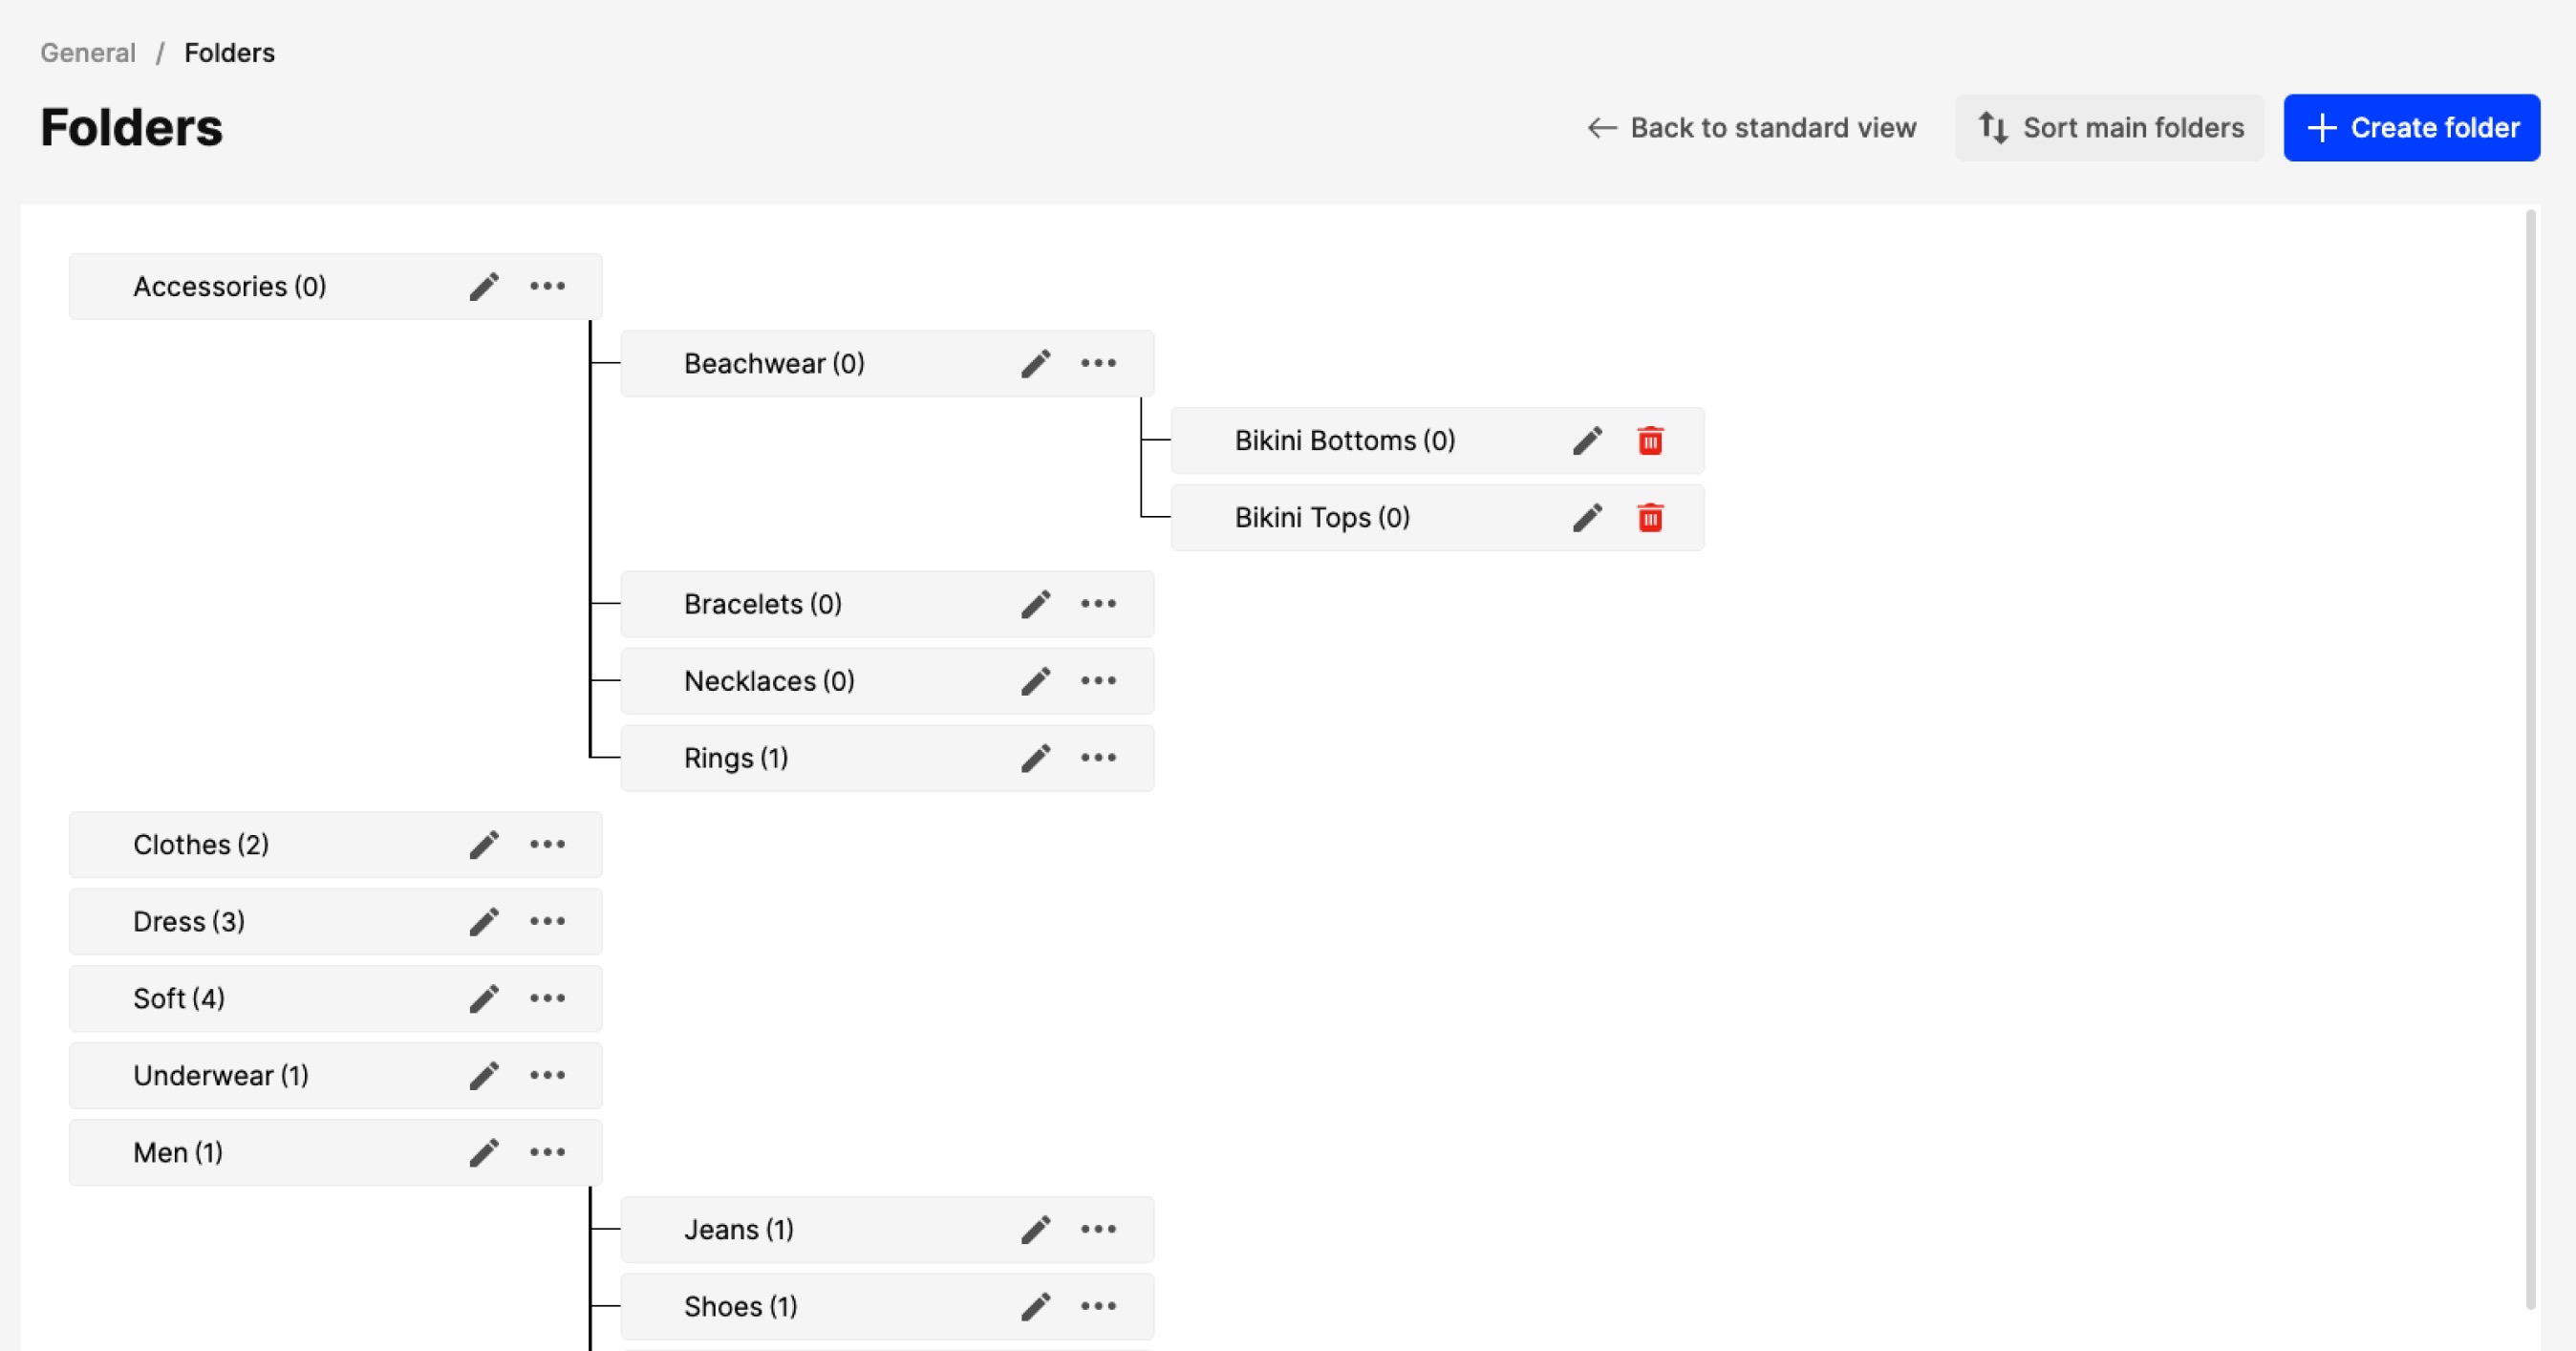
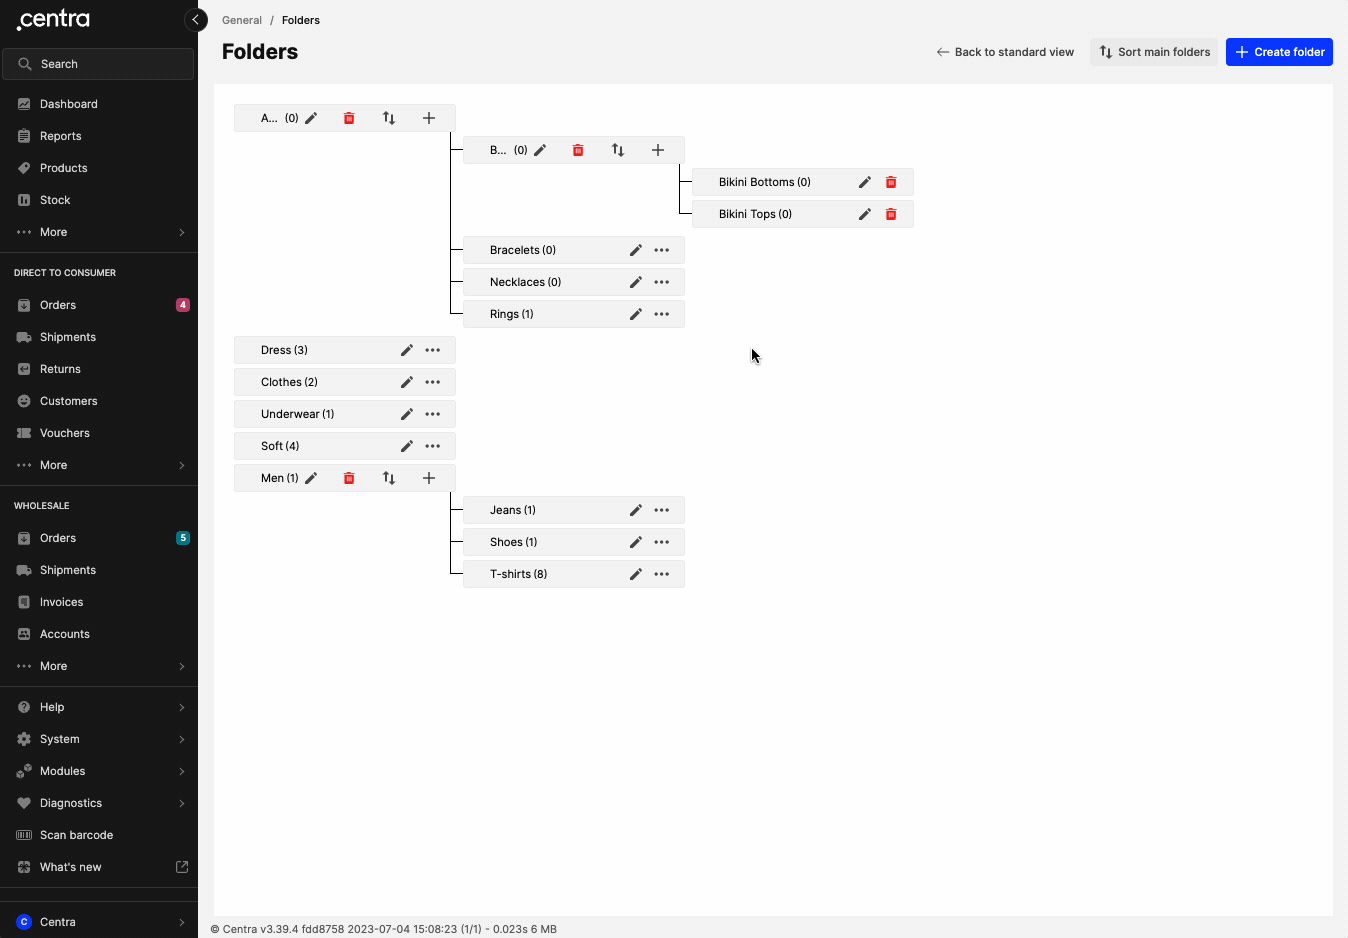
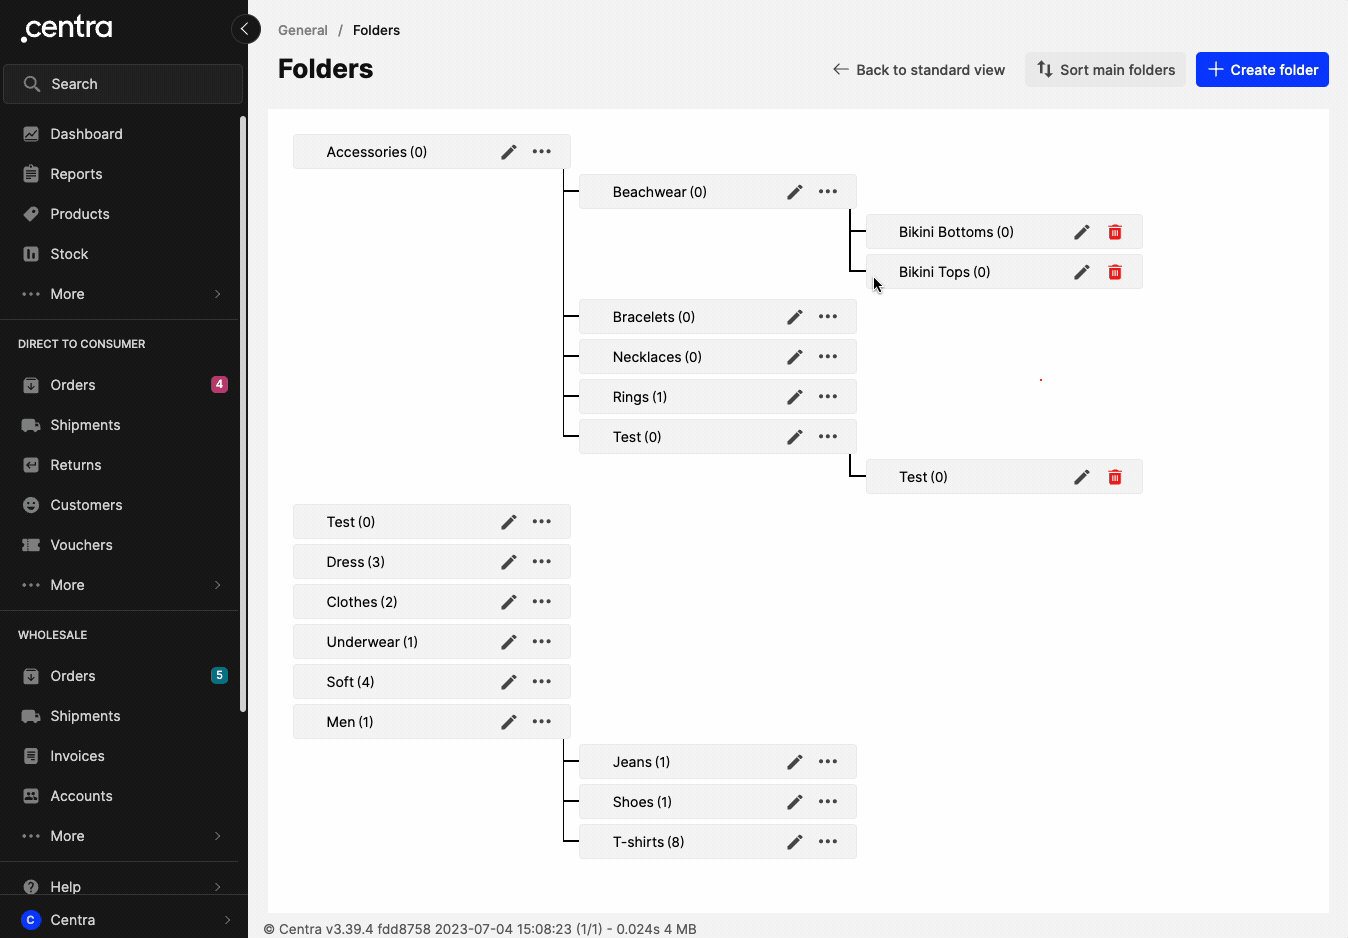
Folder tree structure
This picture shows the parent Folder ('Accessories', ‘Clothes’, ‘Dress’, ’Soft’, ‘Underwear’, ‘Men’), the child Folders ('Beachwear', ‘Bracelets’, ‘Necklaces’, ‘Rings’, ‘Jeans’, ‘Shoes’ ) and grandchild Folders ('Bikini bottoms', 'Bikini Tops'). Within each Folder field, next to the Folder name, you can see a number in brackets. This showcases how many products have been added to this Folder.
Buttons on the top-right
* __Back to standard view__ - Clicking this redirects you back to the Folders page
* __Sort main folders__ - This button allows you to change the sorting of the parent Folders

* Create Folder: This is the same as the __'Create Folder'__ on the Folders page. You can use it to create a new Folder. Note that this takes you back to the Folders page.Buttons within the tree structure of the Multi view
On each Folder you can see the following options: Pencil (edit), Three dots or the Bin (delete). If you click on the three dots you will also see: '+Add', 'Sort', and the bin option expanded as 'Delete'
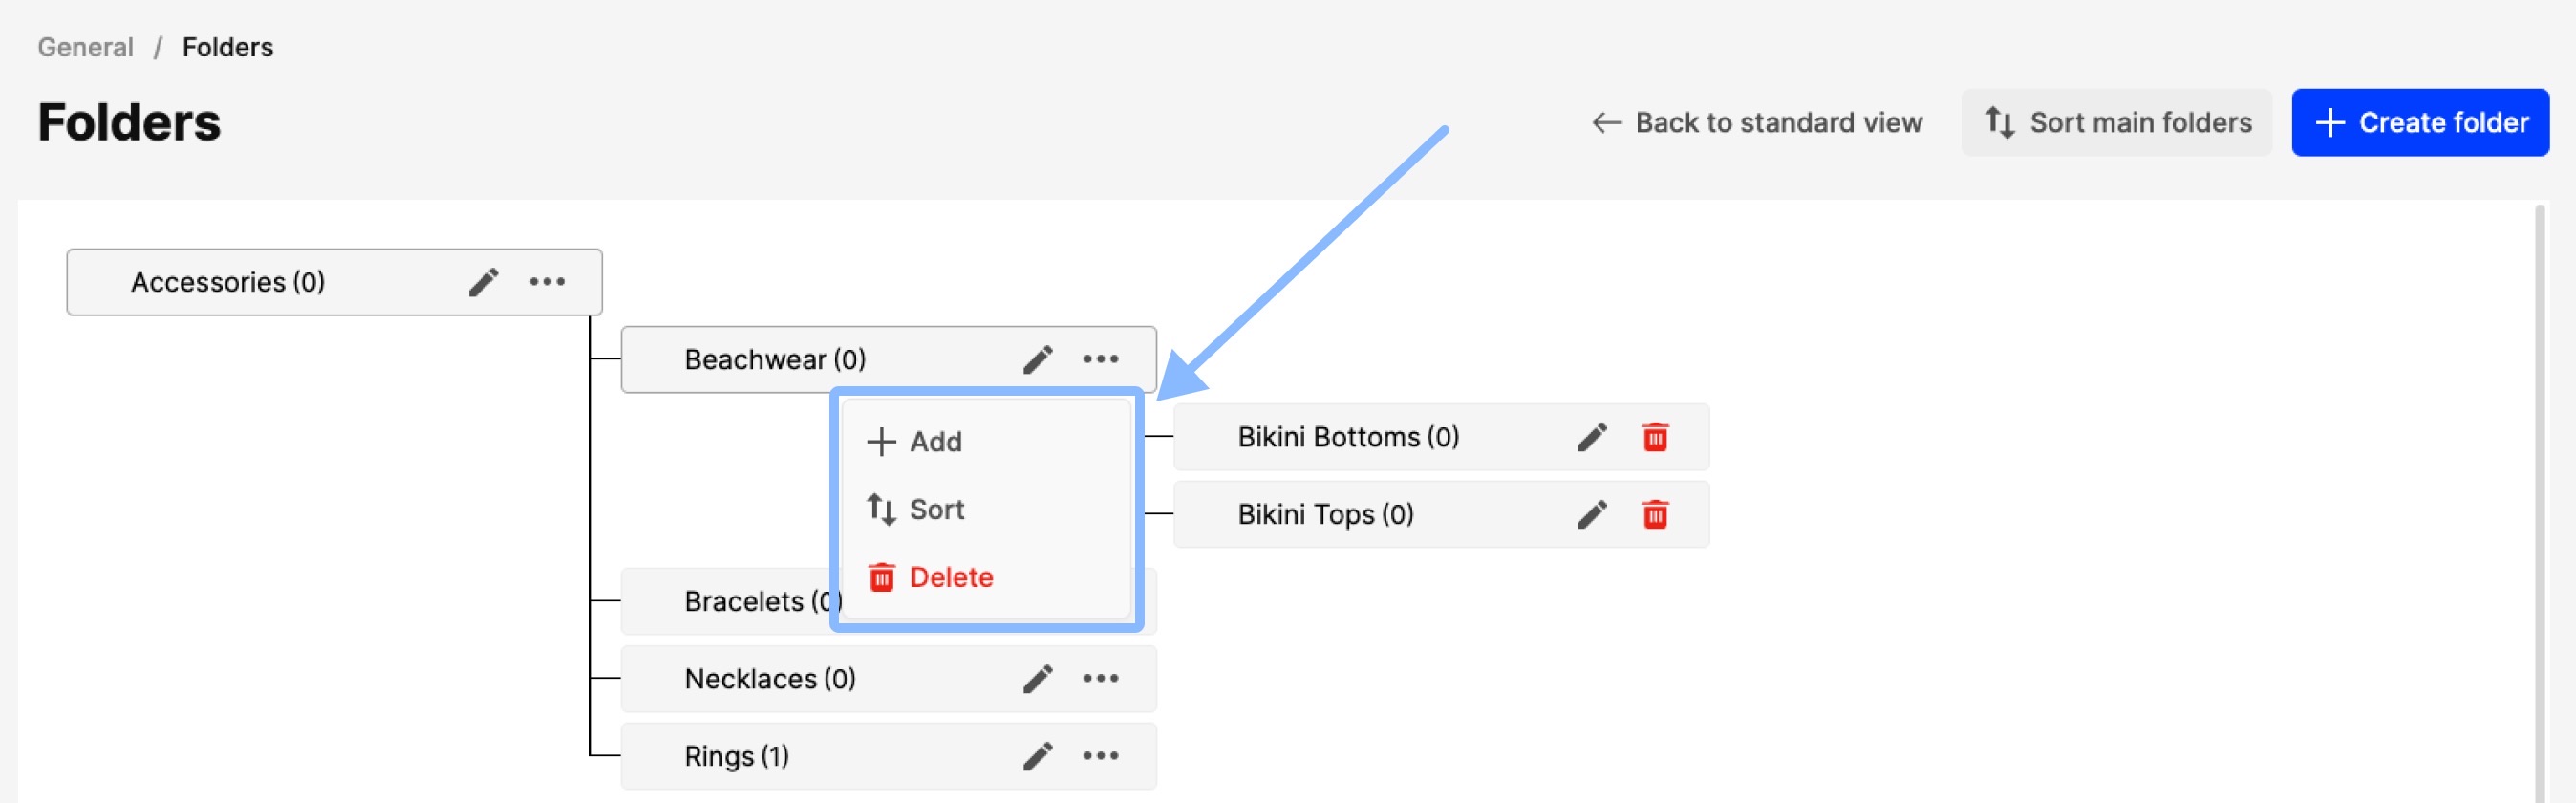
- Pencil (edit) - This button opens a pop-up where you can change the Folder name and the parent Folder

- Bin (Delete) - This will delete the respective Folder
- +Add - You can use this to add a child Folder to the selected Folder. A similar pop-up as when you edit a Folder comes up, where you can add a Folder name and choose a parent Folder. This is for editing the details of the newly added Folder, as shown below:
- Sort - This option opens if the next level includes more than one subfolder and allows you to sort the Folders on the next level as demonstrated below:
How to assign a Folder to Products
Product level
- Click on 'Products' and select the Product you want to assign to a folder
- Click 'Edit' and select the destination Folder in the Basic attributes section:
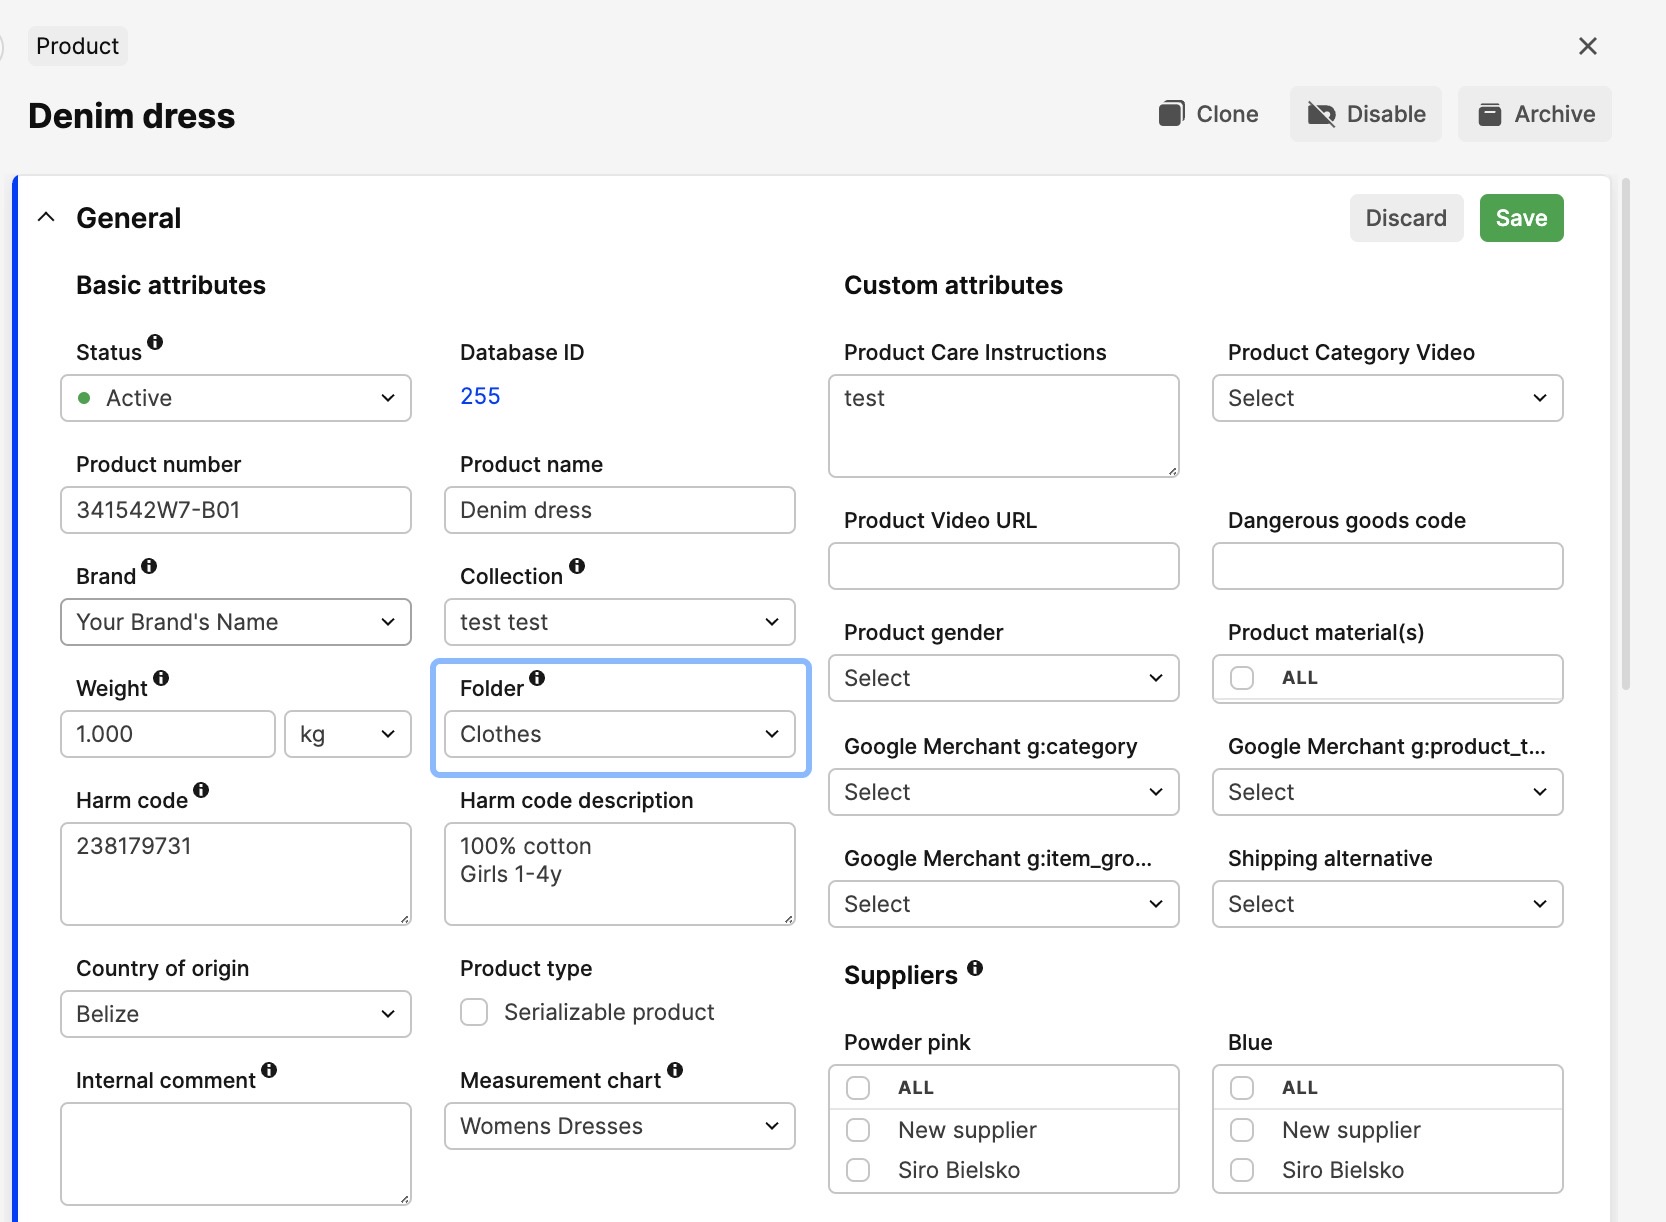
- Click 'Save'.
Add/change Folders in bulk
There are two ways to add a Folder to Products or change existing ones. They are both described below:
Product batch actions
- Click on 'Products' in the menu
- Tick the boxes of the Products you’d like to change, and in the 'Action' menu select 'Change general attributes':
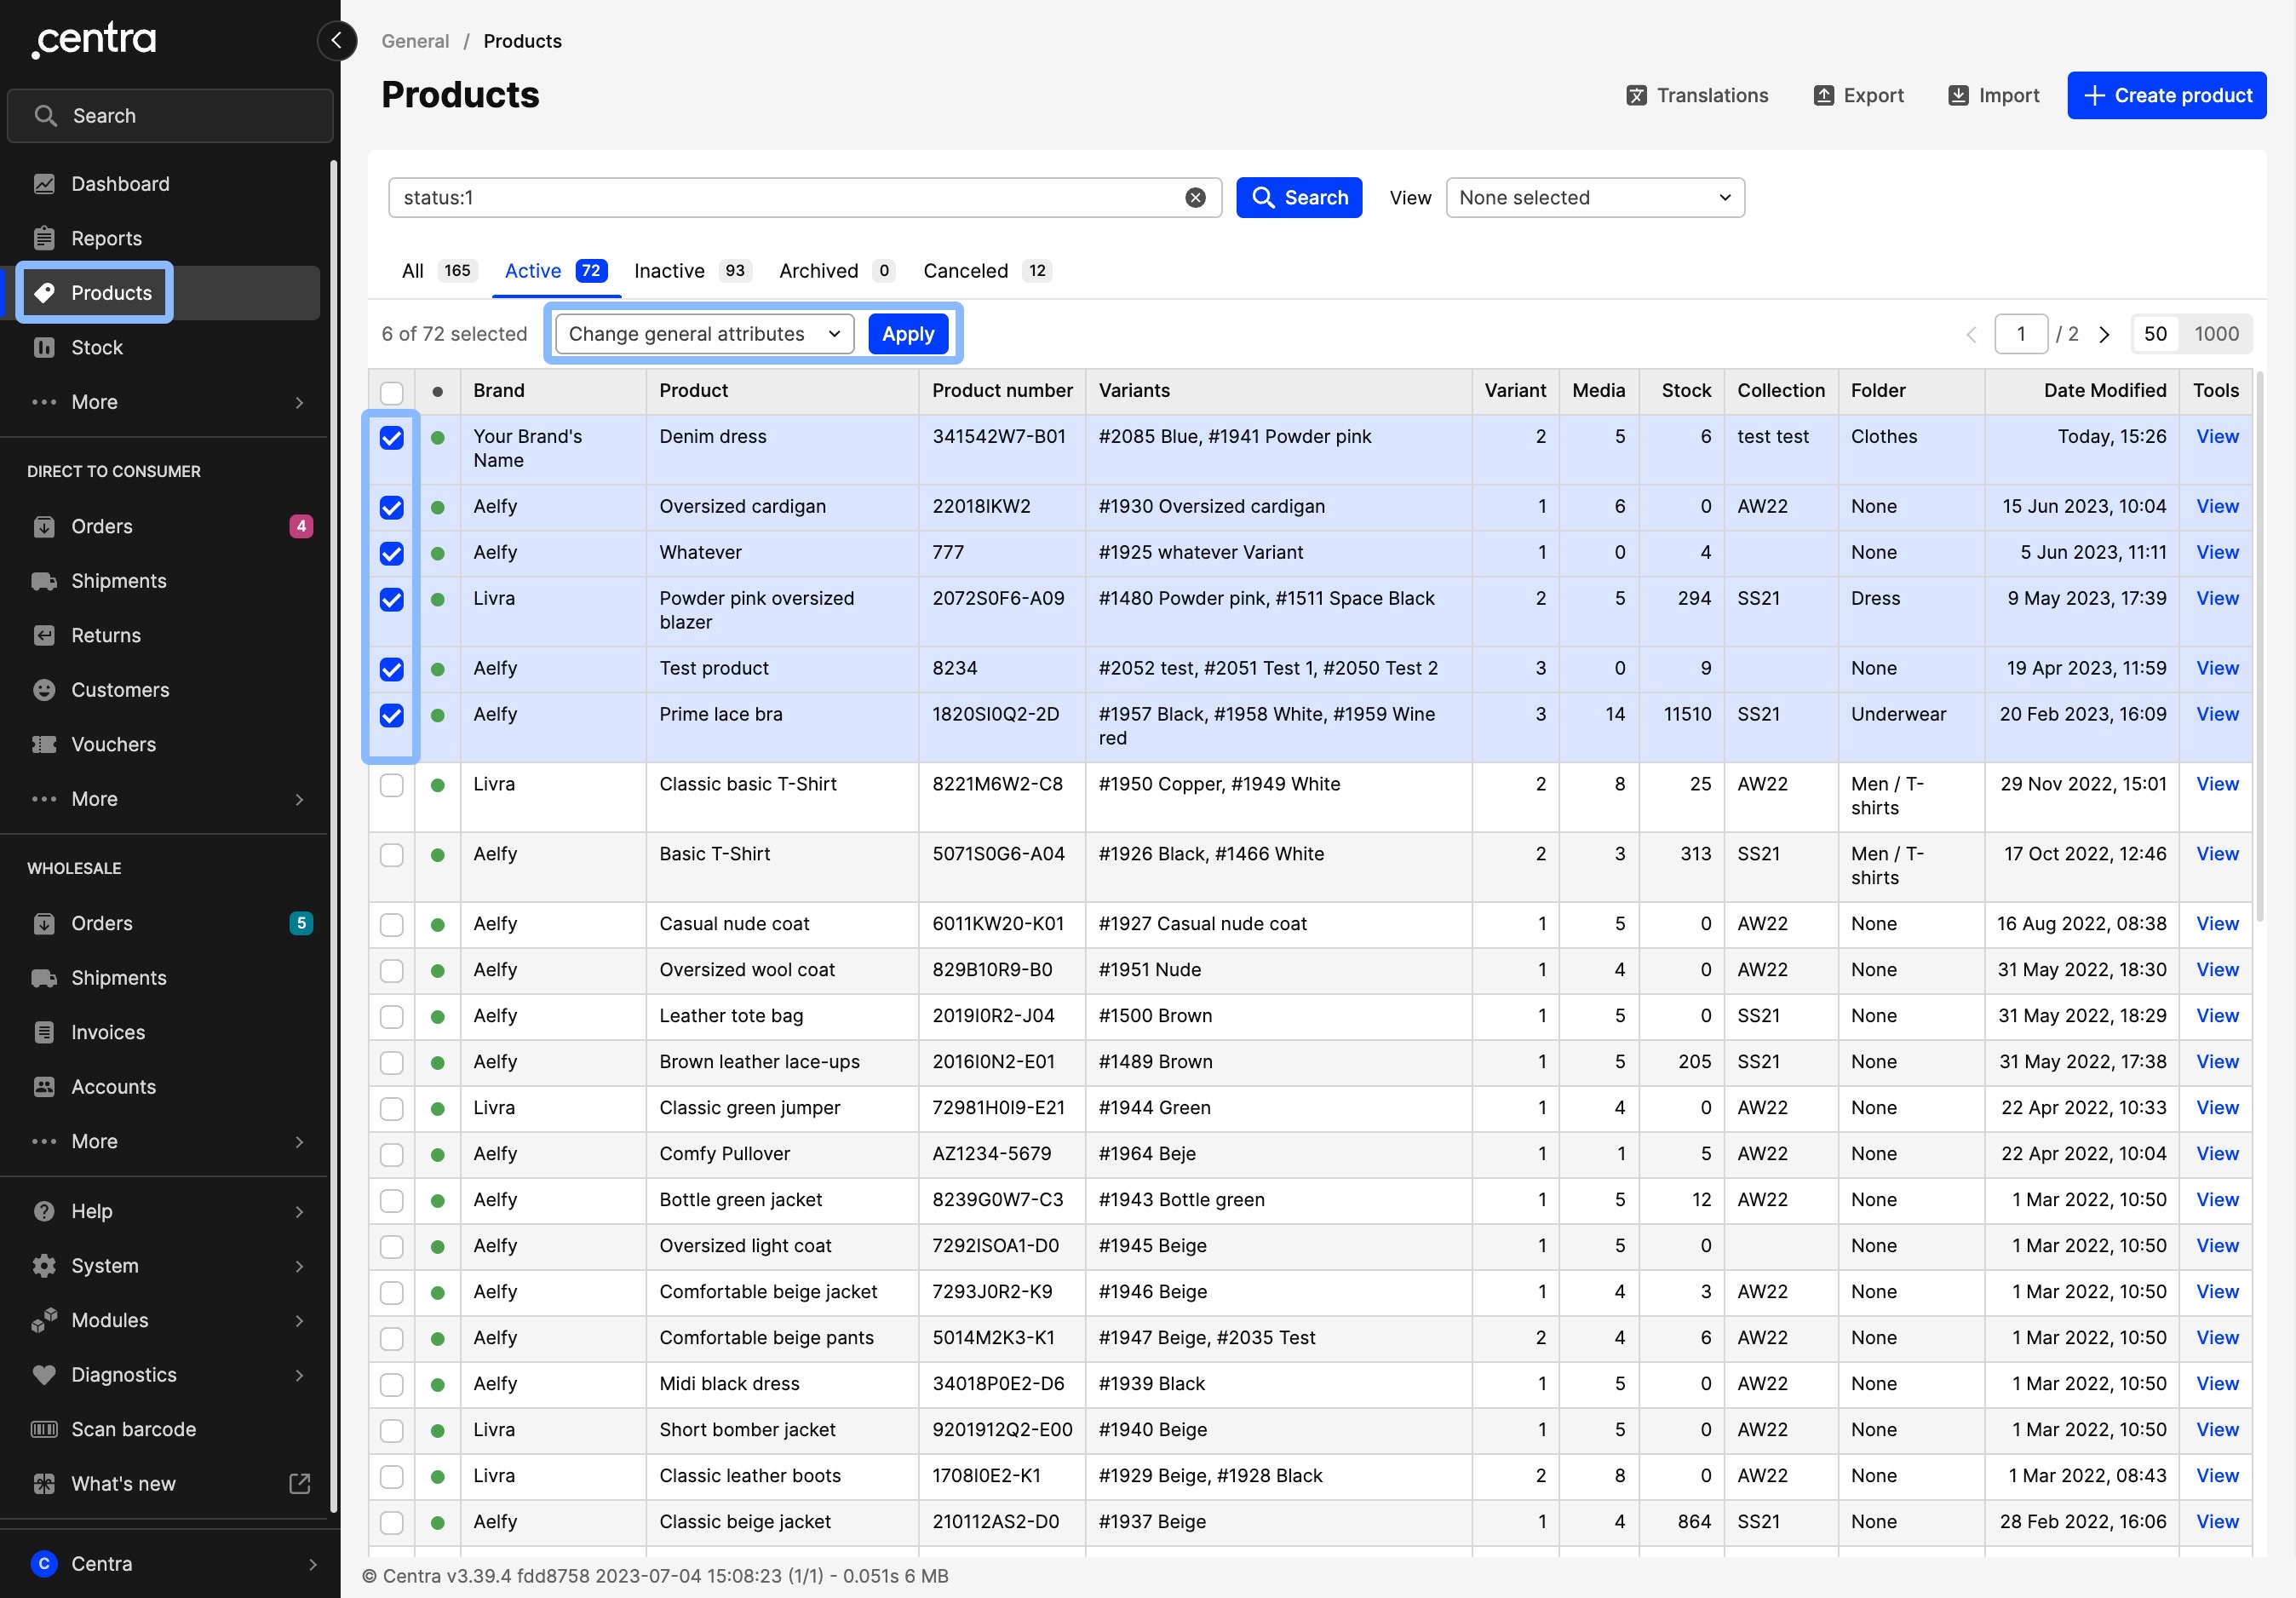
- In the pop-up, tick the 'Folder' box, and in the drop-down menu that appears, select the Folder of your choice
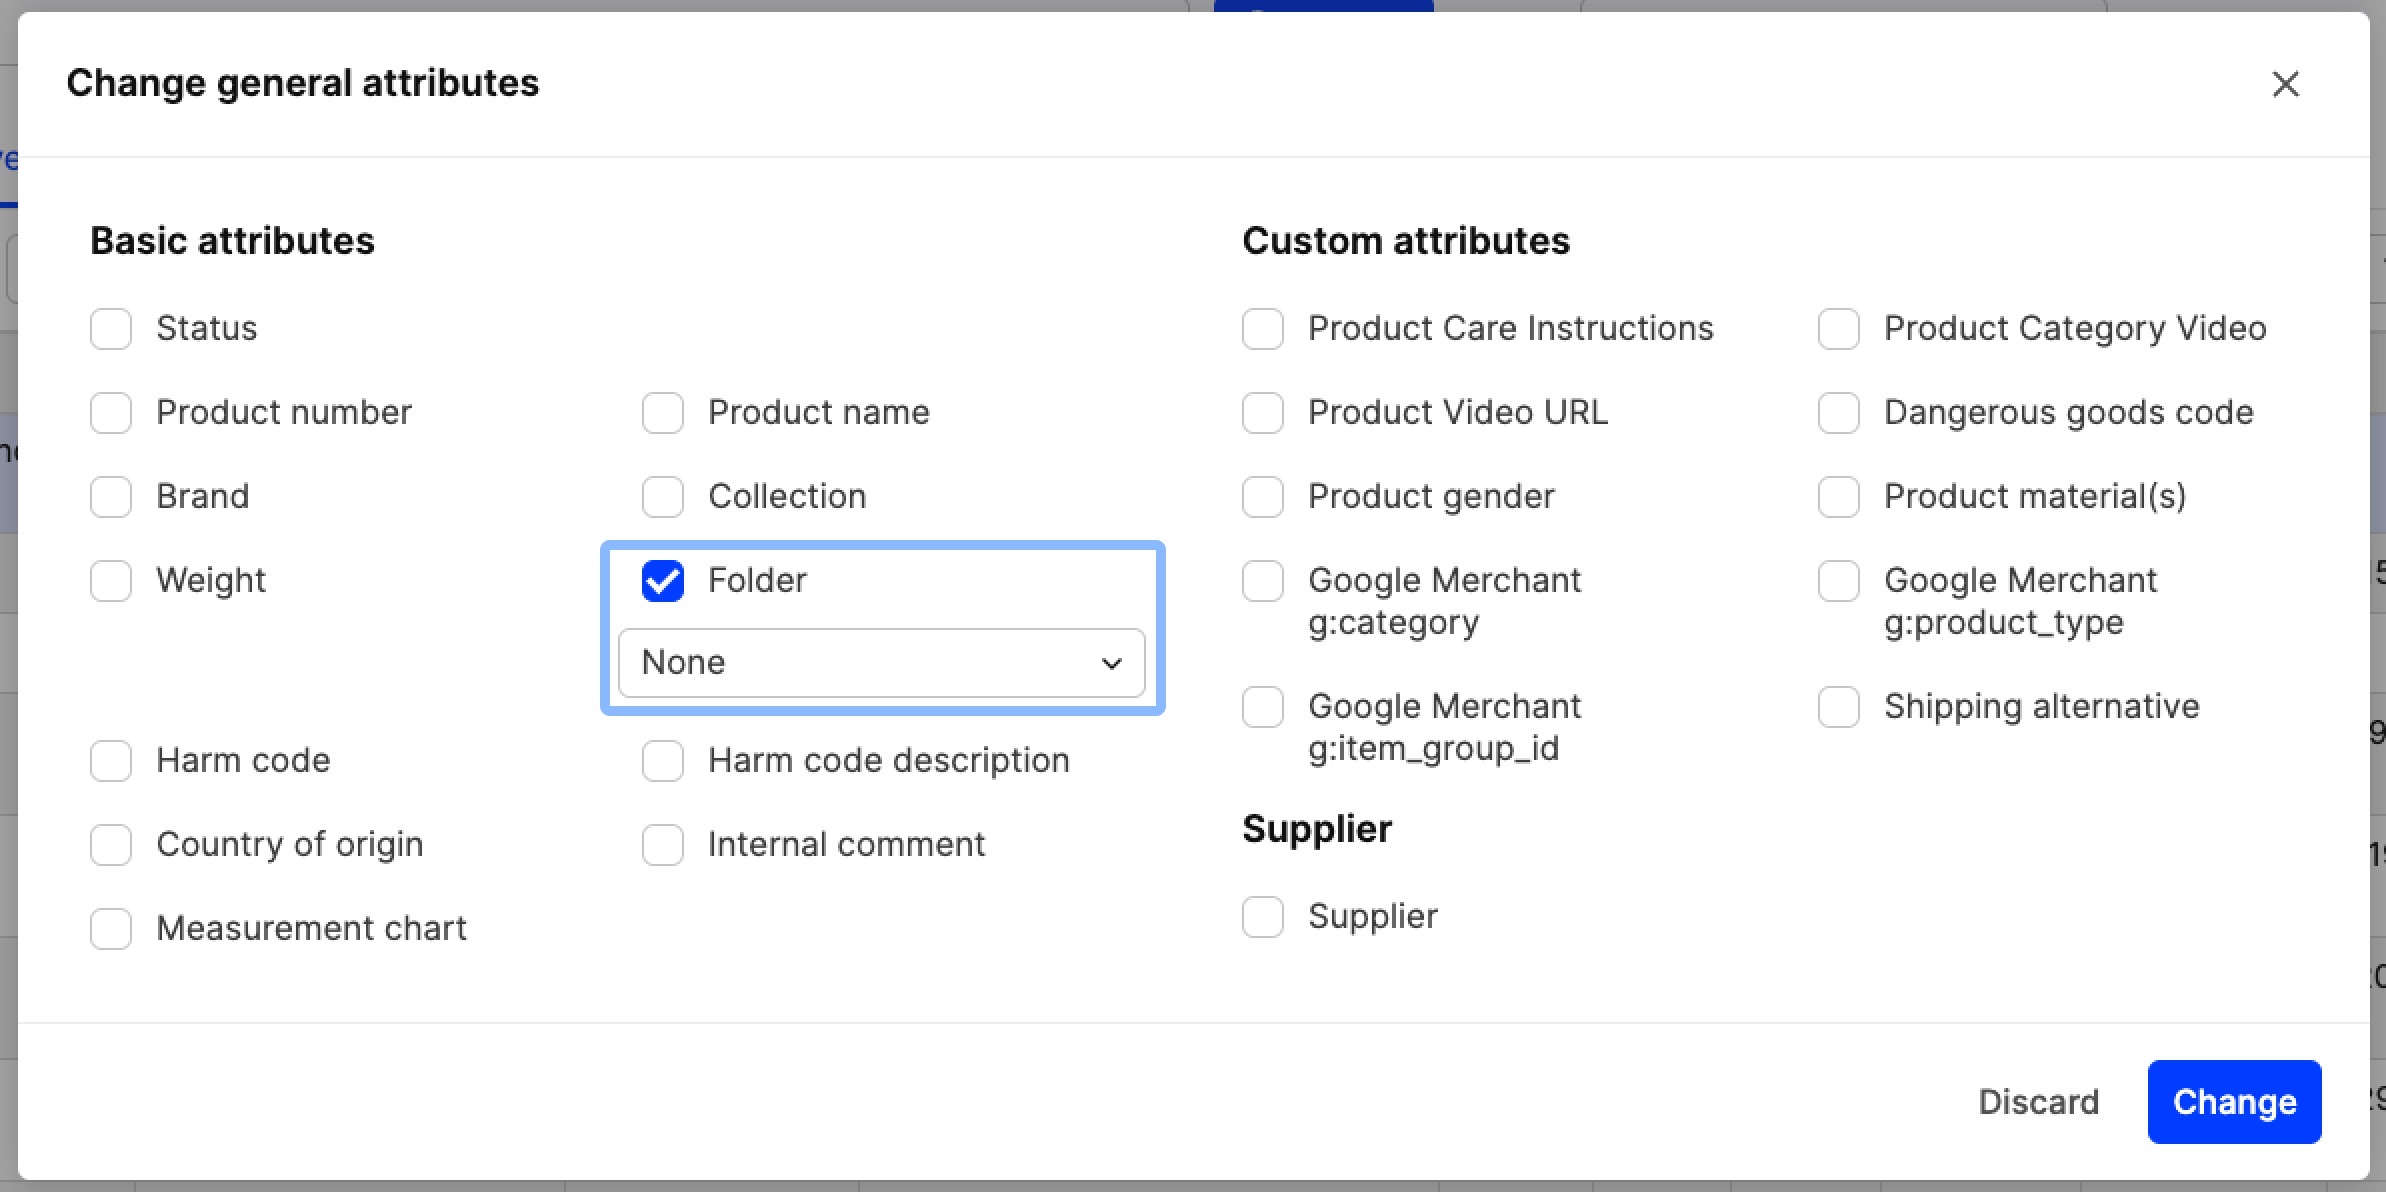
- Click 'Change'.
Import:
- Click on 'Products' in the side menu
- At the top-right, click on 'Import'
- Within the Import page, select 'Import type: Products'
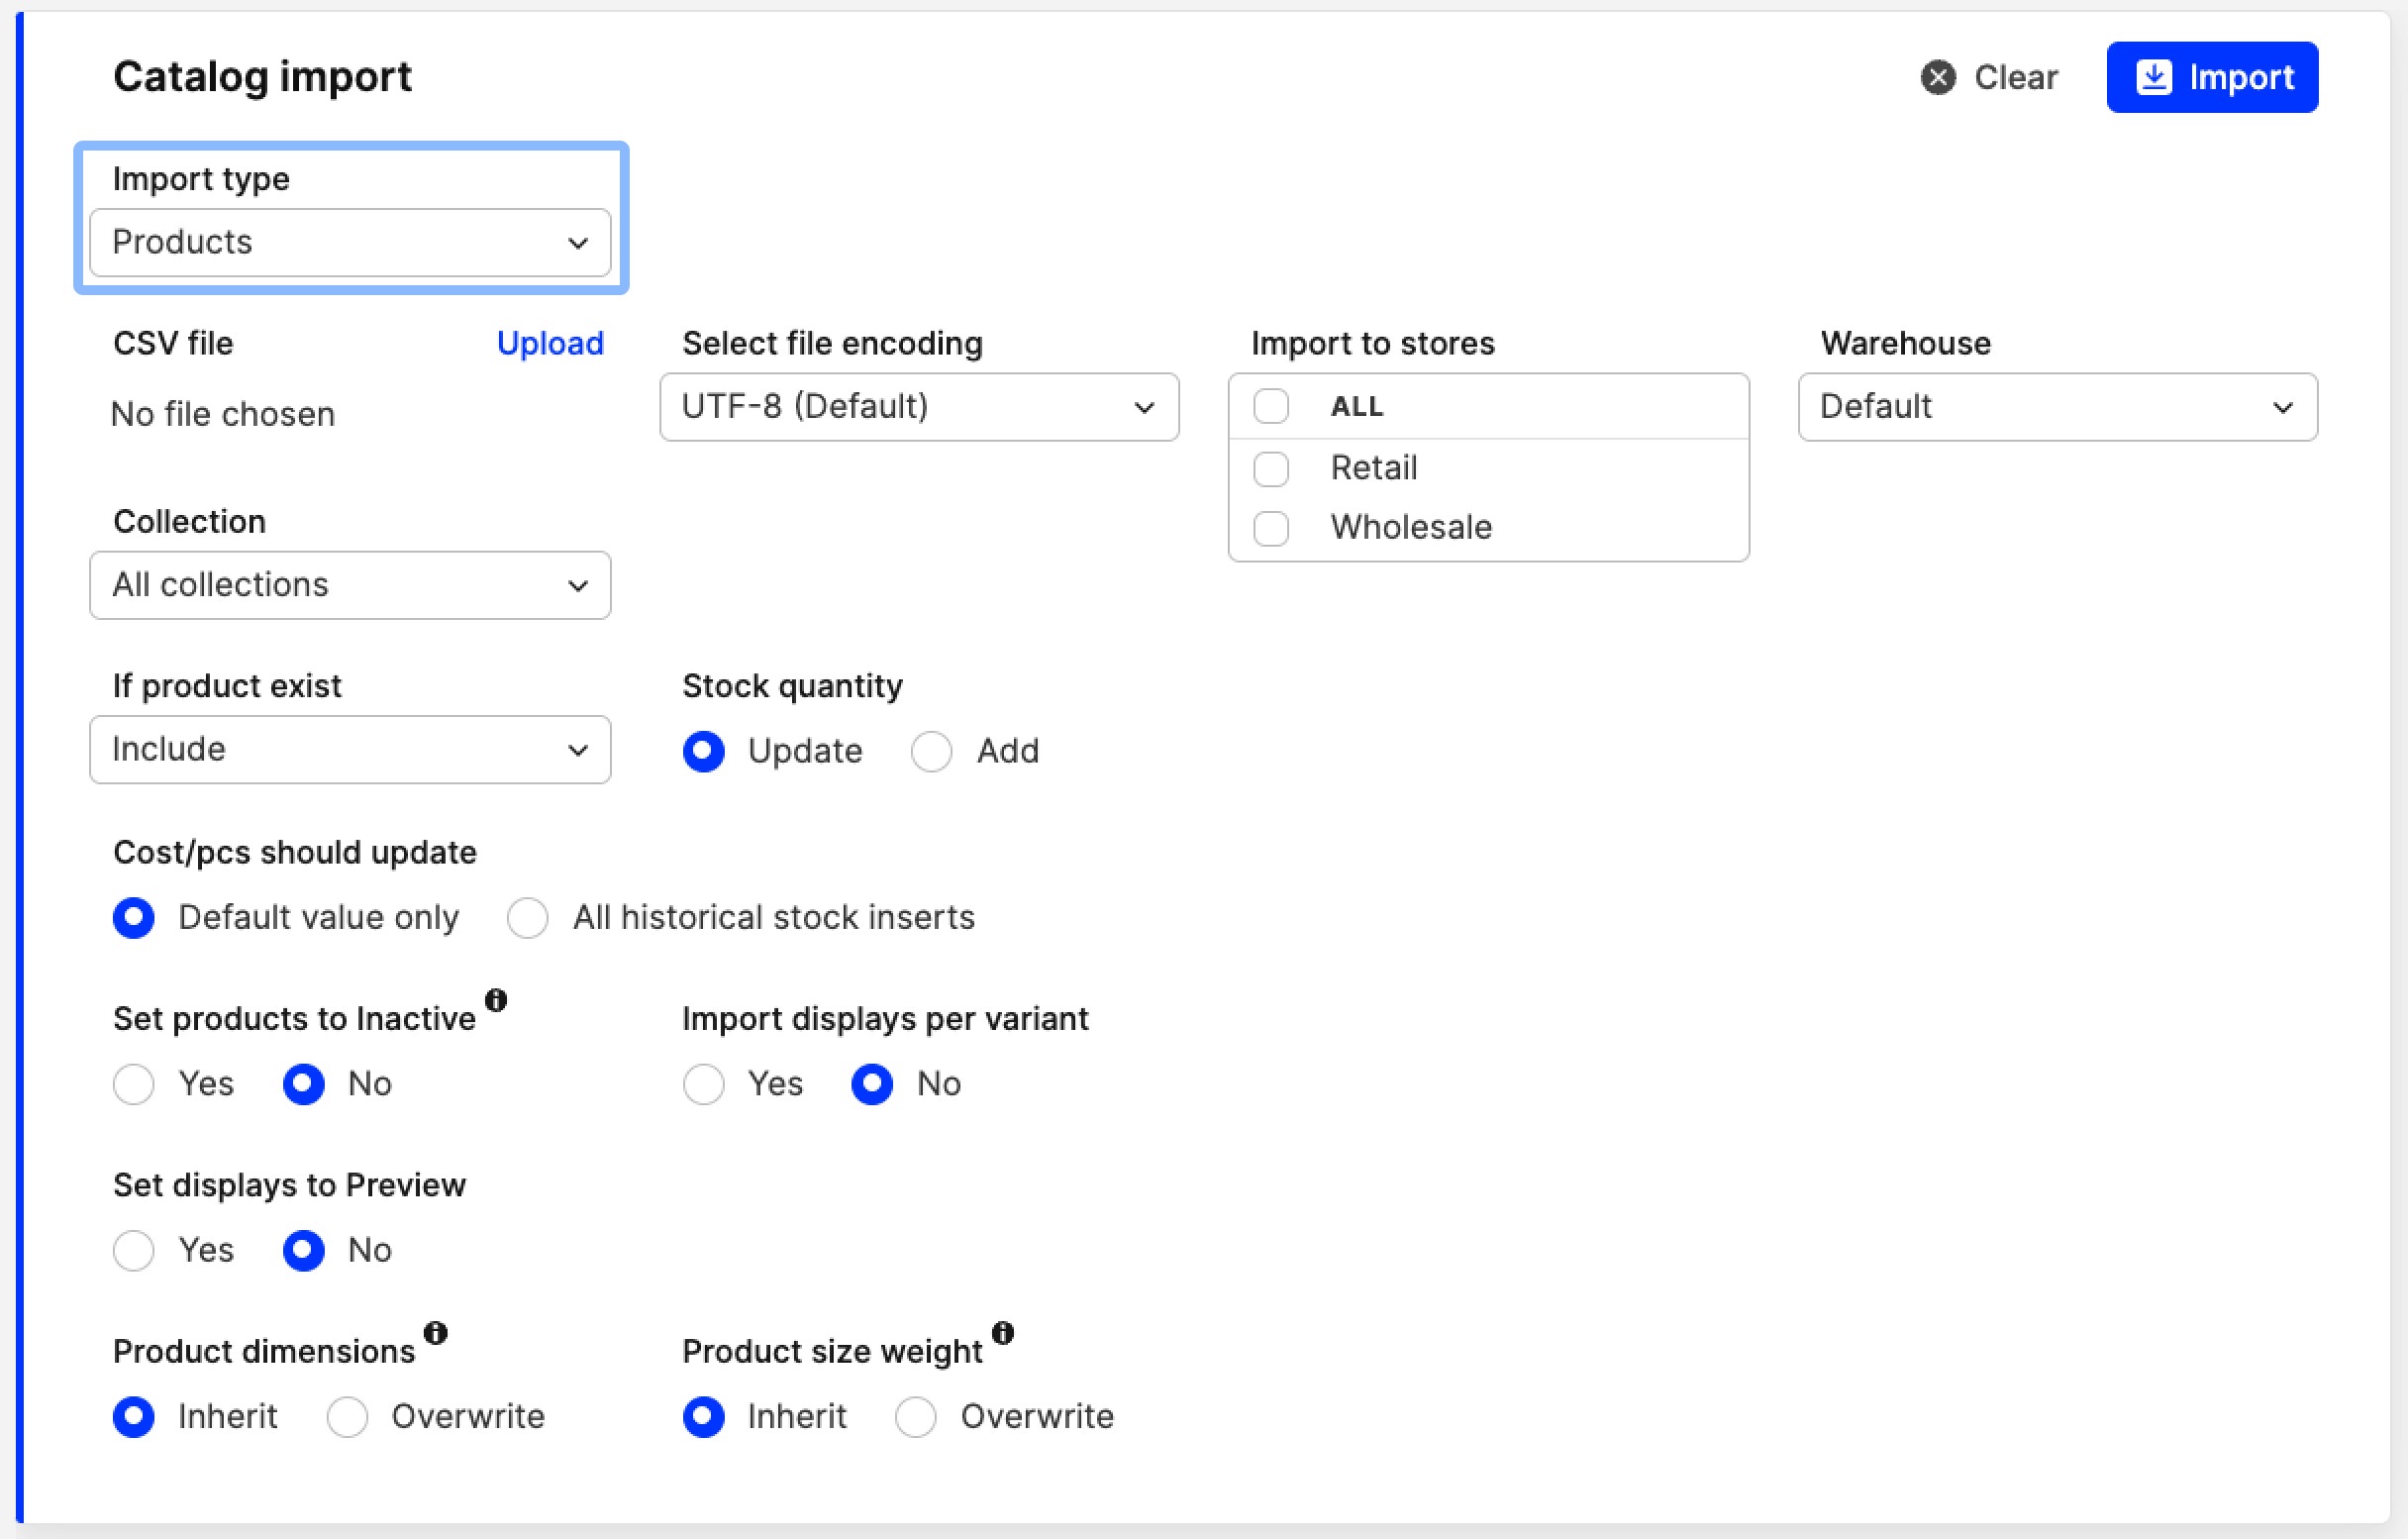
- Click on 'Upload' and select your import file. You can read more about import files here, however, ensure that you include the Product ID in your spreadsheet to allow Centra to map the right Product
- Review the remaining settings in the Catalog import, then click 'Import'
- In the Crosscheck, ensure that the data you are about to import is correct. If you are updating existing Products, check that the right product was connected
- Click 'Save'.