Creating collections
About this article
In this article you will learn how to create new Collections. The purpose of Collections is to separate your items by seasonal collection. This is the main use case, however, you can also create different types of collections. Some other examples include: specific pattern (i.e. Floral collections), core collection (i.e. Basic White T-shirts), occasional collections (i.e. Bridal, Holidays, Xmas). Collections are very useful when reviewing sales stats through Reports or the Dashboard.
How to create a new Collection
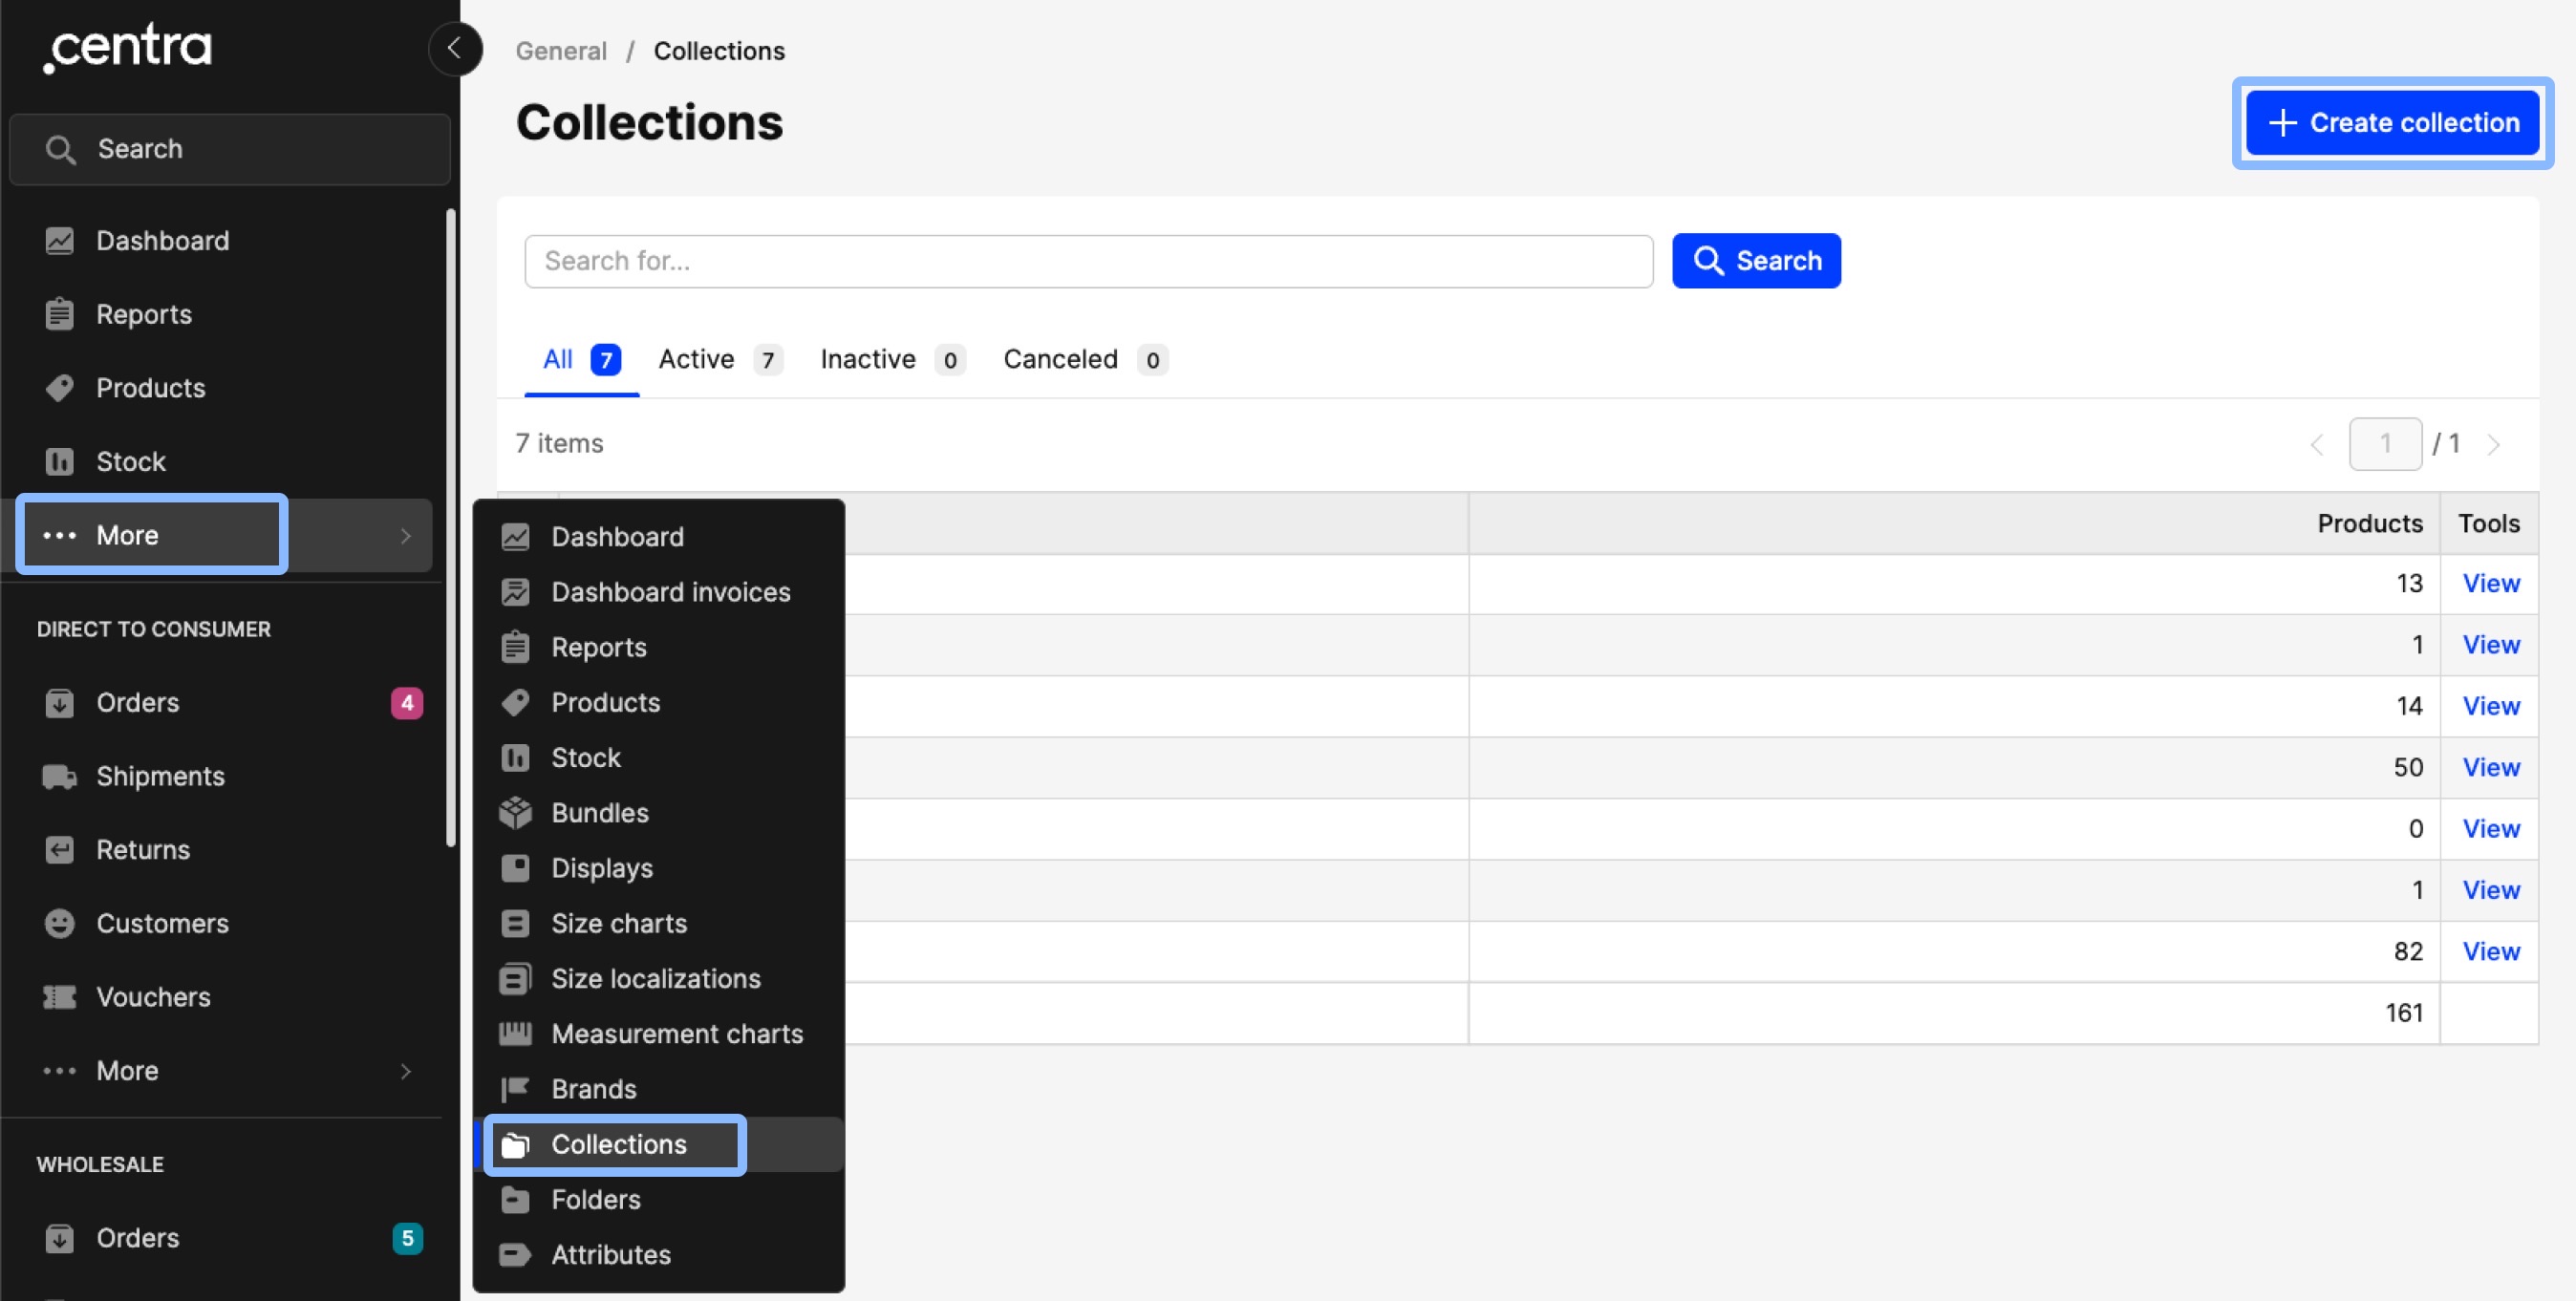
- Under the 'More' tab in the main menu at the left, go to 'Collections' and click '+Create Collection'
- Enter the name of the collection you wish to add:
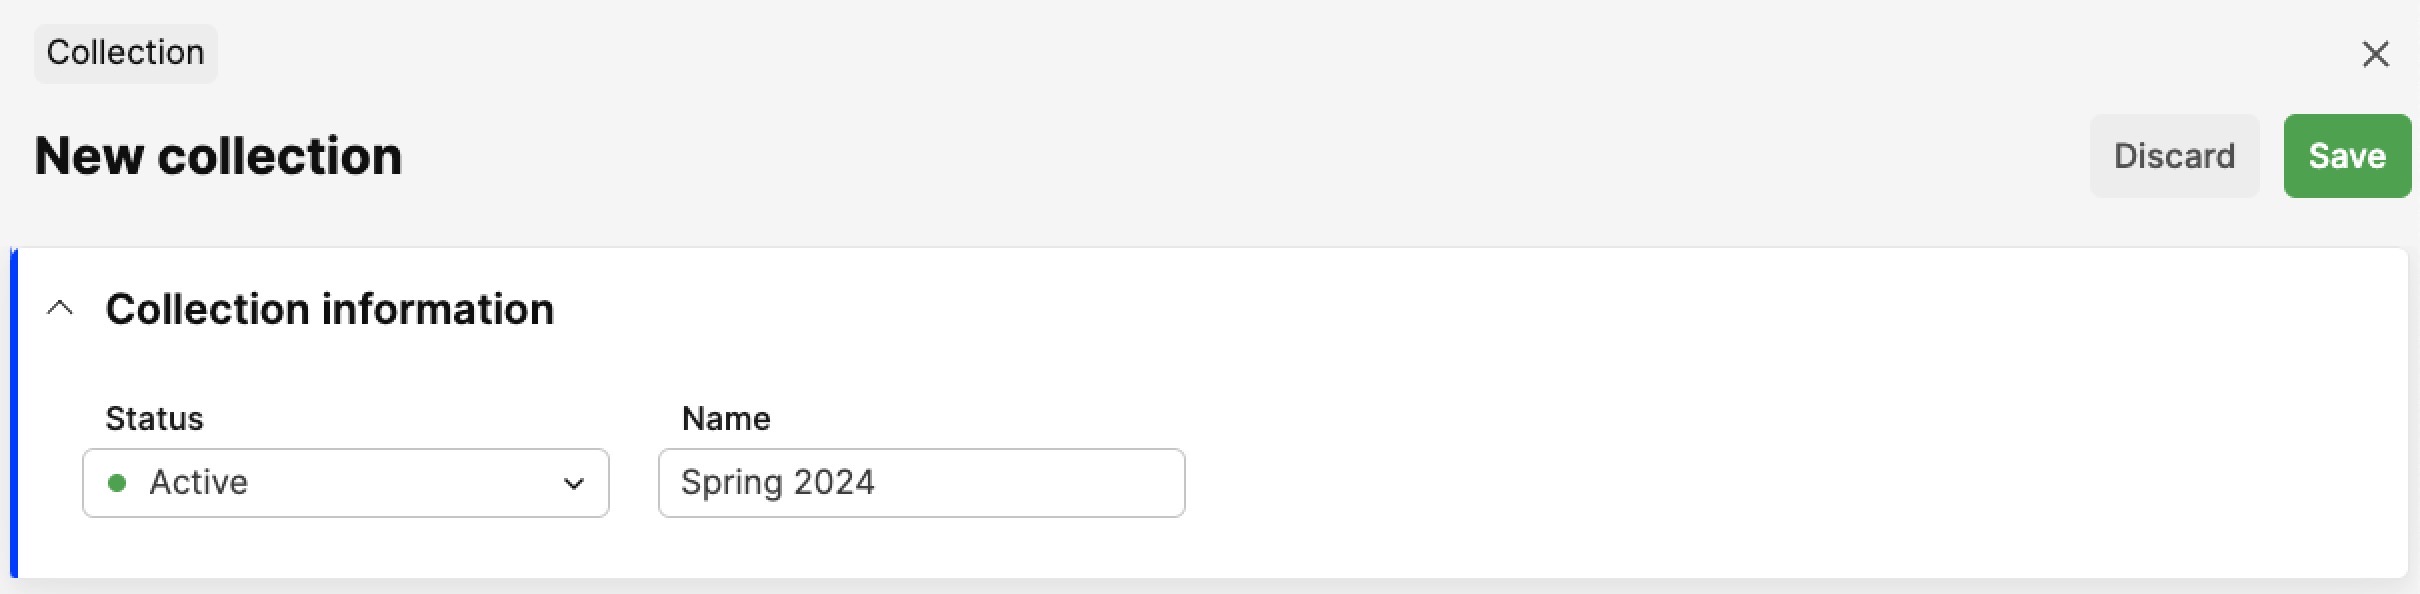
- Choose the status you’d like to set: 'Active', 'Inactive', or 'Disabled'
- Click 'Save' in upper-right corner.
How to add a Collection to Products
Product level
- Click on 'Products' and select the Product of your choice
- In the General section of the Product, click 'Edit' and select the Collection you want from the drop-down menu:
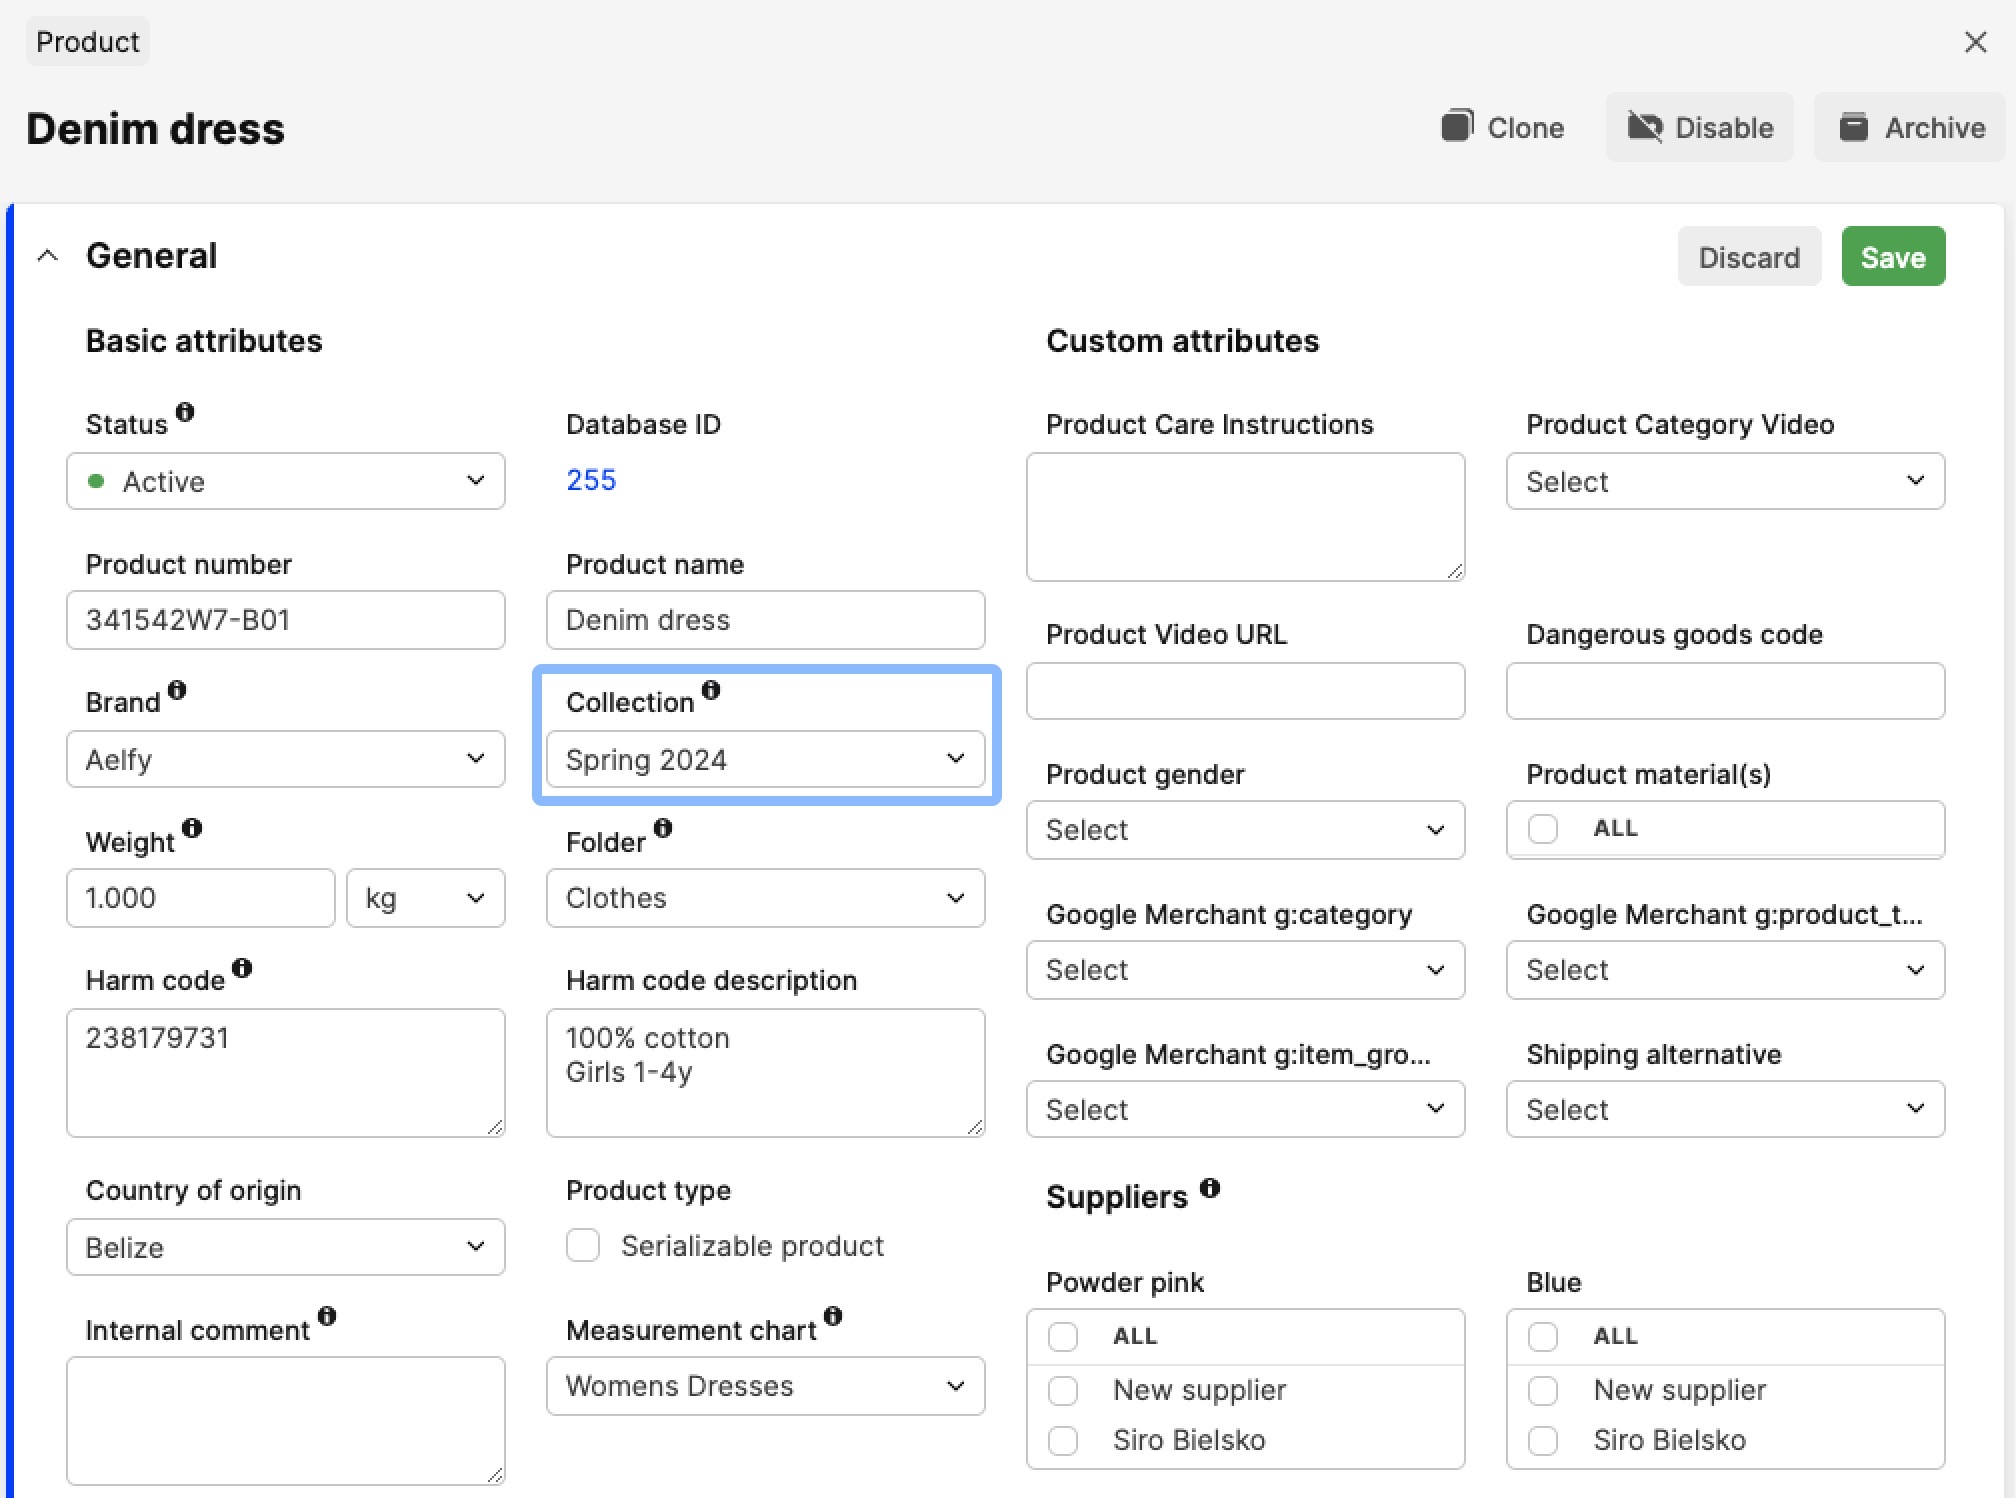
- Click 'Save'.
Add/change Collection in bulk
Product batch actions:
- Go to the Products page by clicking on 'Products' in the menu
- Select the Products where you would like to add or change the Collection by ticking their respective boxes on the left side of the Listing, and in the Action menu select 'Change general attributes':
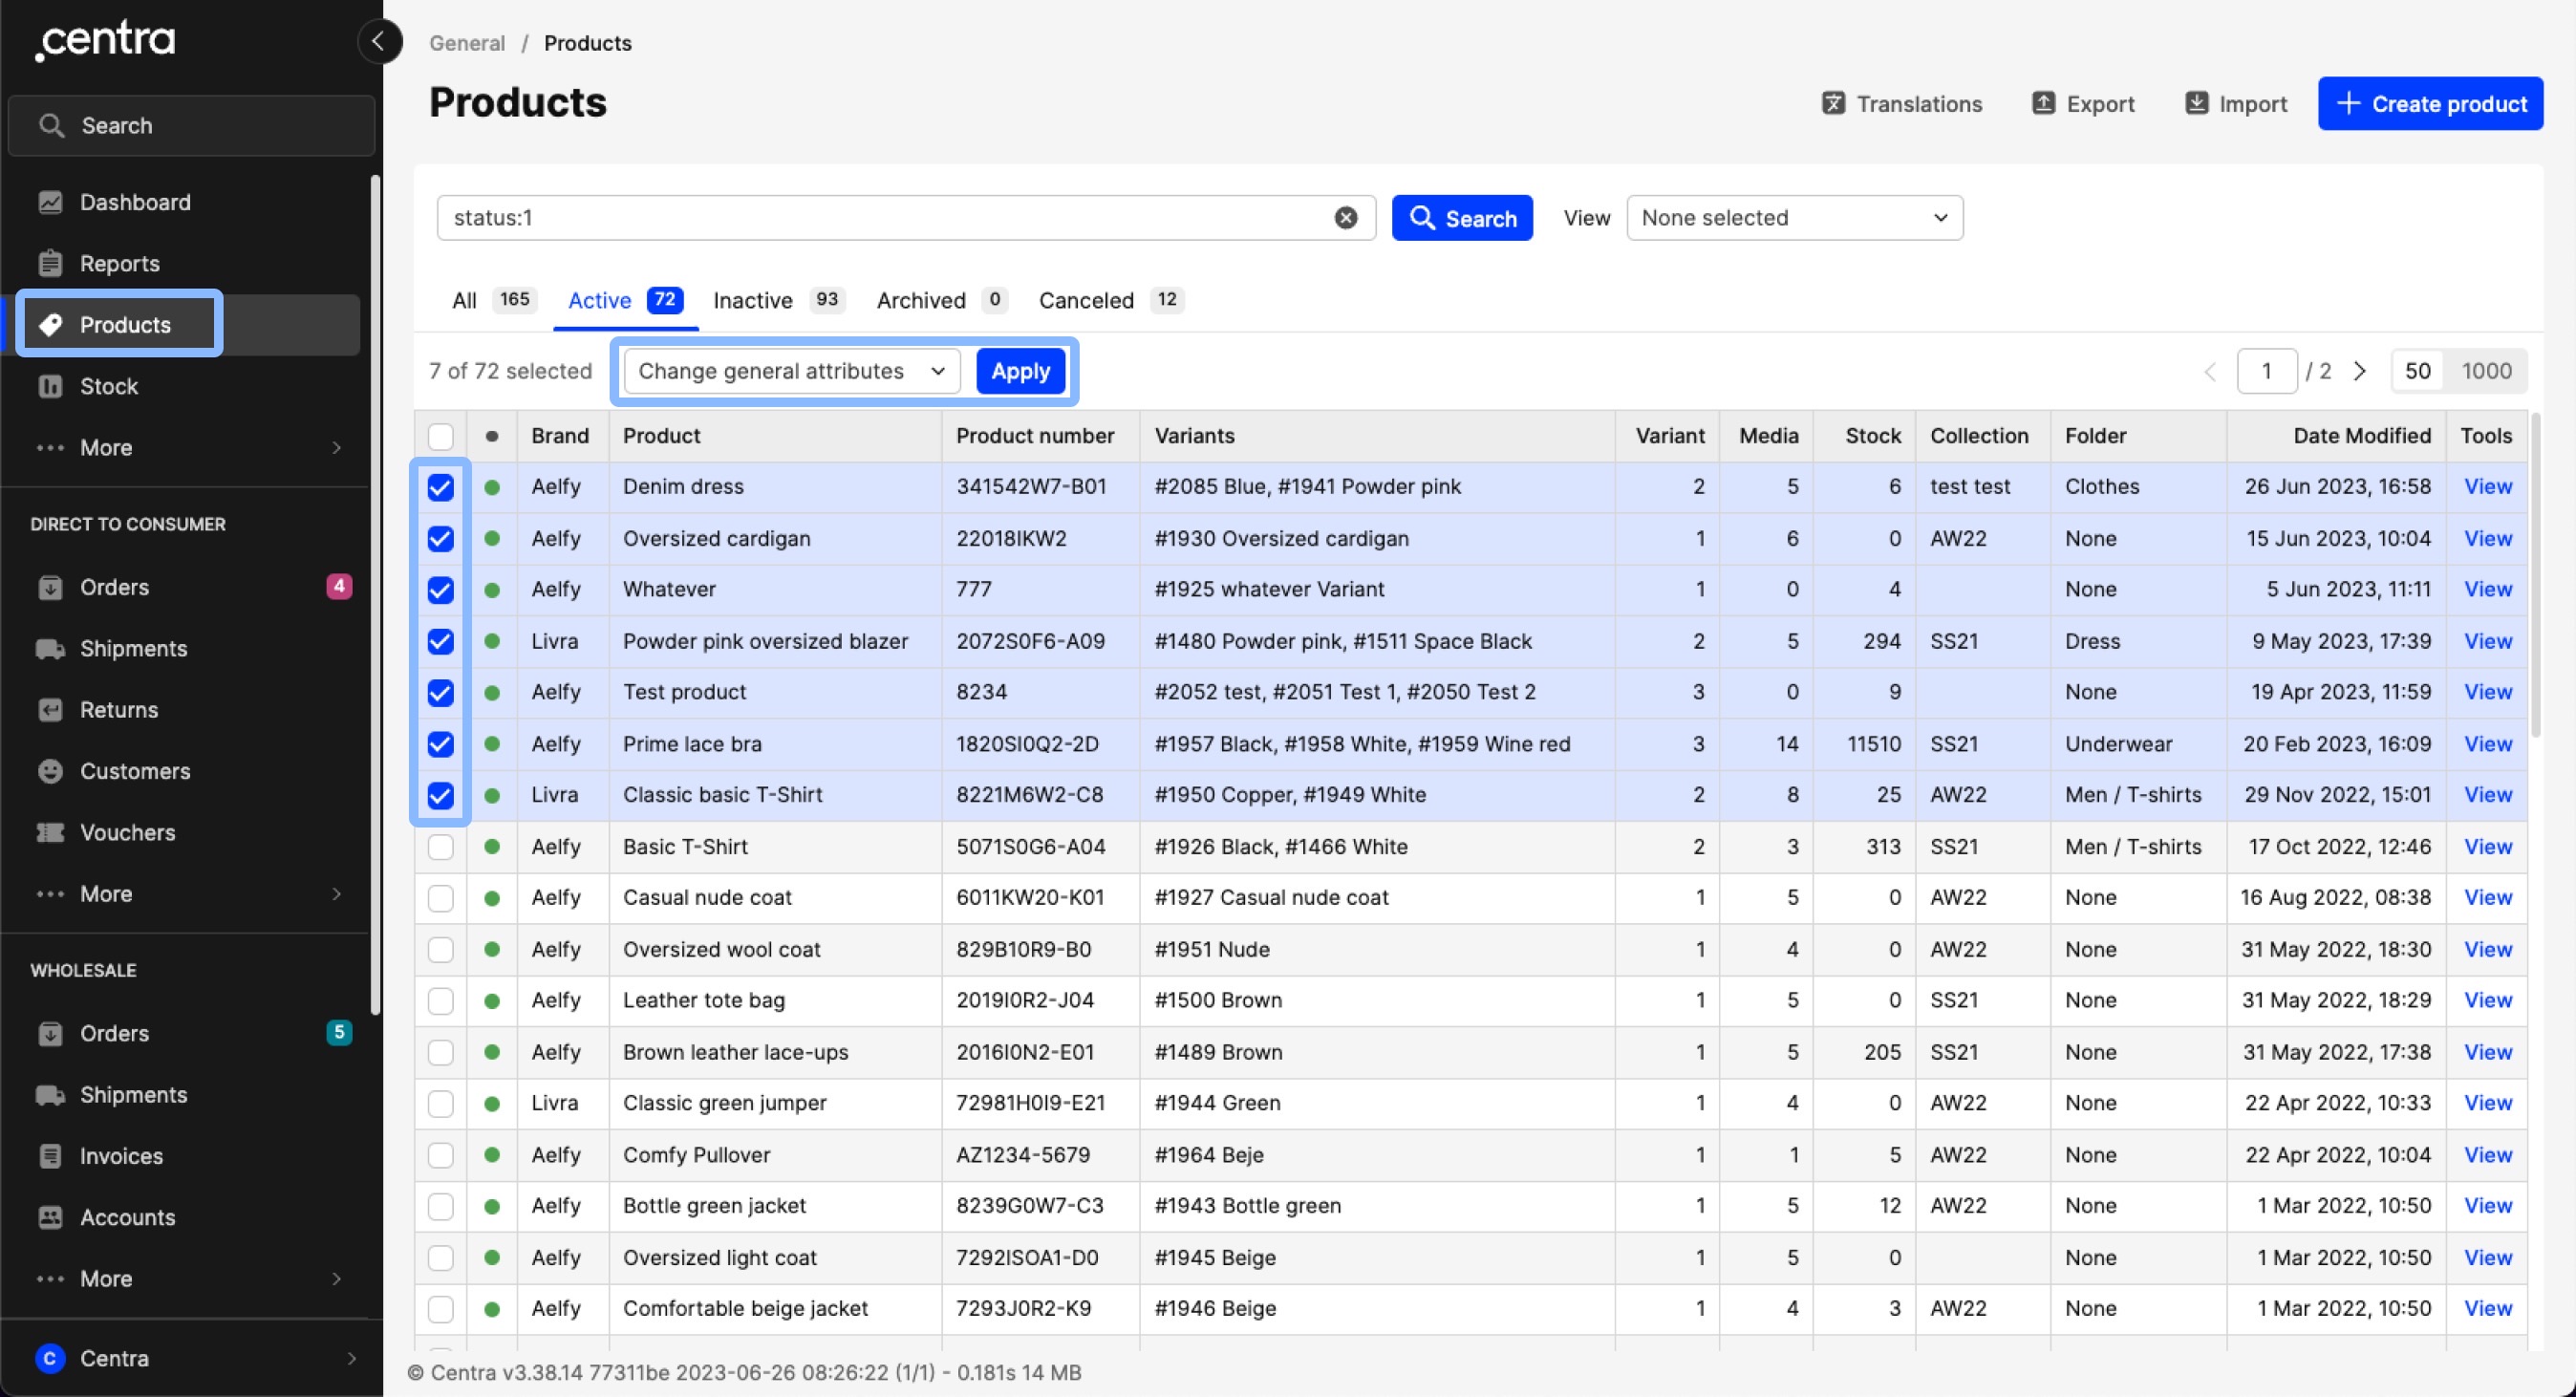
- Tick the Collection box in the pop-up and select your choice from the menu:
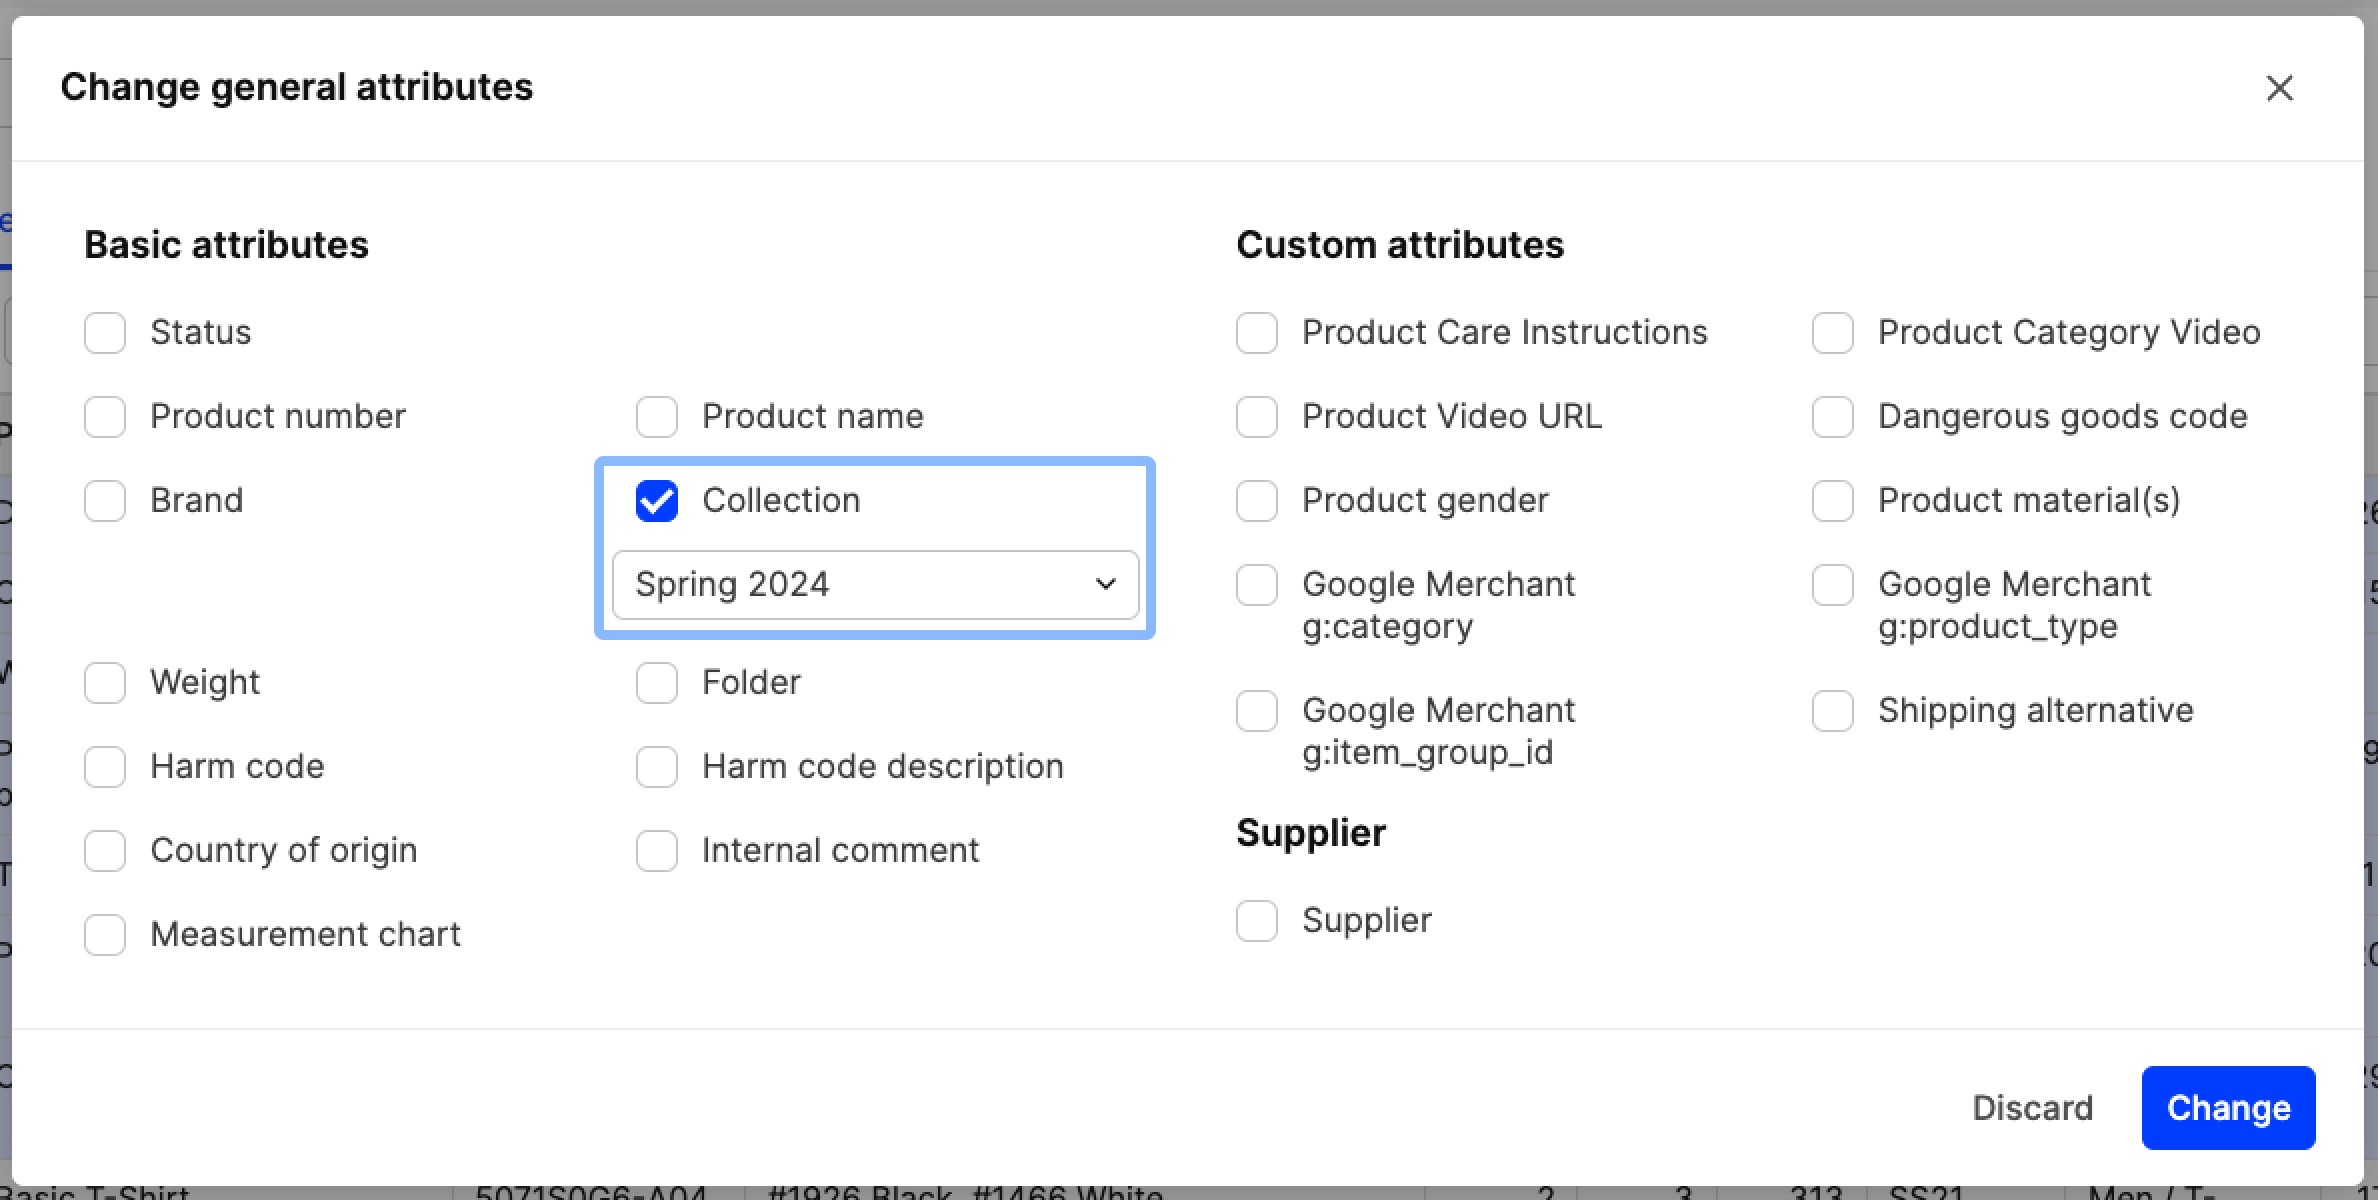
- Click 'Change'.
Import:
- Use the Product import by clicking on 'Products' in the menu, then 'Import' on the top-right, and then select Products in the 'Import type' menu:
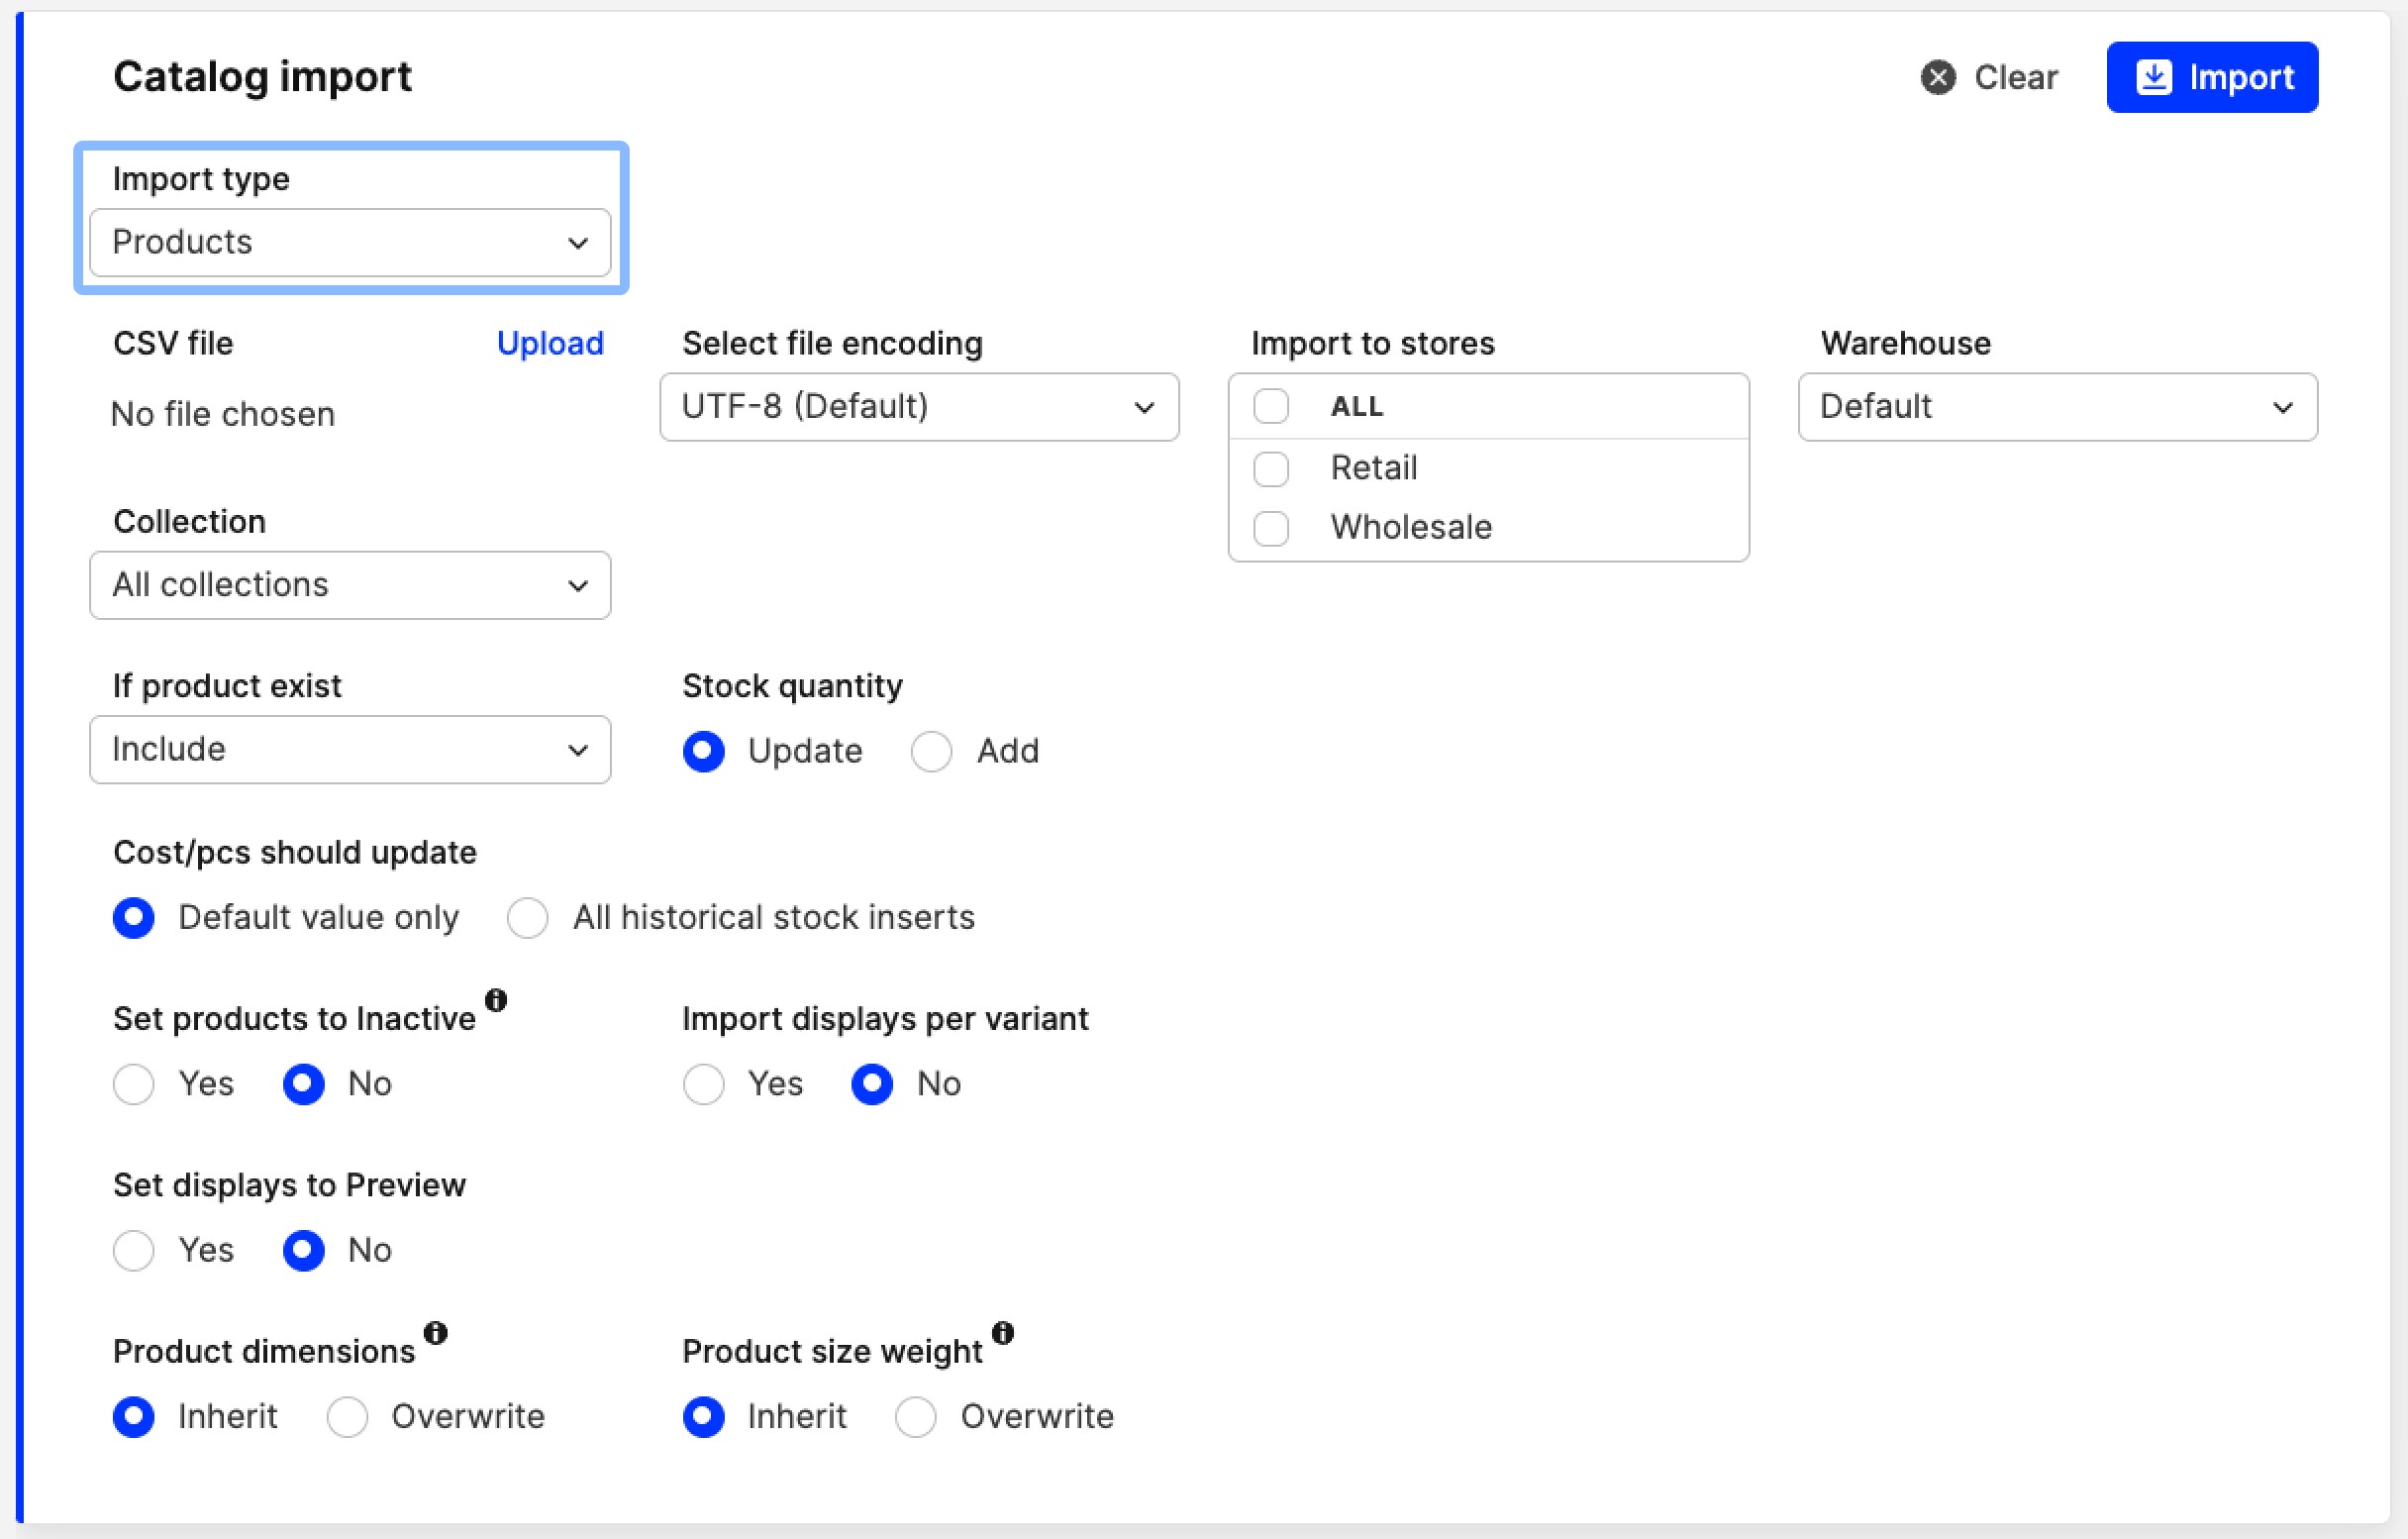
- You need to upload an import file in the corresponding field. In the file, you will need to add at a minimum the Product ID to map to an existing product
- Go through the remaining settings in the 'Catalog import' section (read more about Product import here). Once you have ensured they are correct, click 'Import'
- Review the data you are about to import in the Crosscheck, and if it is correct, click 'Save' to proceed with the import.