How to customize text styles
About this article
It’s now possible to add custom text styles in the Showroom from a selection of Google Fonts and not be restricted to the same basic font. The steps below will tell you how to design them.
How to add custom text styles
- Start by going to your CMS page, in the hamburger menu to the left, click Pages
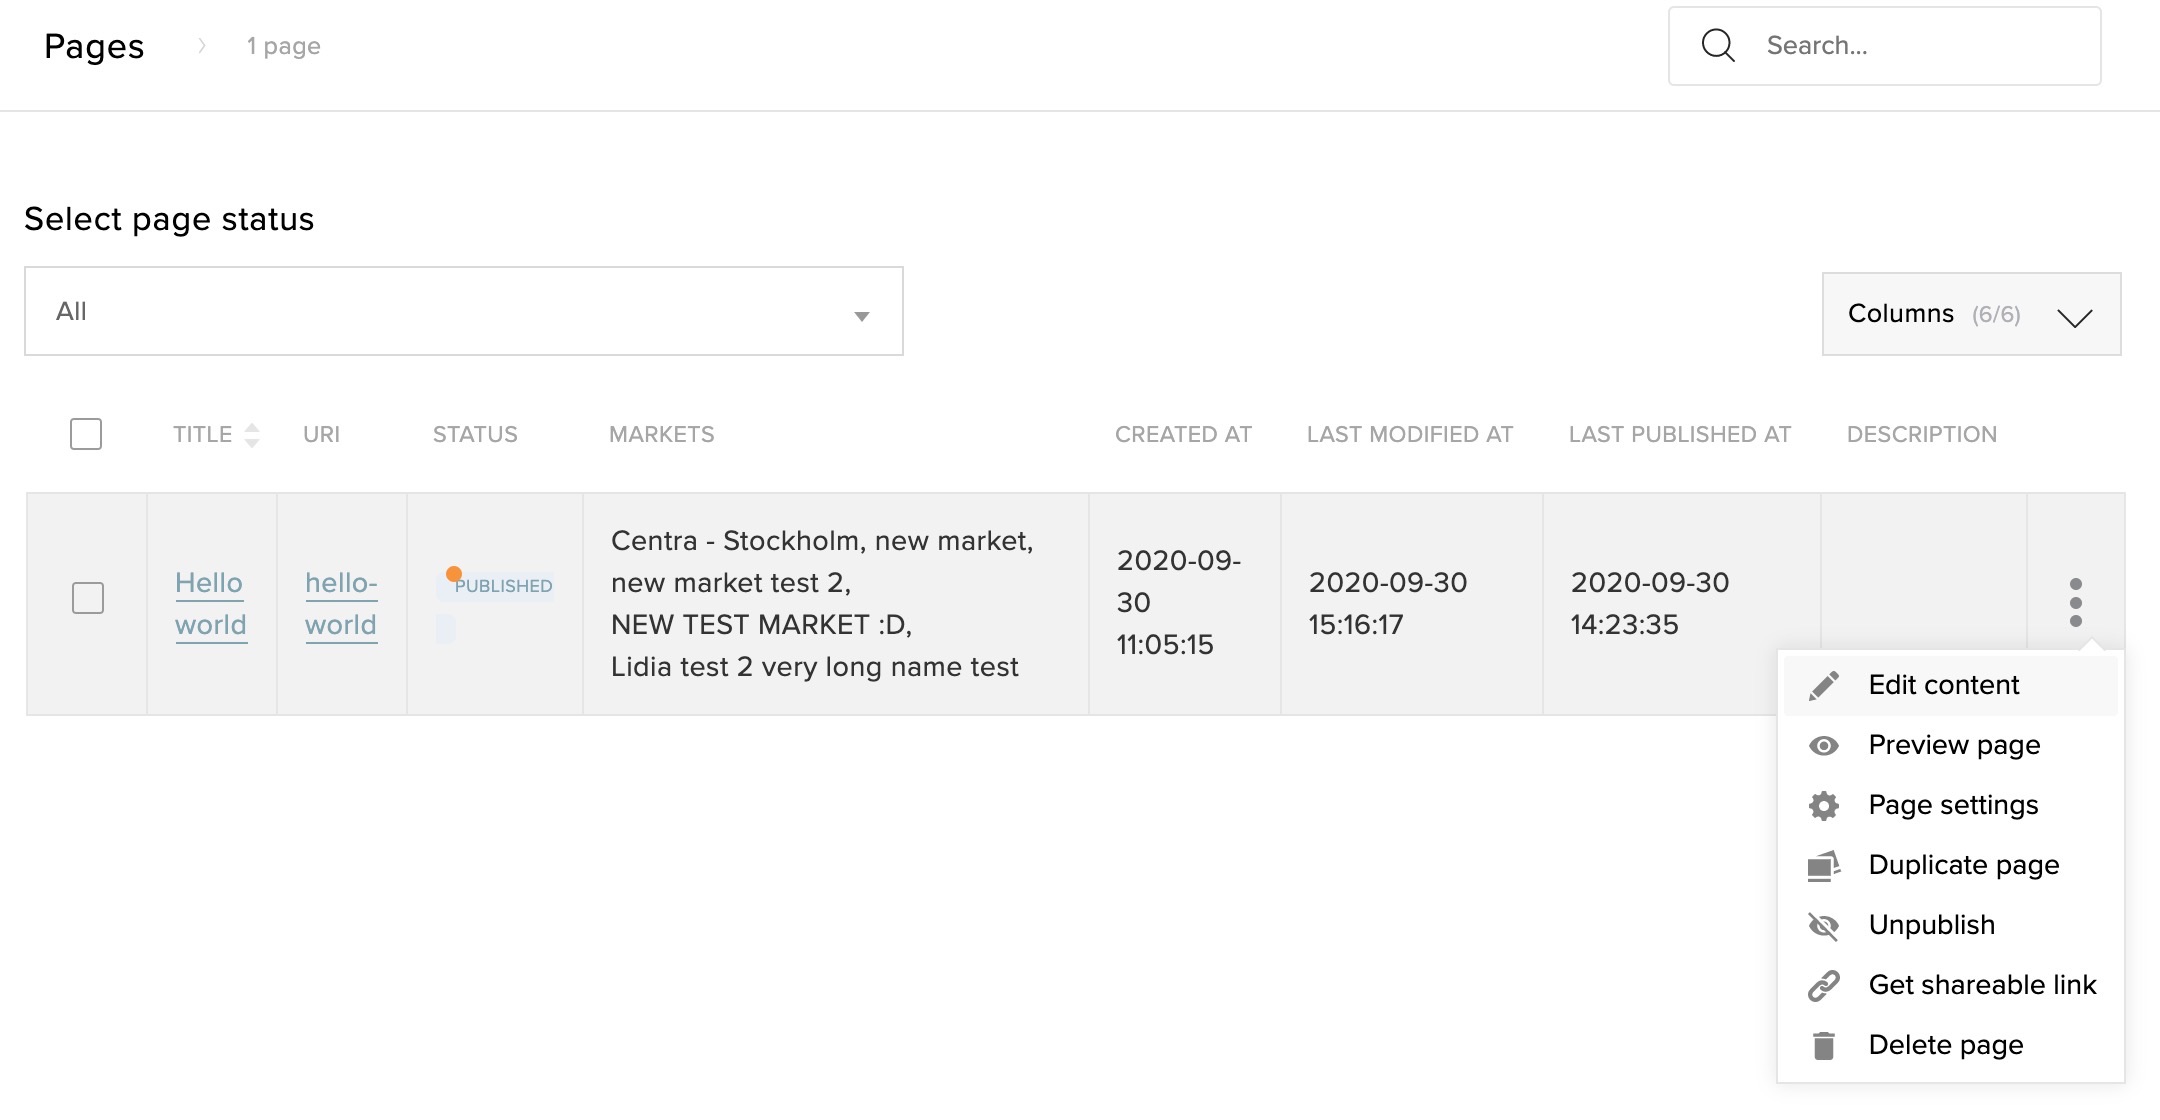
- Edit the CMS page by either clicking on the row or click on the three dots and Edit content
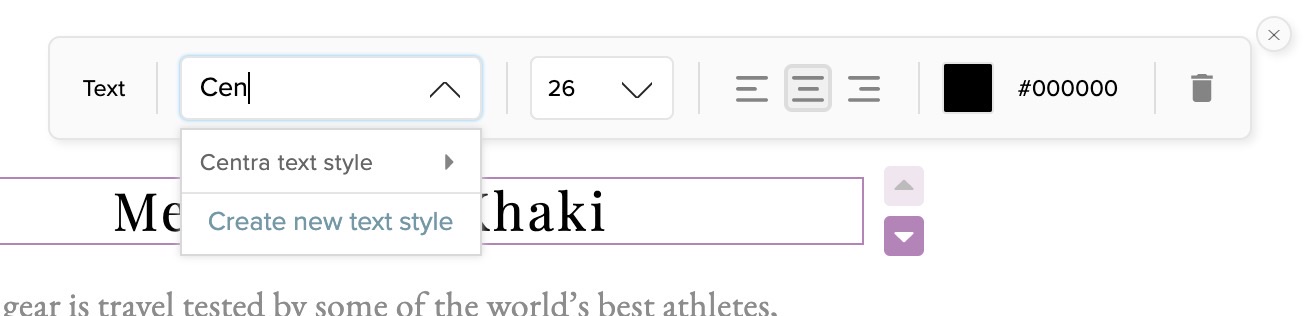
- Click on the text section and select a style from the list or click Create new text style
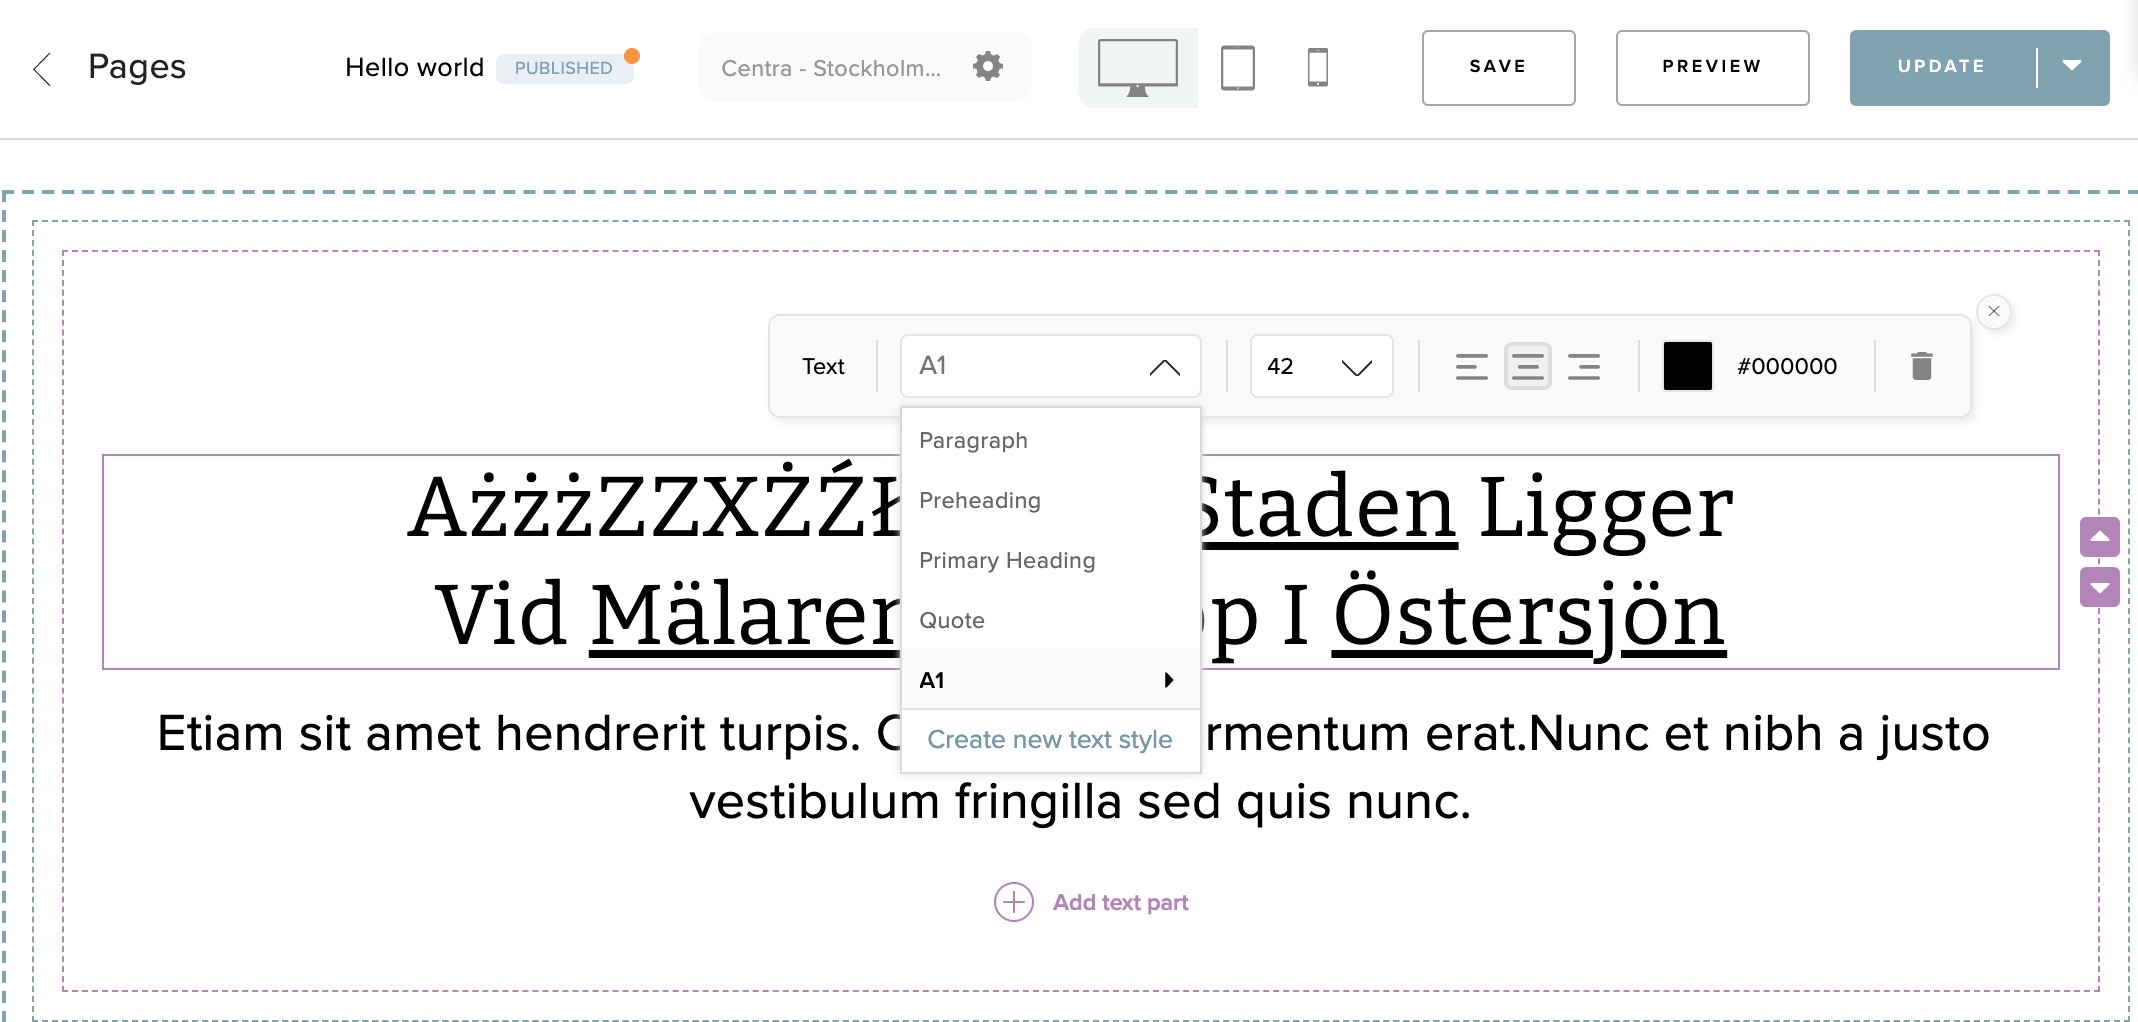
- You will then get this pop-up to the right
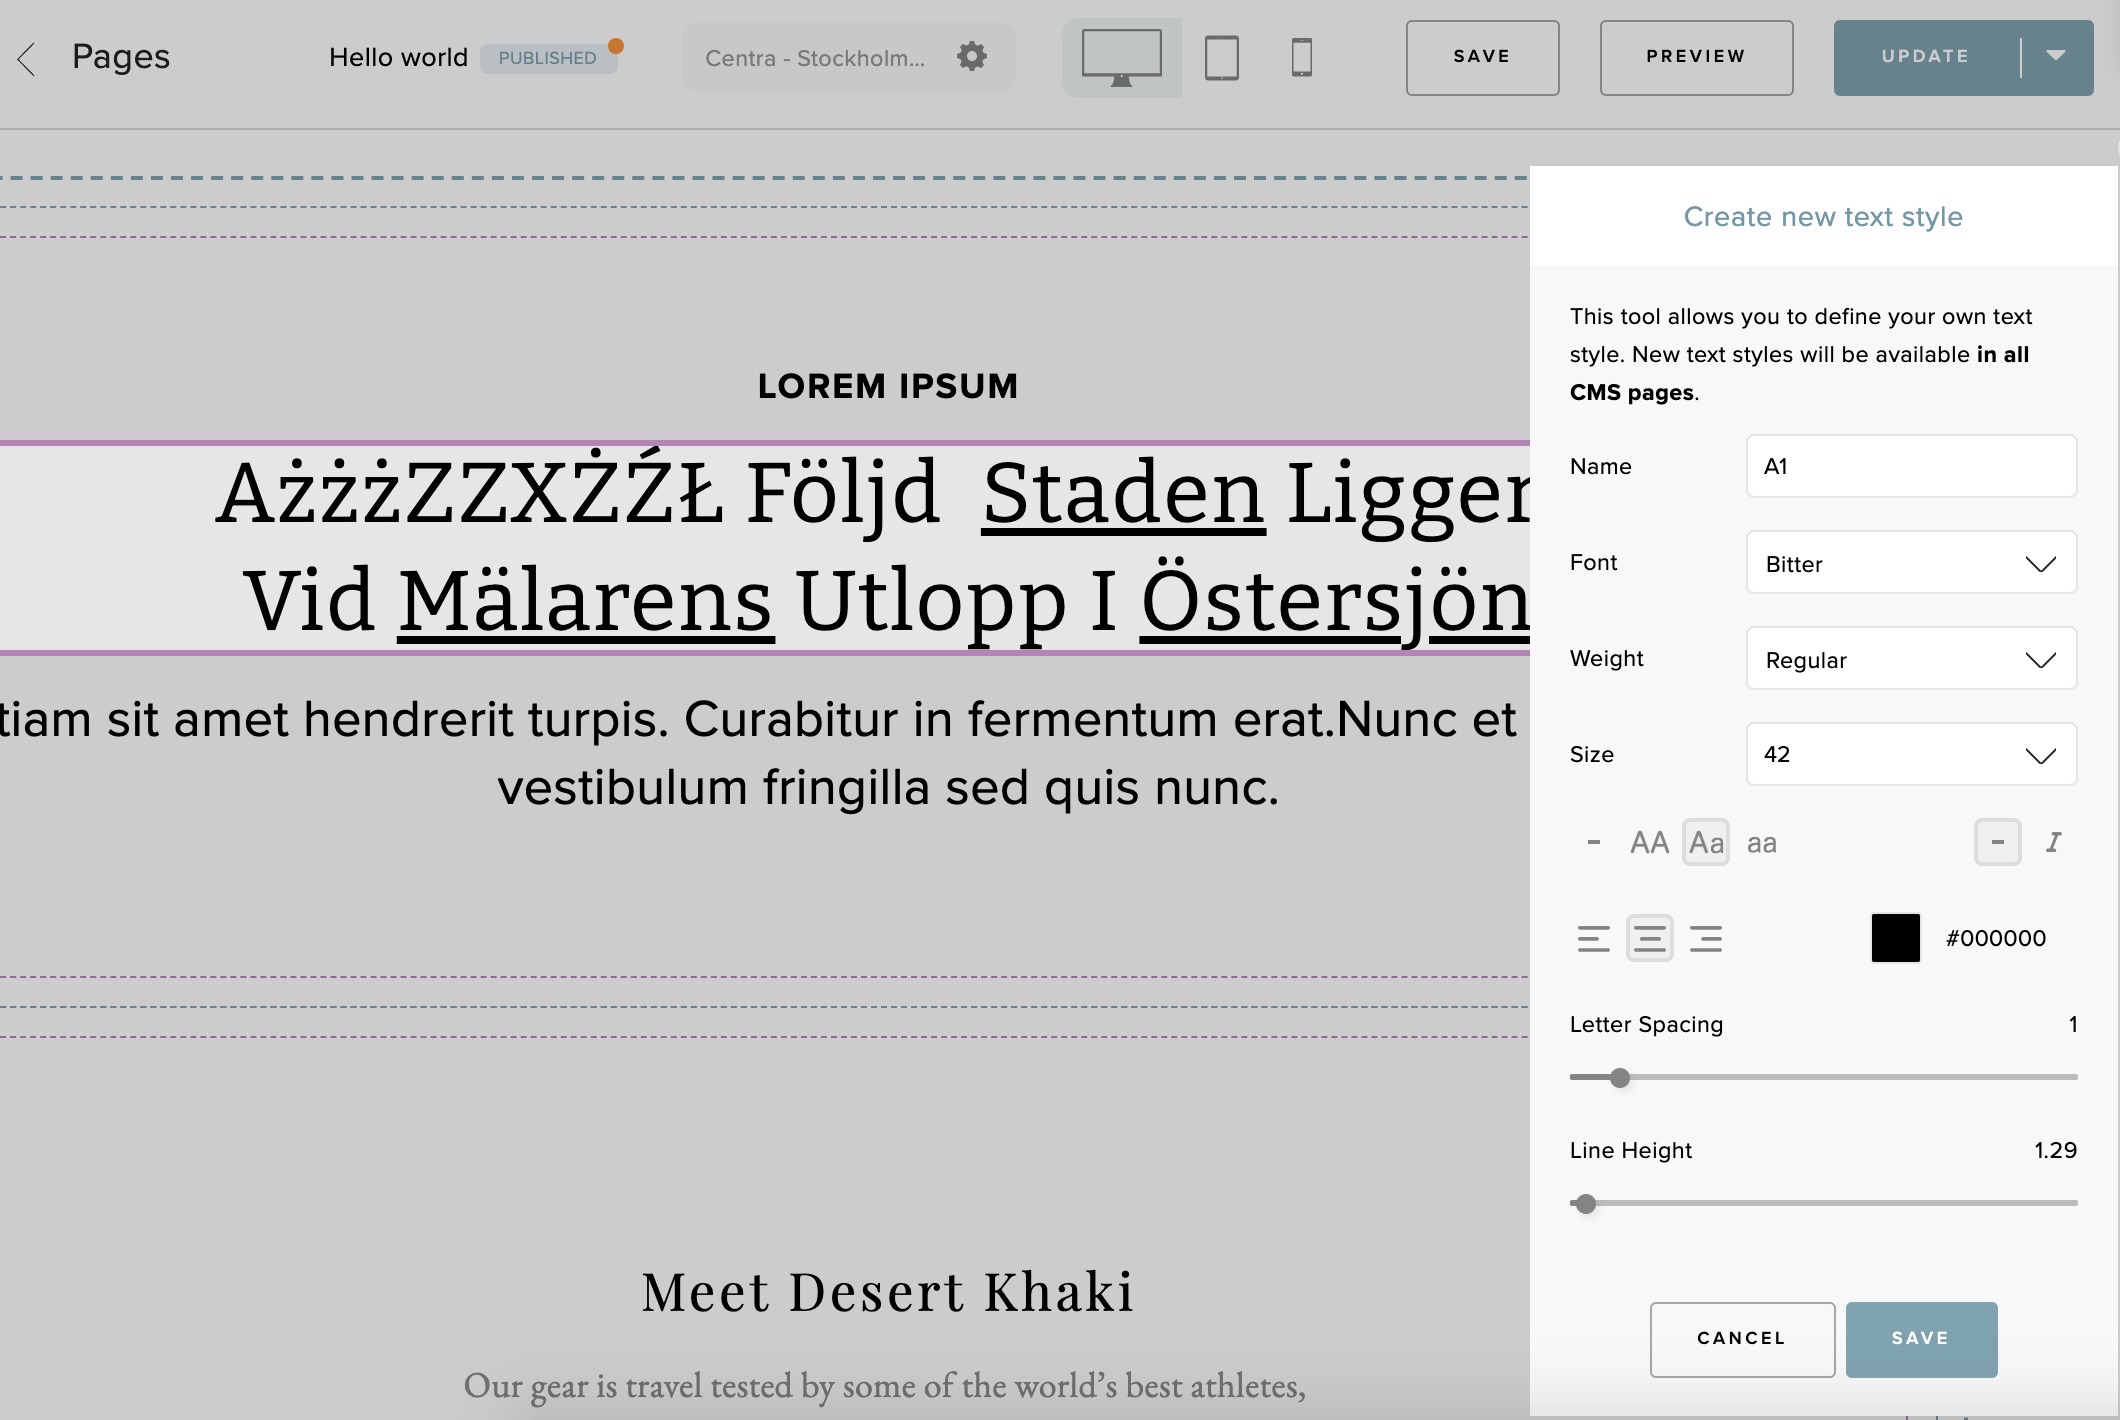
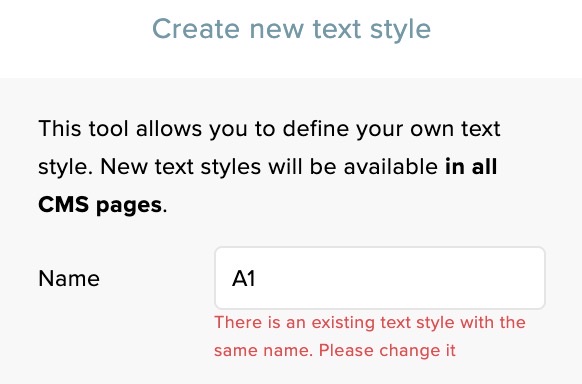
- In this pop-up you can select all different types of settings to design your font. So first you pick out a font in the Font-list that you prefer, then you can change weight, size, color, letter spacing and line height. You can also choose if it should be italic, left or right aligned, if it should be capitalized or lowercase. And before saving your font you need to Name it so that you easily can find it for your next text section. If you forget to set the name you will get this error message:
How to use custom text styles
So if you now want to use this new text style in another text section in your CMS
- Go to the CMS page you'd like to change the font in. Click on the text block to find your newly created text style in the bottom of the font drop-down list, select it and Apply
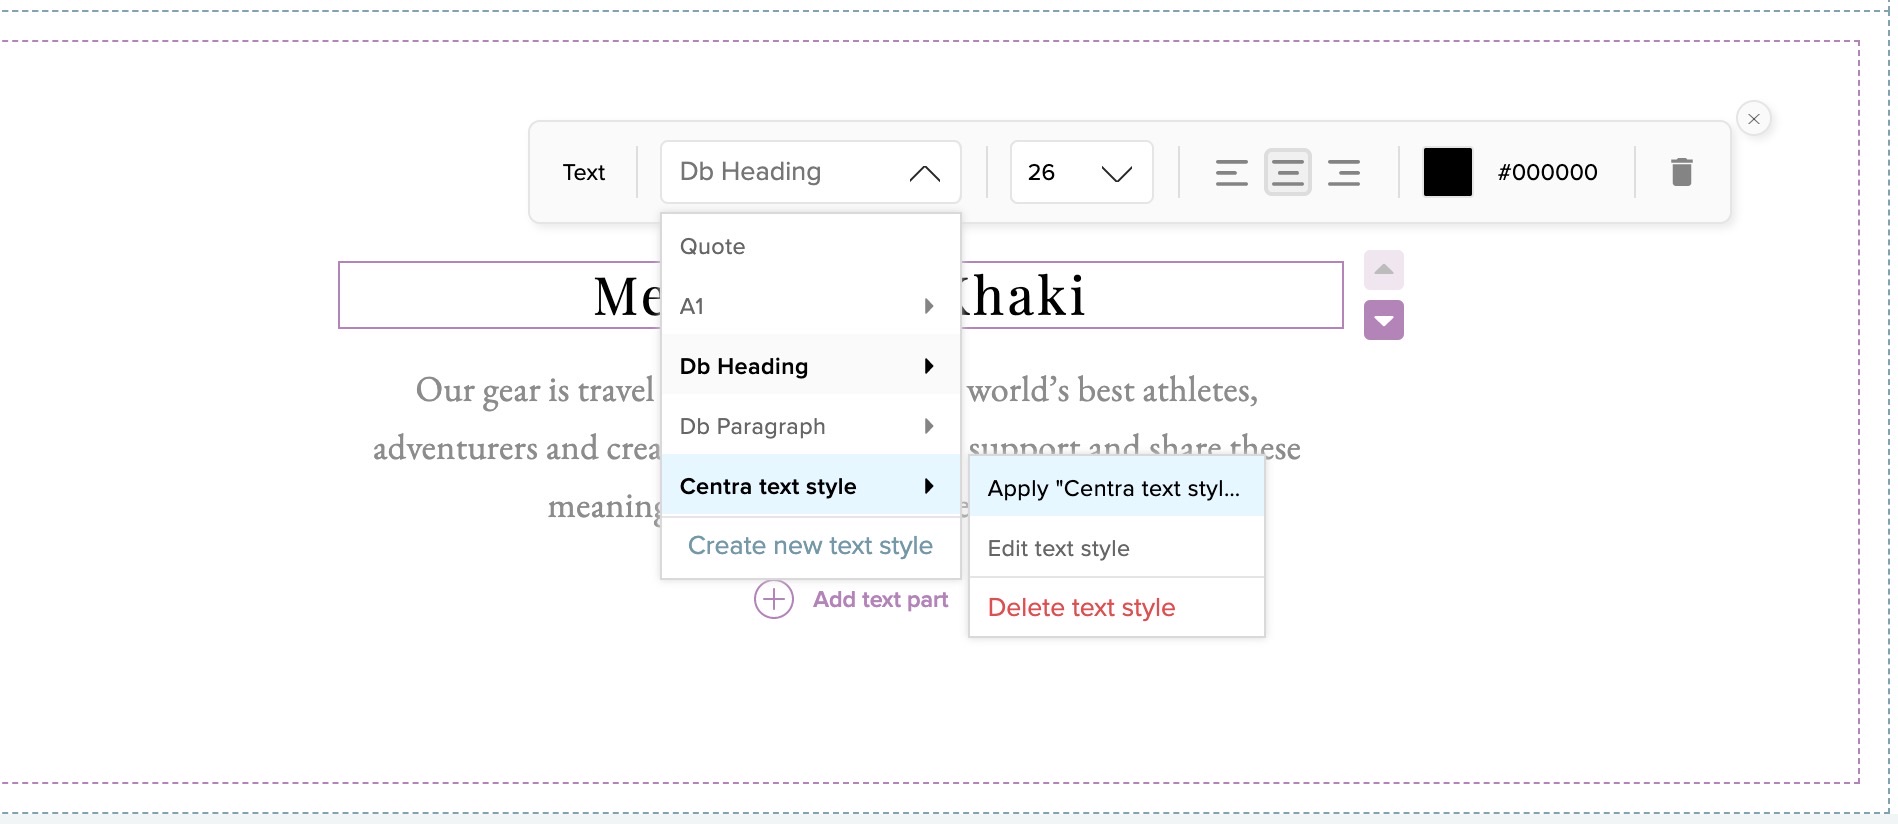
- You can also choose to edit it or delete it from this view.
Edit: If you choose to EDIT the text style, the changes will be applied on all places using that particular text style, in all CMS pages in the showroom when you save the changes
Delete: If you choose to DELETE the text style, you get the option to replace the text style with something else if it’s used in some other CMS page or text section.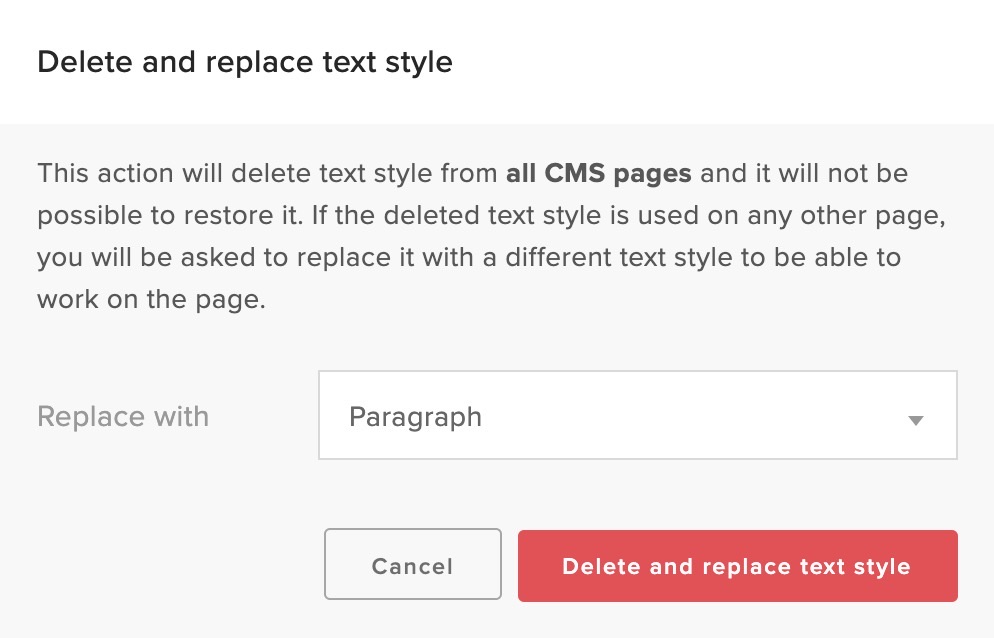
You can also search in the text field for your specific fonts
How to add hosted custom fonts
You might have purchased a licence for a hosted font. In this example we will show how to add such a font from Google.
- Log in to Centra Backend AMS
- Go to 'System' > Stores' > choose your Wholesale store, and scroll down to the plugin section and click on Showroom API
- In the Showroom API plugin there is a section called 'Custom fonts'. This is where you fill in the details about your hosted font:

- Click '+Add custom font' and fill in the fields:
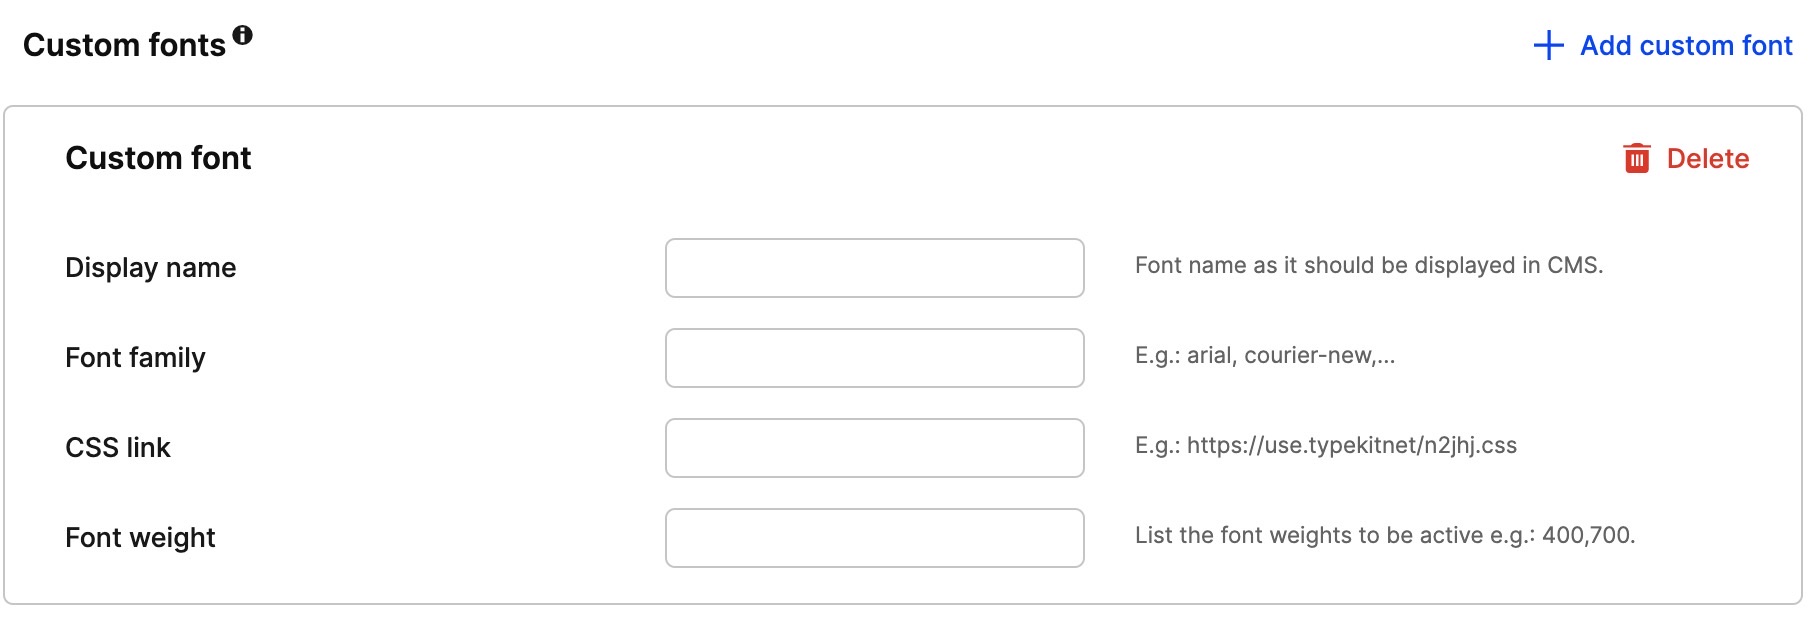
- Display name - Font name as it should be displayed in the CMS
- Font Family - E.g.: arial, courier-new. Or as in our google font example:

- CSS link - E.g.: https://use.typekitnet/n2jhj.css. To retrieve the CSS link from the Google font as in our example, please select the style and copy this selected part of the link as in the example below before pasting it into the field
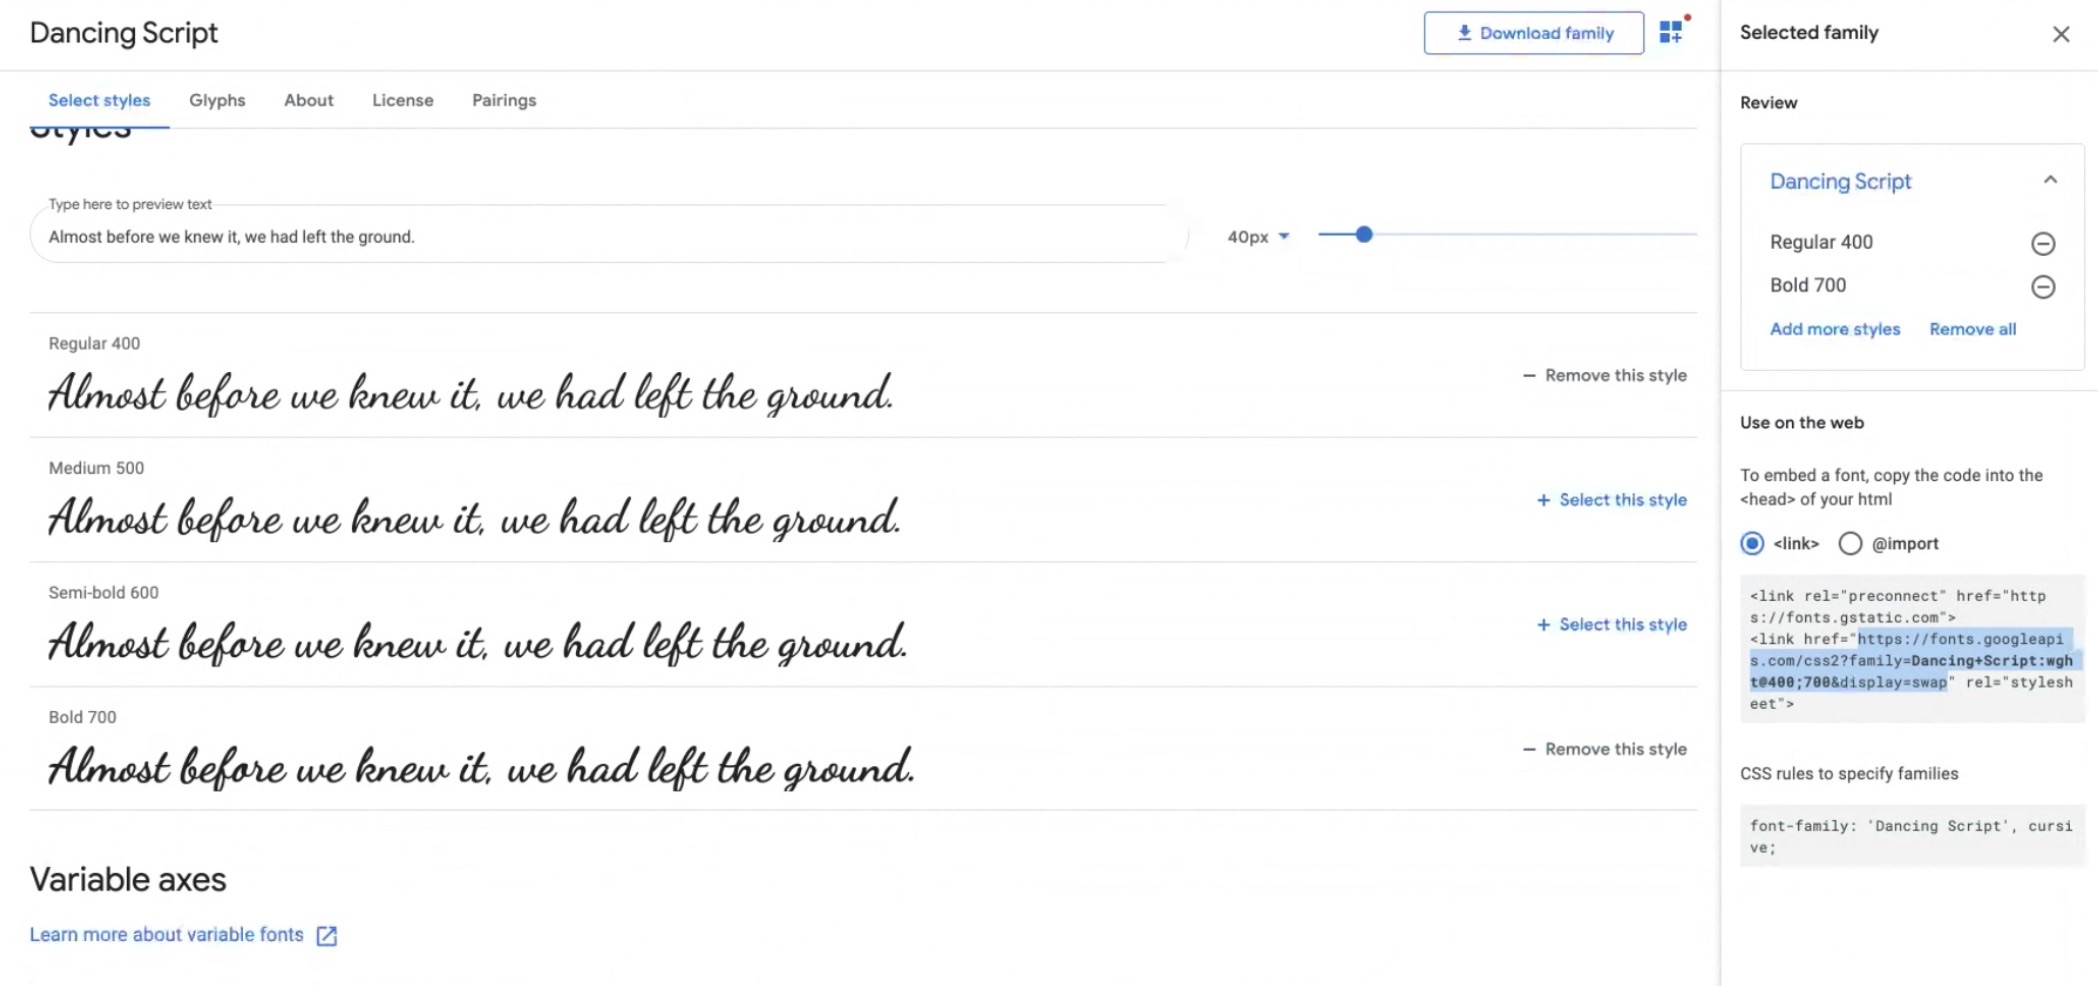
- Font Weight - List the font weights to be active e.g.: 400,700. In our example above we've picked both regular 400 and a bold 700 weight
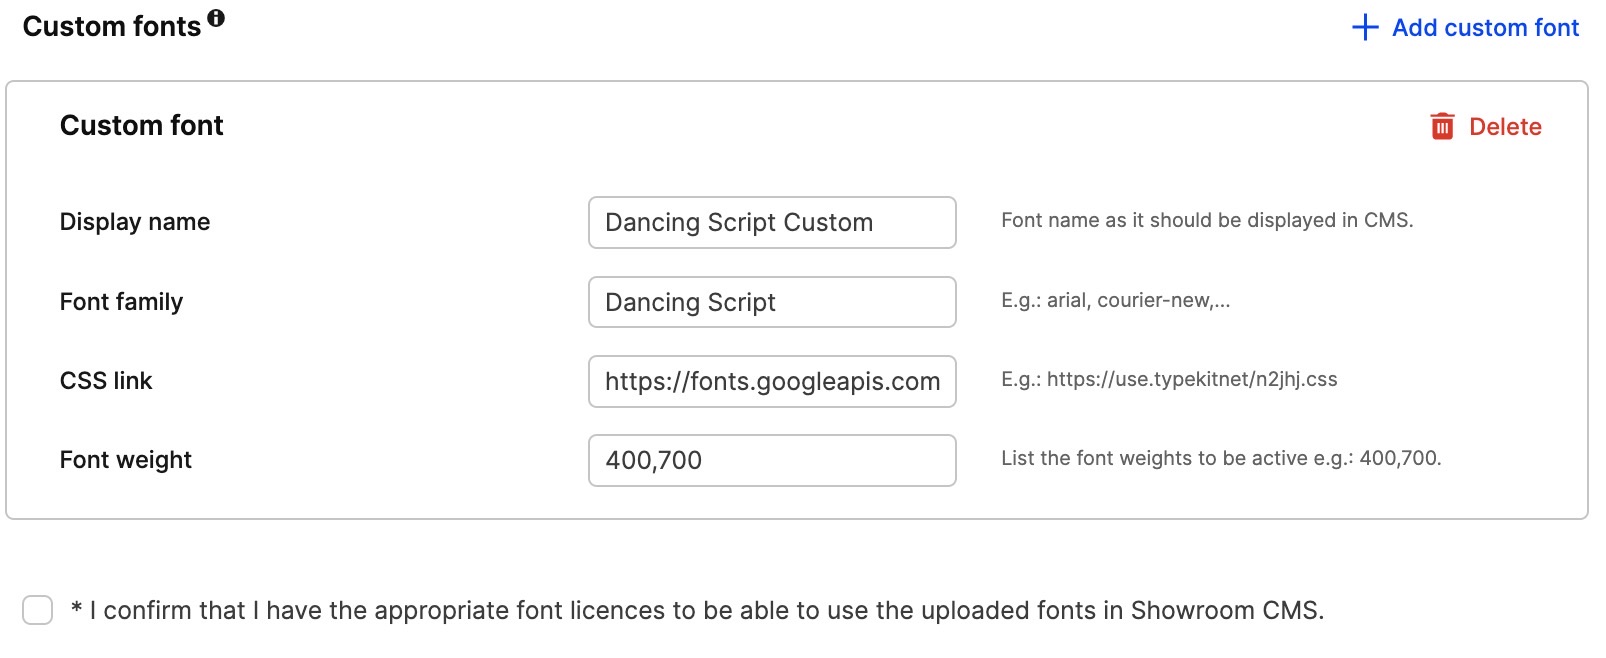
- When the plugin is filled in correctly it could look something like this:
- Time to click 'Save' in the upper-right corner of the plugin settings
- Then you need to add your hosted custom font to your CMS page in the Showroom. In the above block "How to add custom text styles" you can read more how to do that. And also how to use it "How to use custom text styles".