Custom product badges in Showroom
About this article:
You can add customized badges to products in the Showroom. This feature is great to highlight new products, outgoing products and campaigns. Alternatively, you can use it to steer your buyers towards a product category that you think they're interested in, with the goal to drive more sales. Logos, images or icons can also be added within the product badge for additional customization. This article describes the steps required to set them up.
Product badges in Showroom
If you have Showroom enabled, you automatically have access to the ‘Showroom Custom Tag' custom attribute on your product variants:
Read below to to configure the ‘Showroom Custom Tag' attribute and assign it on products.
How to configure the ‘Showroom Custom Tag’ attribute
-
To configure the ‘Showroom Custom Tag' attribute, click on 'More' in the general section in the main menu to the left and then 'Attributes'
-
Click '+Create attribute'
-
Select ‘Showroom Custom Tag' as the type and the following settings appear to fill out:
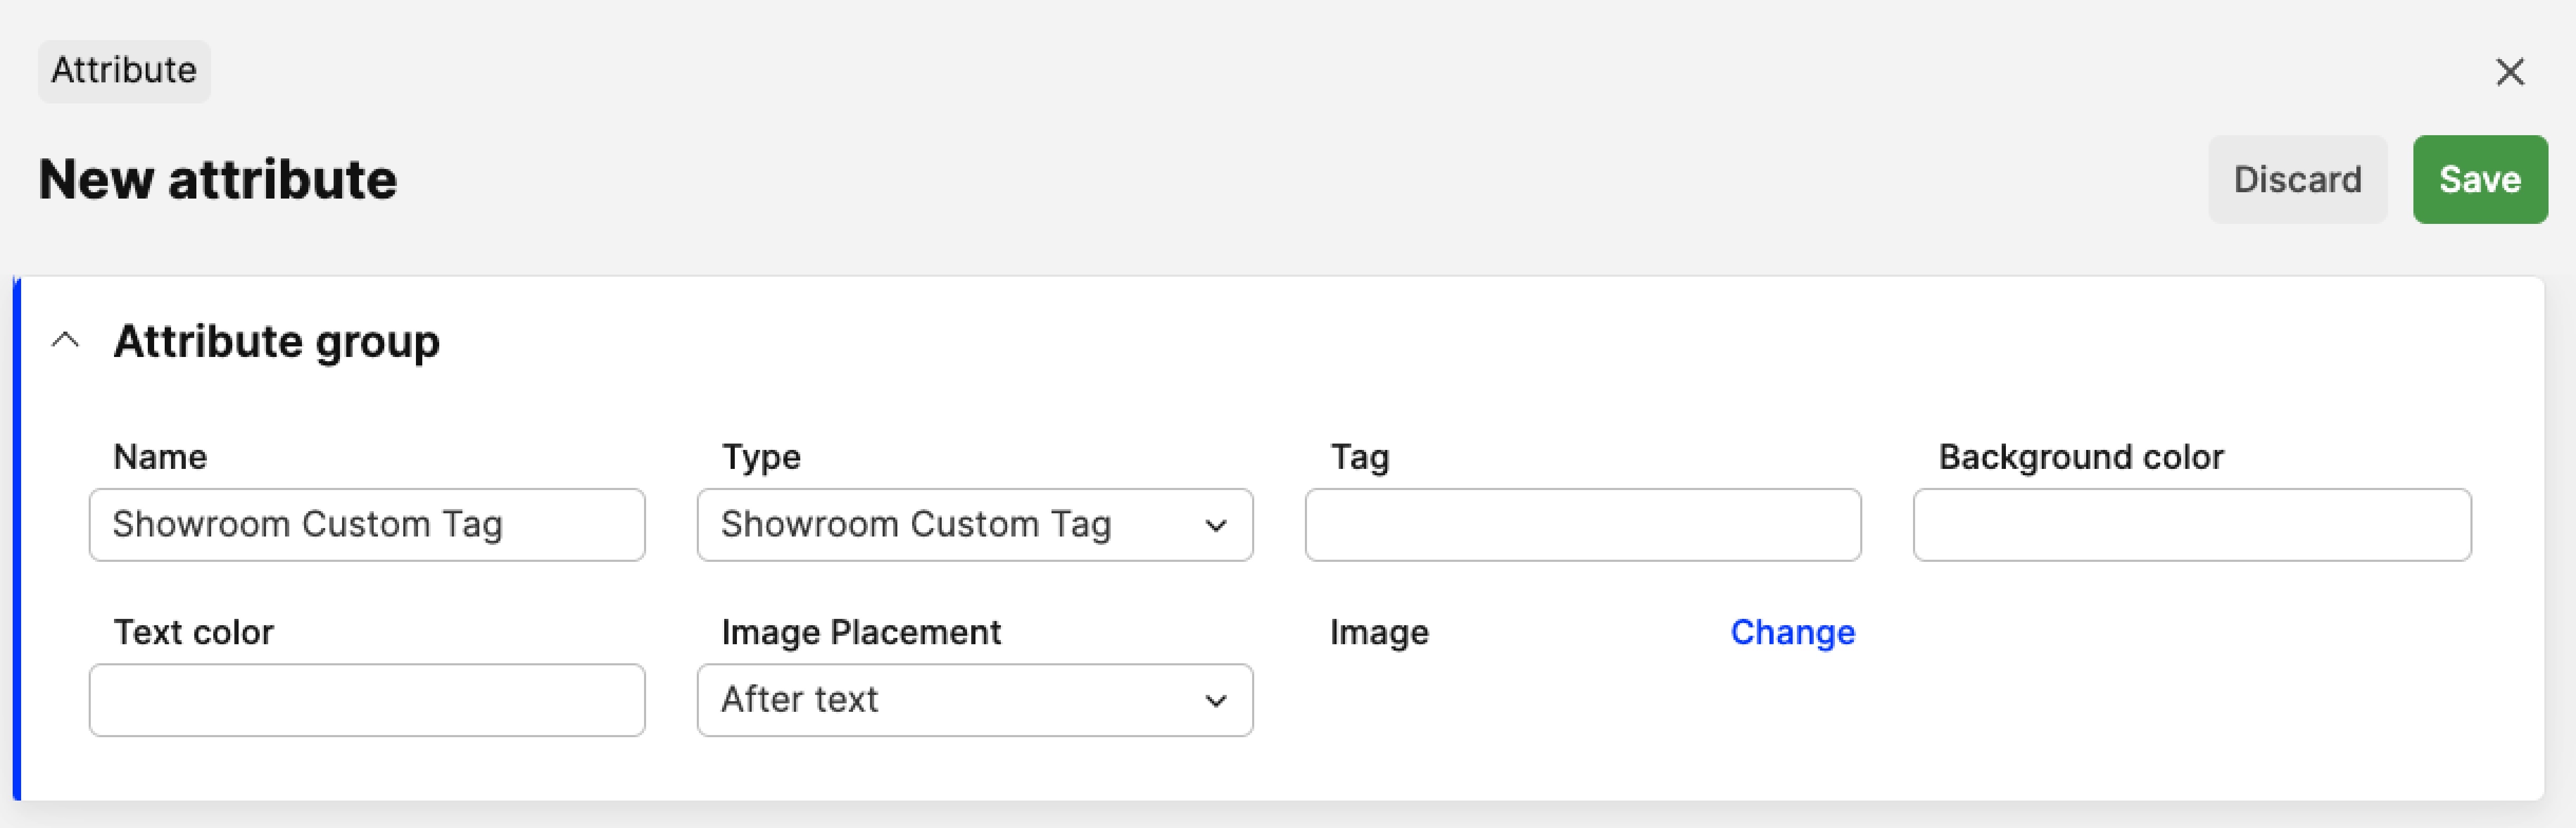
- Name - Insert an internal name for the attribute. This is how it is displayed in Centra
- Type - Choose ‘Showroom Custom Tag’
- Tag - Insert a name for the attribute. This is how it is displayed in the Showroom, if enabled. The ‘Name’ and ‘Tag’ fields can be the same if needed
- Background color - Type in the hex color code you would like to have as the background color of the badge, for example #e47286
- Text color - Type in the hex color code you would like to have as the color of the text in the badge, for example #ffffff
-
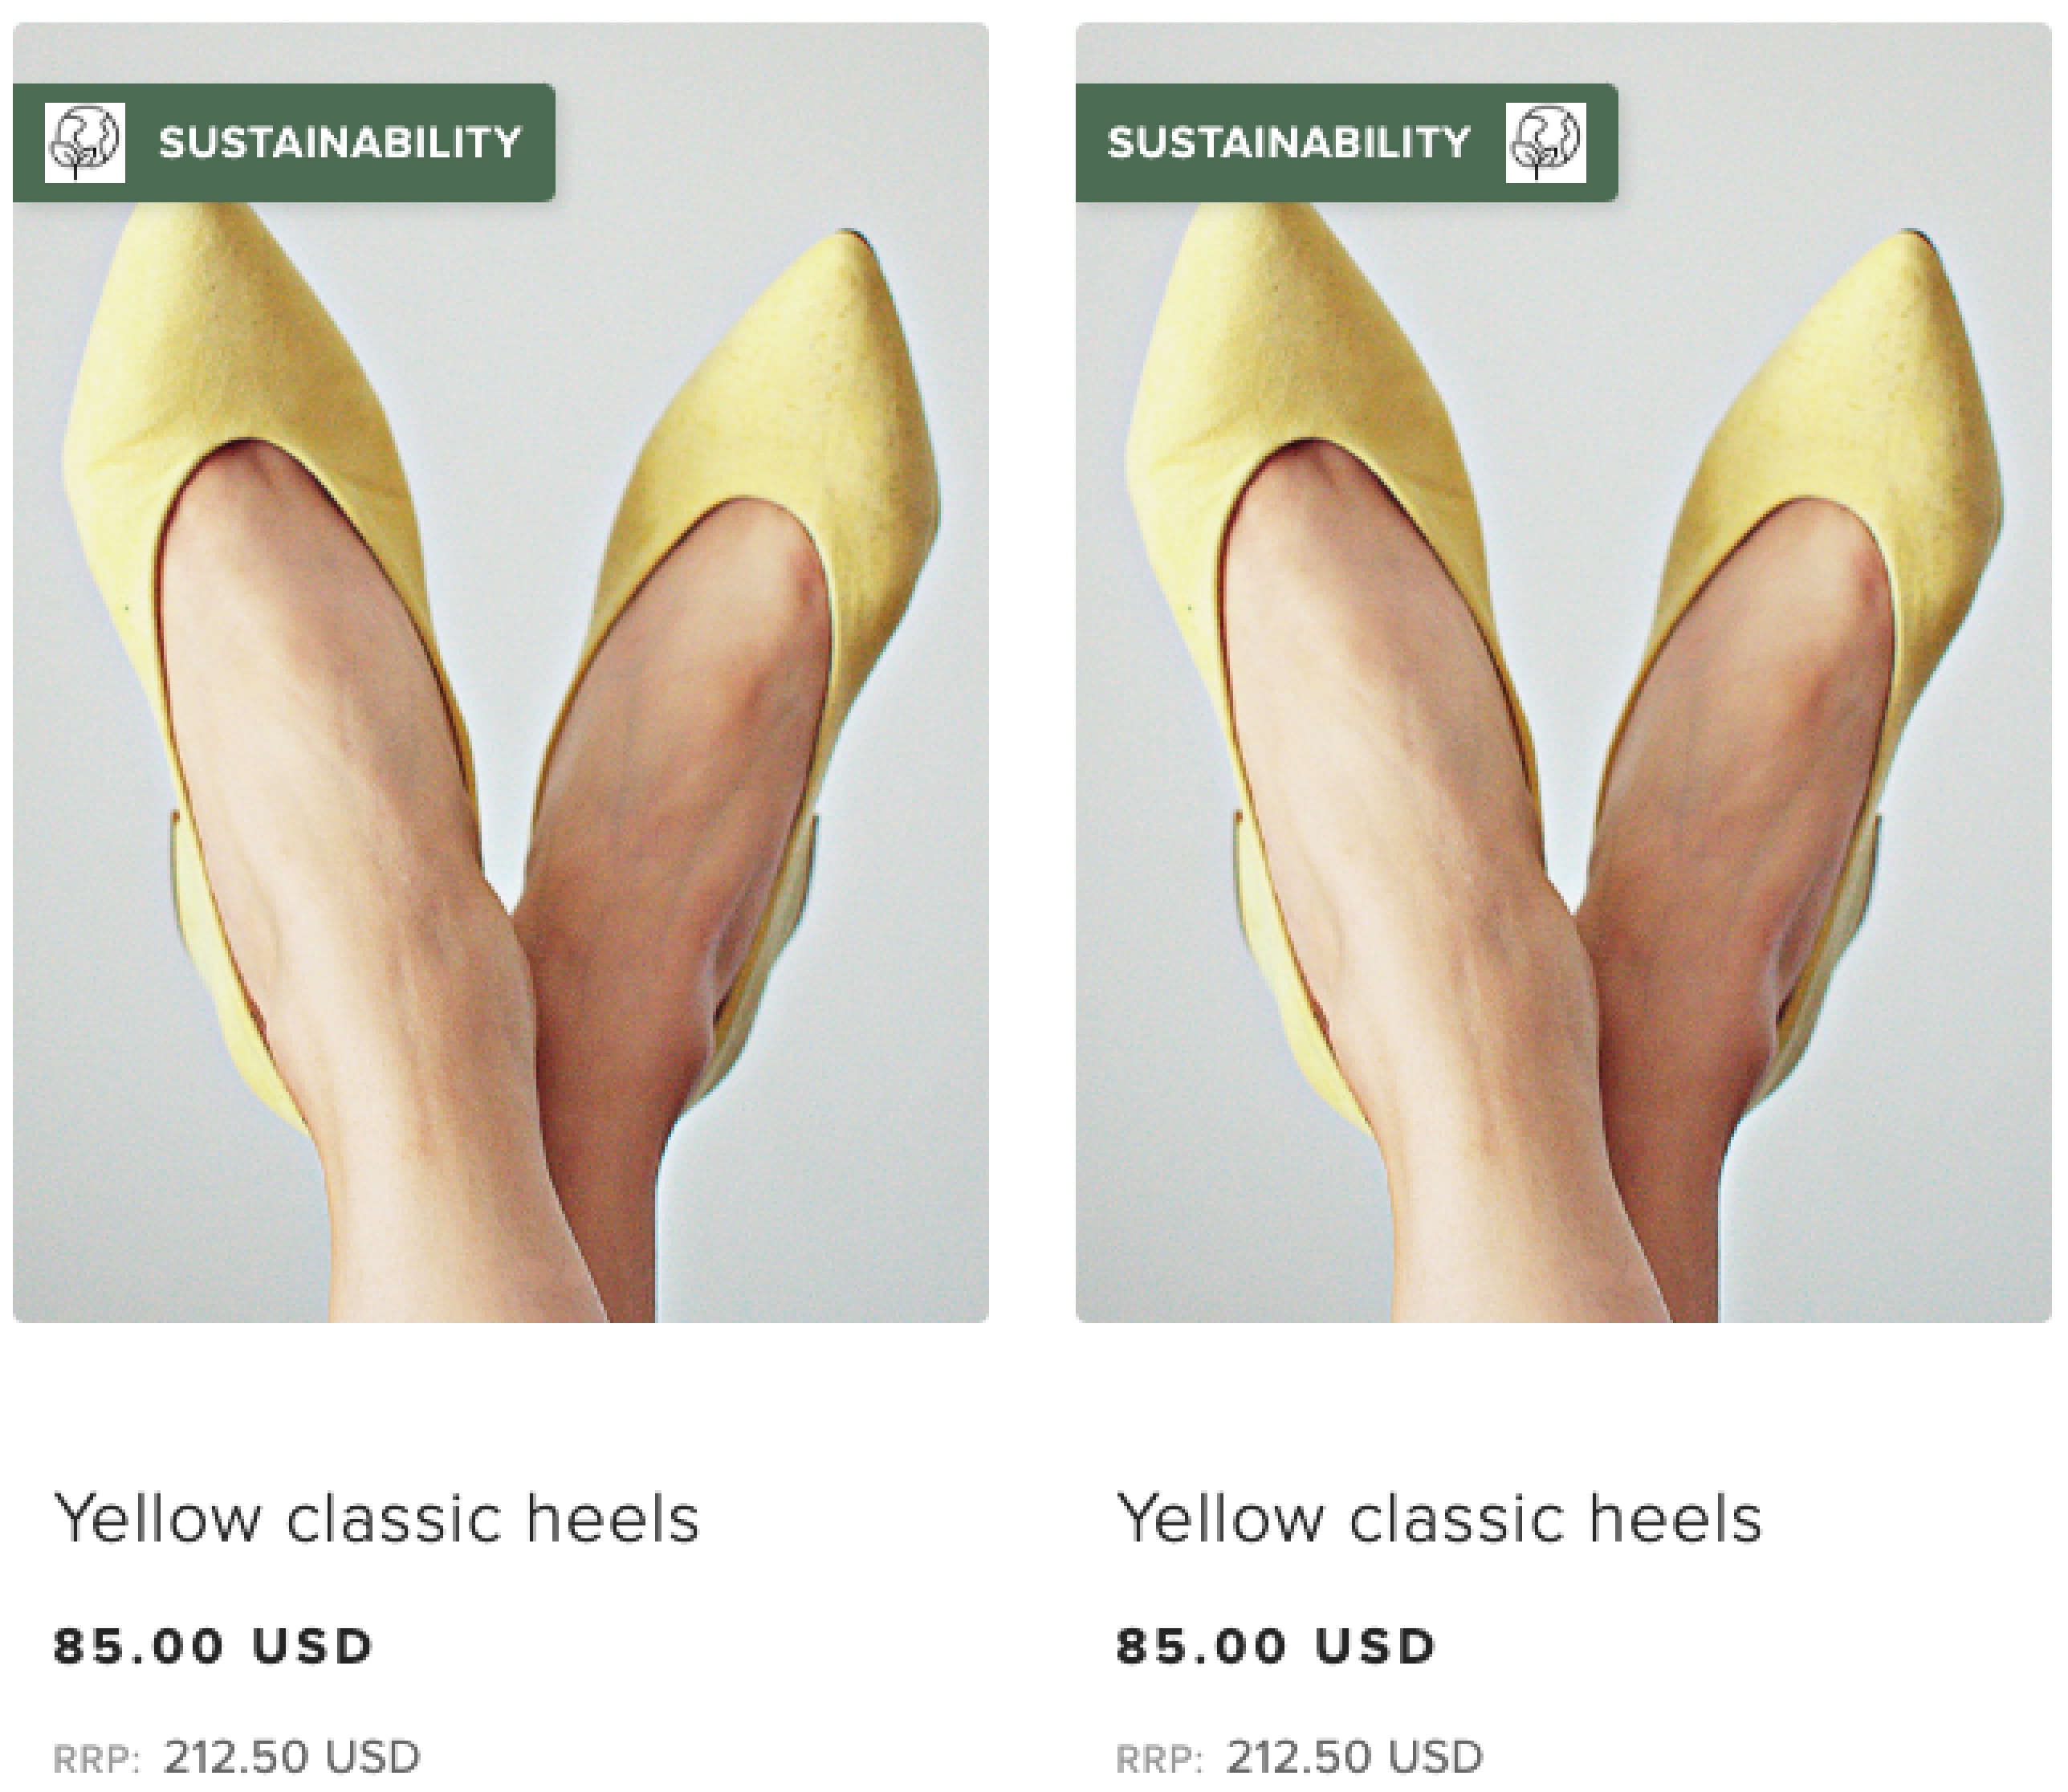
Image Placement - Choose whether the uploaded Image should be shown before (left) or after the text (right) - as seen in the image below. Note that you can skip this setting if no image is uploaded, or image is uploaded but without text.
- Image - Click on ‘Change’ and upload the image you’d like to be shown on the product when this Custom tag is selected. It is recommended to use svg format, however, jpg, jpeg and webp are also supported. Note that a 5x padding is added to any uploaded image, so it’s best to not use padding within the image itself. Lastly, please use images with a background or dark content if you wish to display the Product badges in the filters view which is white.
-
Click 'Save'
You can add the ‘Showroom Custom Tag’ attribute in the Product filters through the respective Showroom plugin setting and the image is also displayed there.
How to add the Showroom Custom Tag on products
You can assign Showroom Custom Tags on each product manually or on multiple products through the Product Import. Let’s explore each way:
Add Product badges to a single product
- Go to the specific product under 'Products' in the main menu to the left
- Click ‘Edit’
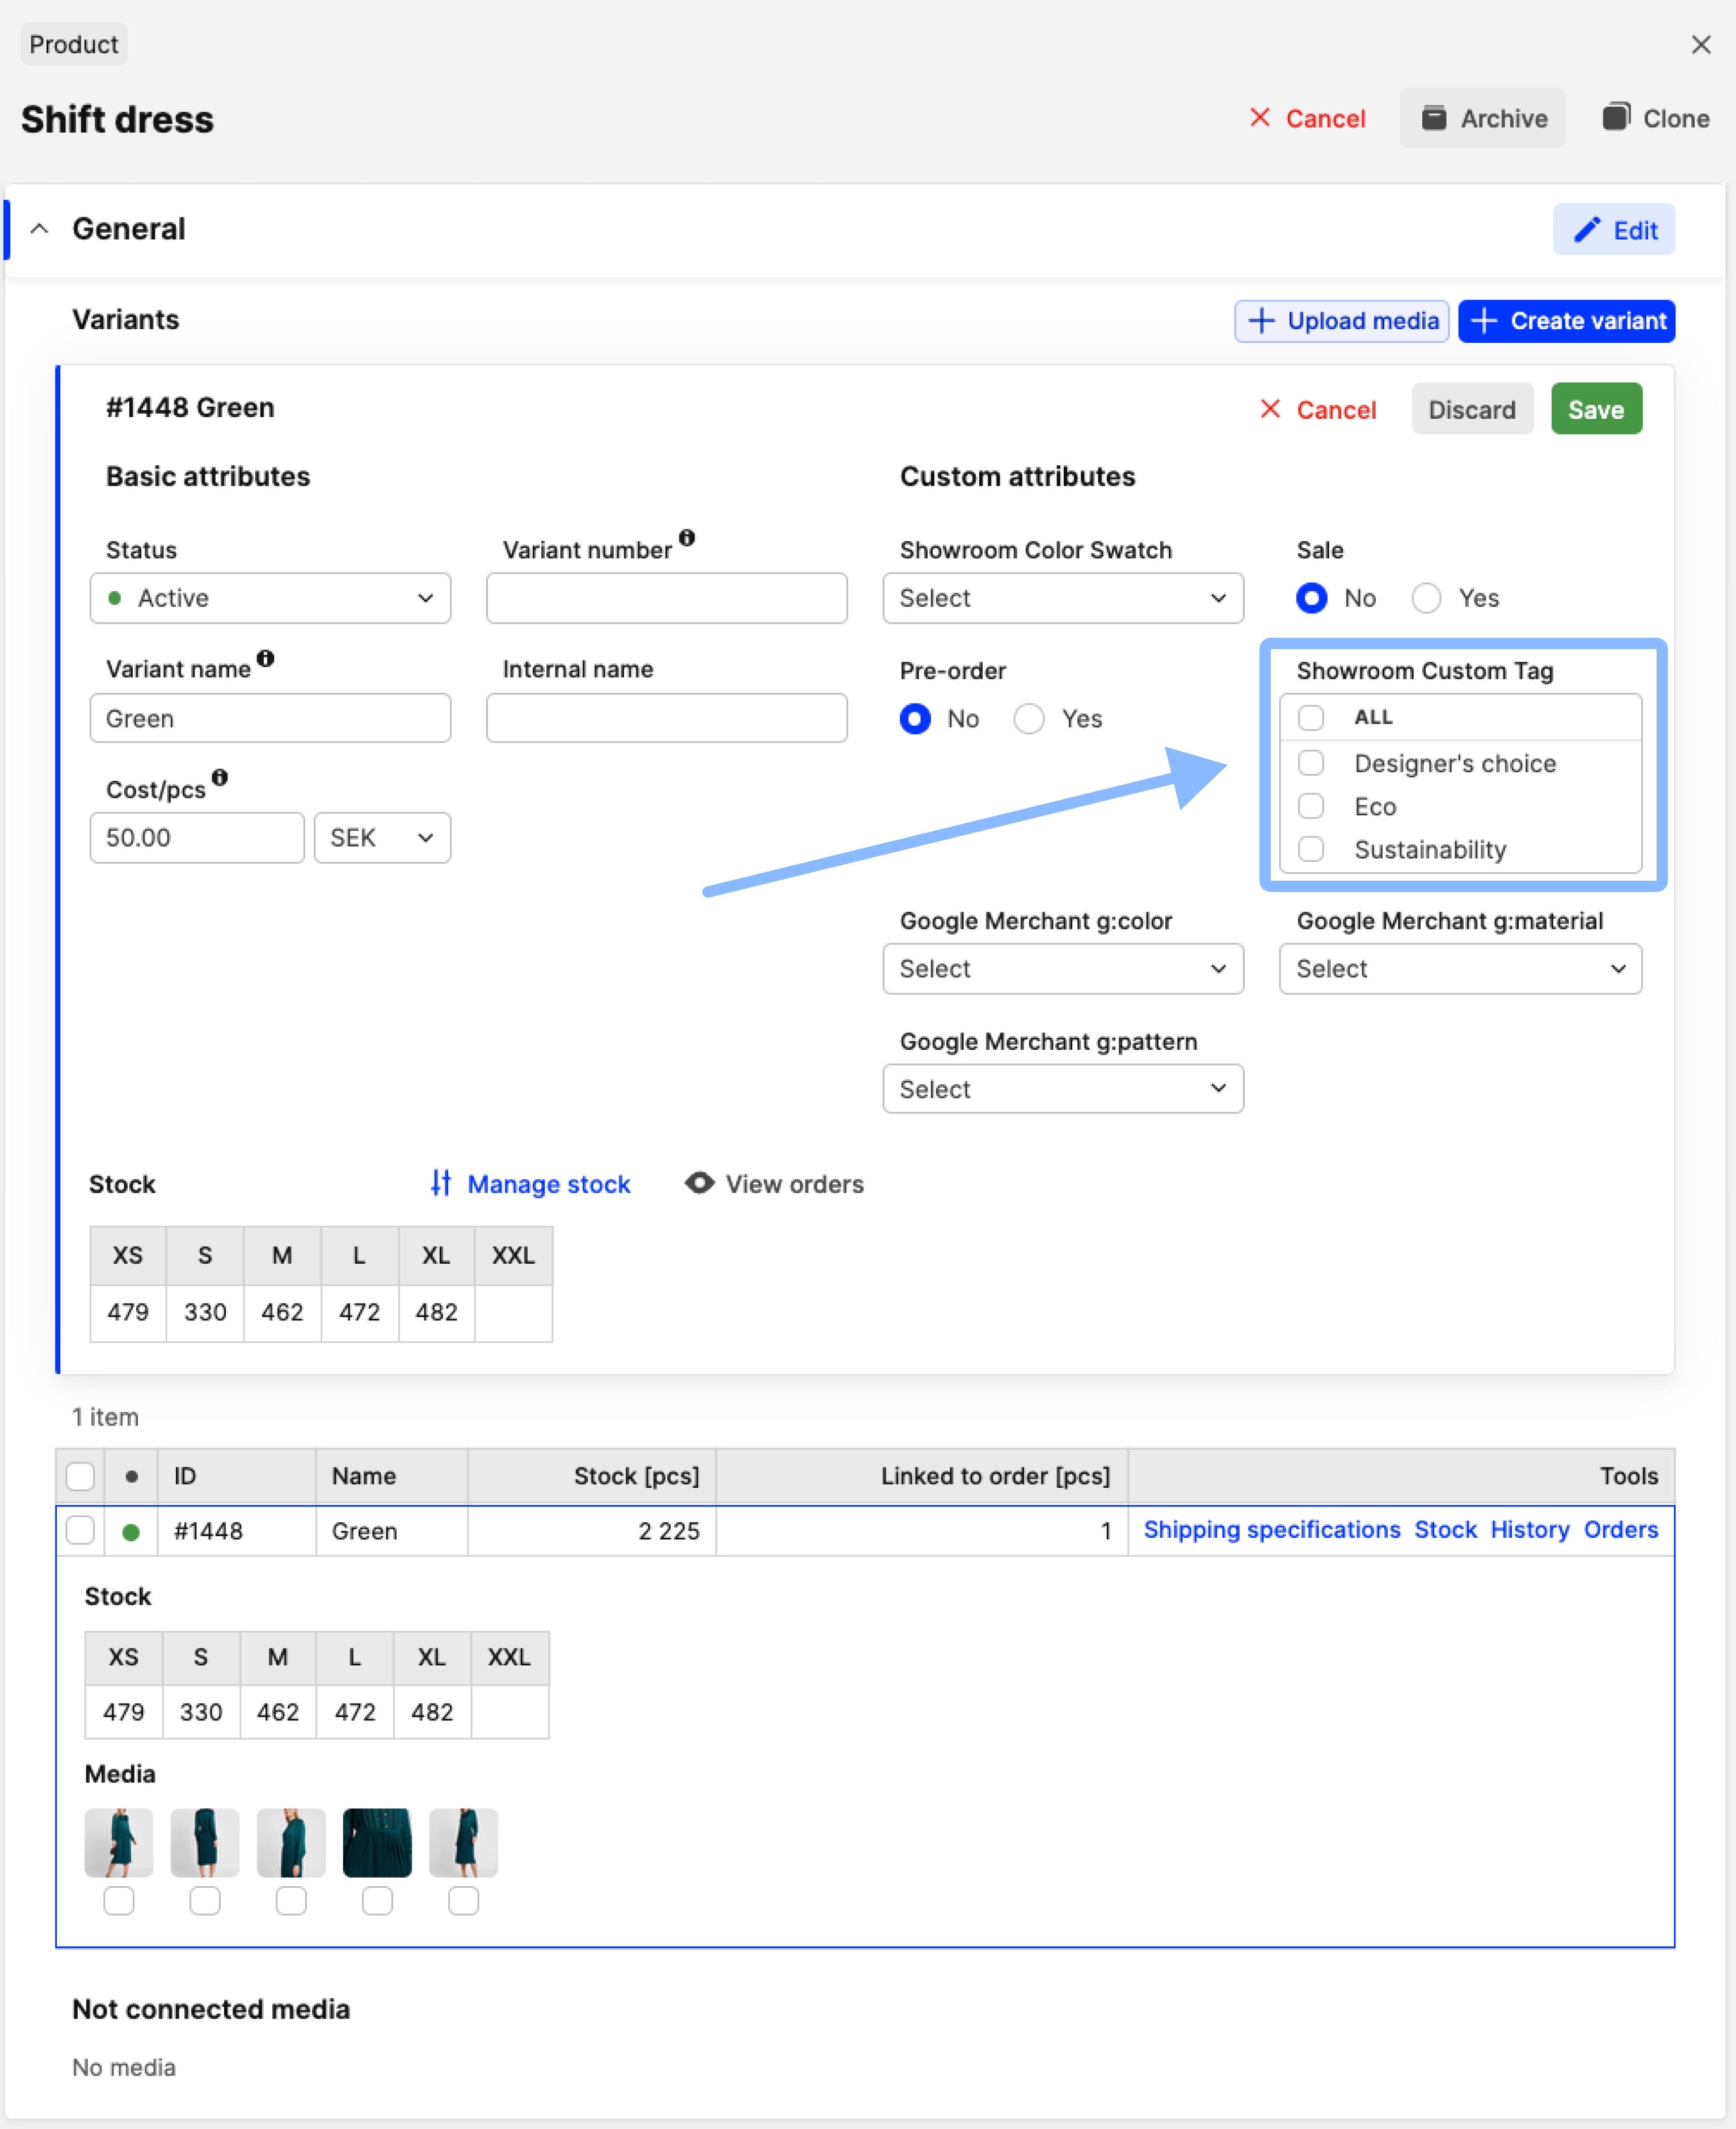
- Click on the variant, to see the variant details
- Select the badge from the ‘Showroom Custom Tag’ dropdown menu
- Click 'Save'.
Add Product badges on multiple products through the Product import
- Start by performing a Product export to export specific products or the whole product catalog. You are targeting a variant specific field in this update, so you can set the ‘One row for every size’ to No, since sizes are not needed
- The Product import scenario found here, shows which columns are required as a minimum to update variant specific fields on a product. In the export file, use the column ‘Attributes - Showroom Custom Tag’ to update the attribute. Insert the name of the badge you would like to add to the variant
- Once your file is ready, save it in a .csv (UTF-8, comma separated) format
- Click on 'Products', then 'Import' and follow our Product import instructions
- Click 'Import'
- Review the crosscheck to make sure all rows looks correct and that the right product was mapped
- Click 'Save' to complete the import.
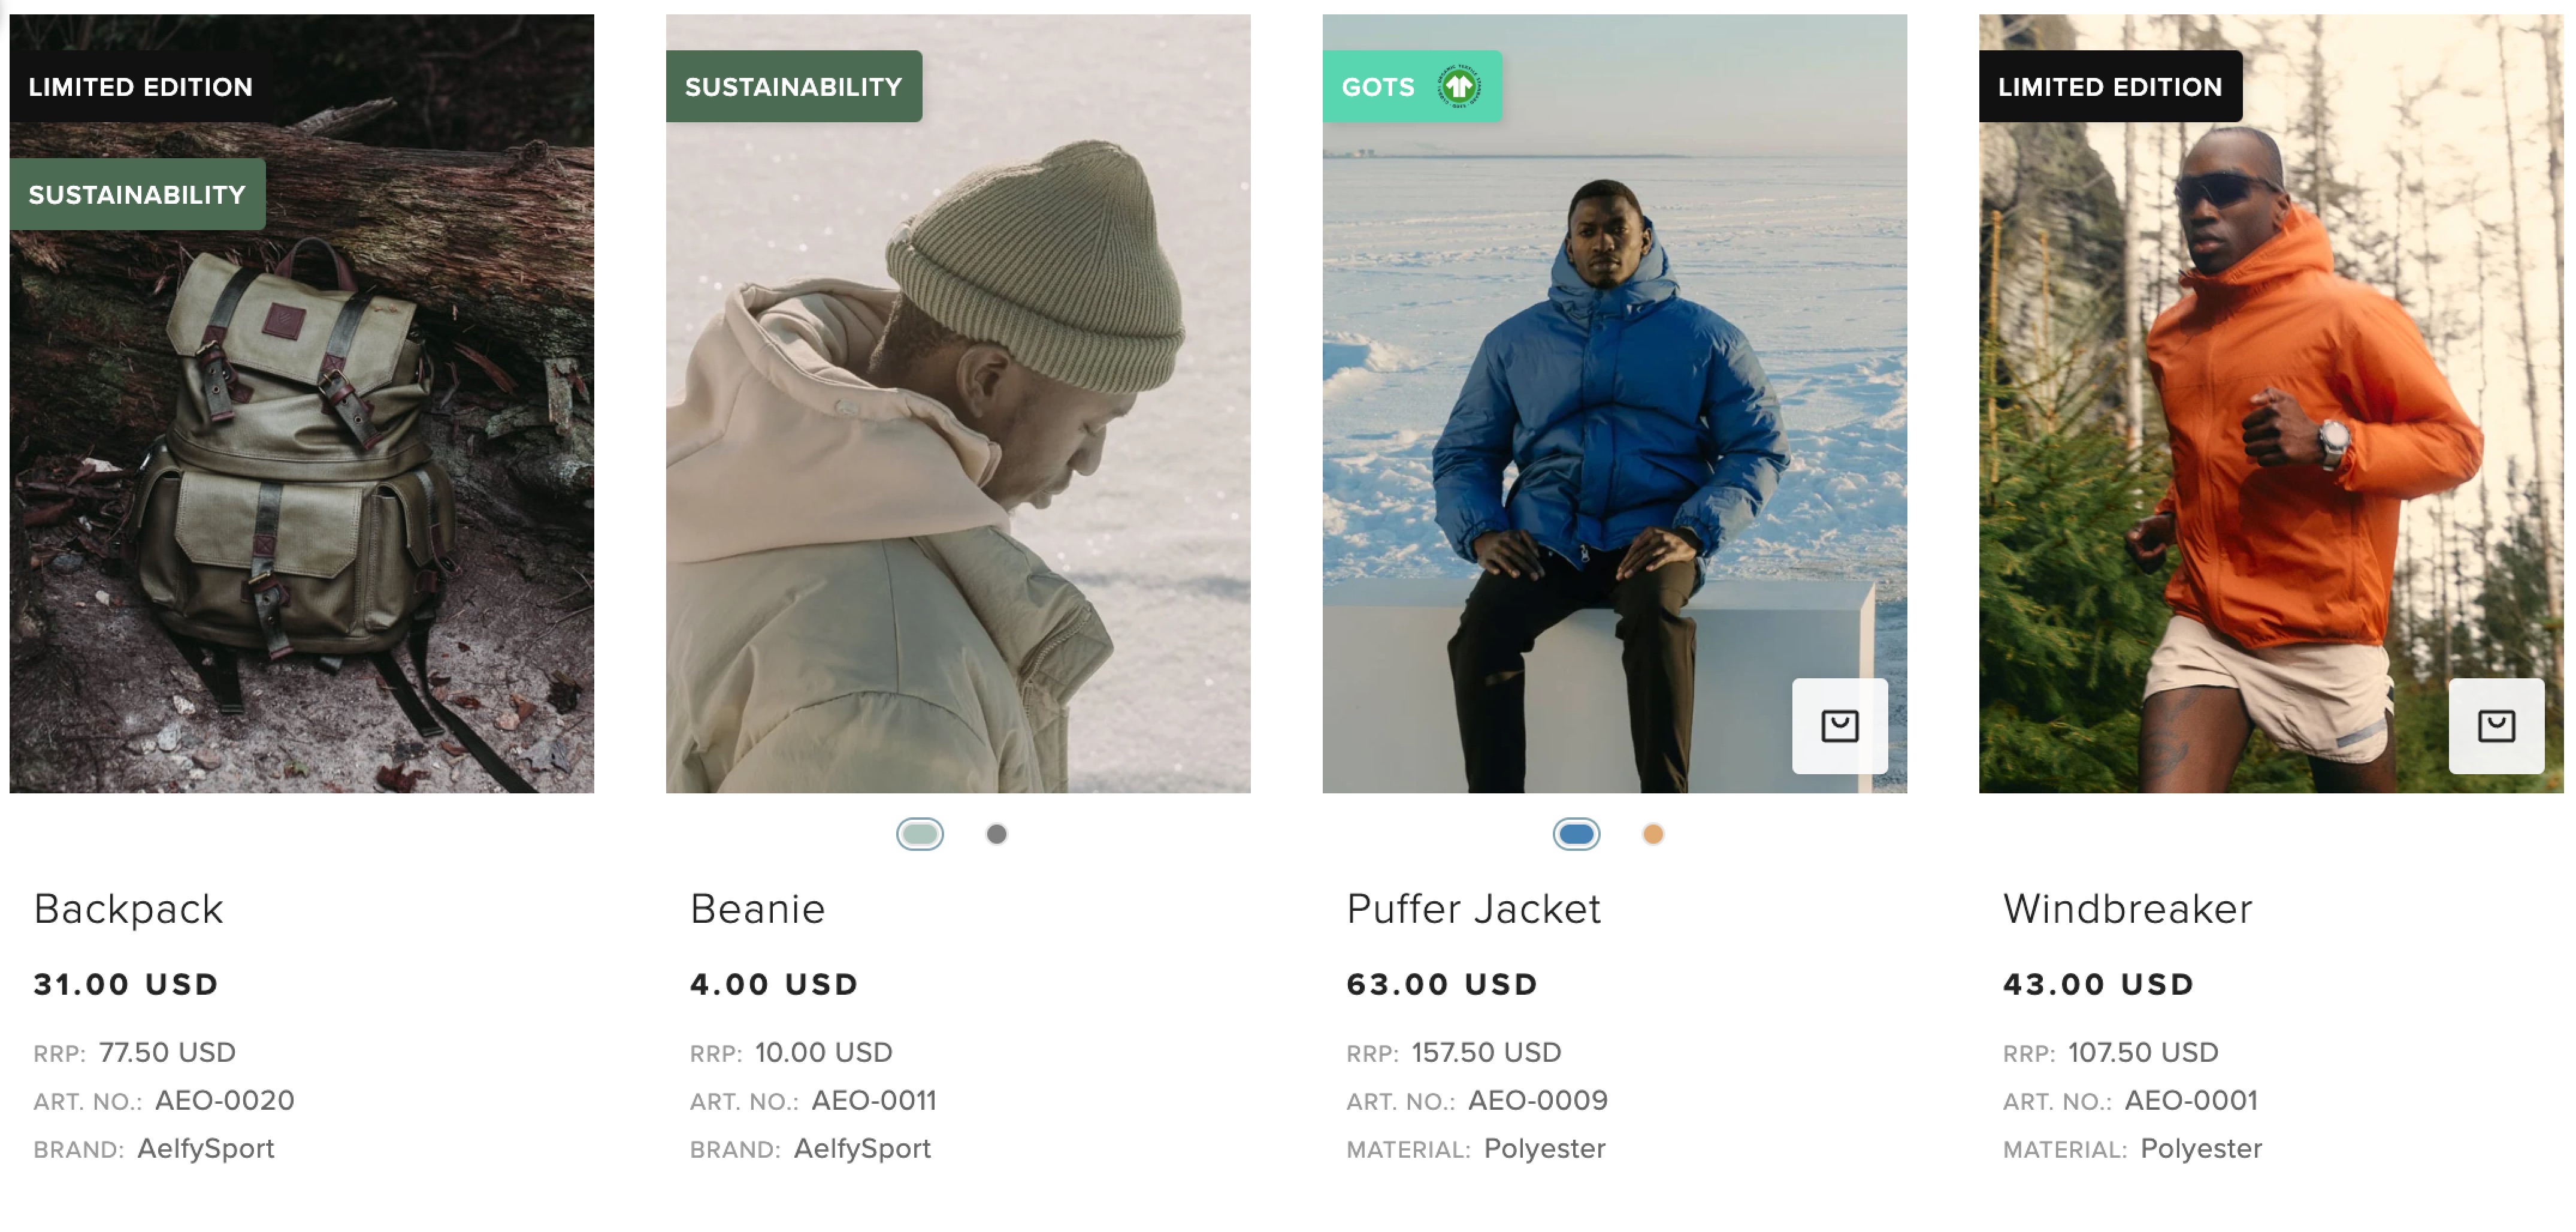
The variants are updated with their custom badges. See examples of the badges displayed in the Showroom below: