Import Selection csv in the Showroom
About this article:
This feature allows you to upload a csv file to the current selection in the Showroom and perform a bulk import, instead of manually adding products to the selection. Through the import you can decide to either override the present quantities or add them on top. If your buying process involves using spreadsheets to place orders, this feature will make it smoother and faster.
How to activate the Import Selection feature in Centra
This feature needs to be activated from your Store setup first. Follow the step by step below to activate the feature:
-
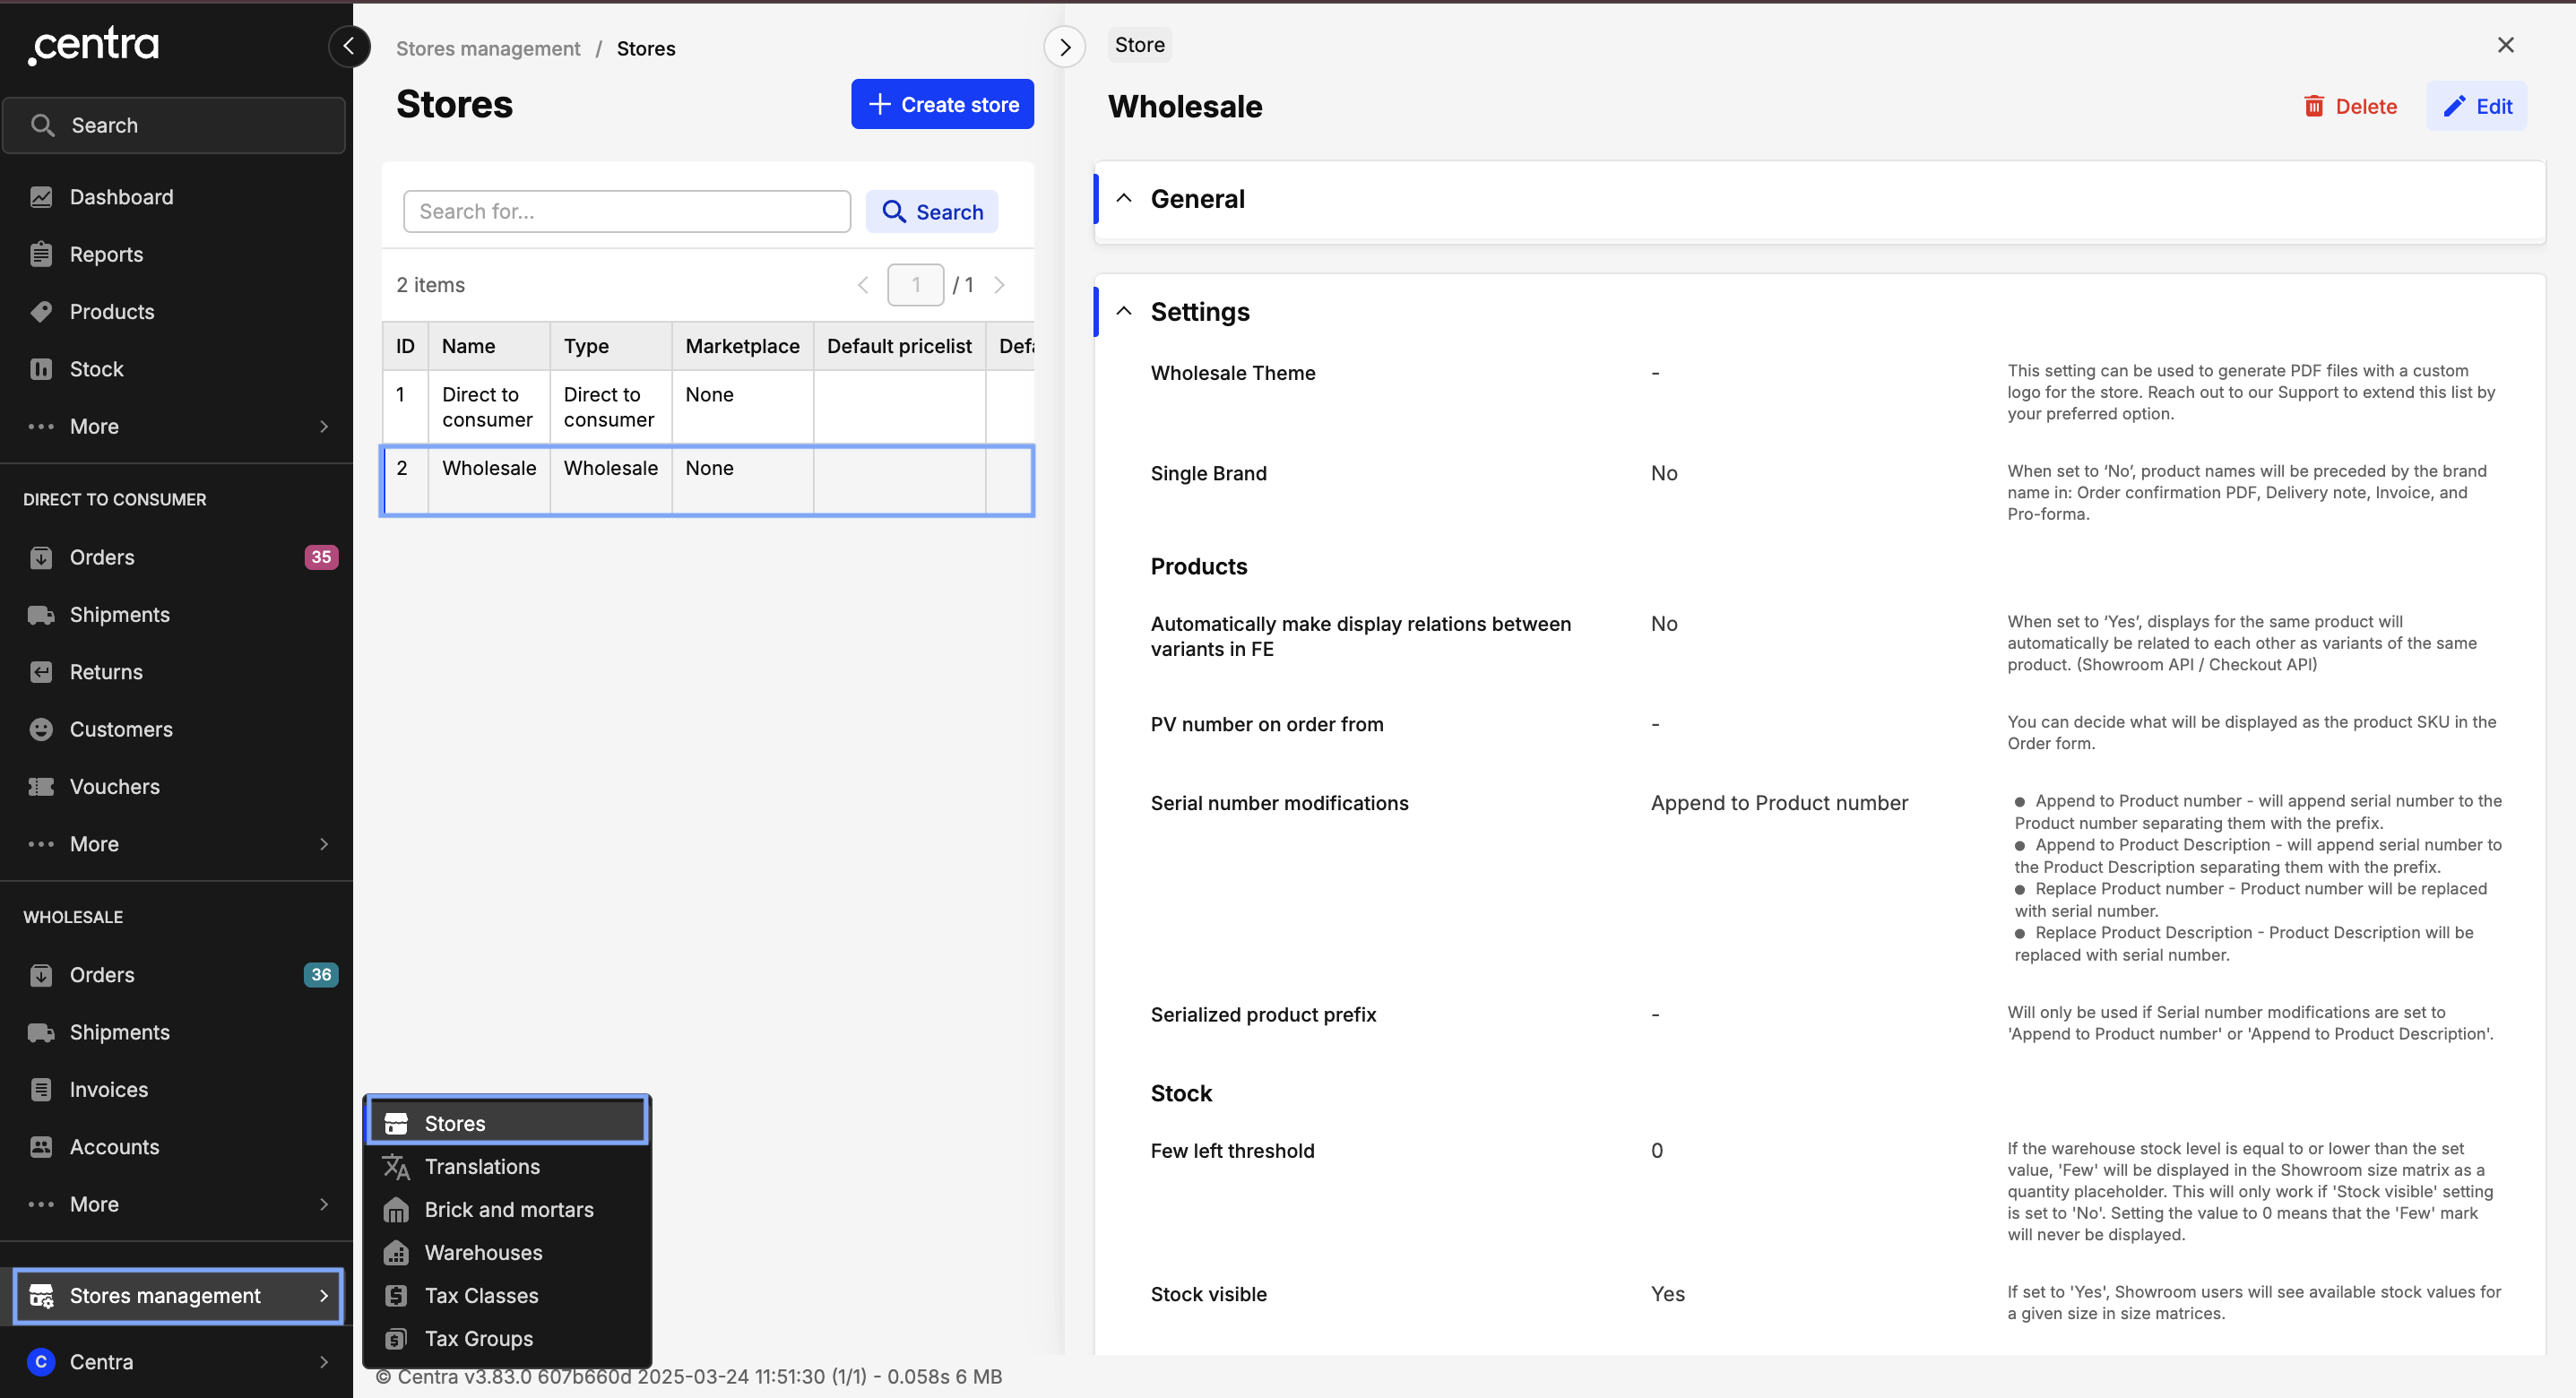
Go to Store Management > Stores > Select Wholesale store
-
Scroll down to Plugins > Showroom API > Click ‘View’
-
To activate the feature on your showroom, set ‘Allow importing CSV to update selection’ to ‘Yes’

-
Then click ‘Save’ to save the changes
How to access the import selection feature
-
In the Showroom, click on the side menu and ‘Selections’
-
Choose a selection
-
In the bottom menu, click on the ‘Import selection .csv’ as seen below:
-
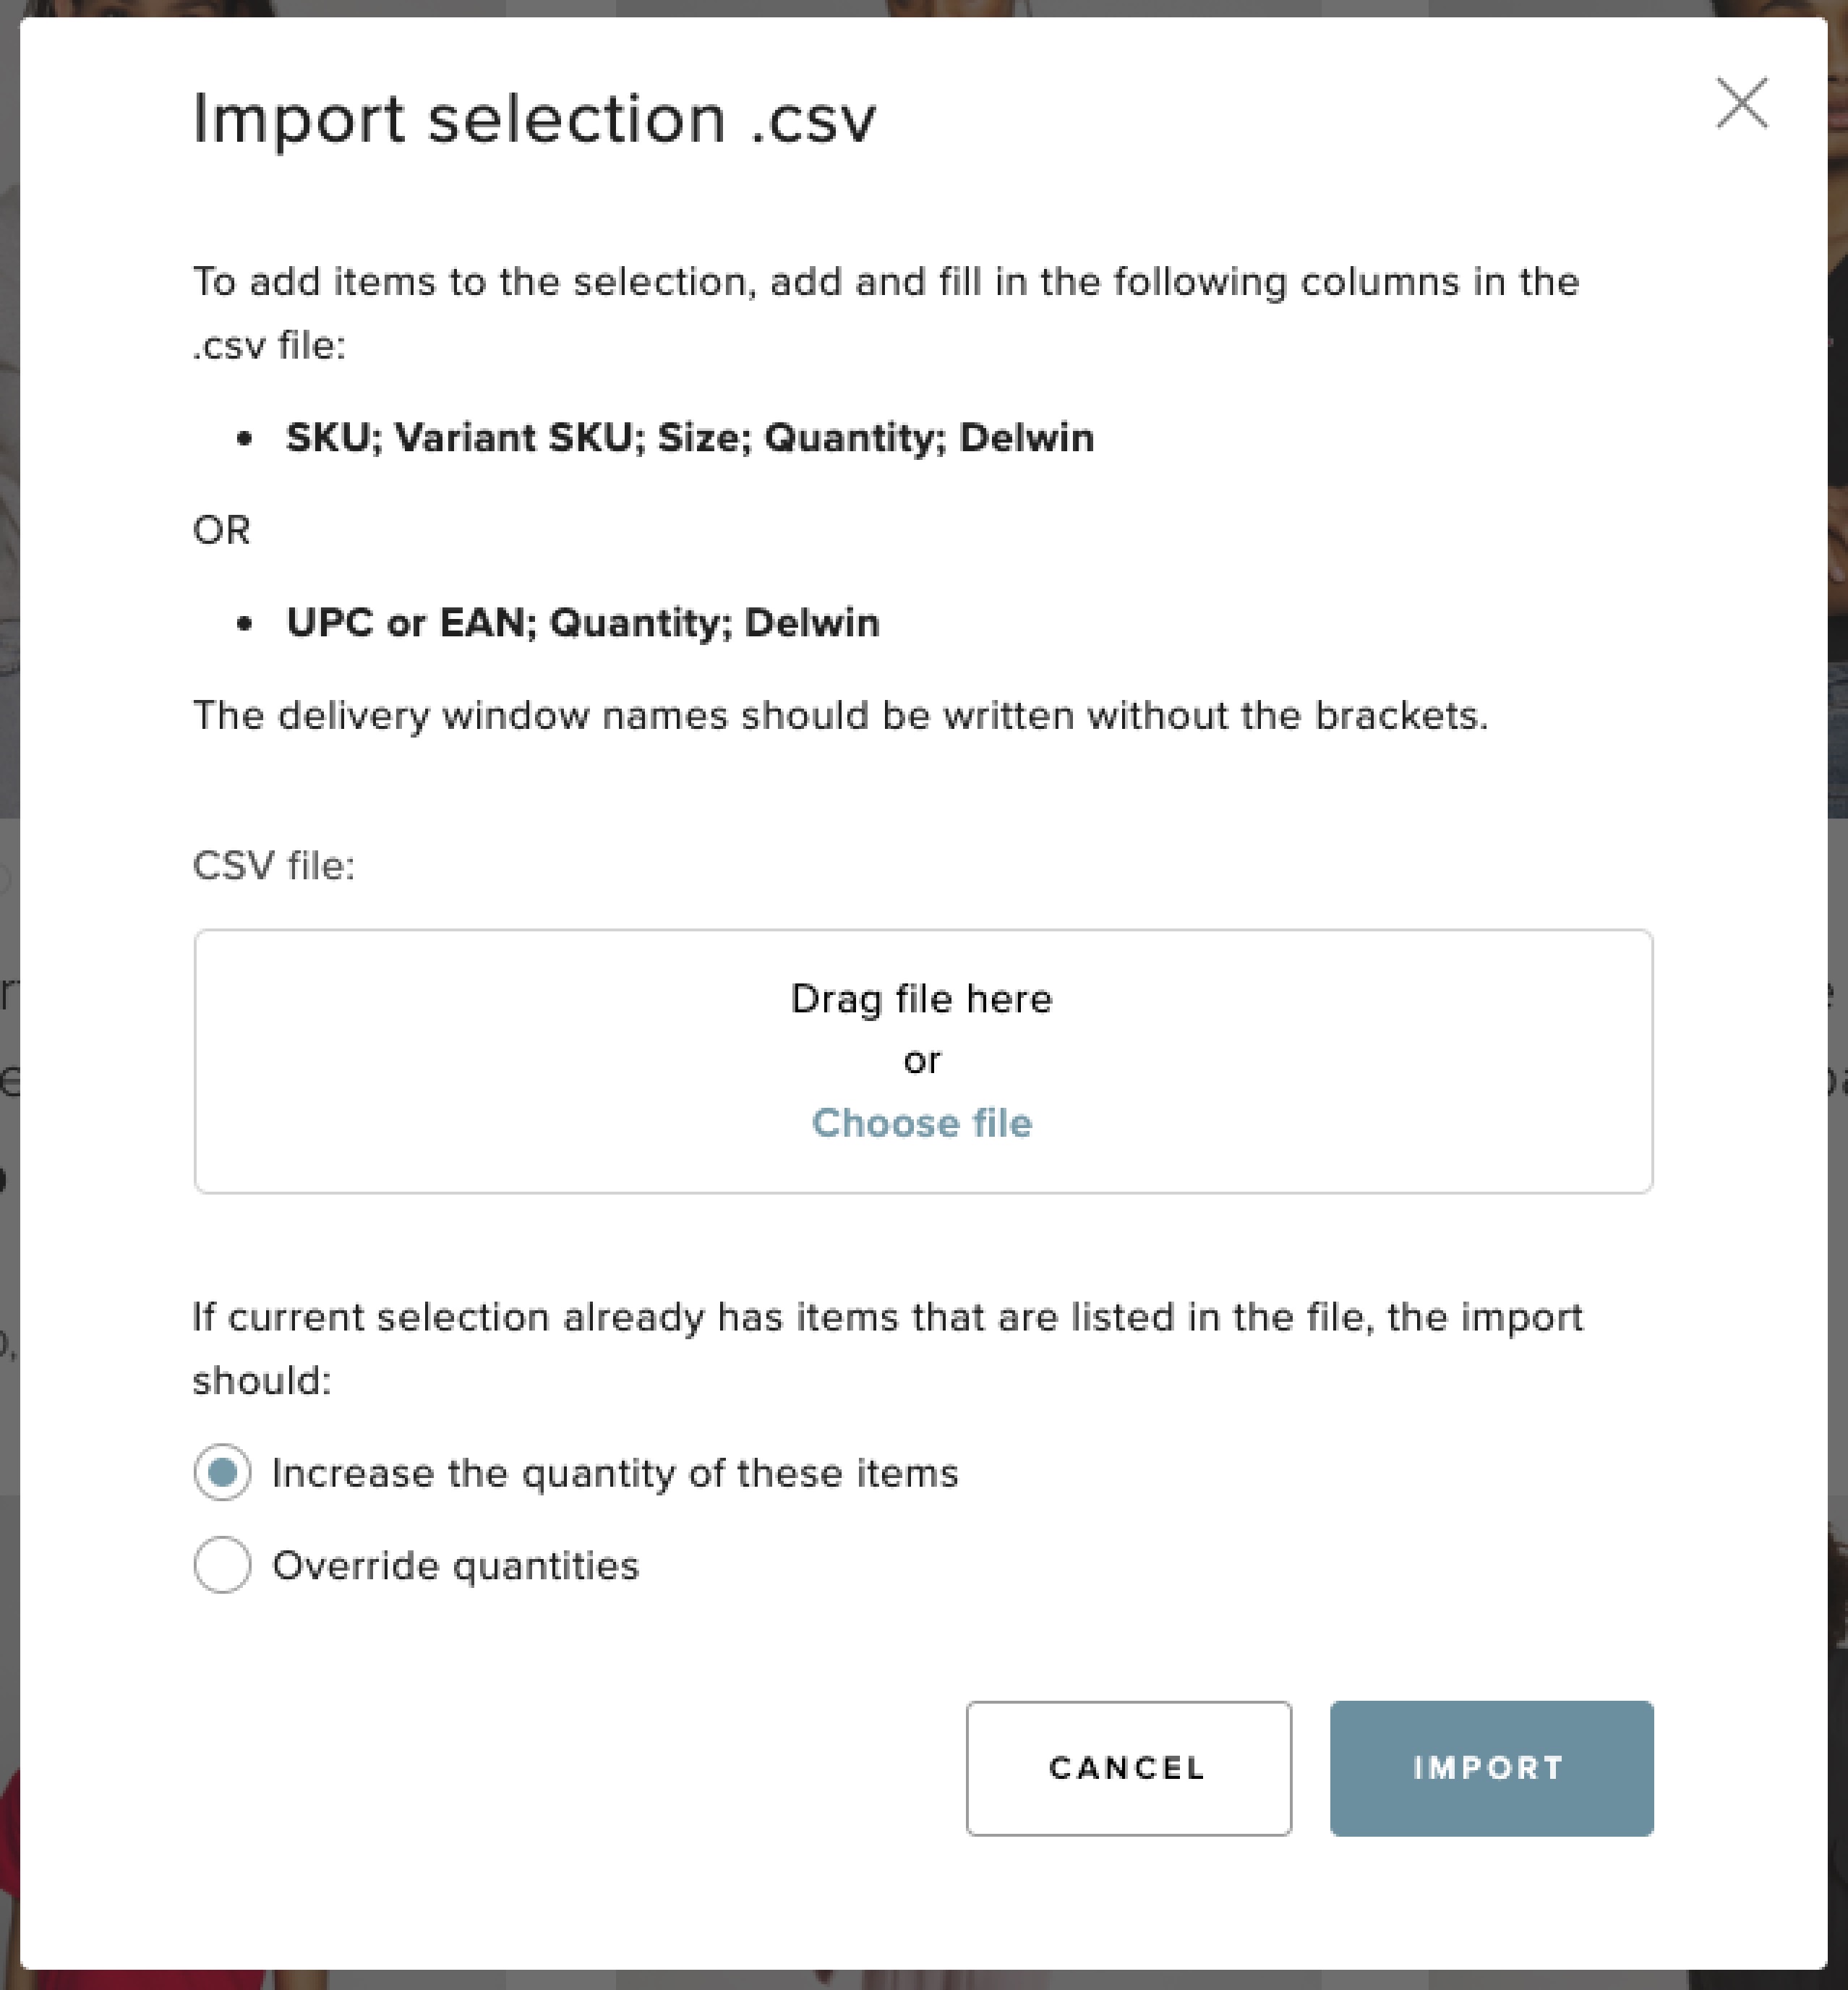
The following pop-up appears:
-
Prepare the import file following the instructions in the pop-up. There are two ways to structure the import file:
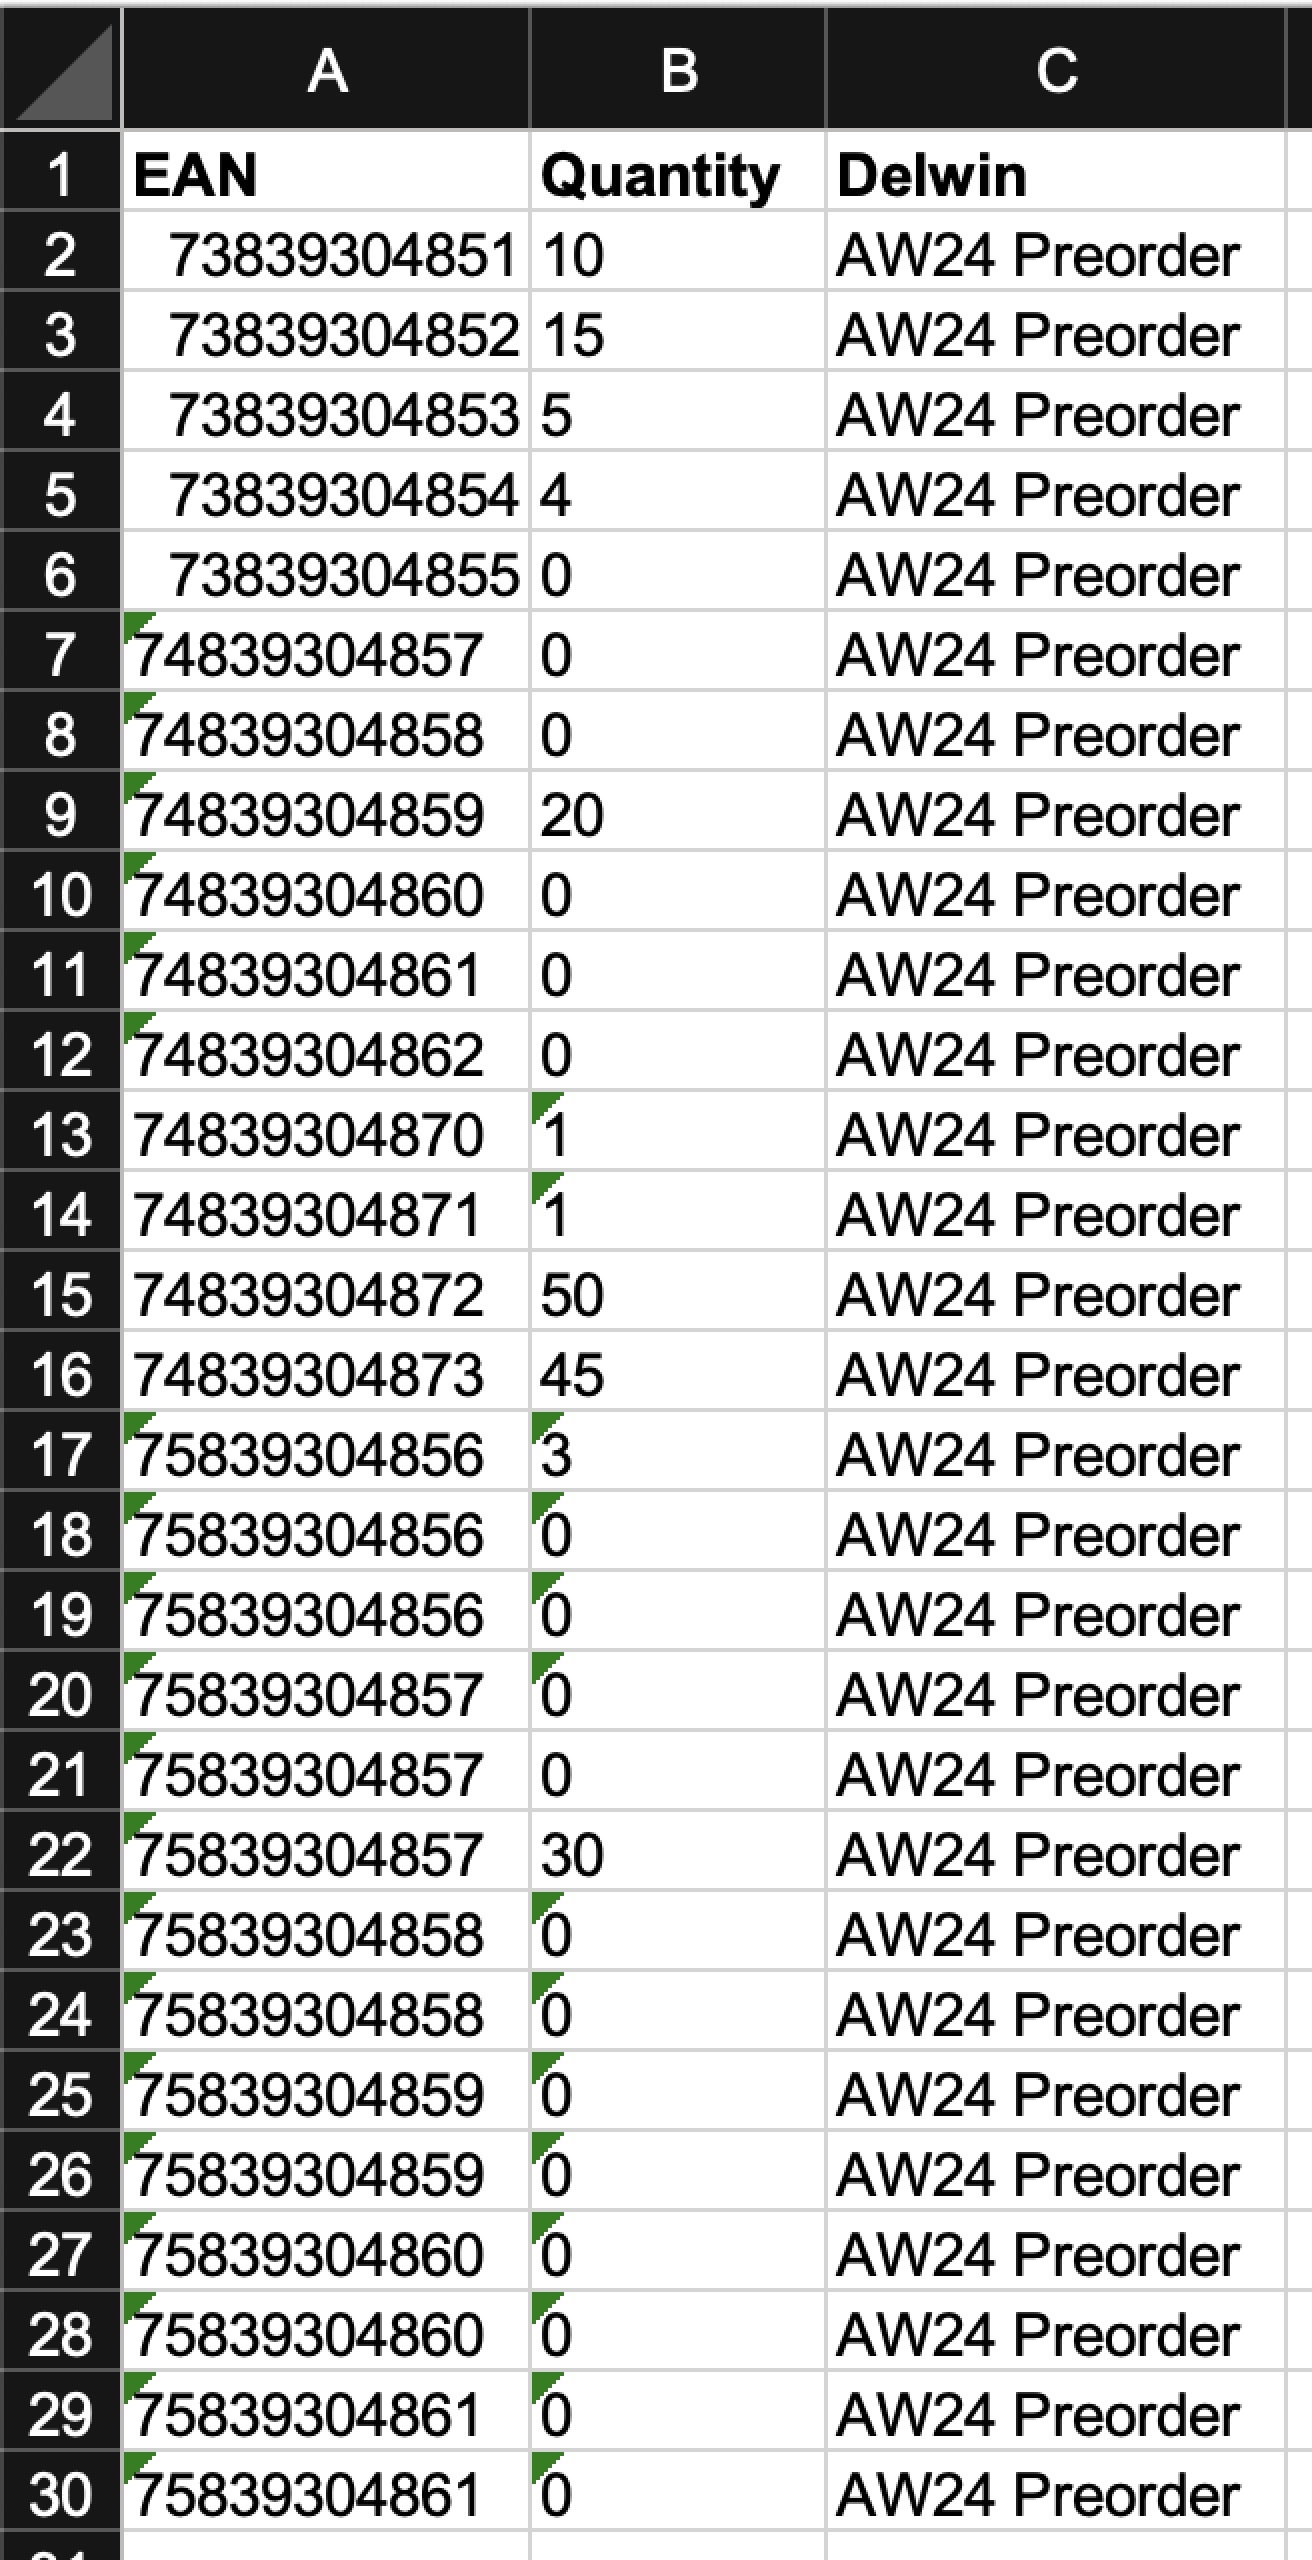
- SKU; Variant SKU; Size; Quantity; Delwin *
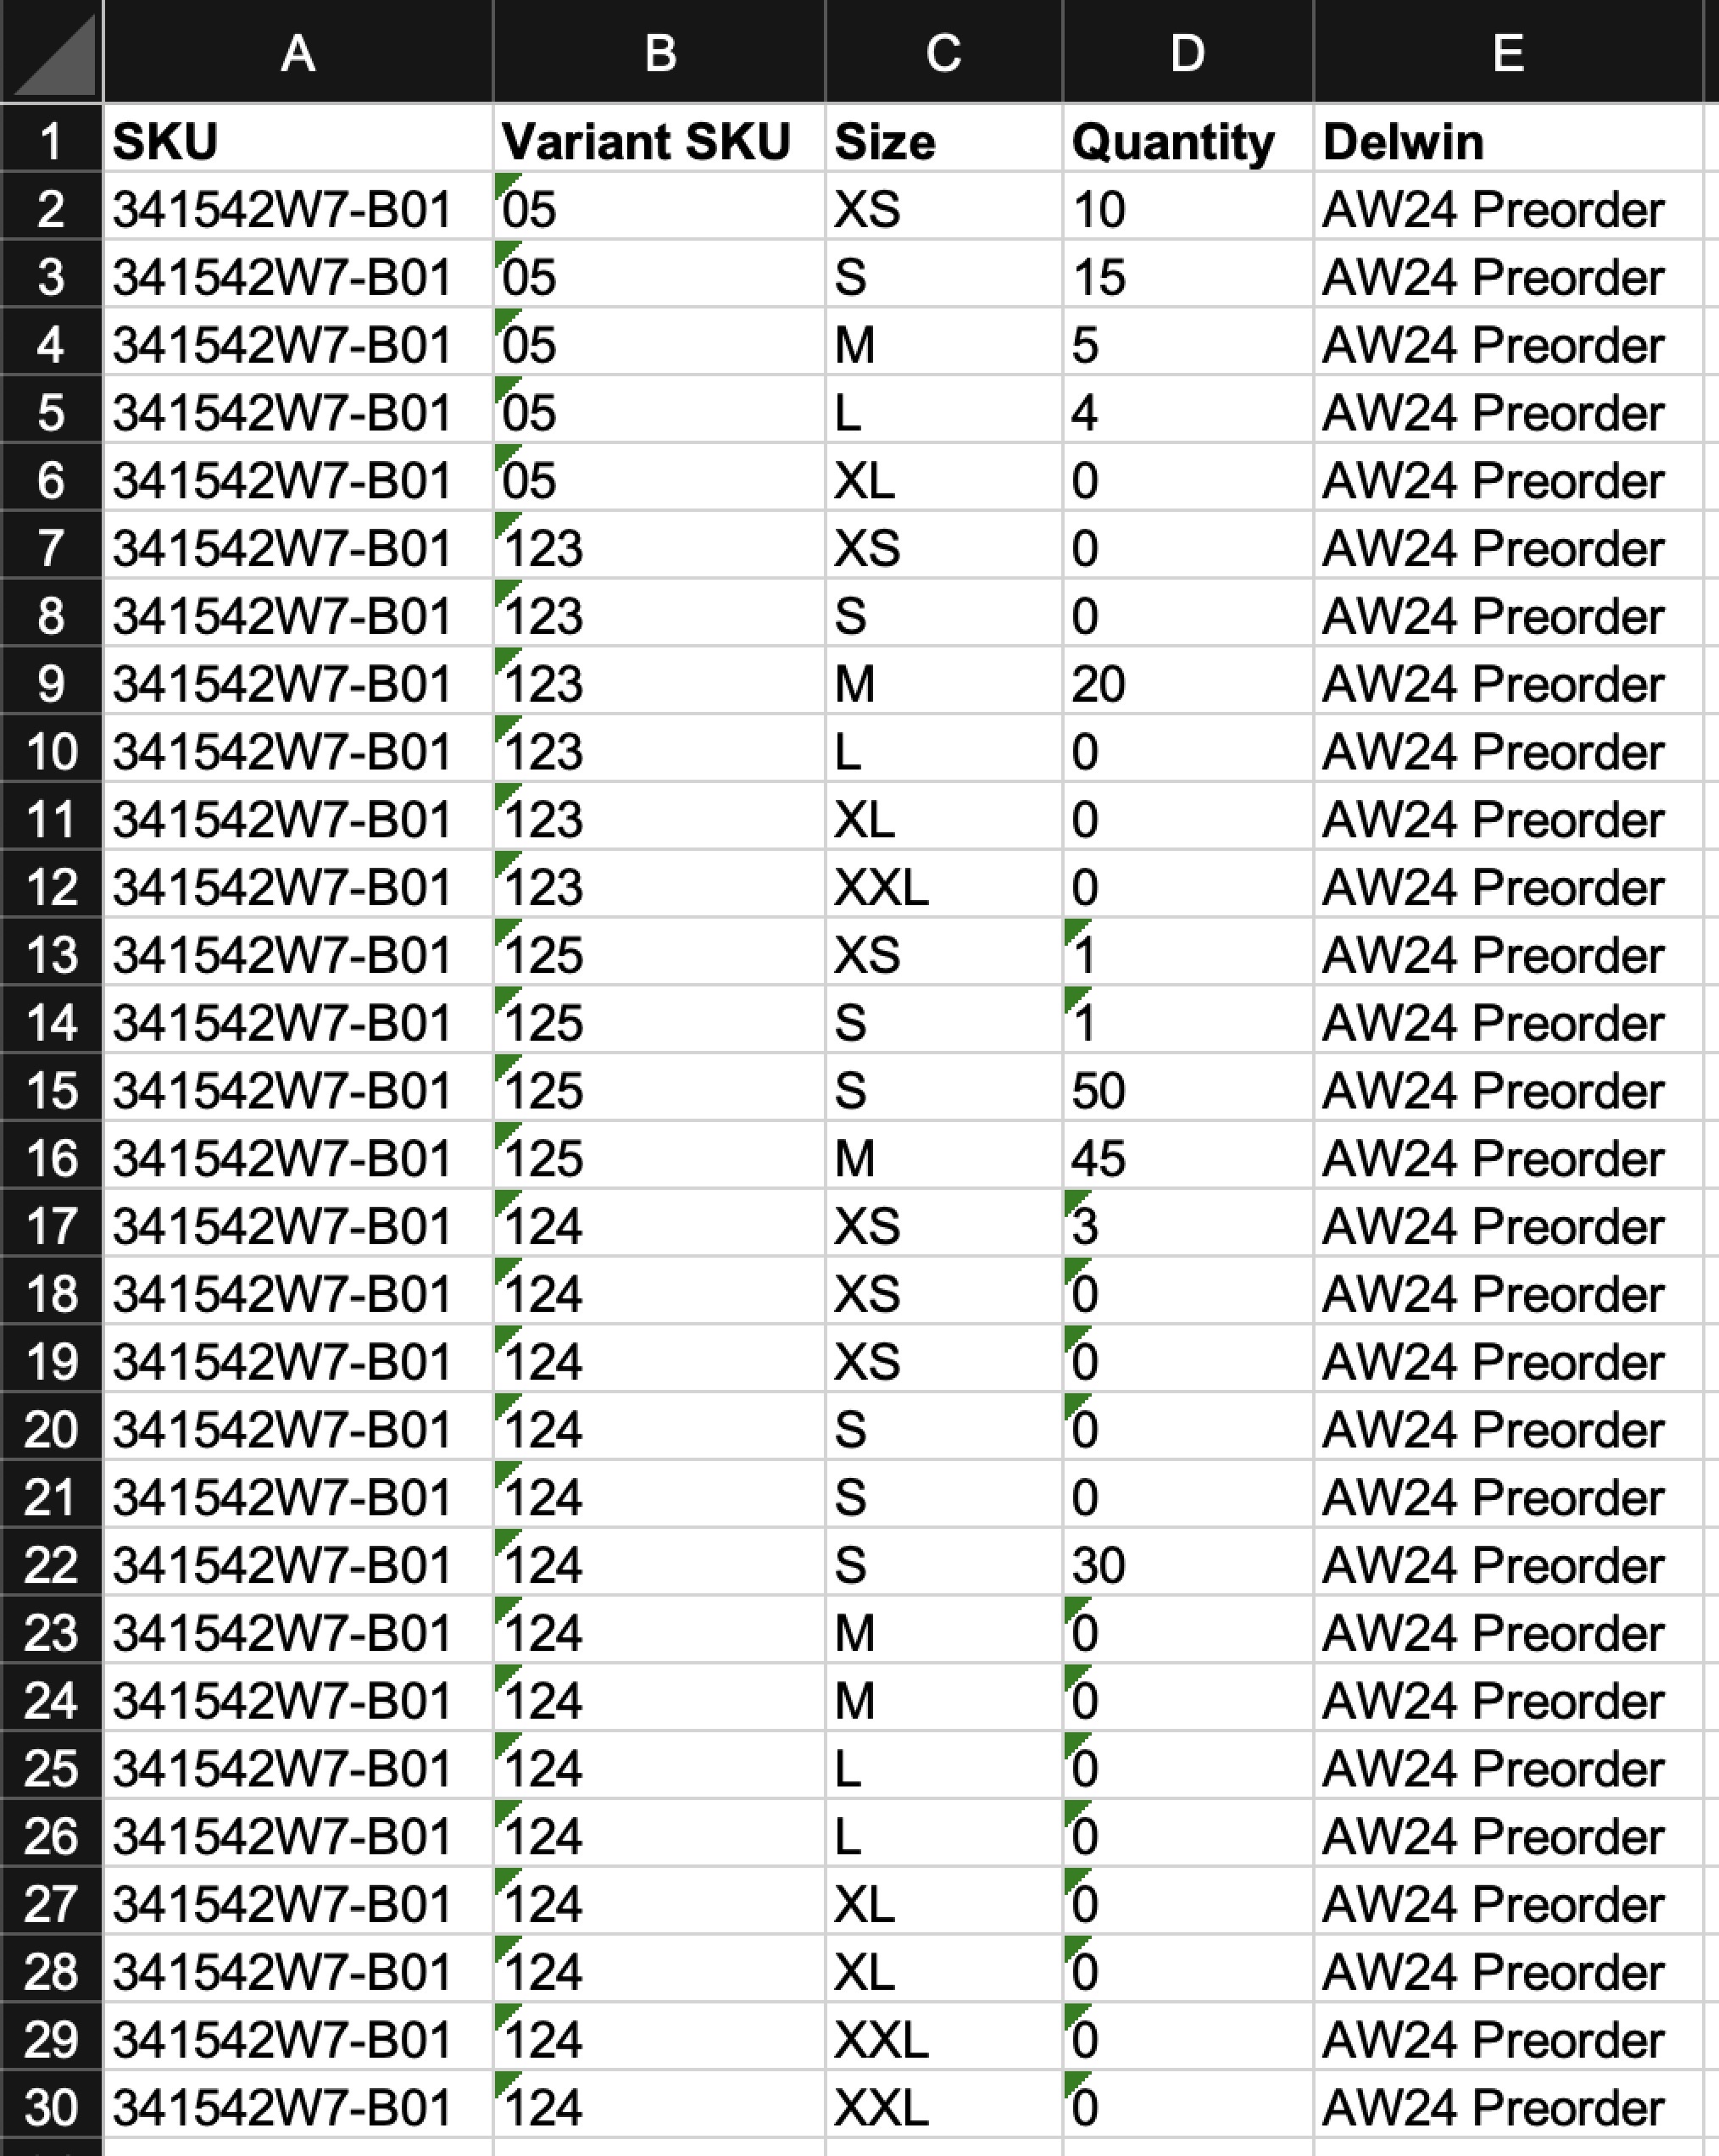
- UPC or EAN; Quantity; Delwin *

- Delwin stands for Delivery window. Please insert the name of the Delivery window.
If you prefer using a sample file instead of creating one from scratch, add a product and quantity to your basket, go to 'Selection,' click the download icon, and select 'Product Information.' This file may include columns like SKU, Variant SKU, EAN, UPC, and Quantity (depending on your selected Product Information data), which you can use as a template. Remember to delete any unnecessary columns.
-
Once the file is ready, save it as csv
-
Upload it by clicking ‘Choose file’ or dragging it to the respective part of the pop-up
-
Select how the import should work between the two options below. Note that this setting is only relevant if you already have some products in your selection and wish to modify/increase their quantity.
- Increase the quantity of these items - If some quantities have already been added to the selection, this setting adds the import file quantities on top. For example, if 2 pcs have been added to the selection and the import file has 3 pcs, the end result is 5 pcs
- Override quantities - If some quantities have already been added to the selection, this setting replaces them with the import file quantities. For example, if 2 pcs have been added to the selection and the import file has 3 pcs, the end result is 3 pcs
-
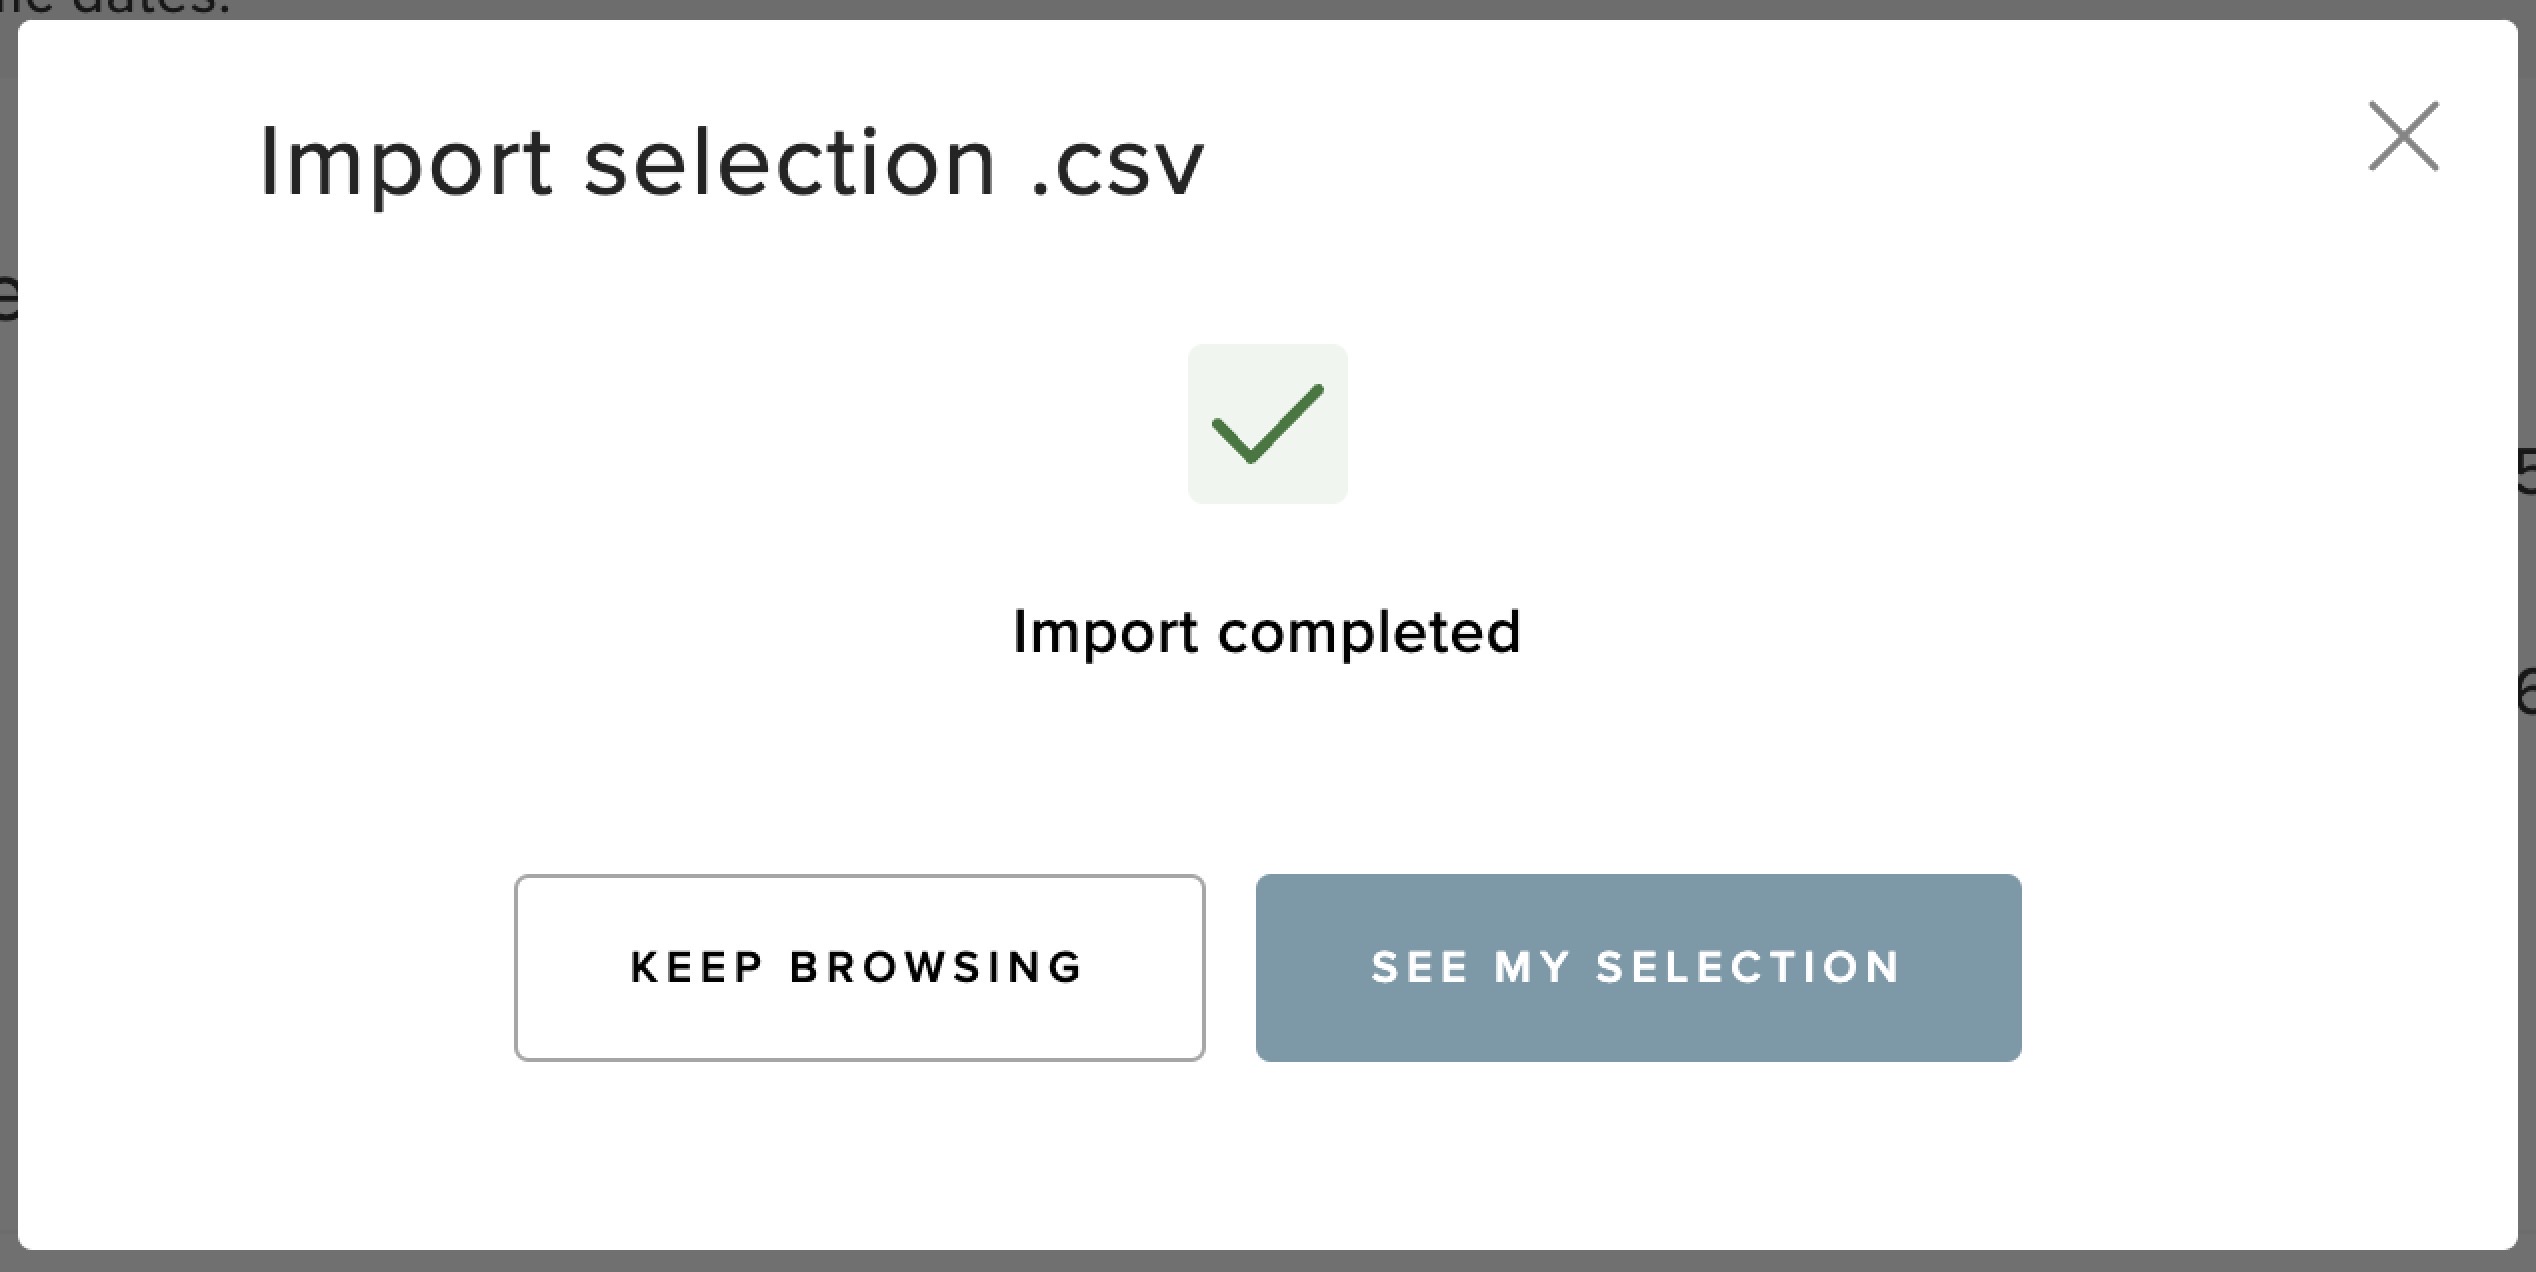
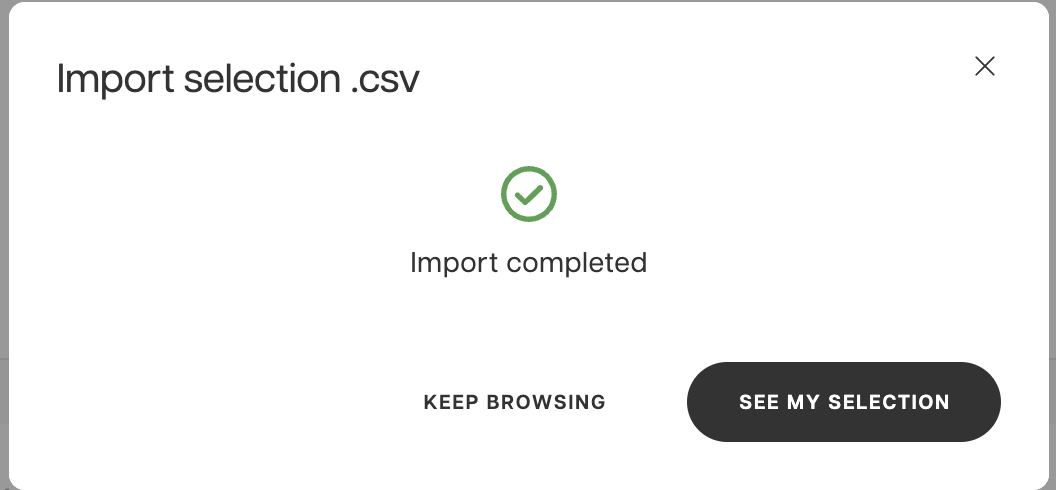
Click ‘Import’ to finalize the process. The following pop-up appears upon successful completion:
If the file is wrong (i.e. fields missing, incorrect data) or the import is not successful, an error message appears to inform you about what went wrong.
Note that the same feature is available in the Centra backend. Read more about this here.