Barcode scanner in Showroom
About this article
Barcode scanner is a Showroom feature that can significantly improve the shopping experience for users. By scanning UPC and EAN codes, buyers can search for specific products in particular sizes using their devices.
To activate the feature
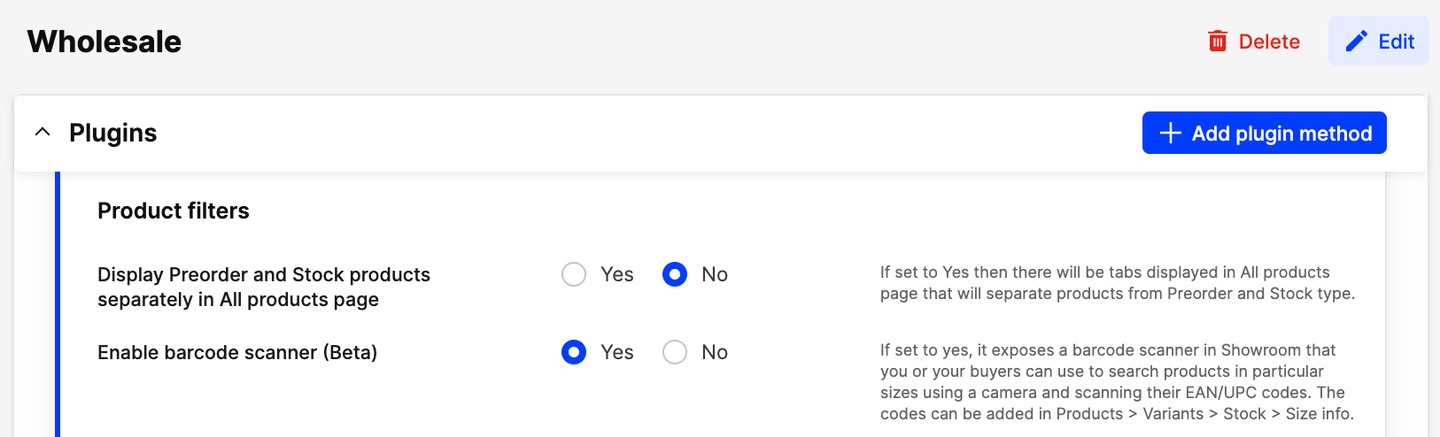
- Go to 'System' > 'Wholesale' > and open the 'Showroom plugin'
- Here you will find a setting called Enable barcode scanner. If set to ‘Yes’, it exposes the barcode scanner in the Showroom that you or your buyers can use to search products in particular sizes with a camera and scanning their EAN/UPC code on the item
Adding EAN/UPC codes to variant sizes
To make products recognizable by the barcode scanner, you need to add an EAN or UPC code to each specific variant size. Here is how to do it:
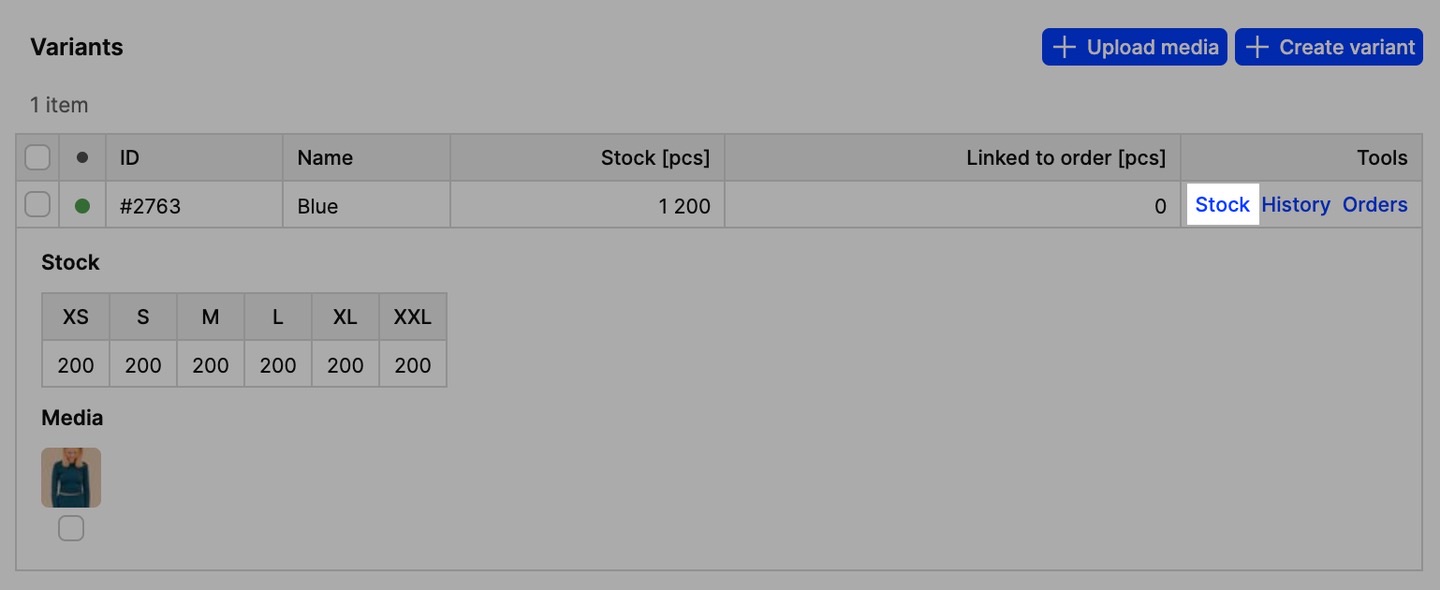
- Navigate to 'Products' in the main menu on the left
- Click on the product you wish to add EAN/UPC for
- Click 'Stock' in the 'Tools' section of the selected variant
- In the pop-up, click 'Size info'
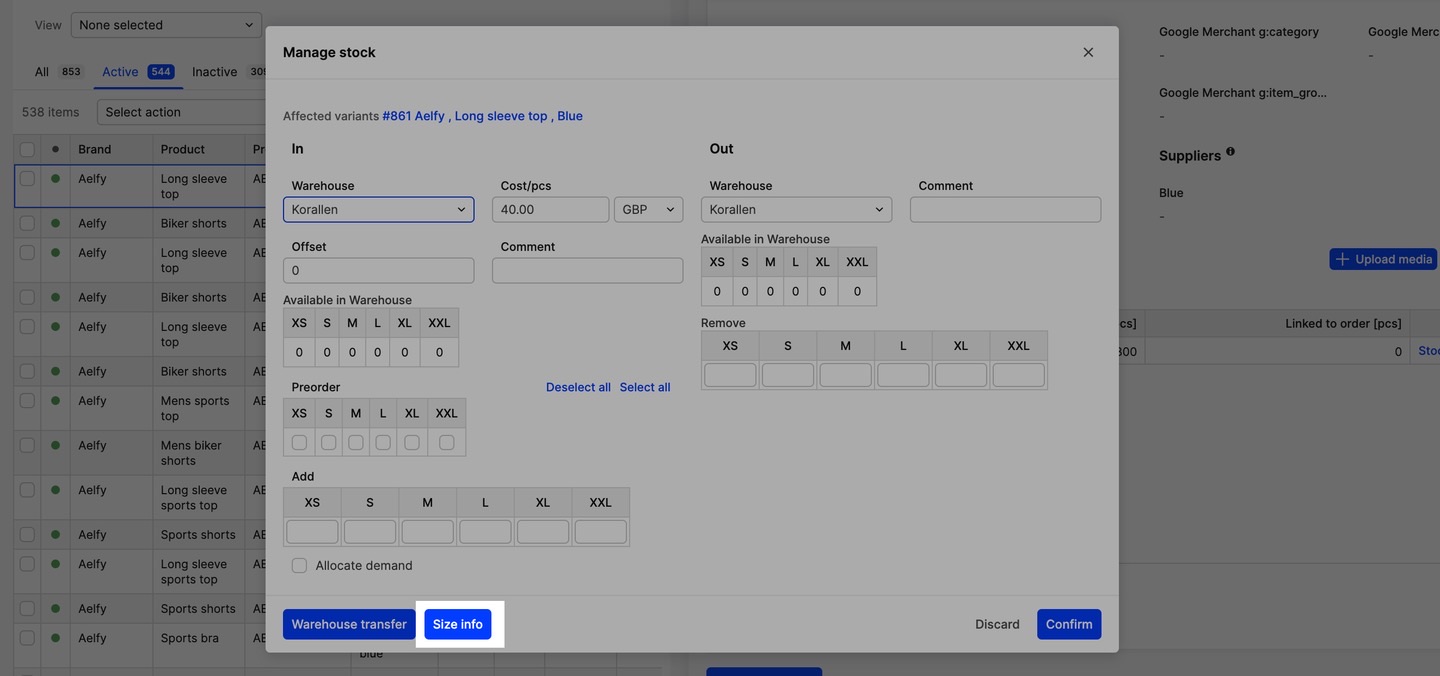
- Fill out the form by entering GTIN (EAN/UPC) for every size. They can be added manually or be imported through a Product import
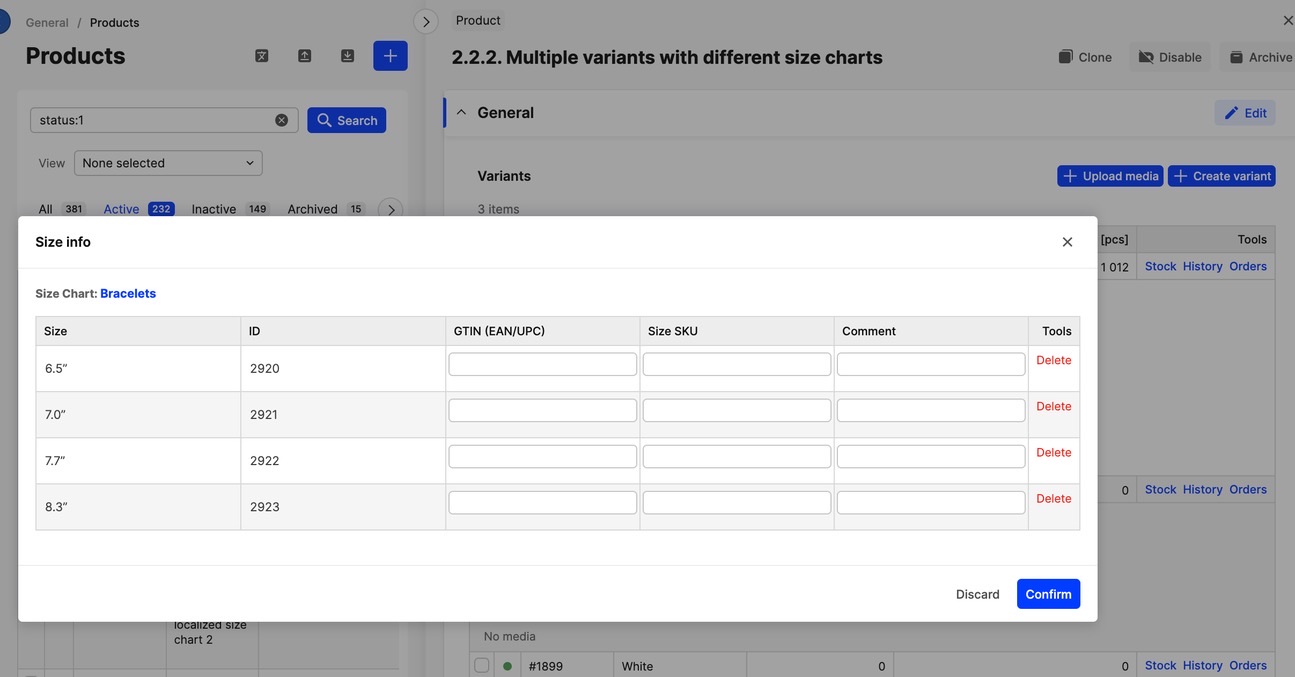
- Click 'Confirm' to save and close the pop-up.
The provided codes will be assigned to the variant sizes and the barcode scanner in the Showroom will recognize the product by scanning its code.
How it works in the Showroom
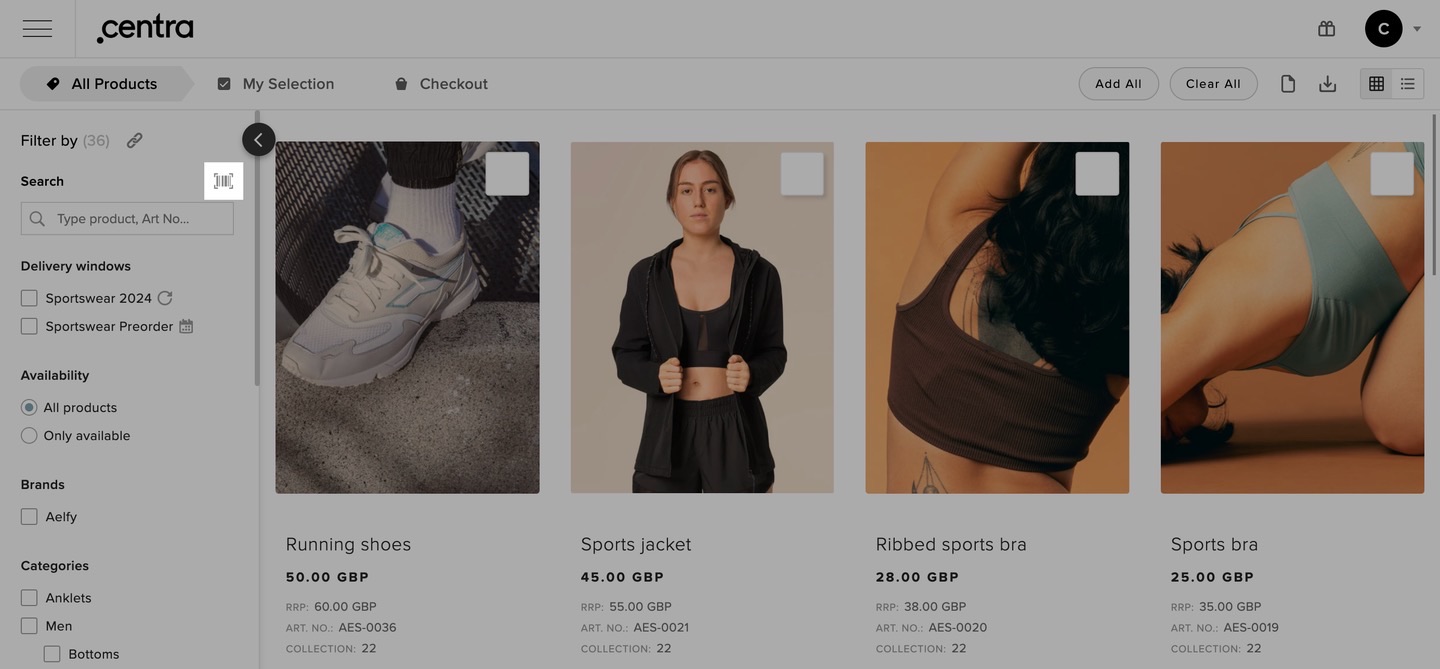
When the feature is enabled, the scanner button is displayed in the filter panel above the search input, as shown in the image below:
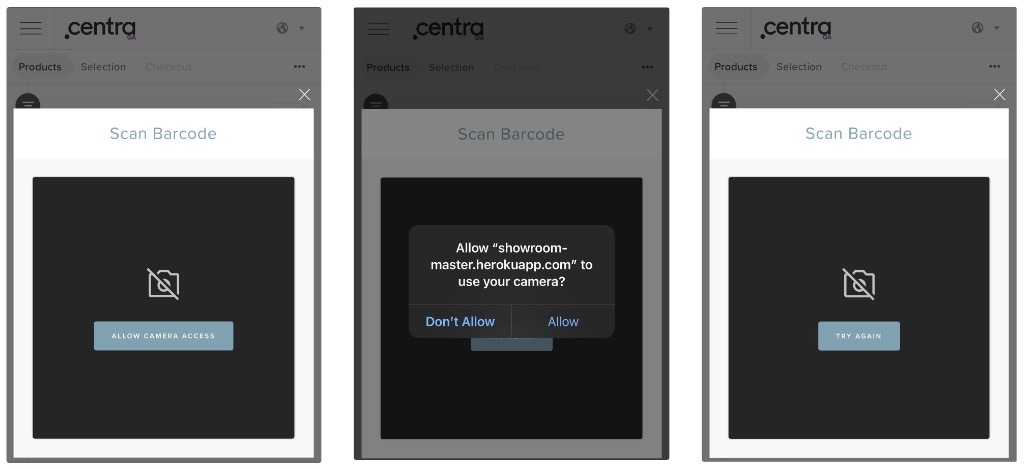
 The scanner button on mobile devices is additionally displayed in the right corner of the filter panel. This allows users to easily activate the scanner even when the filter panel is closed, as shown in the images below.

Camera permissions
The first time a user uses the scanner, they must grant permission to access the camera. If permissions haven’t been granted, the user won't be able to use the scanner. If you accidentally denied permission to use the camera, you can always click the 'Try again' button to grant permission.
Some devices require you to click the 'Try again' button to be able to scan after granting permission.
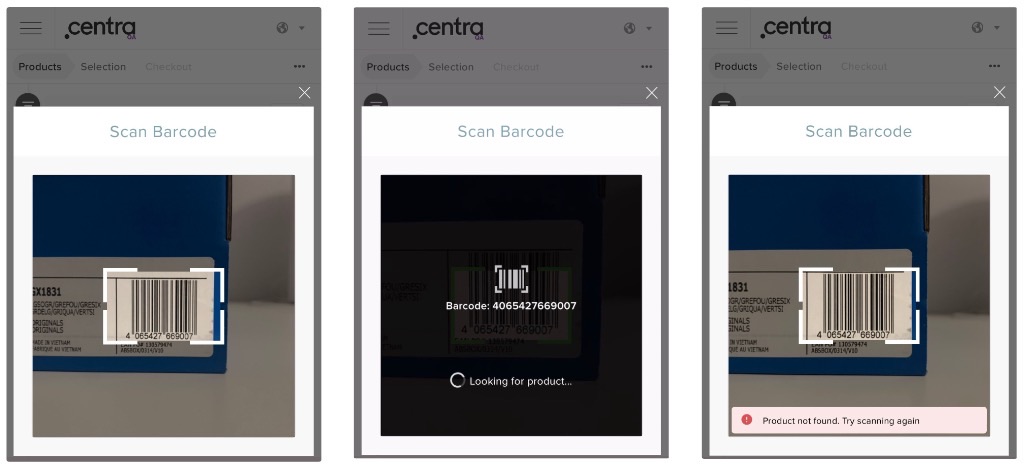
Scan flow
After the user has granted permission to use the camera, they can start scanning product codes. If a matching product is found, the user will be redirected to the product details page. However, if a product is not found with the scanned code, the user will be notified and can continue scanning other products.
There could be several reasons why a product is not found. The seller may not have added the product code to the size information, or perhaps the product is simply not available to the buyer.
Focusing on a specific size in matrices
When the product is successfully found, the user is redirected to the product details page, where the specific size is highlighted in the size chart. This way the user is able to input the quantity right away.
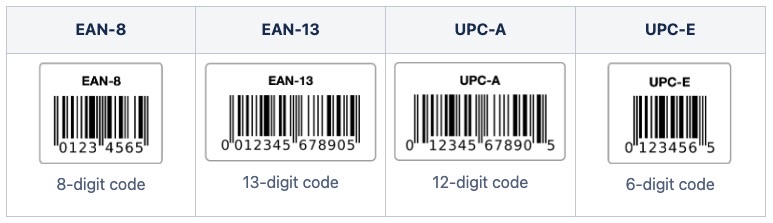
Which code formats are supported
The following code formats are supported in the Showroom:
Known issues
The scanner may be slow due to the following factors: glare, distorted barcode, long distance between the camera and the barcode.
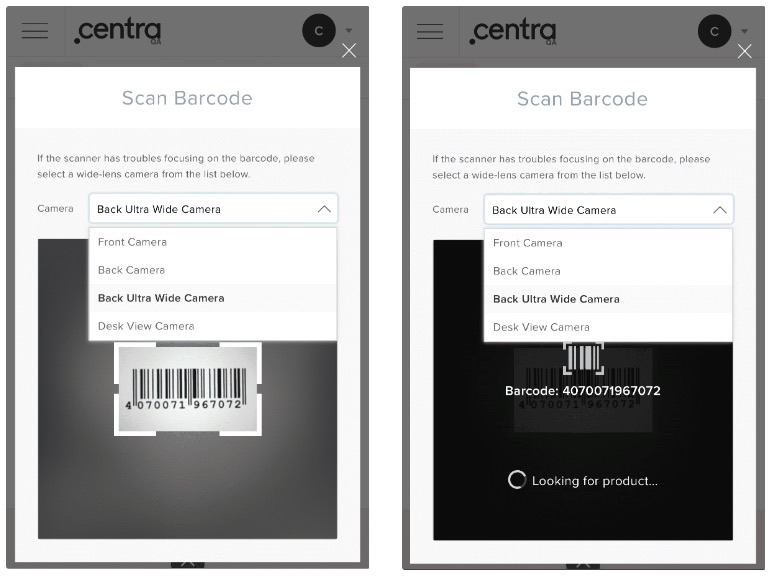
Issues with image focusing during scanning have been reported for some iPhone devices (13, 13 Pro, 14, 14 Pro). To temporarily resolve this issue, a camera selector has been added that allows the user to choose a wide-angle camera. Using this camera can improve the scanning process.