Grouping Delivery windows
About this article
Through this feature, you can group your Delivery windows to show up in a preferred manner in the Showroom filters panel. Great to use when working with multiple Delivery windows and wish to organize them for easier access.
Creating and sorting delivery window groups
Follow the steps below to access Delivery window groups:
-
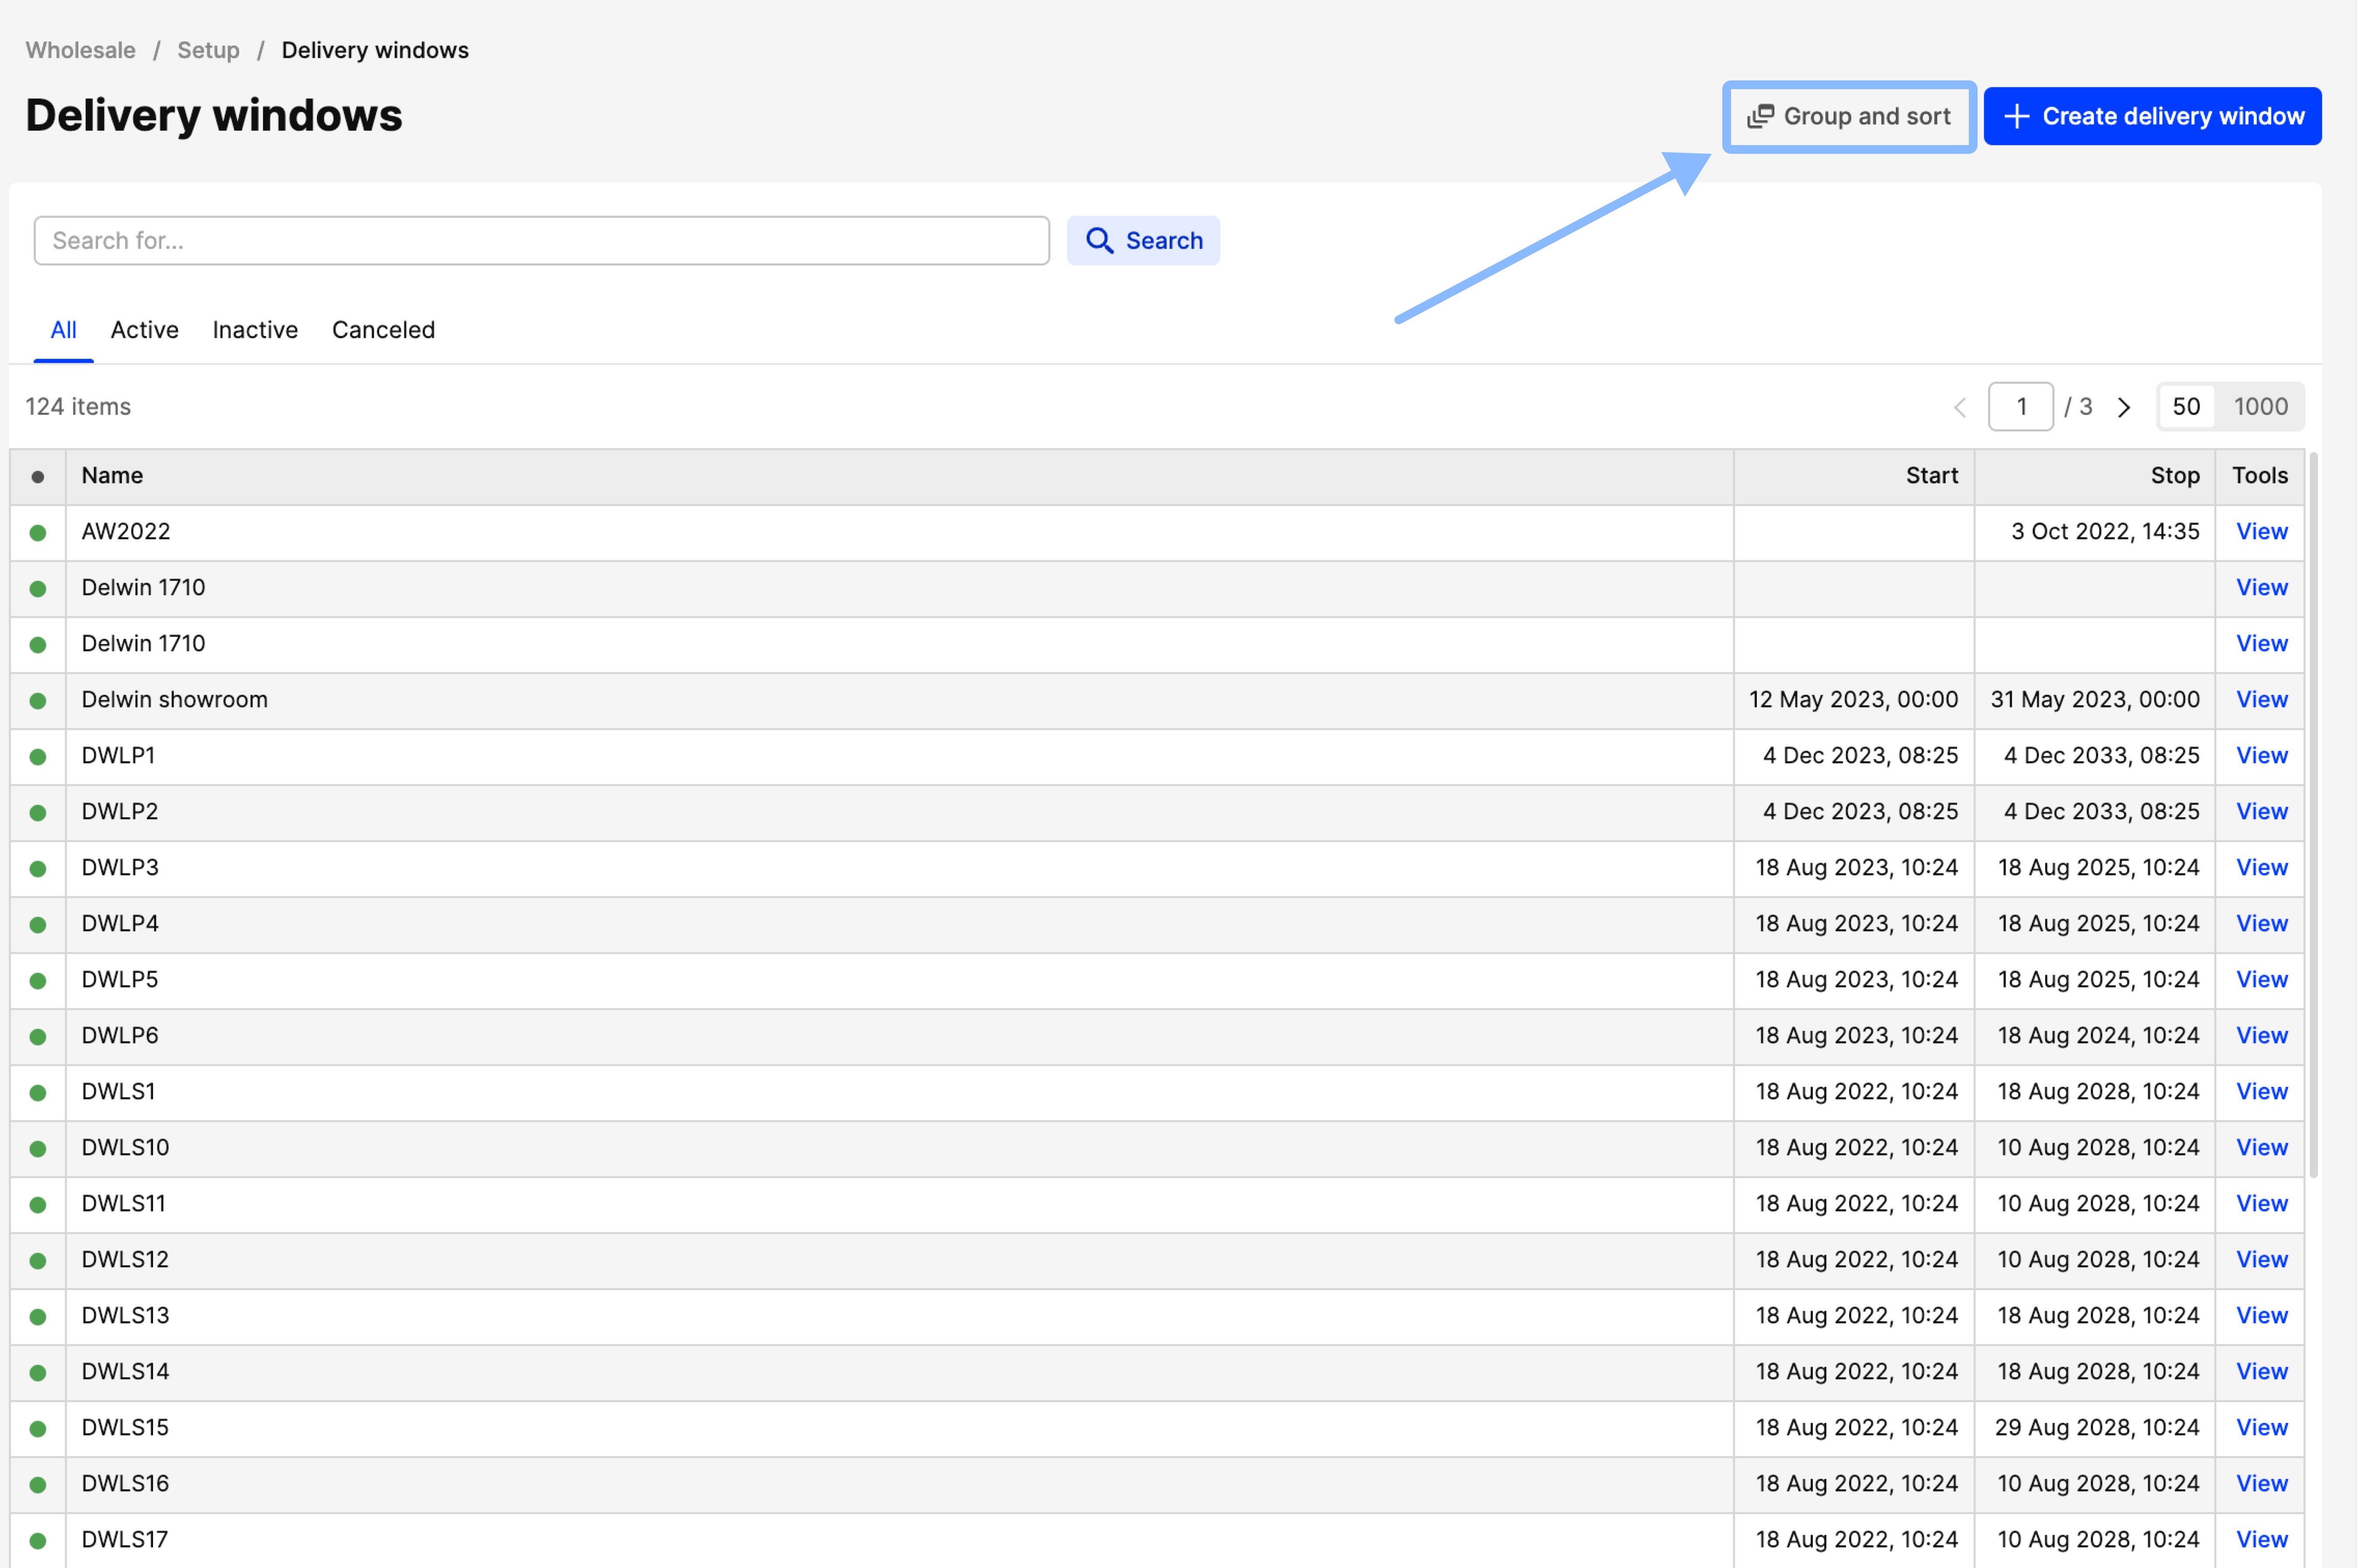
Click on ‘More’ in the Wholesale part of the menu and select ‘Delivery windows’
-
On the top right corner, click on ‘Group and sort’
-
The following page can be seen where you can create new groups and sort existing ones:
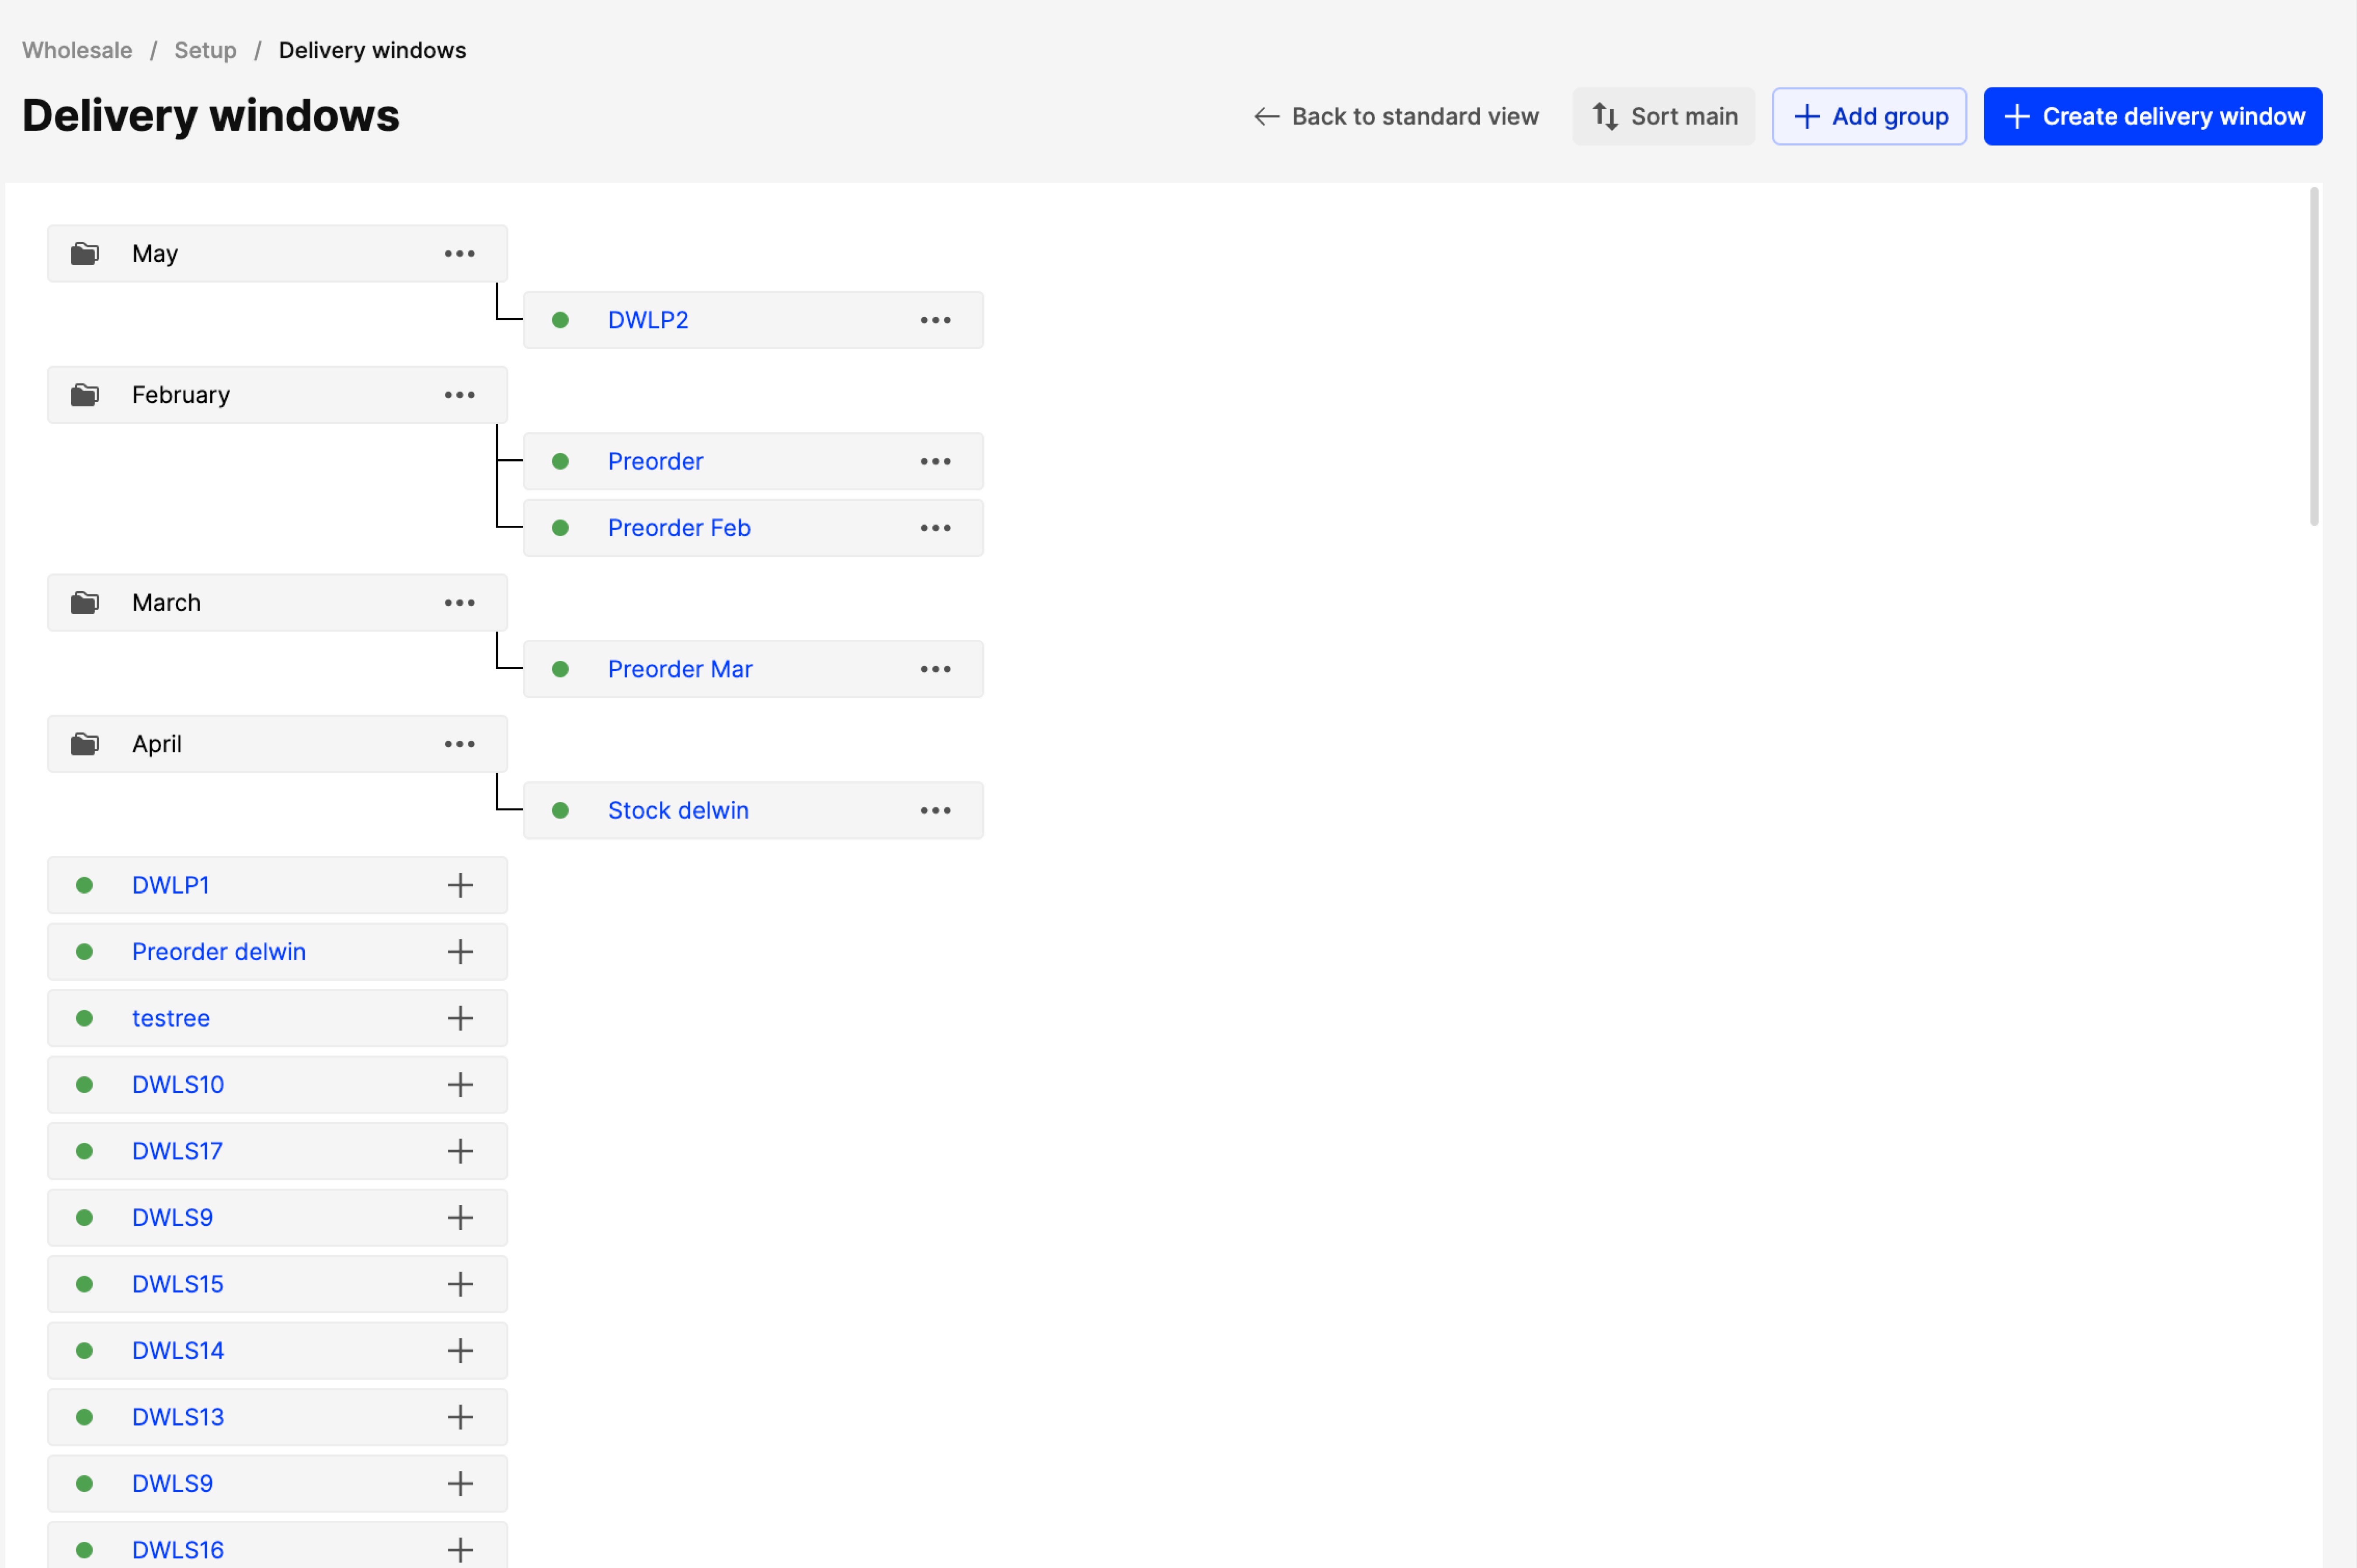
Read more below about how to create a Delivery window group, how to sort groups and how to assign Delivery windows to groups.
Creating a delivery window group
- Click on ‘+Add group’
- In the pop-up, you can insert the name of the new Delivery window group as seen below:

- Click ‘Confirm’ to create a new Delivery window group.
Sorting delivery window groups
Once you have created a few Delivery window groups, you can sort them according to your preferences:
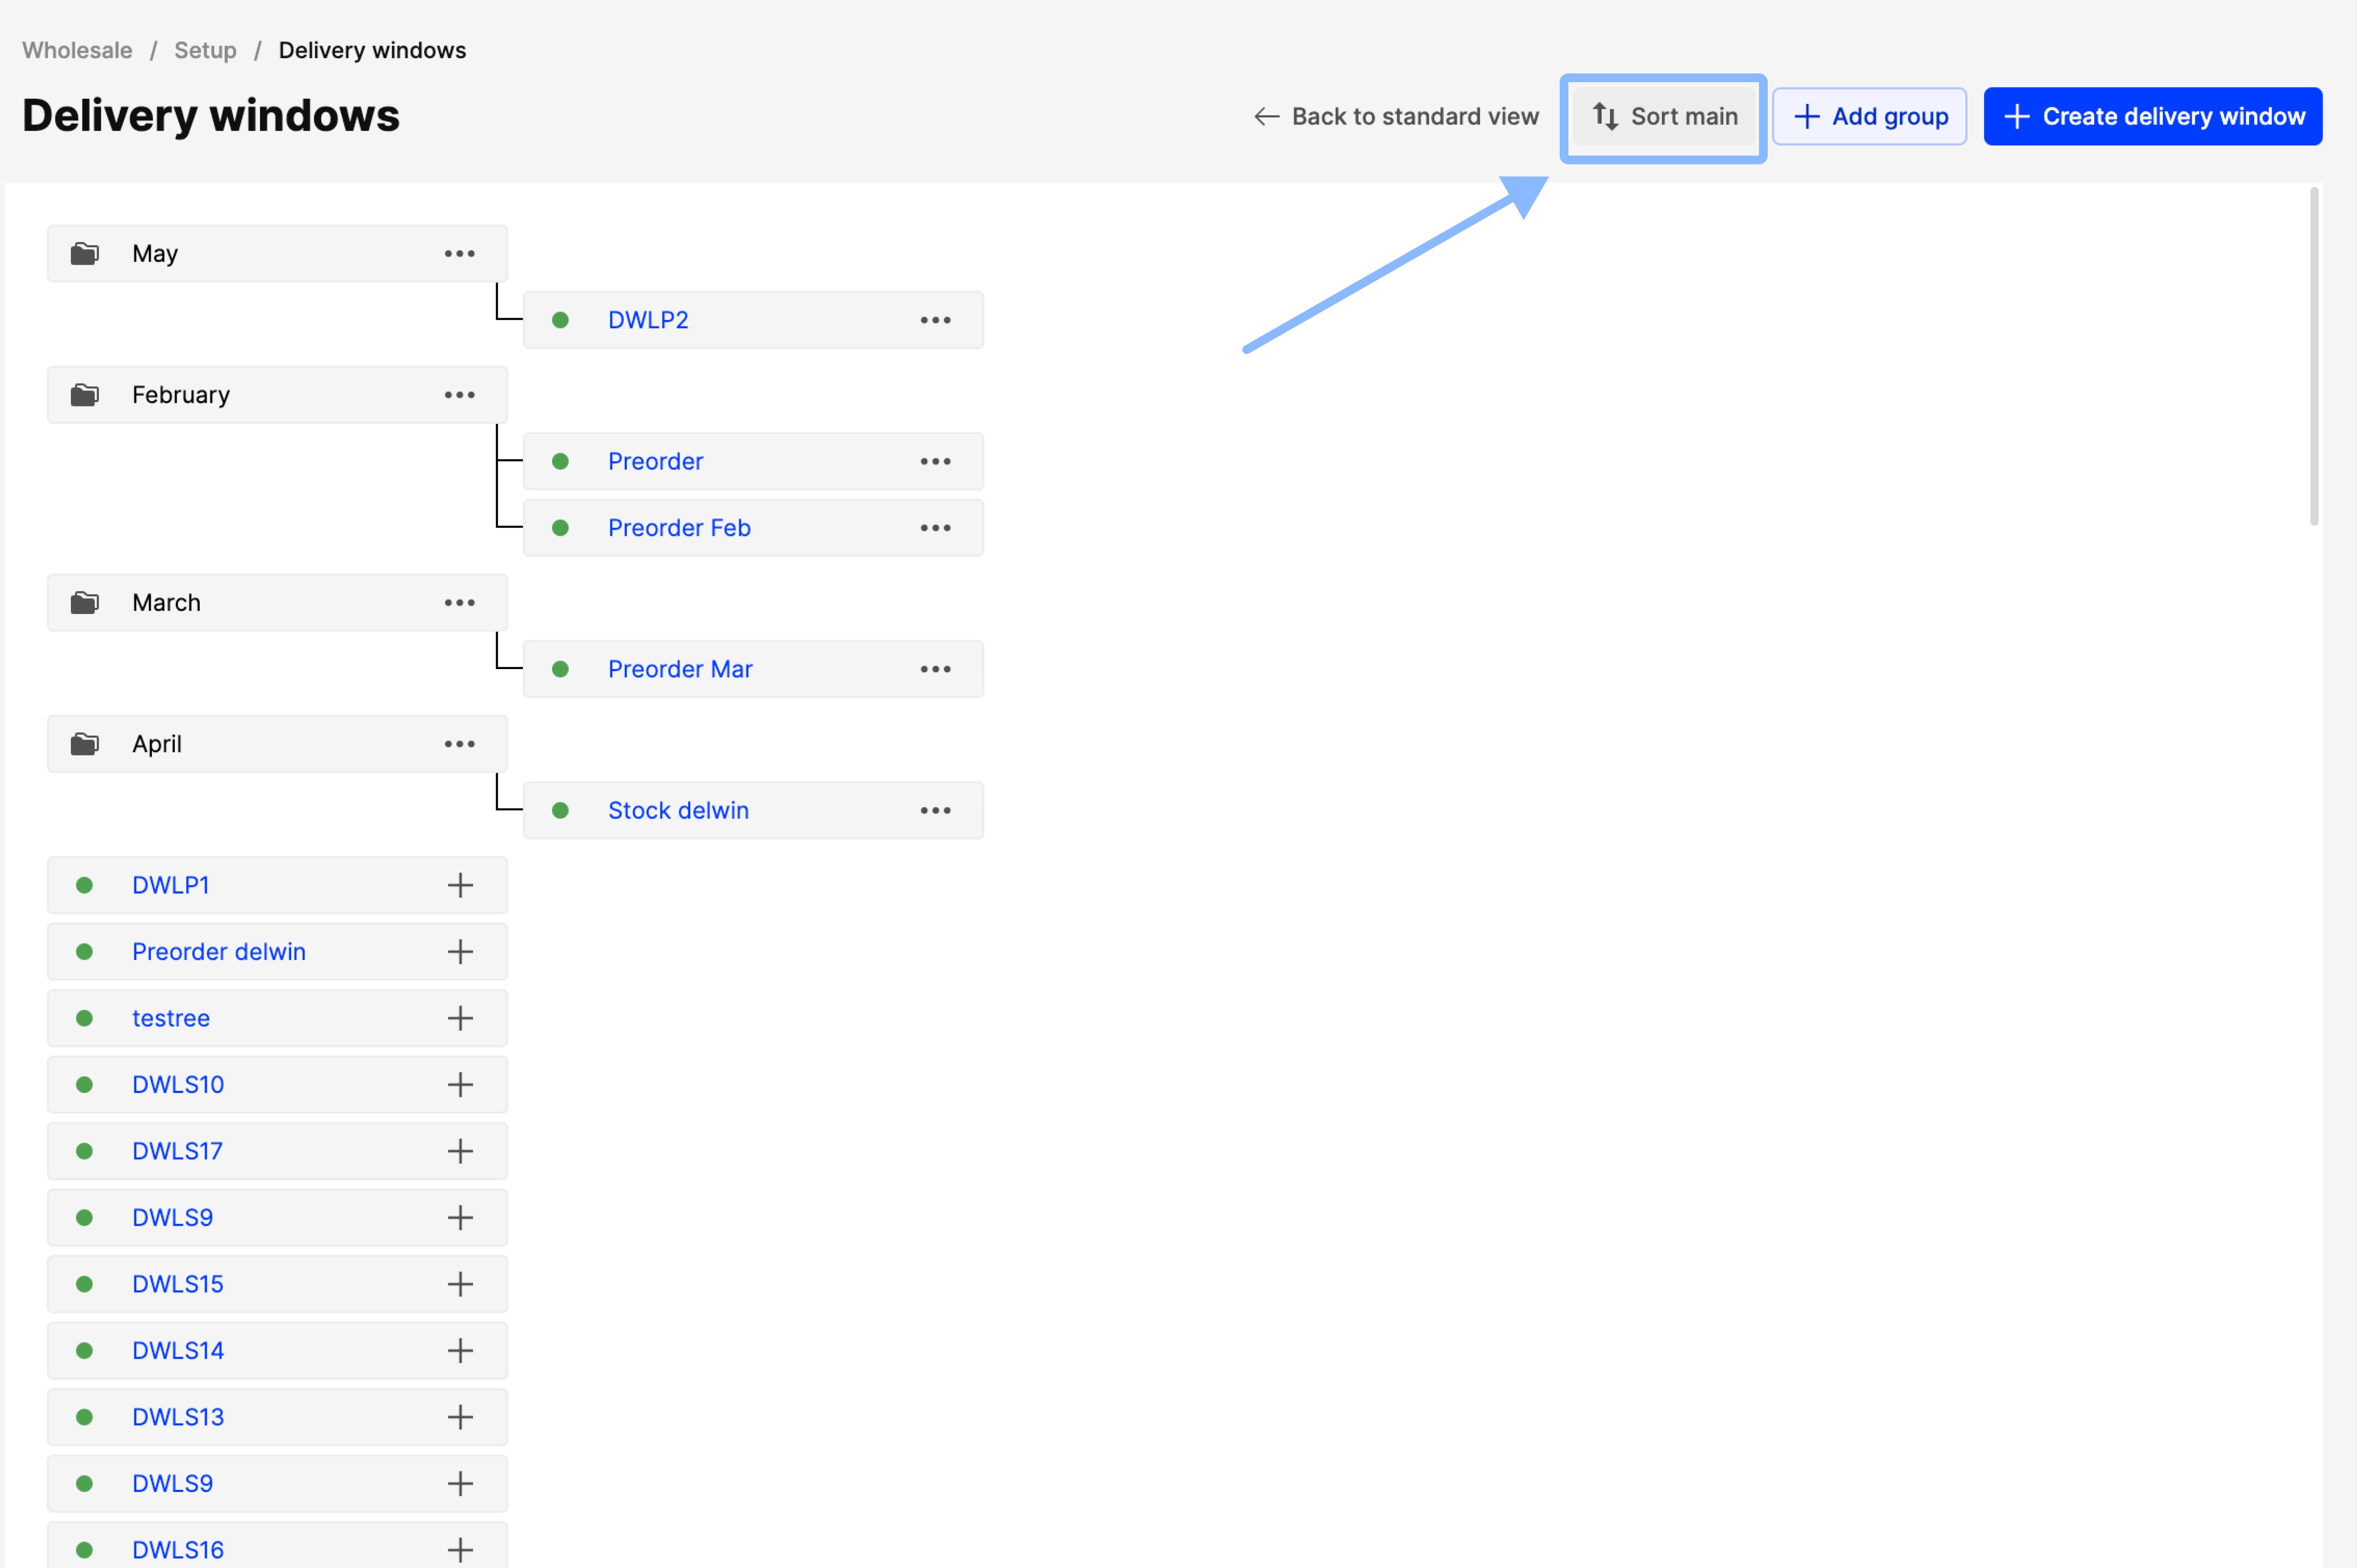
- Click on ‘Sort main’
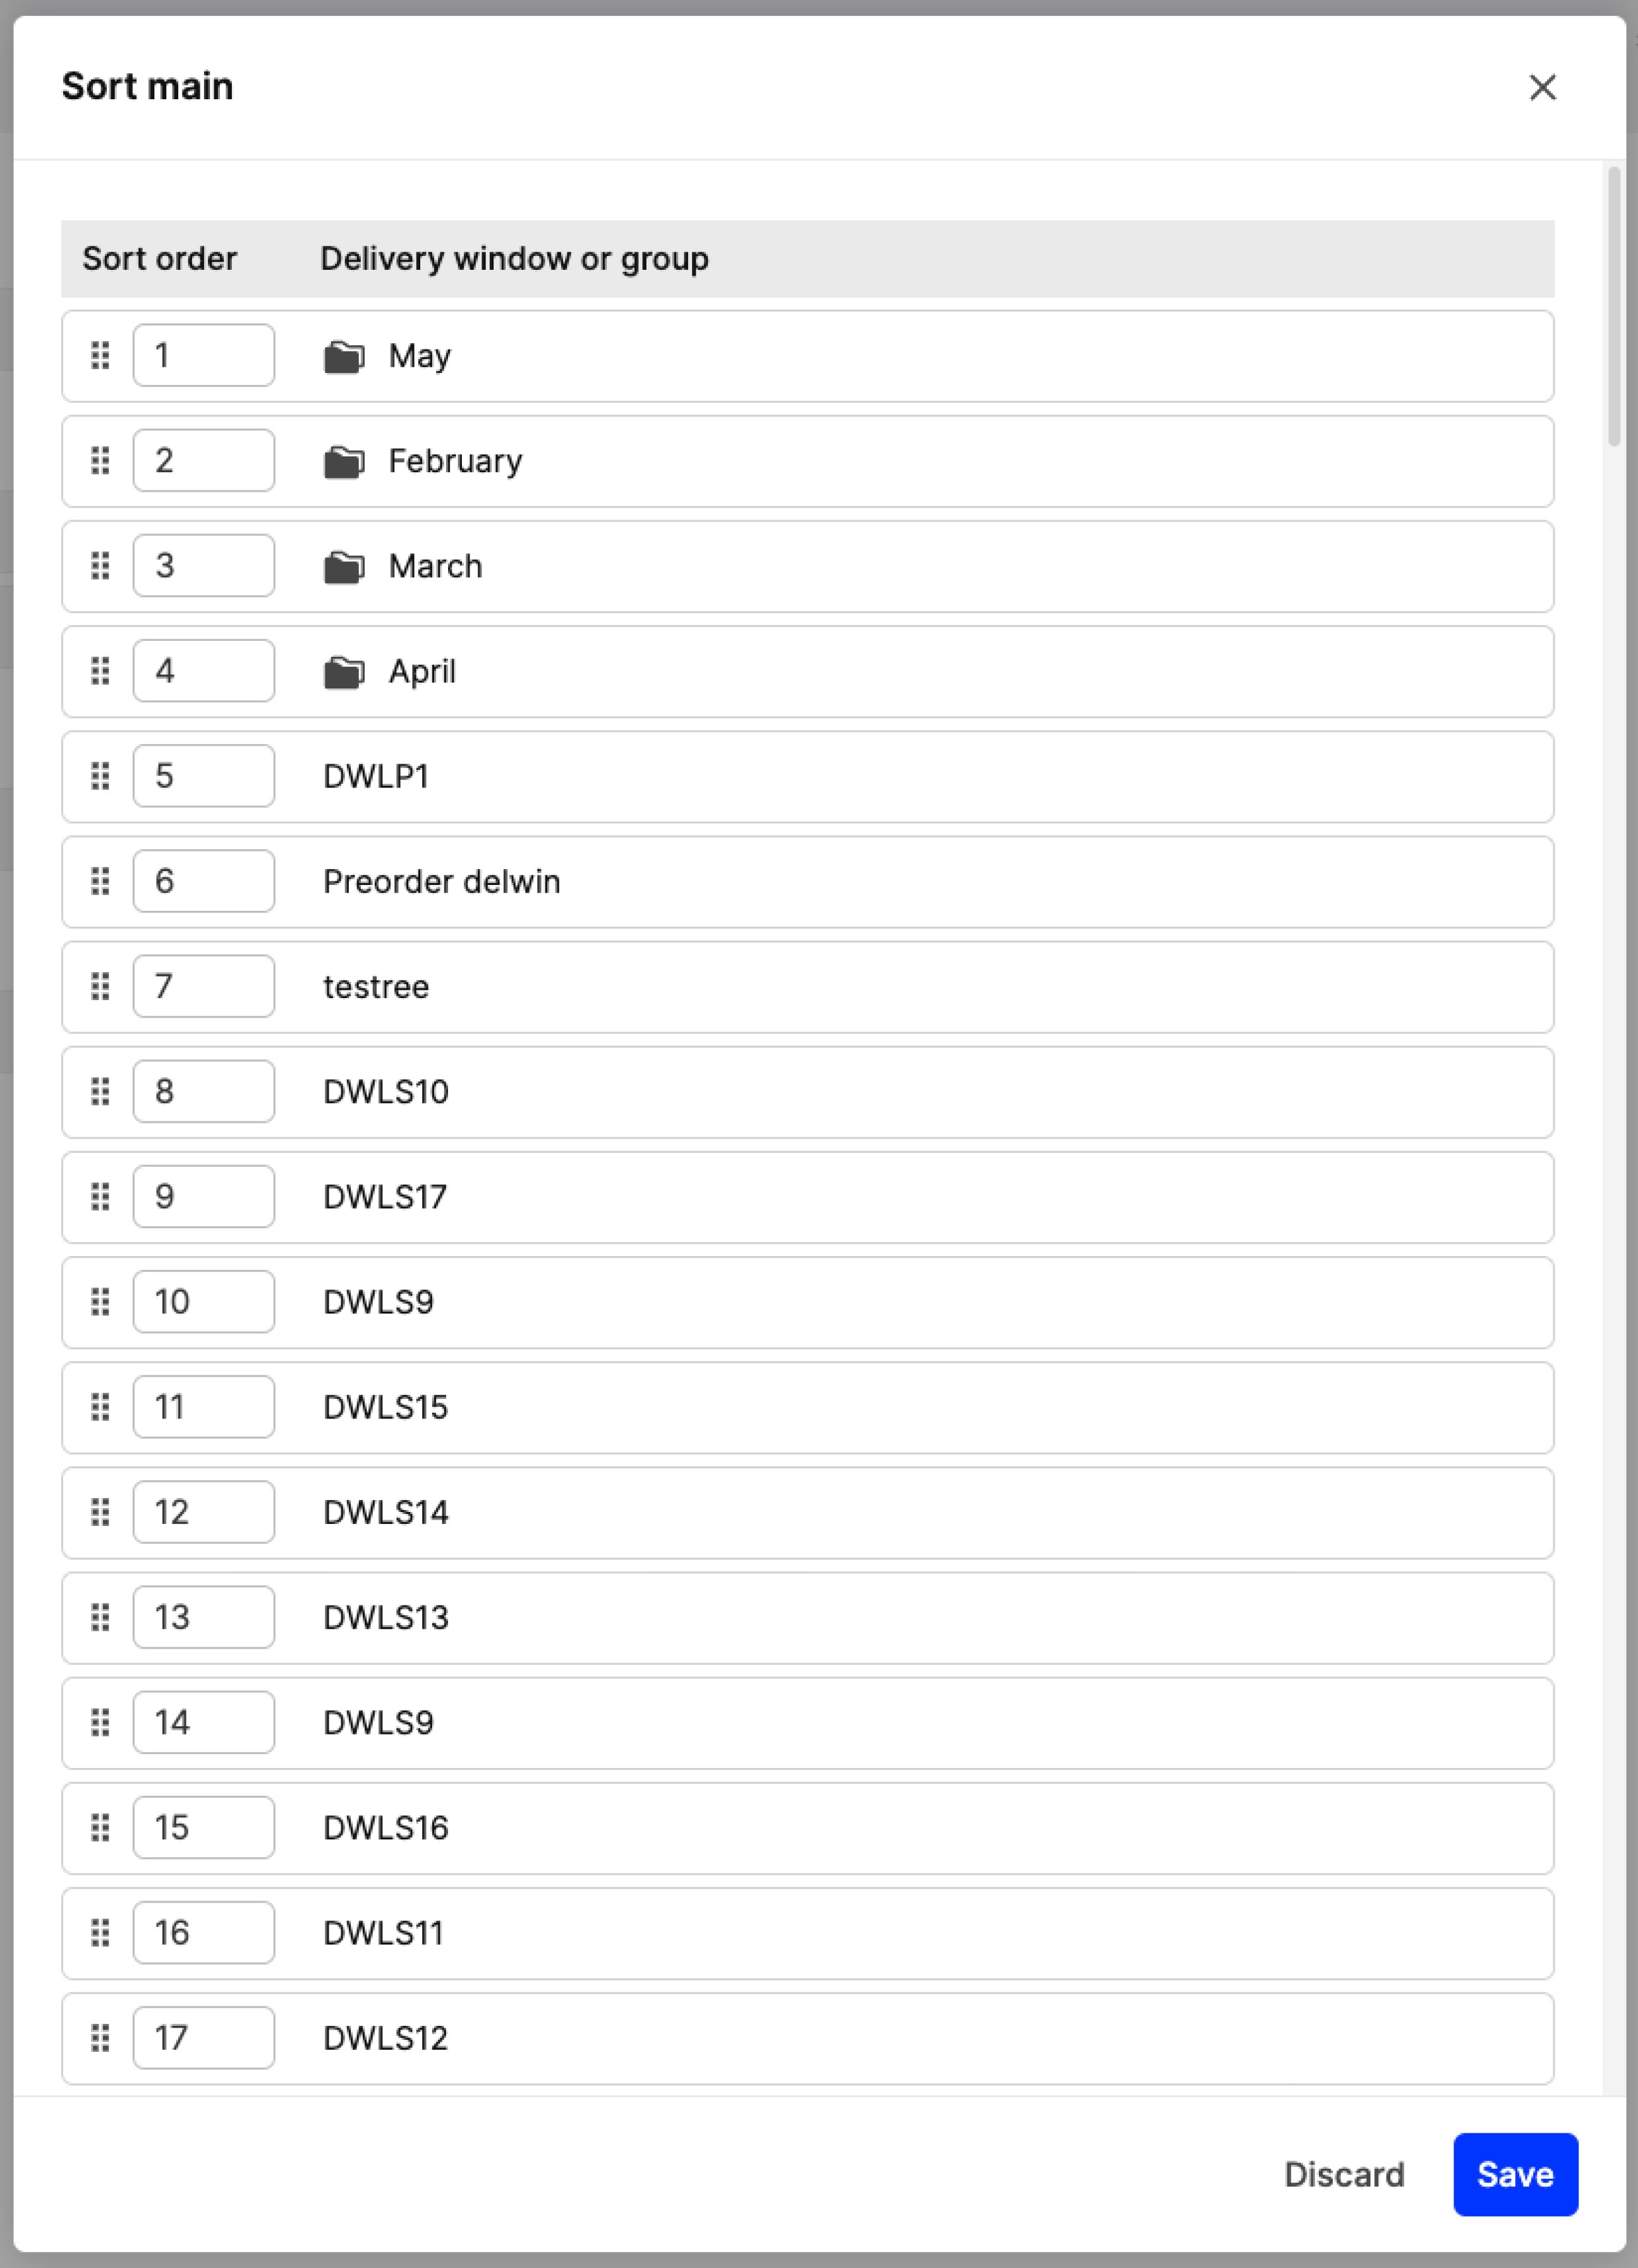
- Drag and drop or insert numbers to change the sorting of the Delivery window groups as well as Delivery windows:
- Click ‘Save’.
How to manage Delivery windows to groups
There are two ways to add a Delivery window to a group. One is through the ‘Group and sort’ page, whereas the other is found on the Delivery windows settings:
Through the ‘Group and sort’ page
Manually manage the delivery windows
Use this method to move or adjust individual delivery windows one by one.
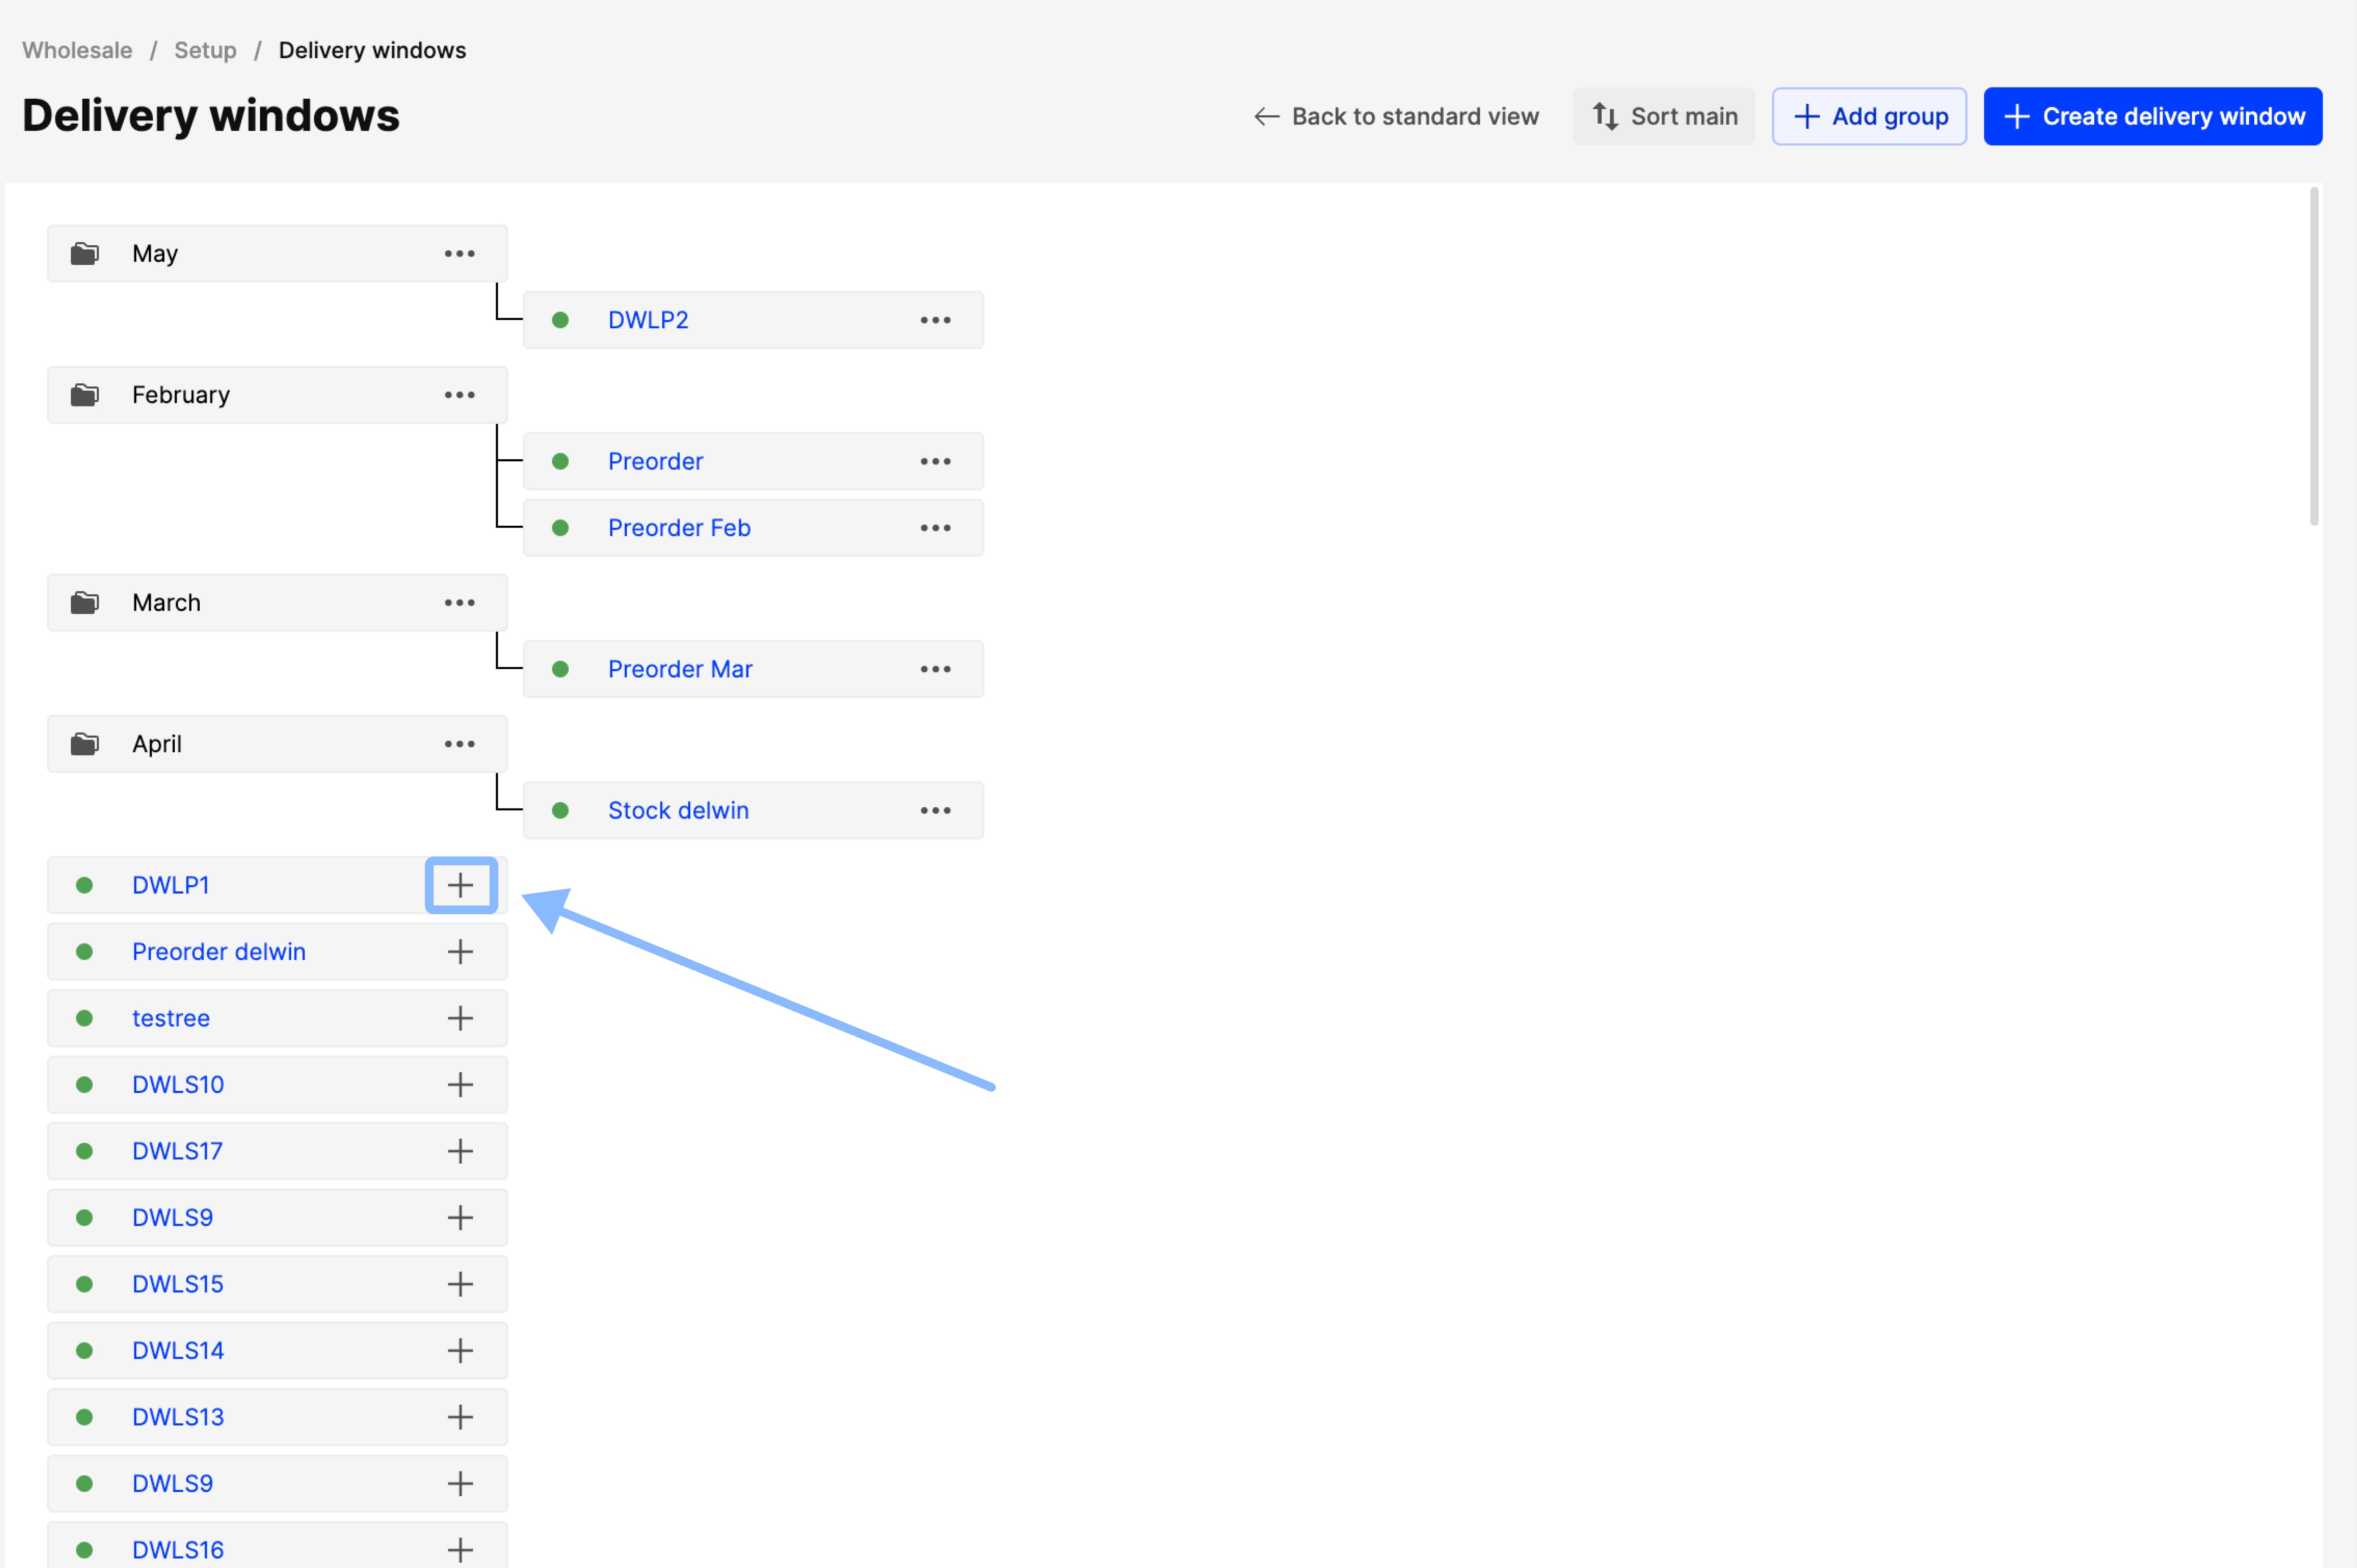
- Once you are in the ‘Group and sort’ page, you can click on the three dots seen next to each Delivery window group:
- Click on the plus sign (+) next to the delivery window of your choice as seen below:
- The following pop-up appears, where you can assign a group by select an existing one or creating a new one:
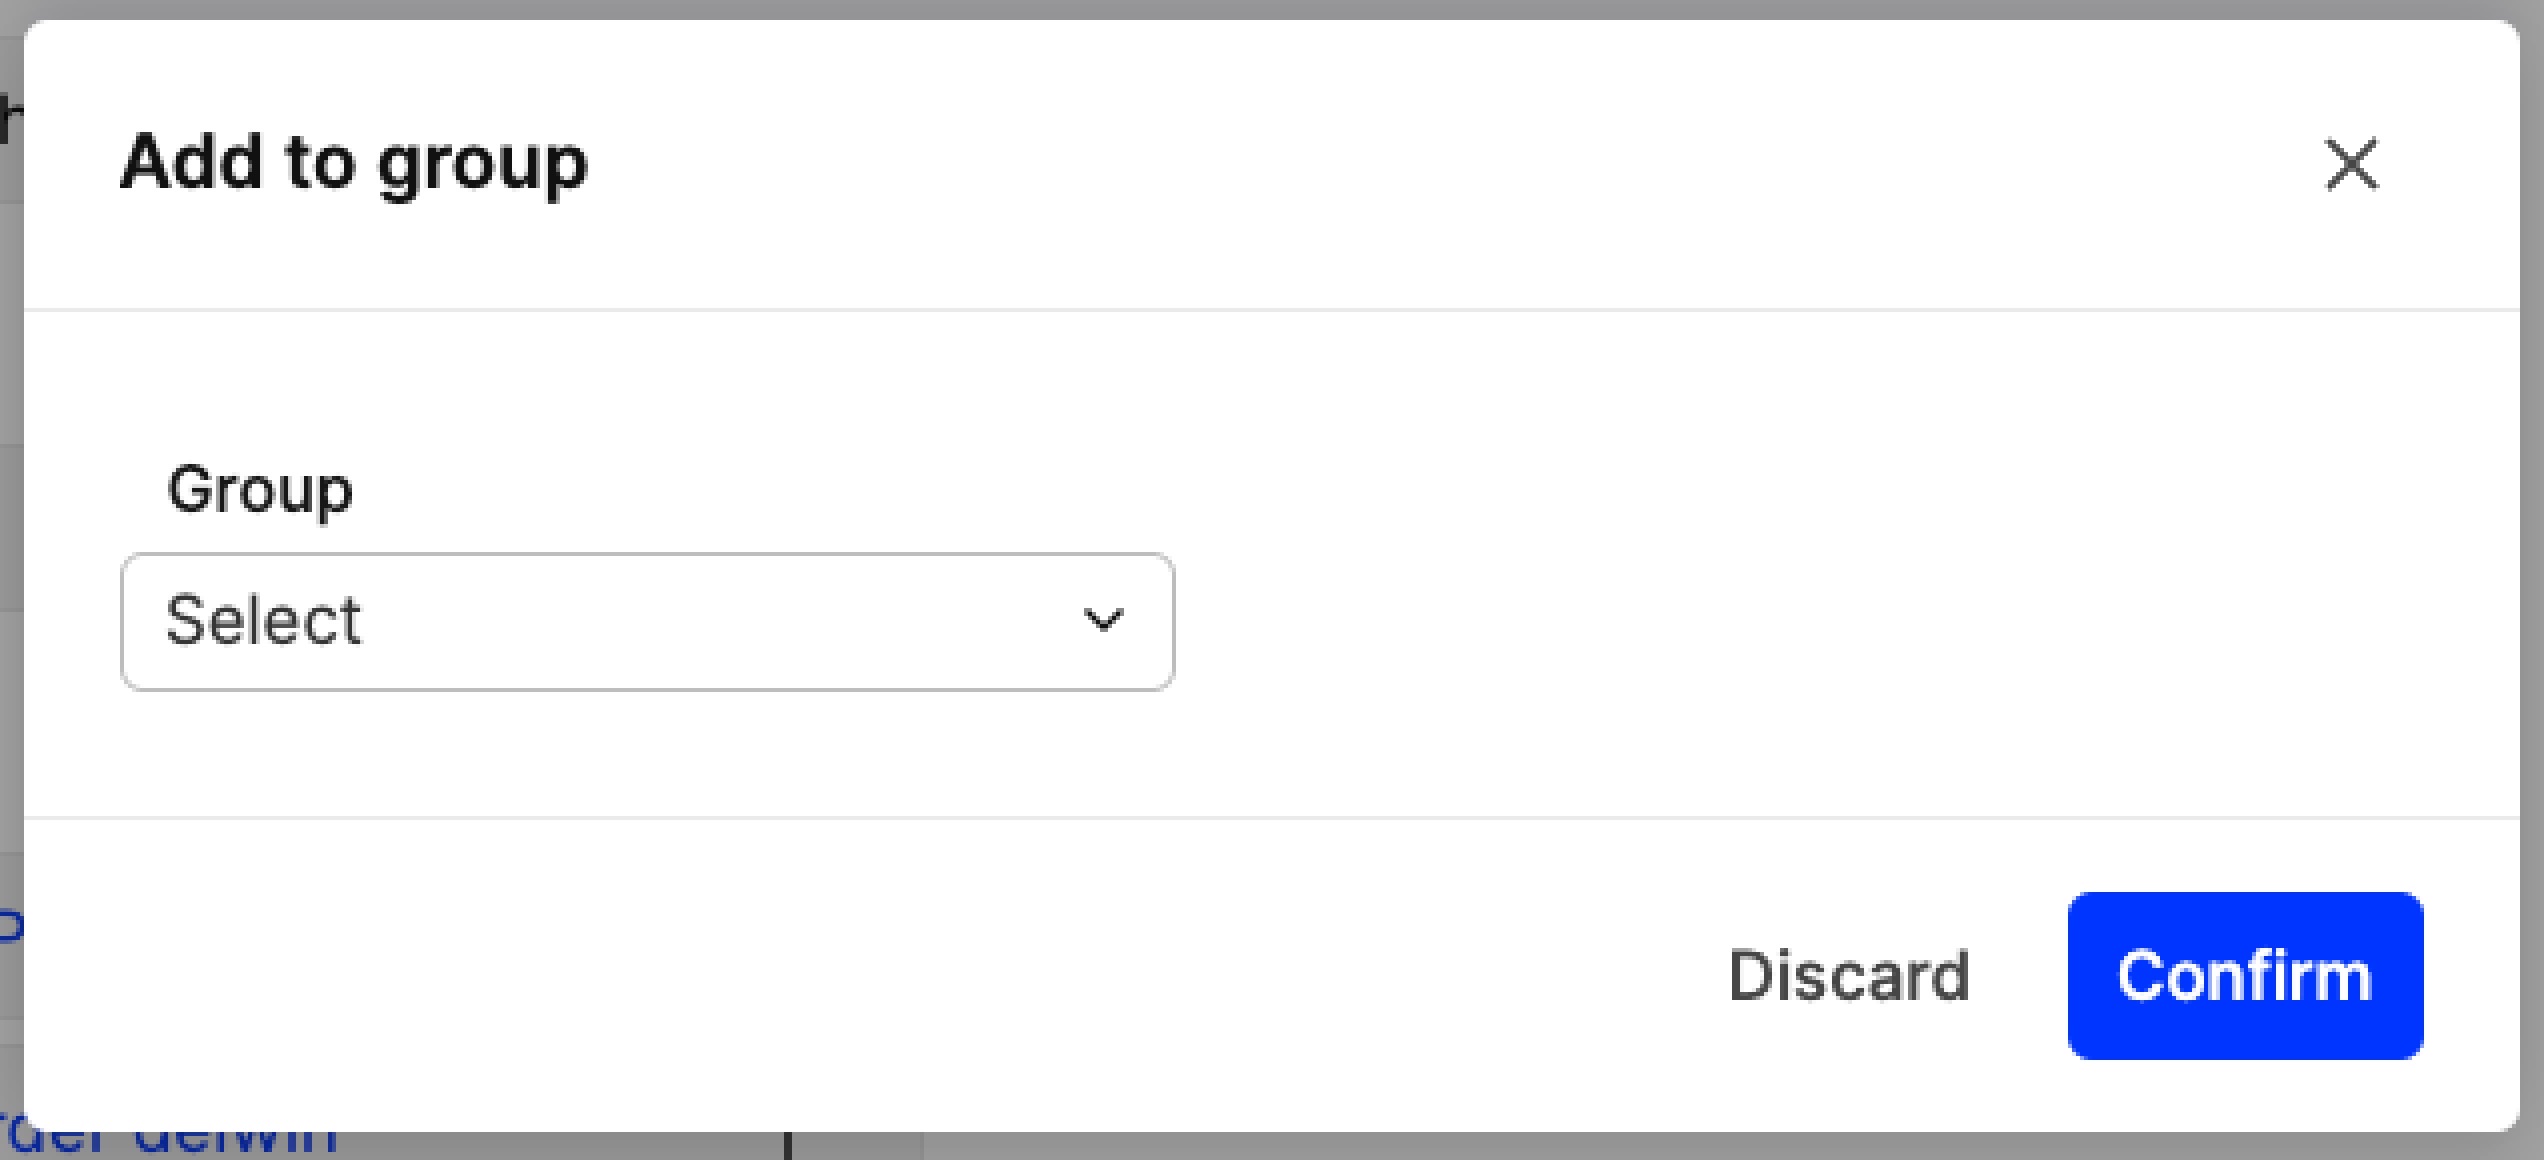
- Click ‘Confirm’ to save your changes.
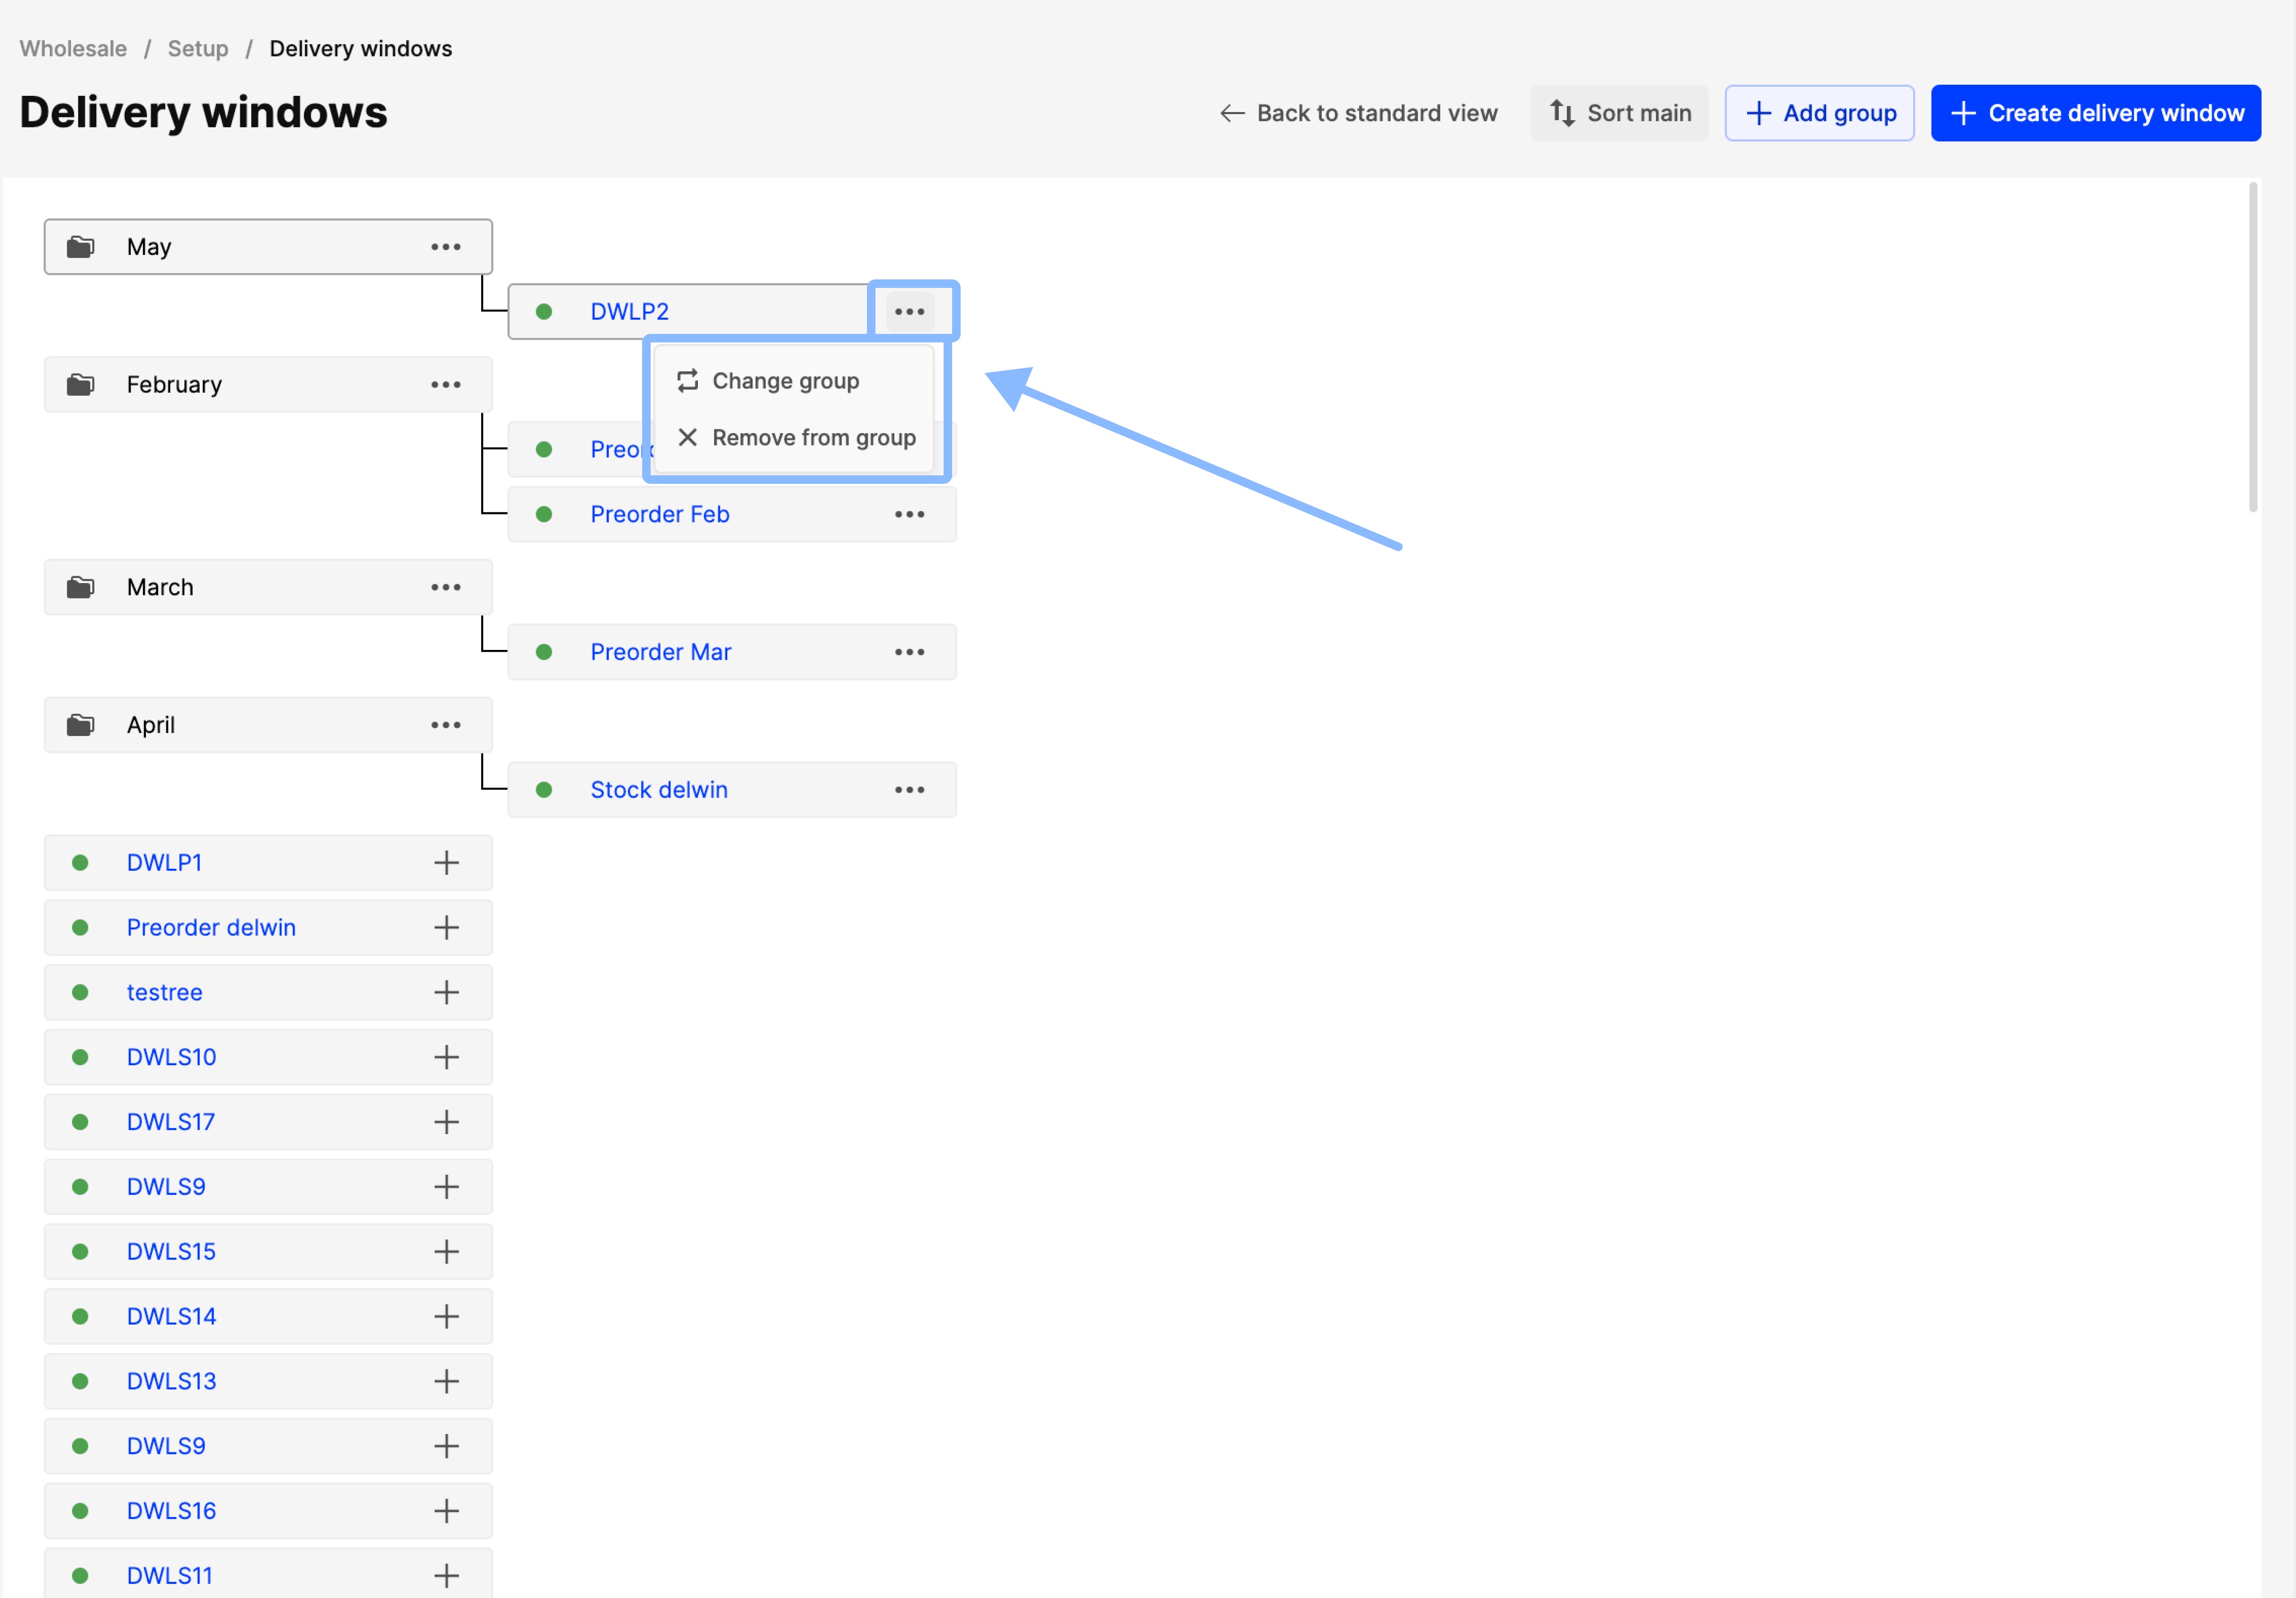
Please note that once a Delivery window is added to a group, you can click on the three dots on the Delivery window itself, to change to another group or remove it from the current one, by clicking ‘Change group’ or ‘Remove from group’, respectively:
Bulk manage delivery windows
You can now move multiple delivery windows into groups simultaneously using filters and bulk selections.
Filtering delivery windows by status
Refine the list to focus on specific delivery windows before applying bulk changes:
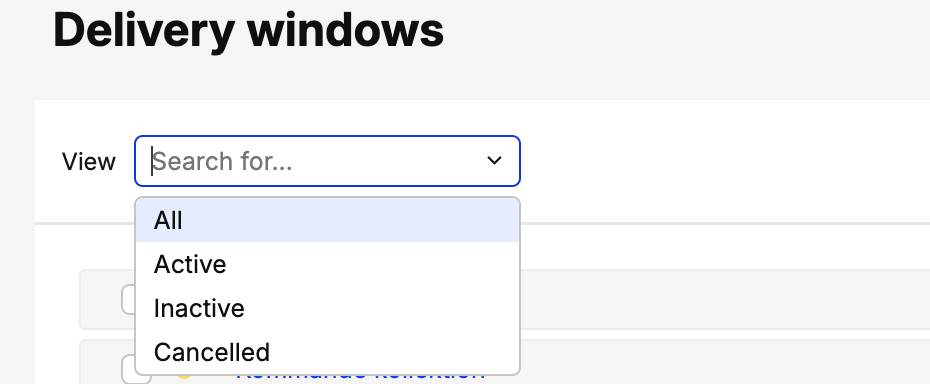
- Click View.
-
Select one or more of the following statuses to filter the list:
-
All
-
Active
-
Inactive
-
Cancelled
-
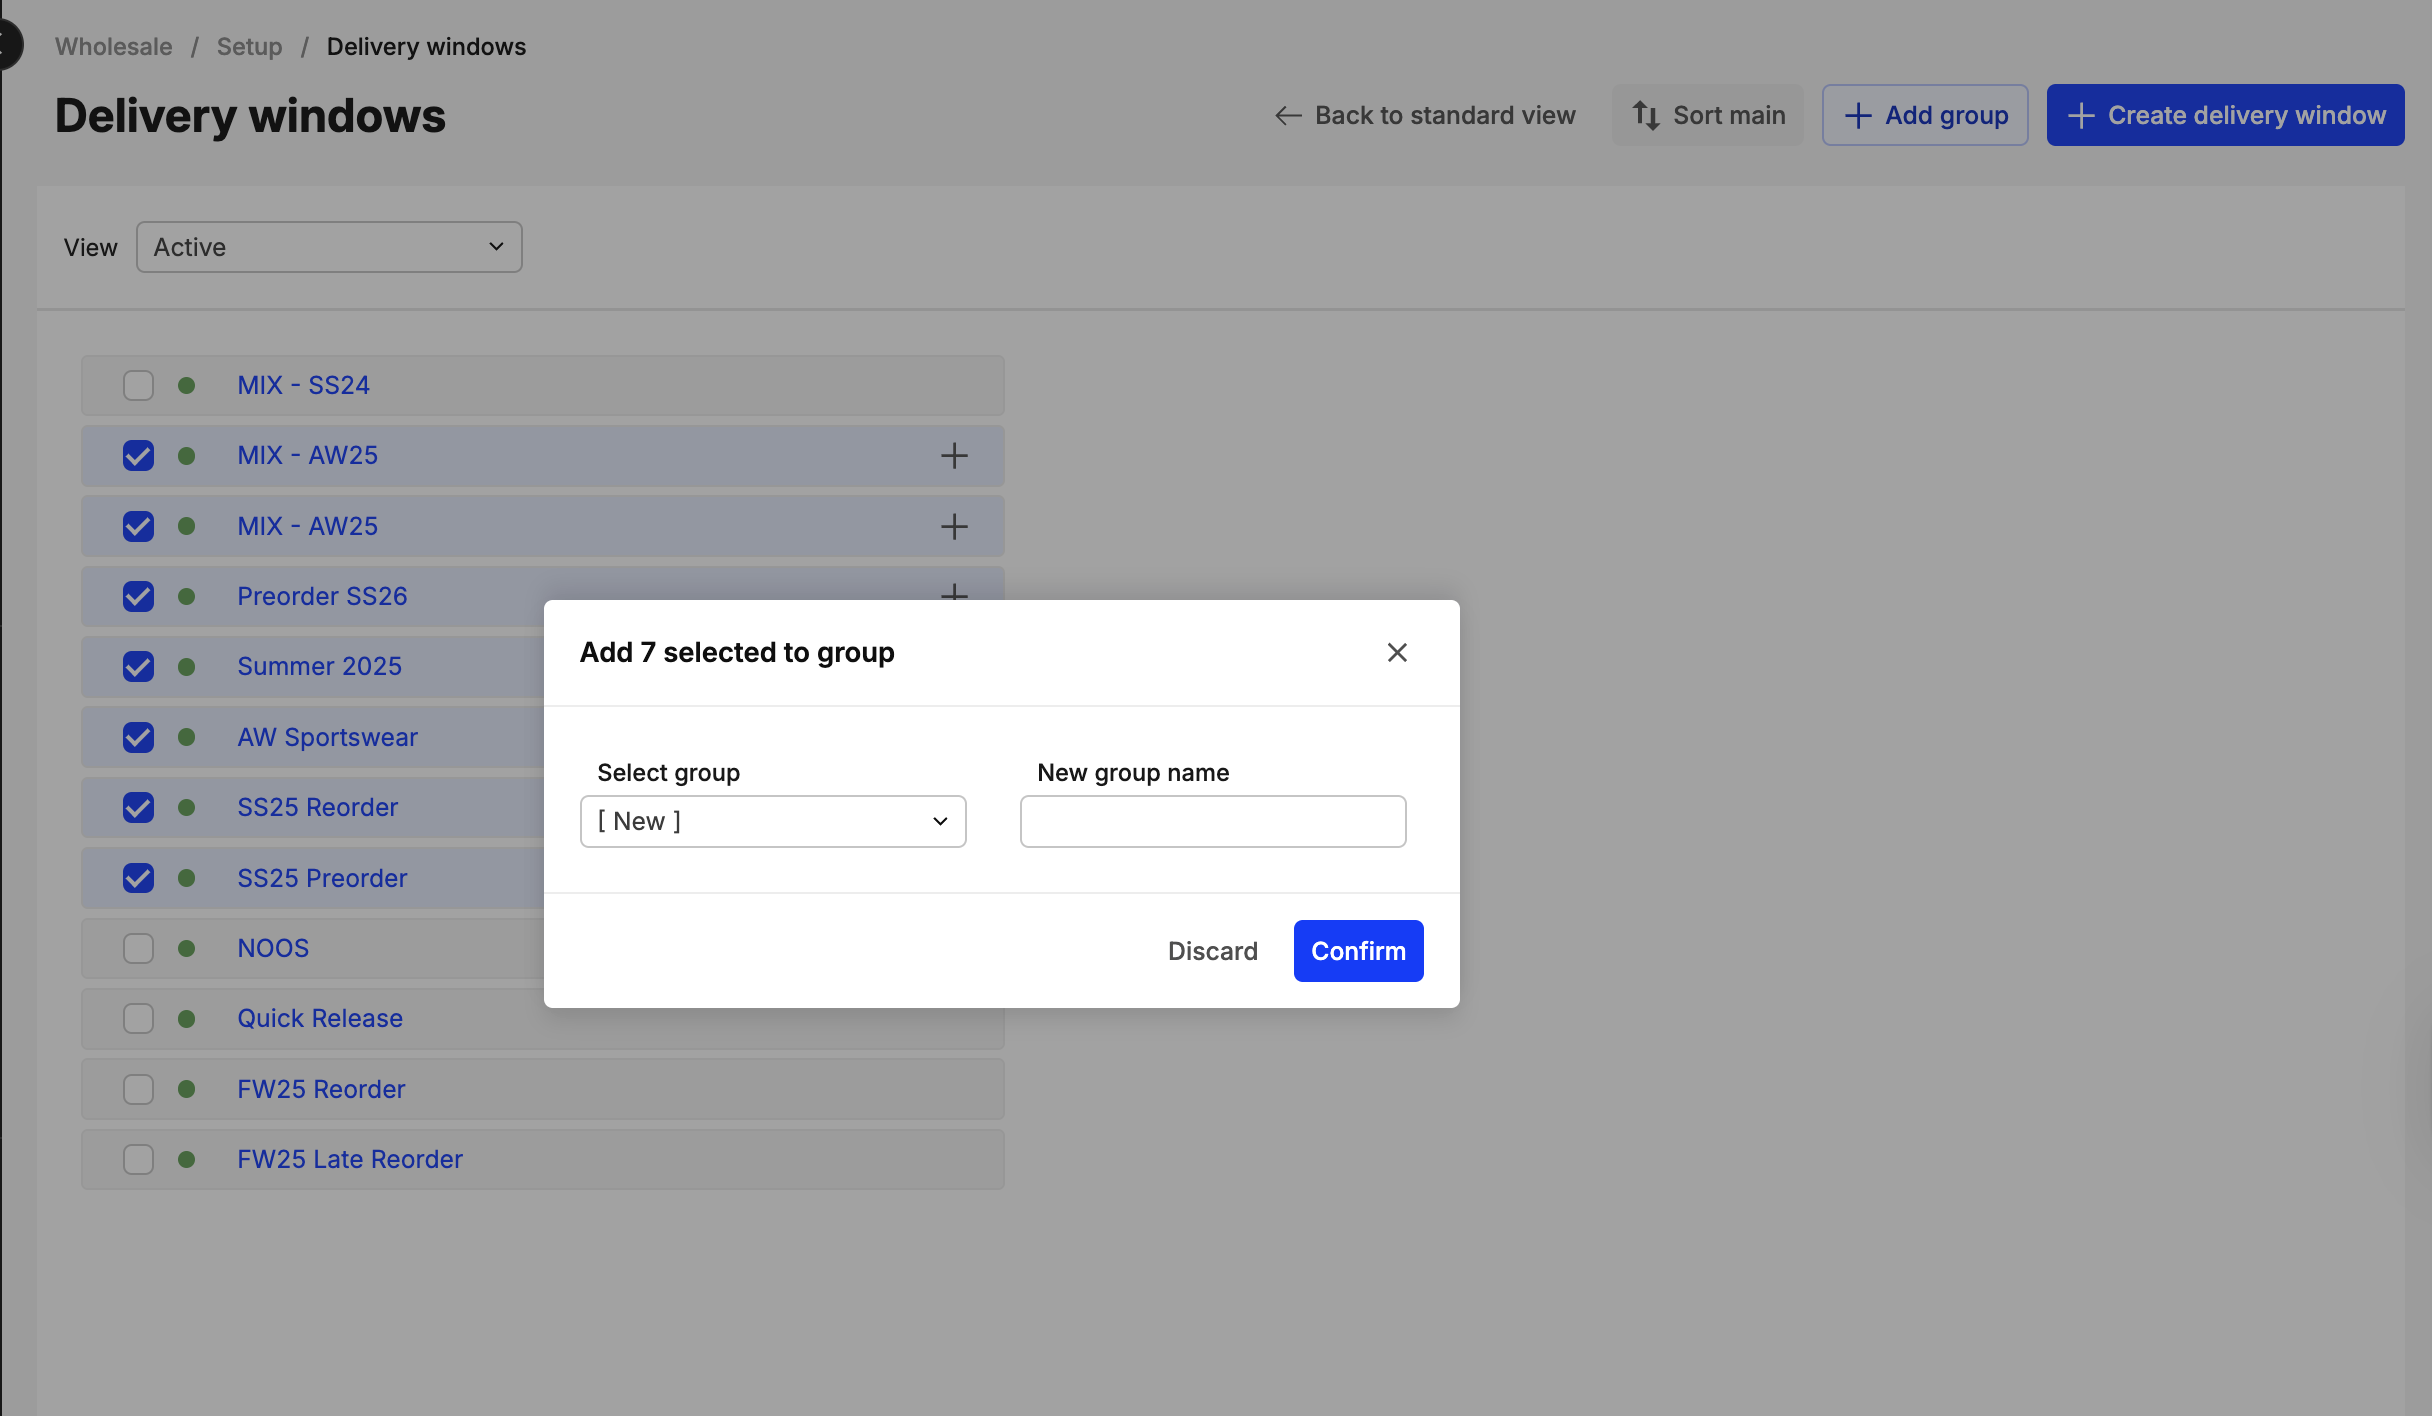
Add multiple delivery windows to a group
- Tick the checkboxes next to the delivery windows you wish to organize.
-
Click the + (plus) button.
-
Select an existing delivery window group from the pop-up menu. To create a new group, select [ New ] and enter the name in the the “New group name” field.
-
Click Confirm to move all selected windows.
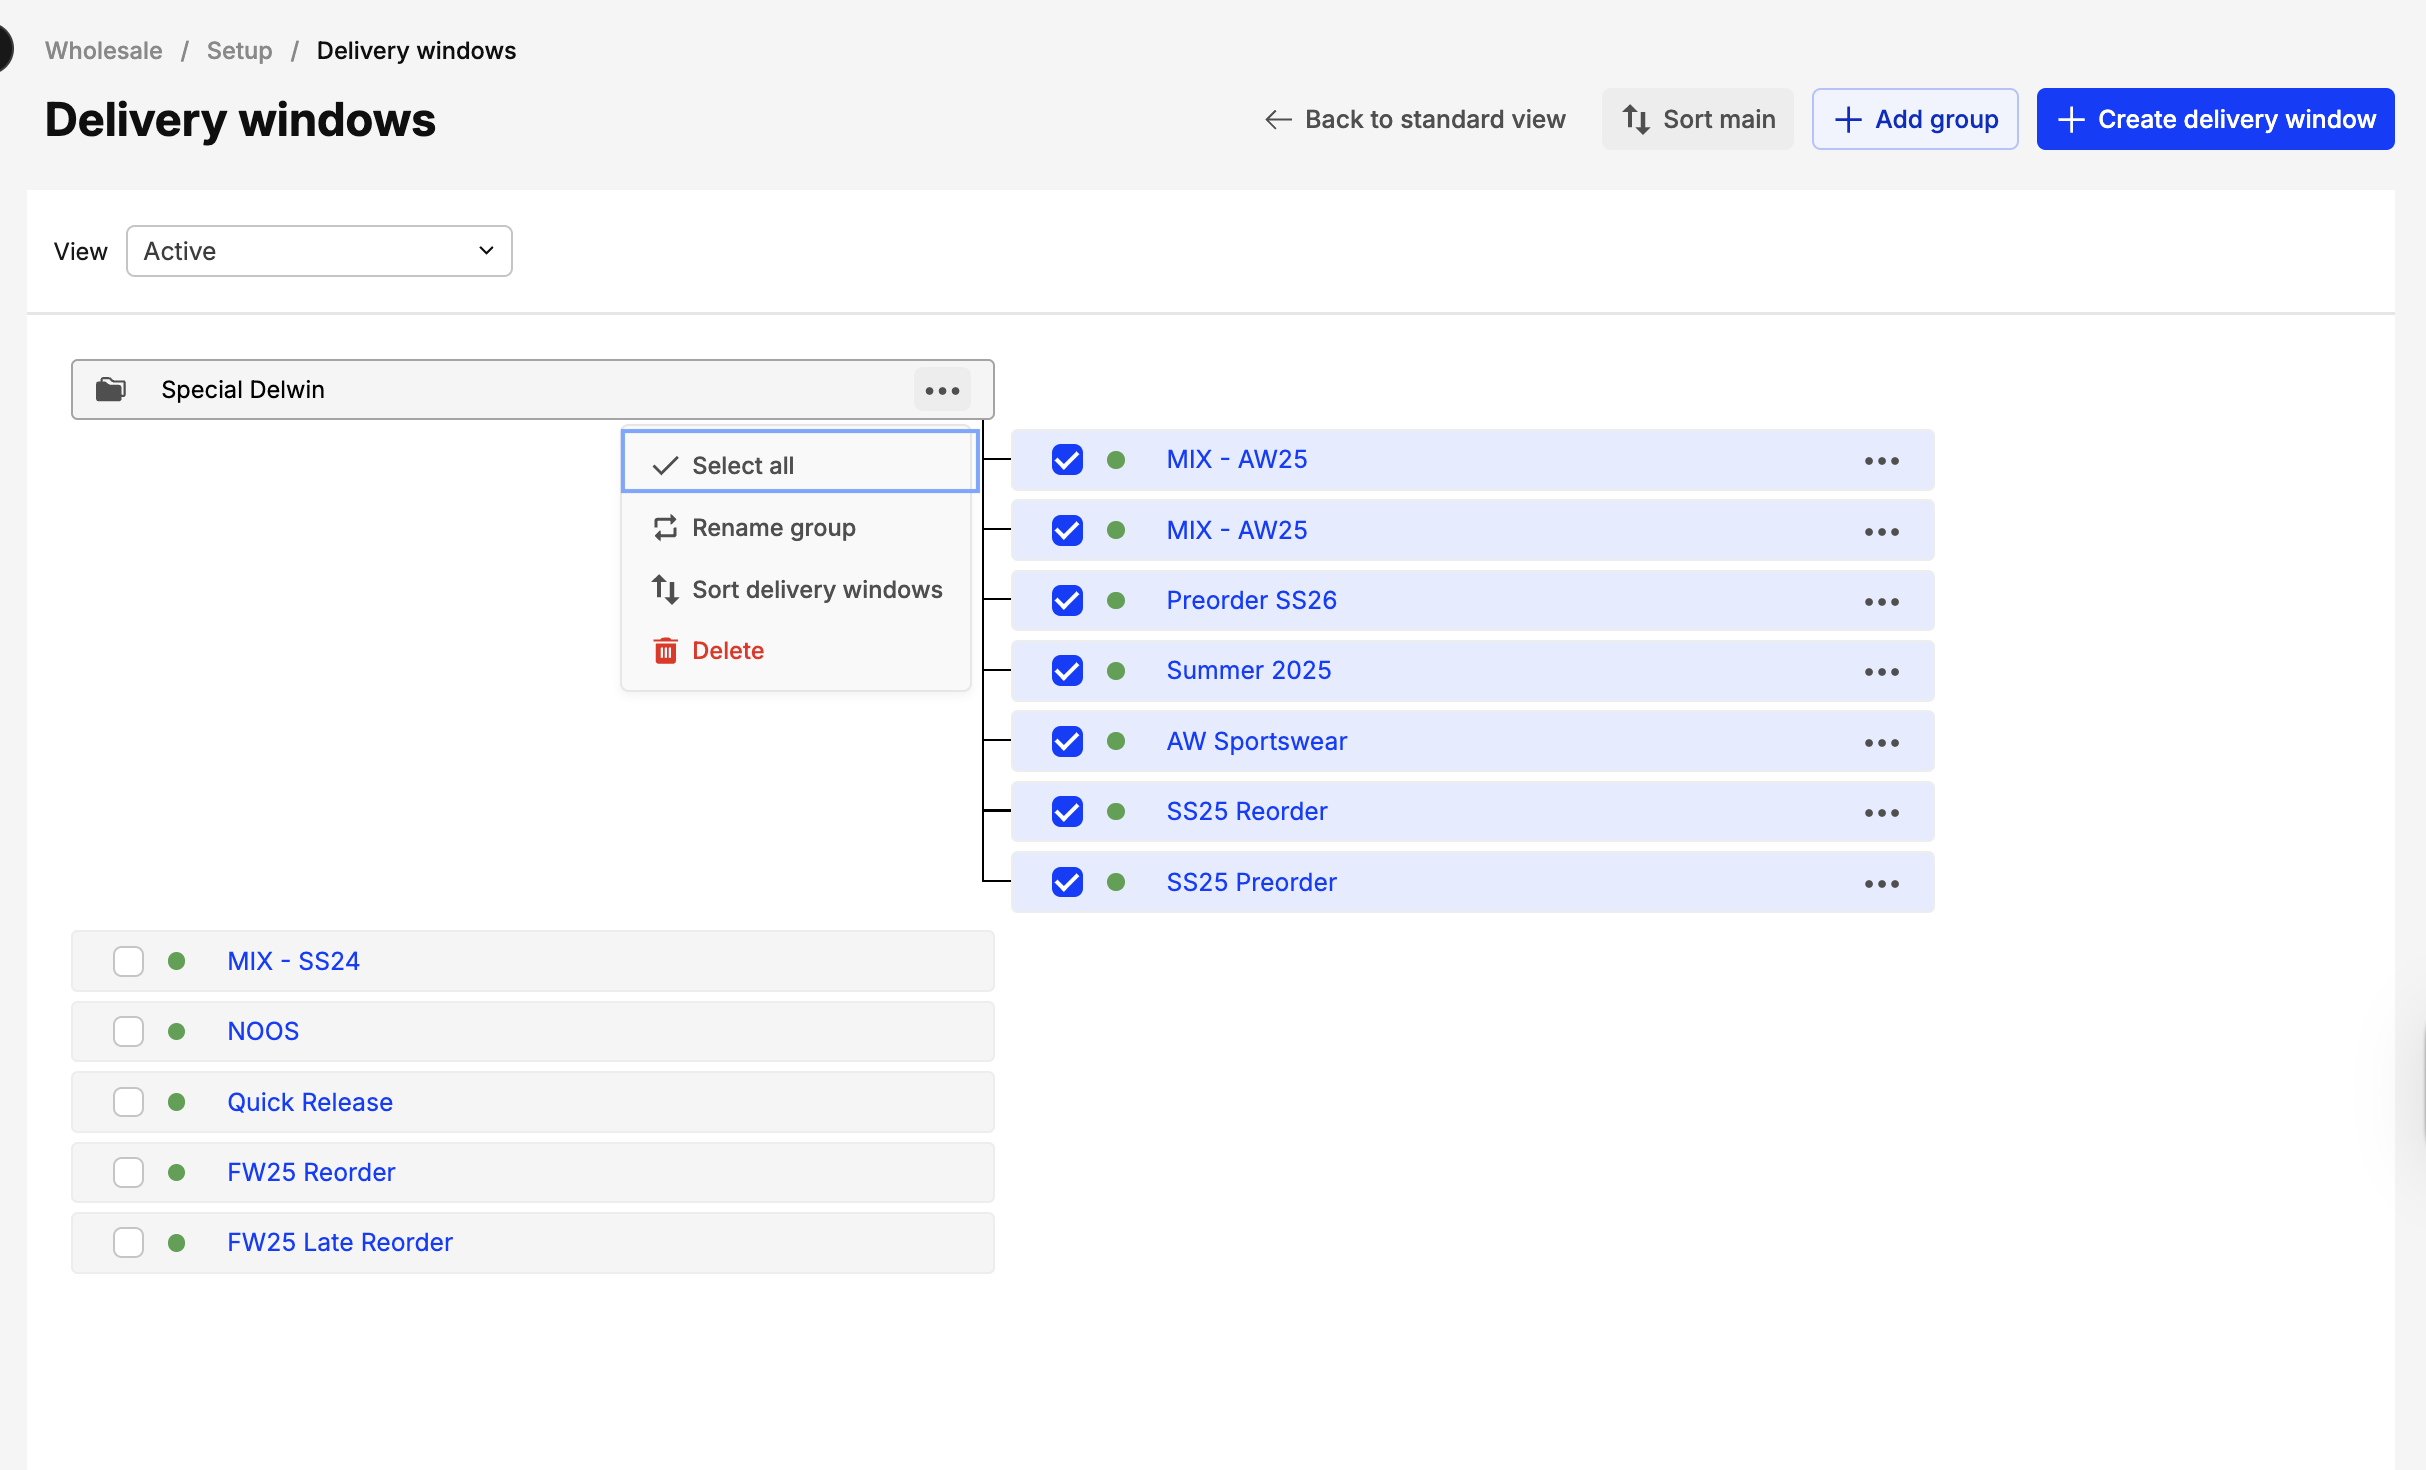
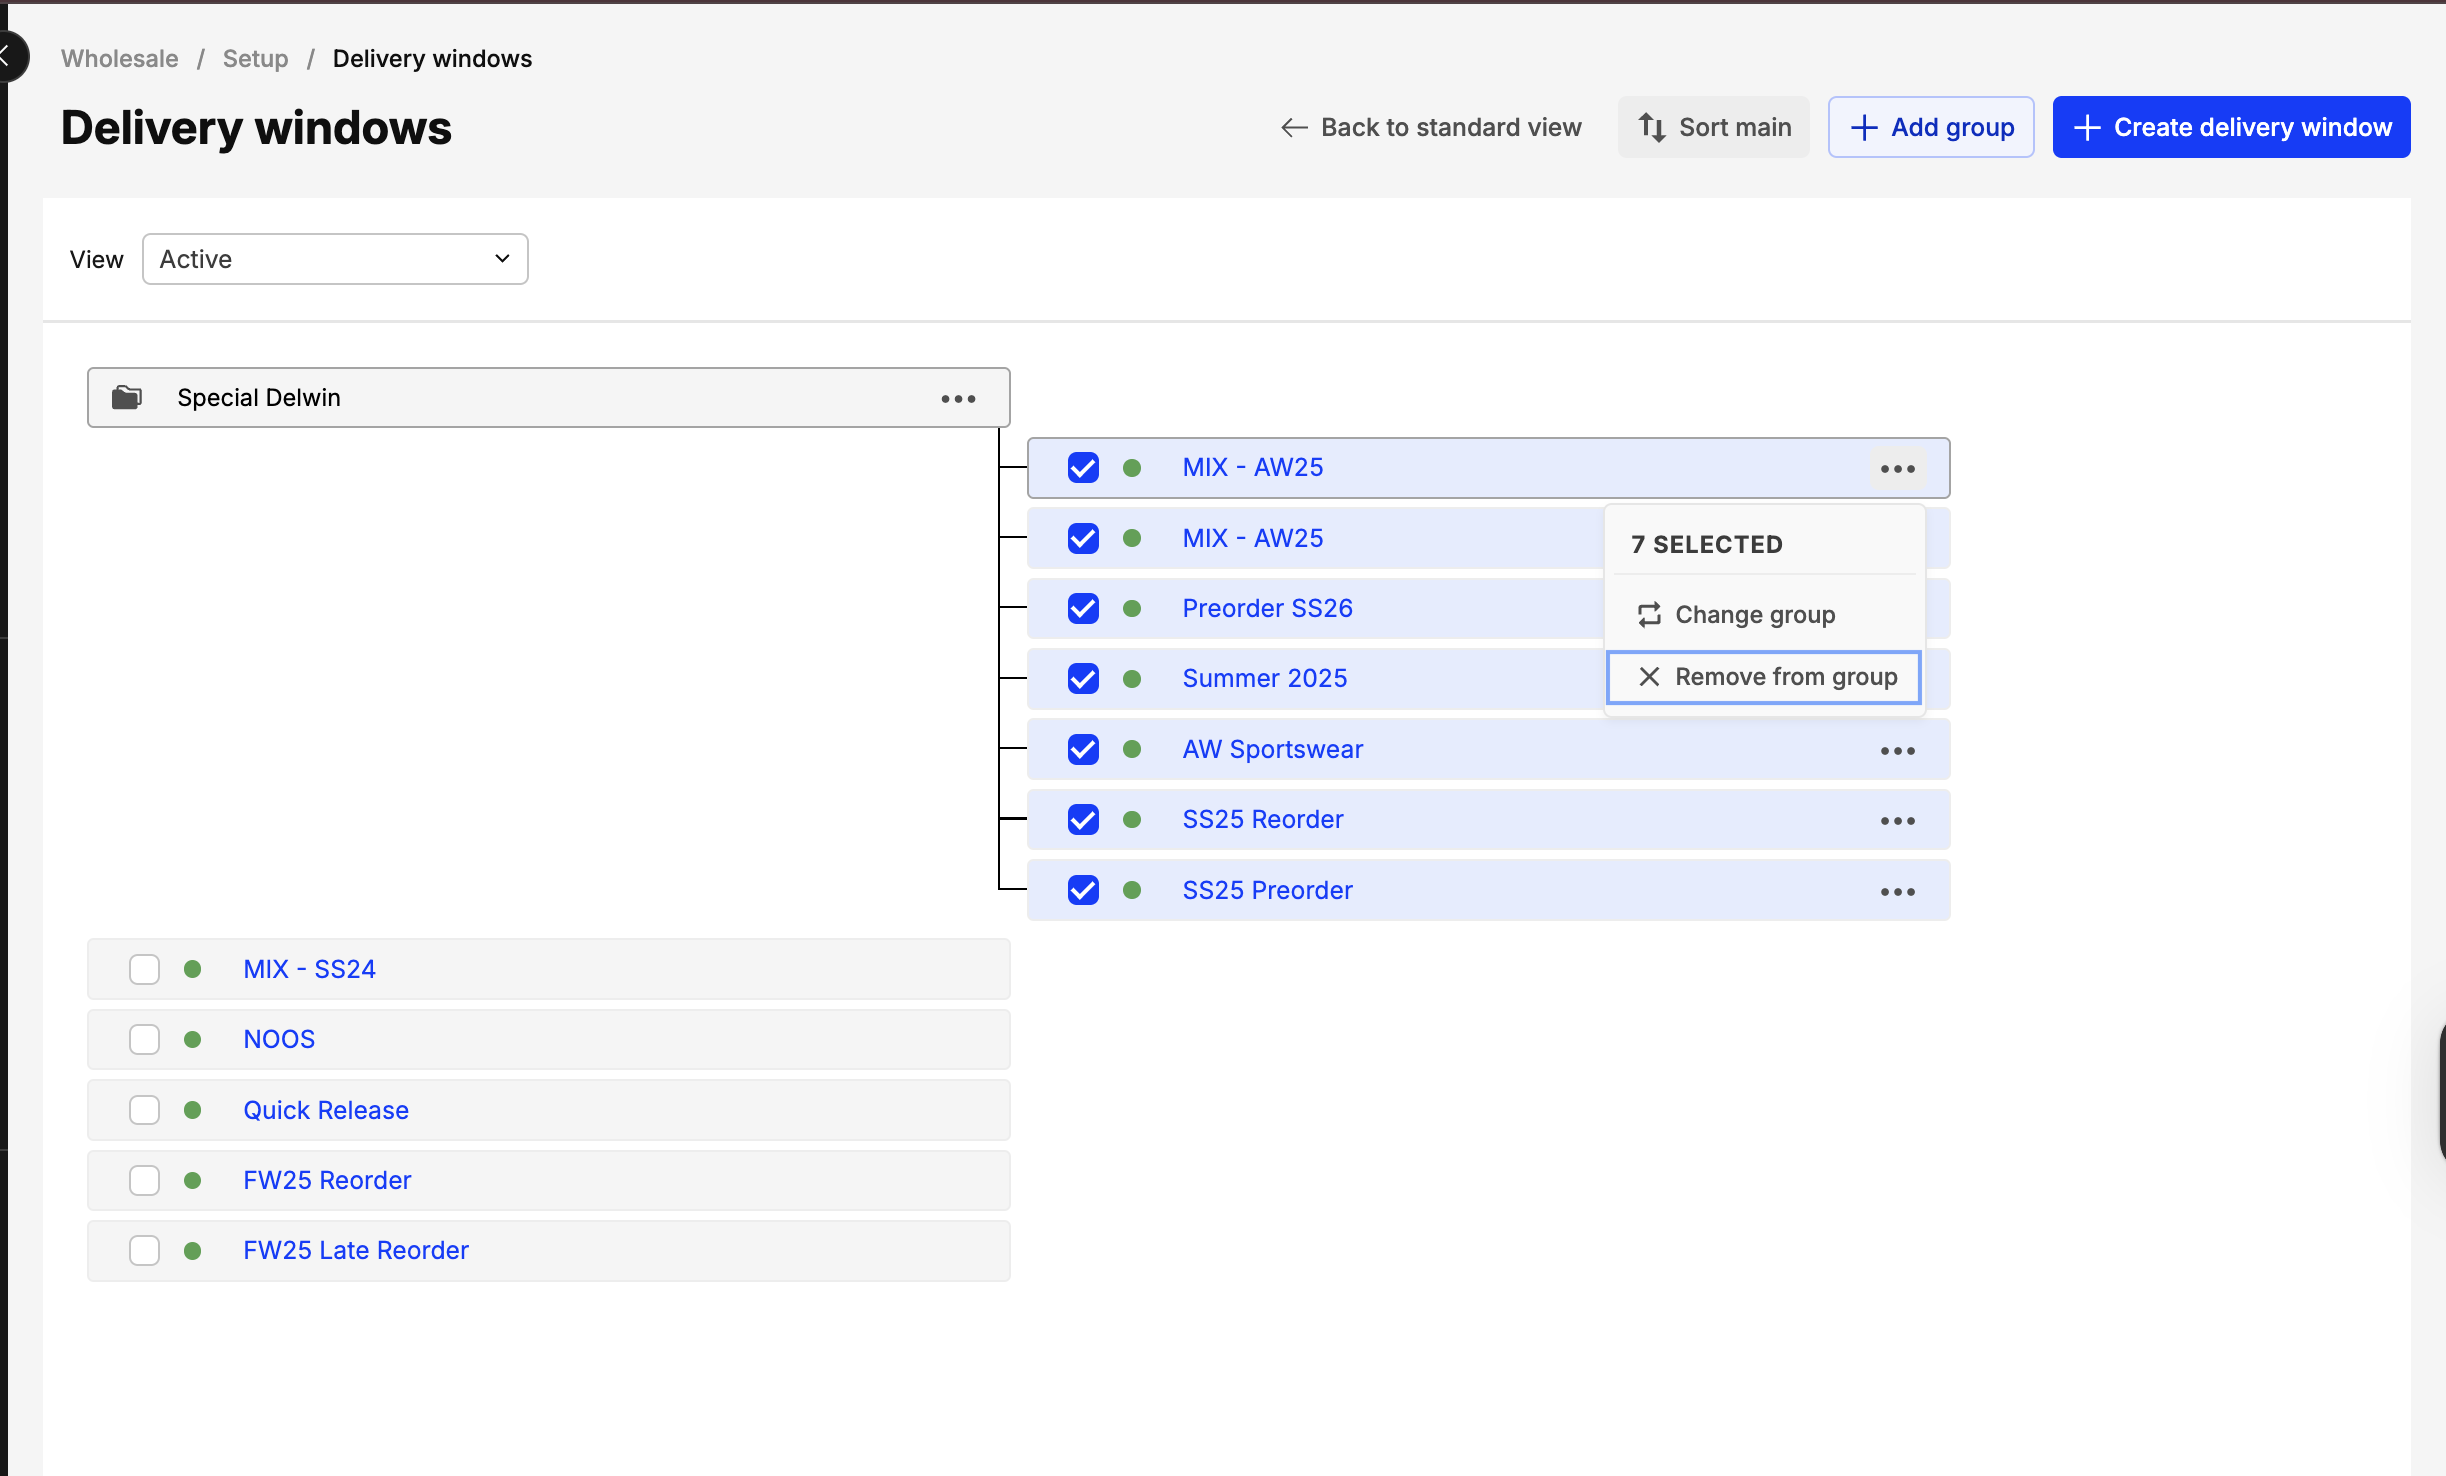
Remove delivery windows in bulk
Efficiently clear groups by removing windows in a single action:
-
Locate the delivery window group you wish to modify.
-
Click the three dots on the group and select Select all.
-
Click the three dots on any selected delivery window and choose Remove from group.
Through the Delivery window settings
- Click on ‘More’ in the Wholesale part of the menu and select ‘Delivery windows’
- Select a Delivery window of your choice
- Click ‘Edit’ and use the ‘Group’ setting to assign a group to this Delivery window. Note that here you can also remove an existing group, or change to another.
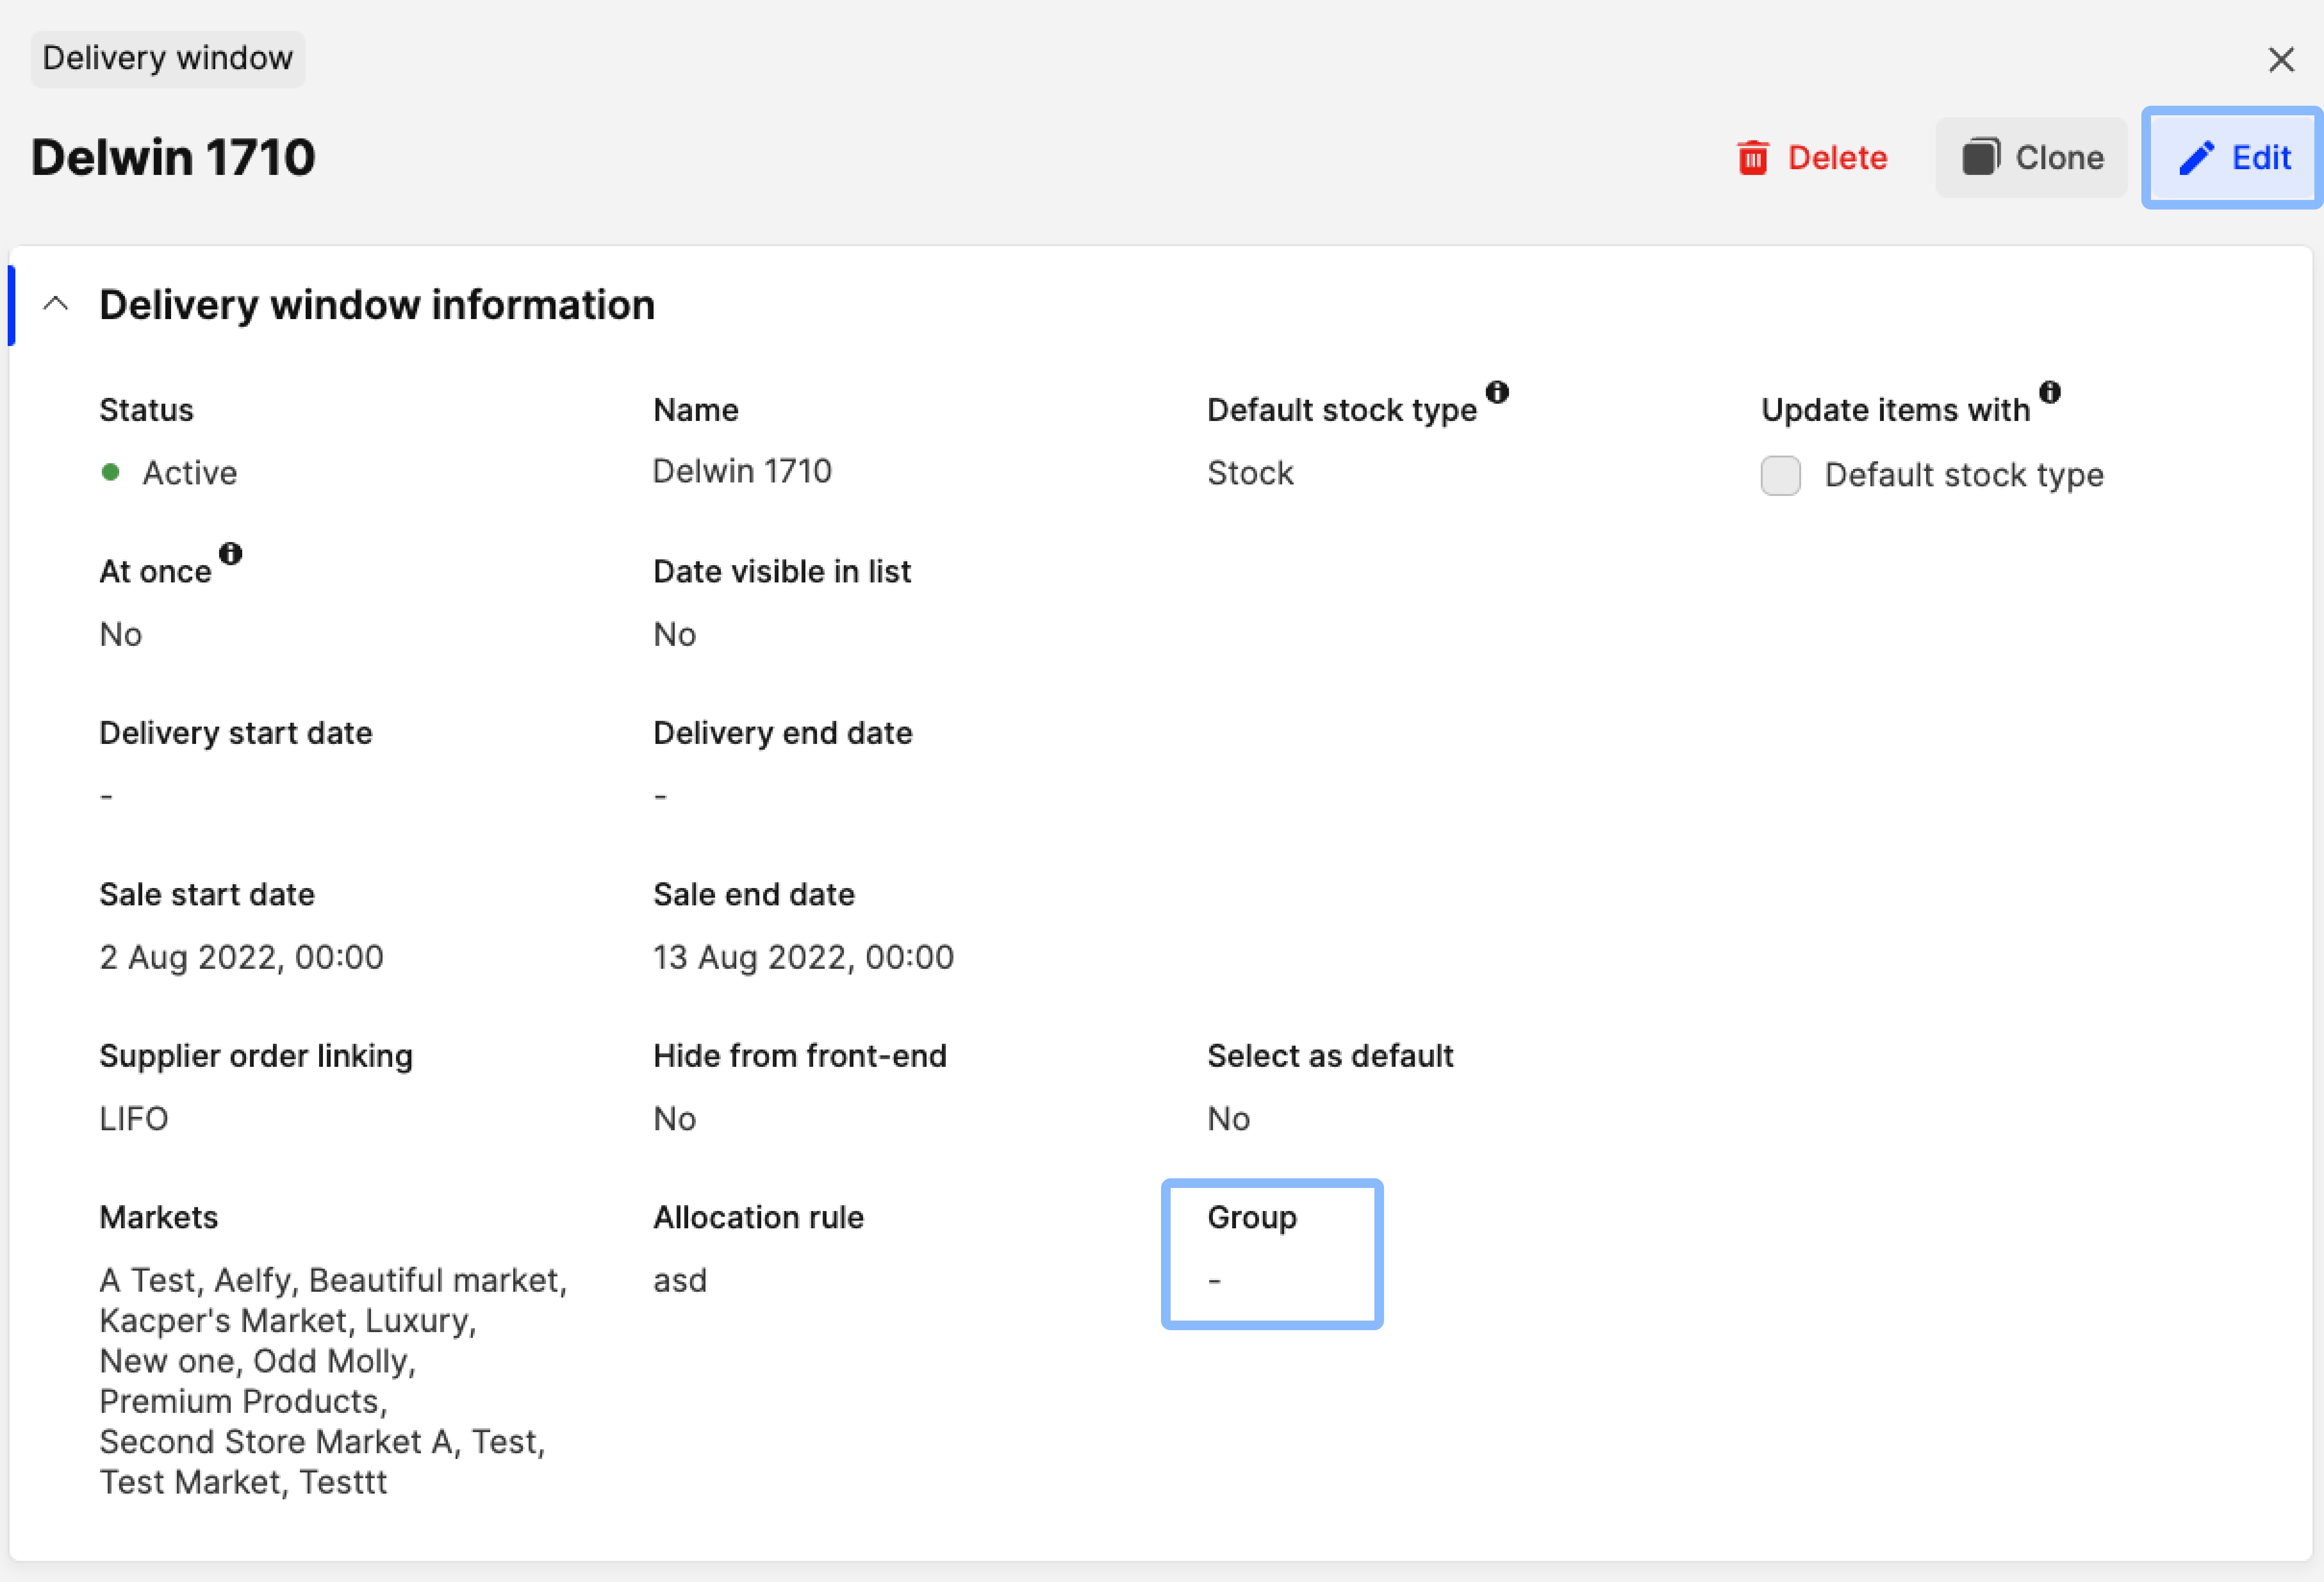
- Click ‘Save’.
Each delivery window can be added only to one group.
Displaying Delivery window grouping in the Showroom filter panel
The Deliver window groups can be added to the Showroom filter panel as seen below:
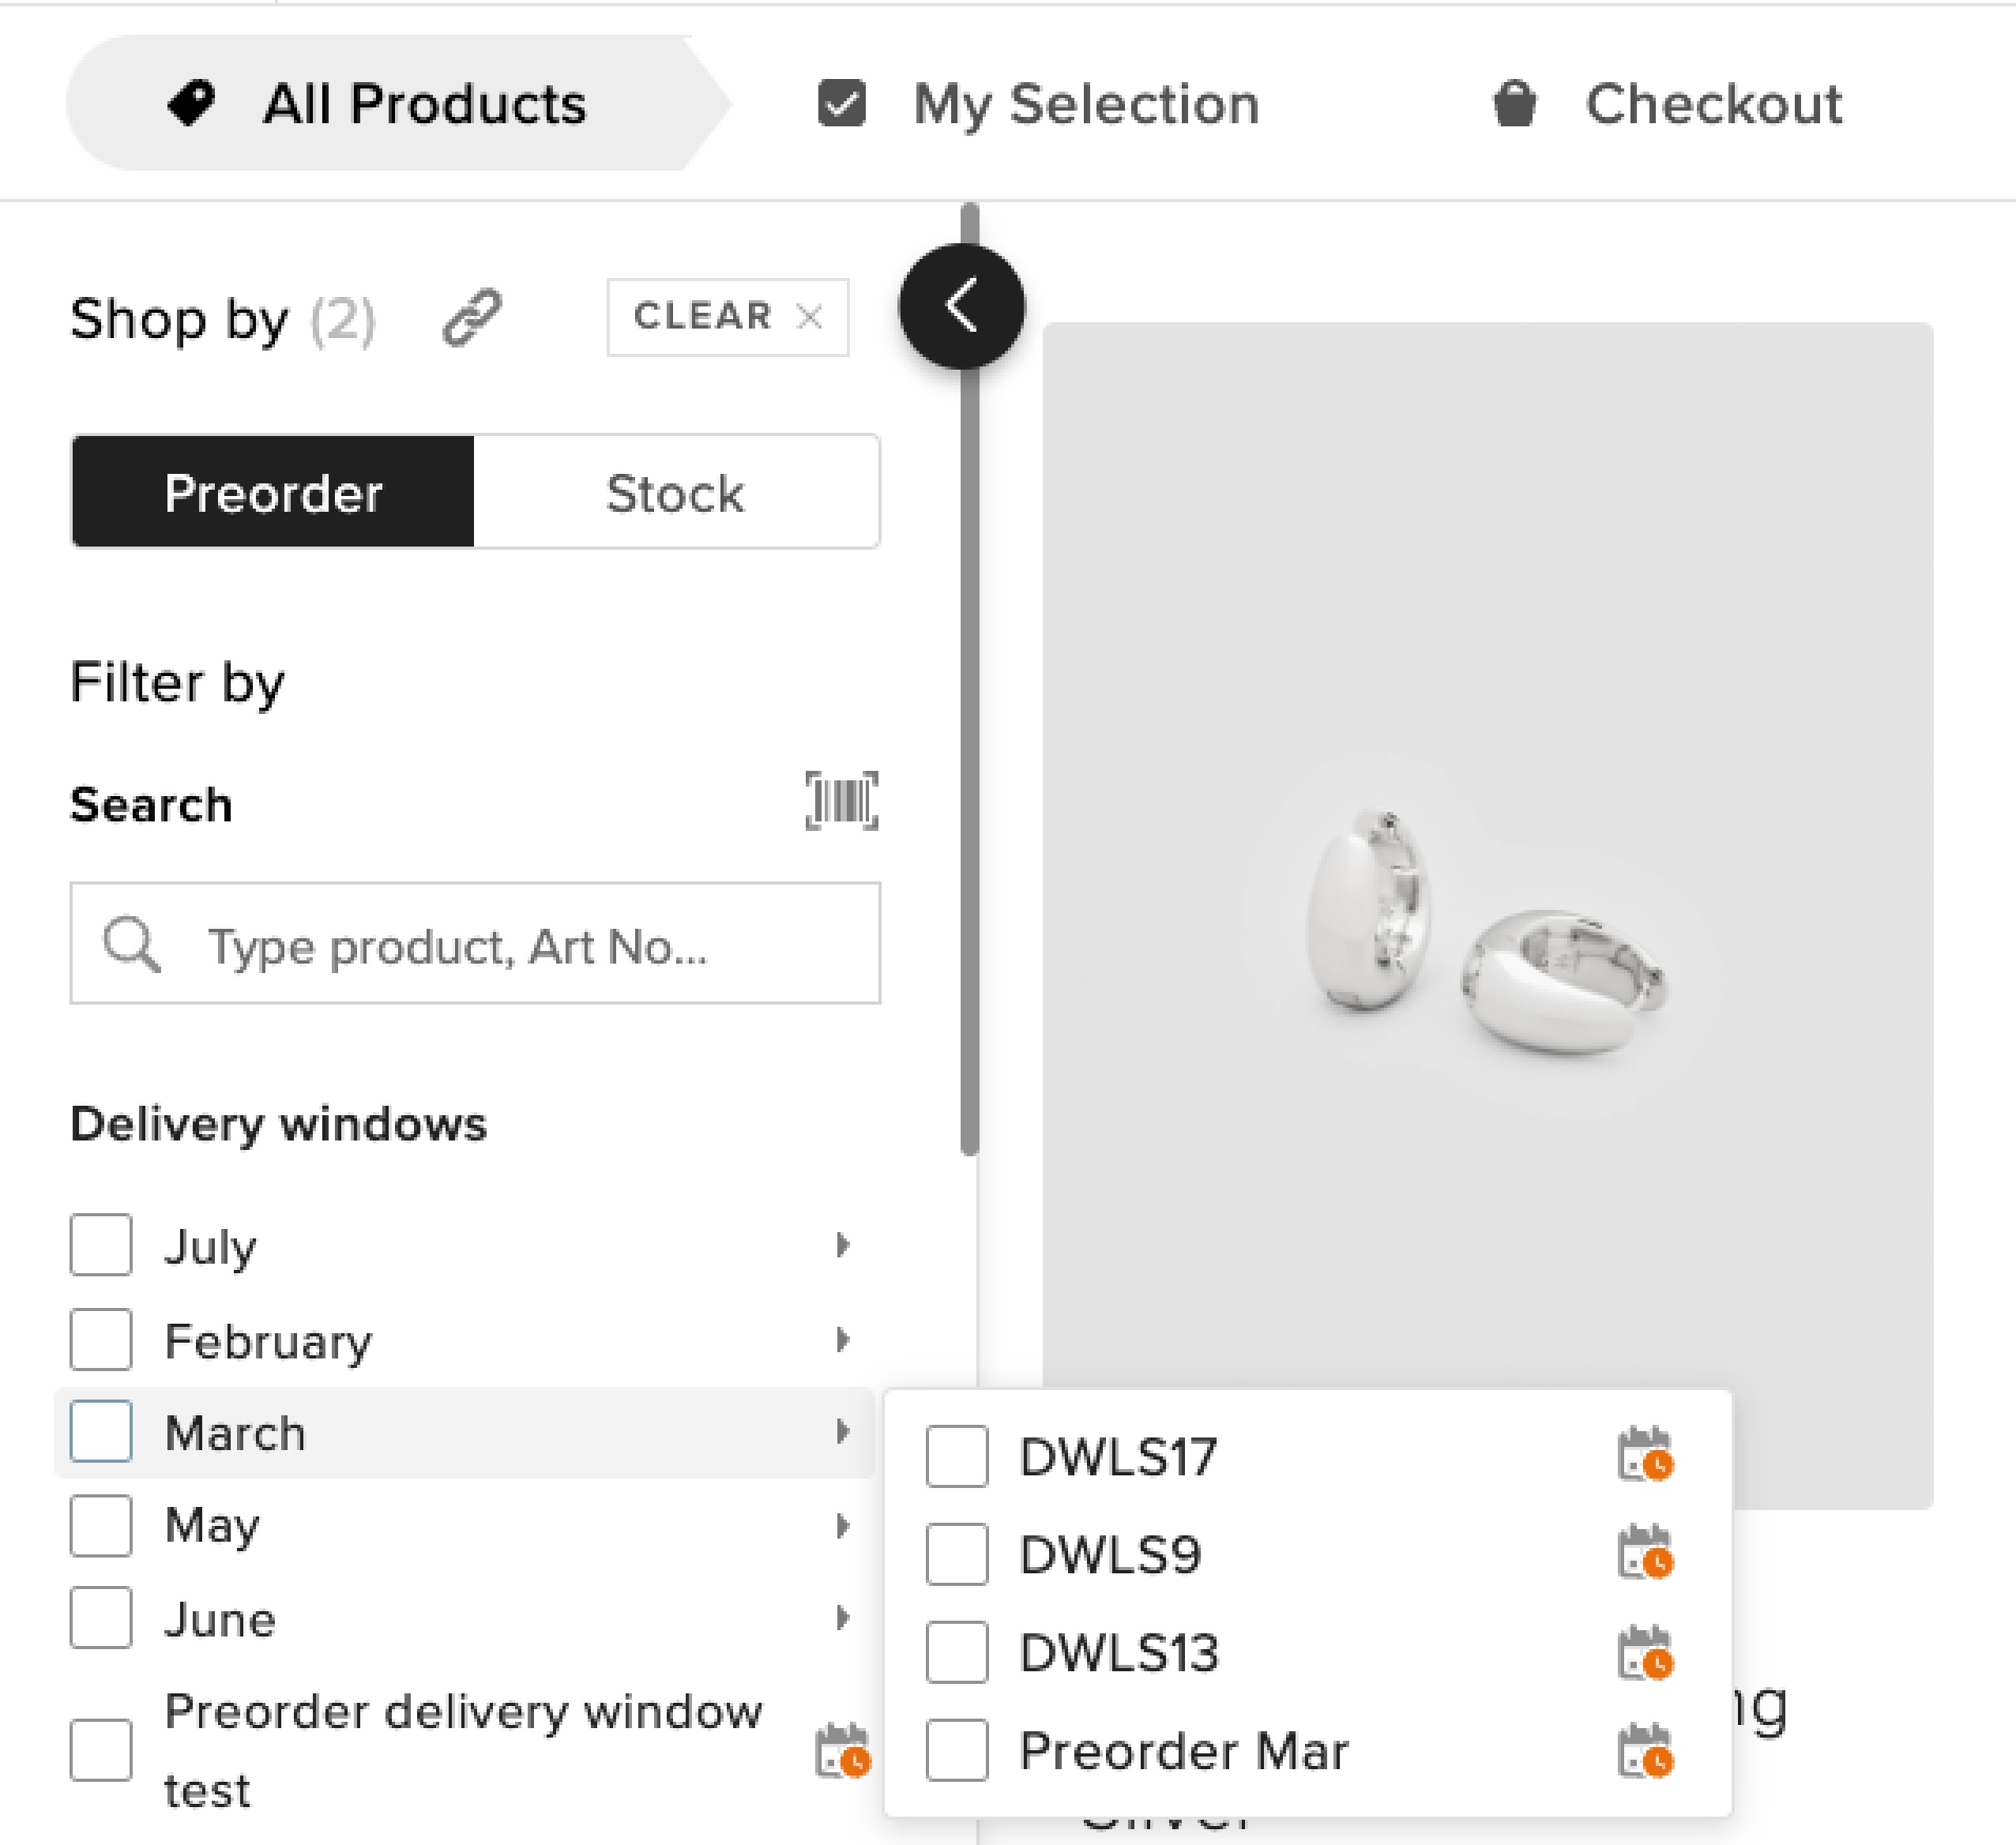
In order to do so, please follow these steps:
-
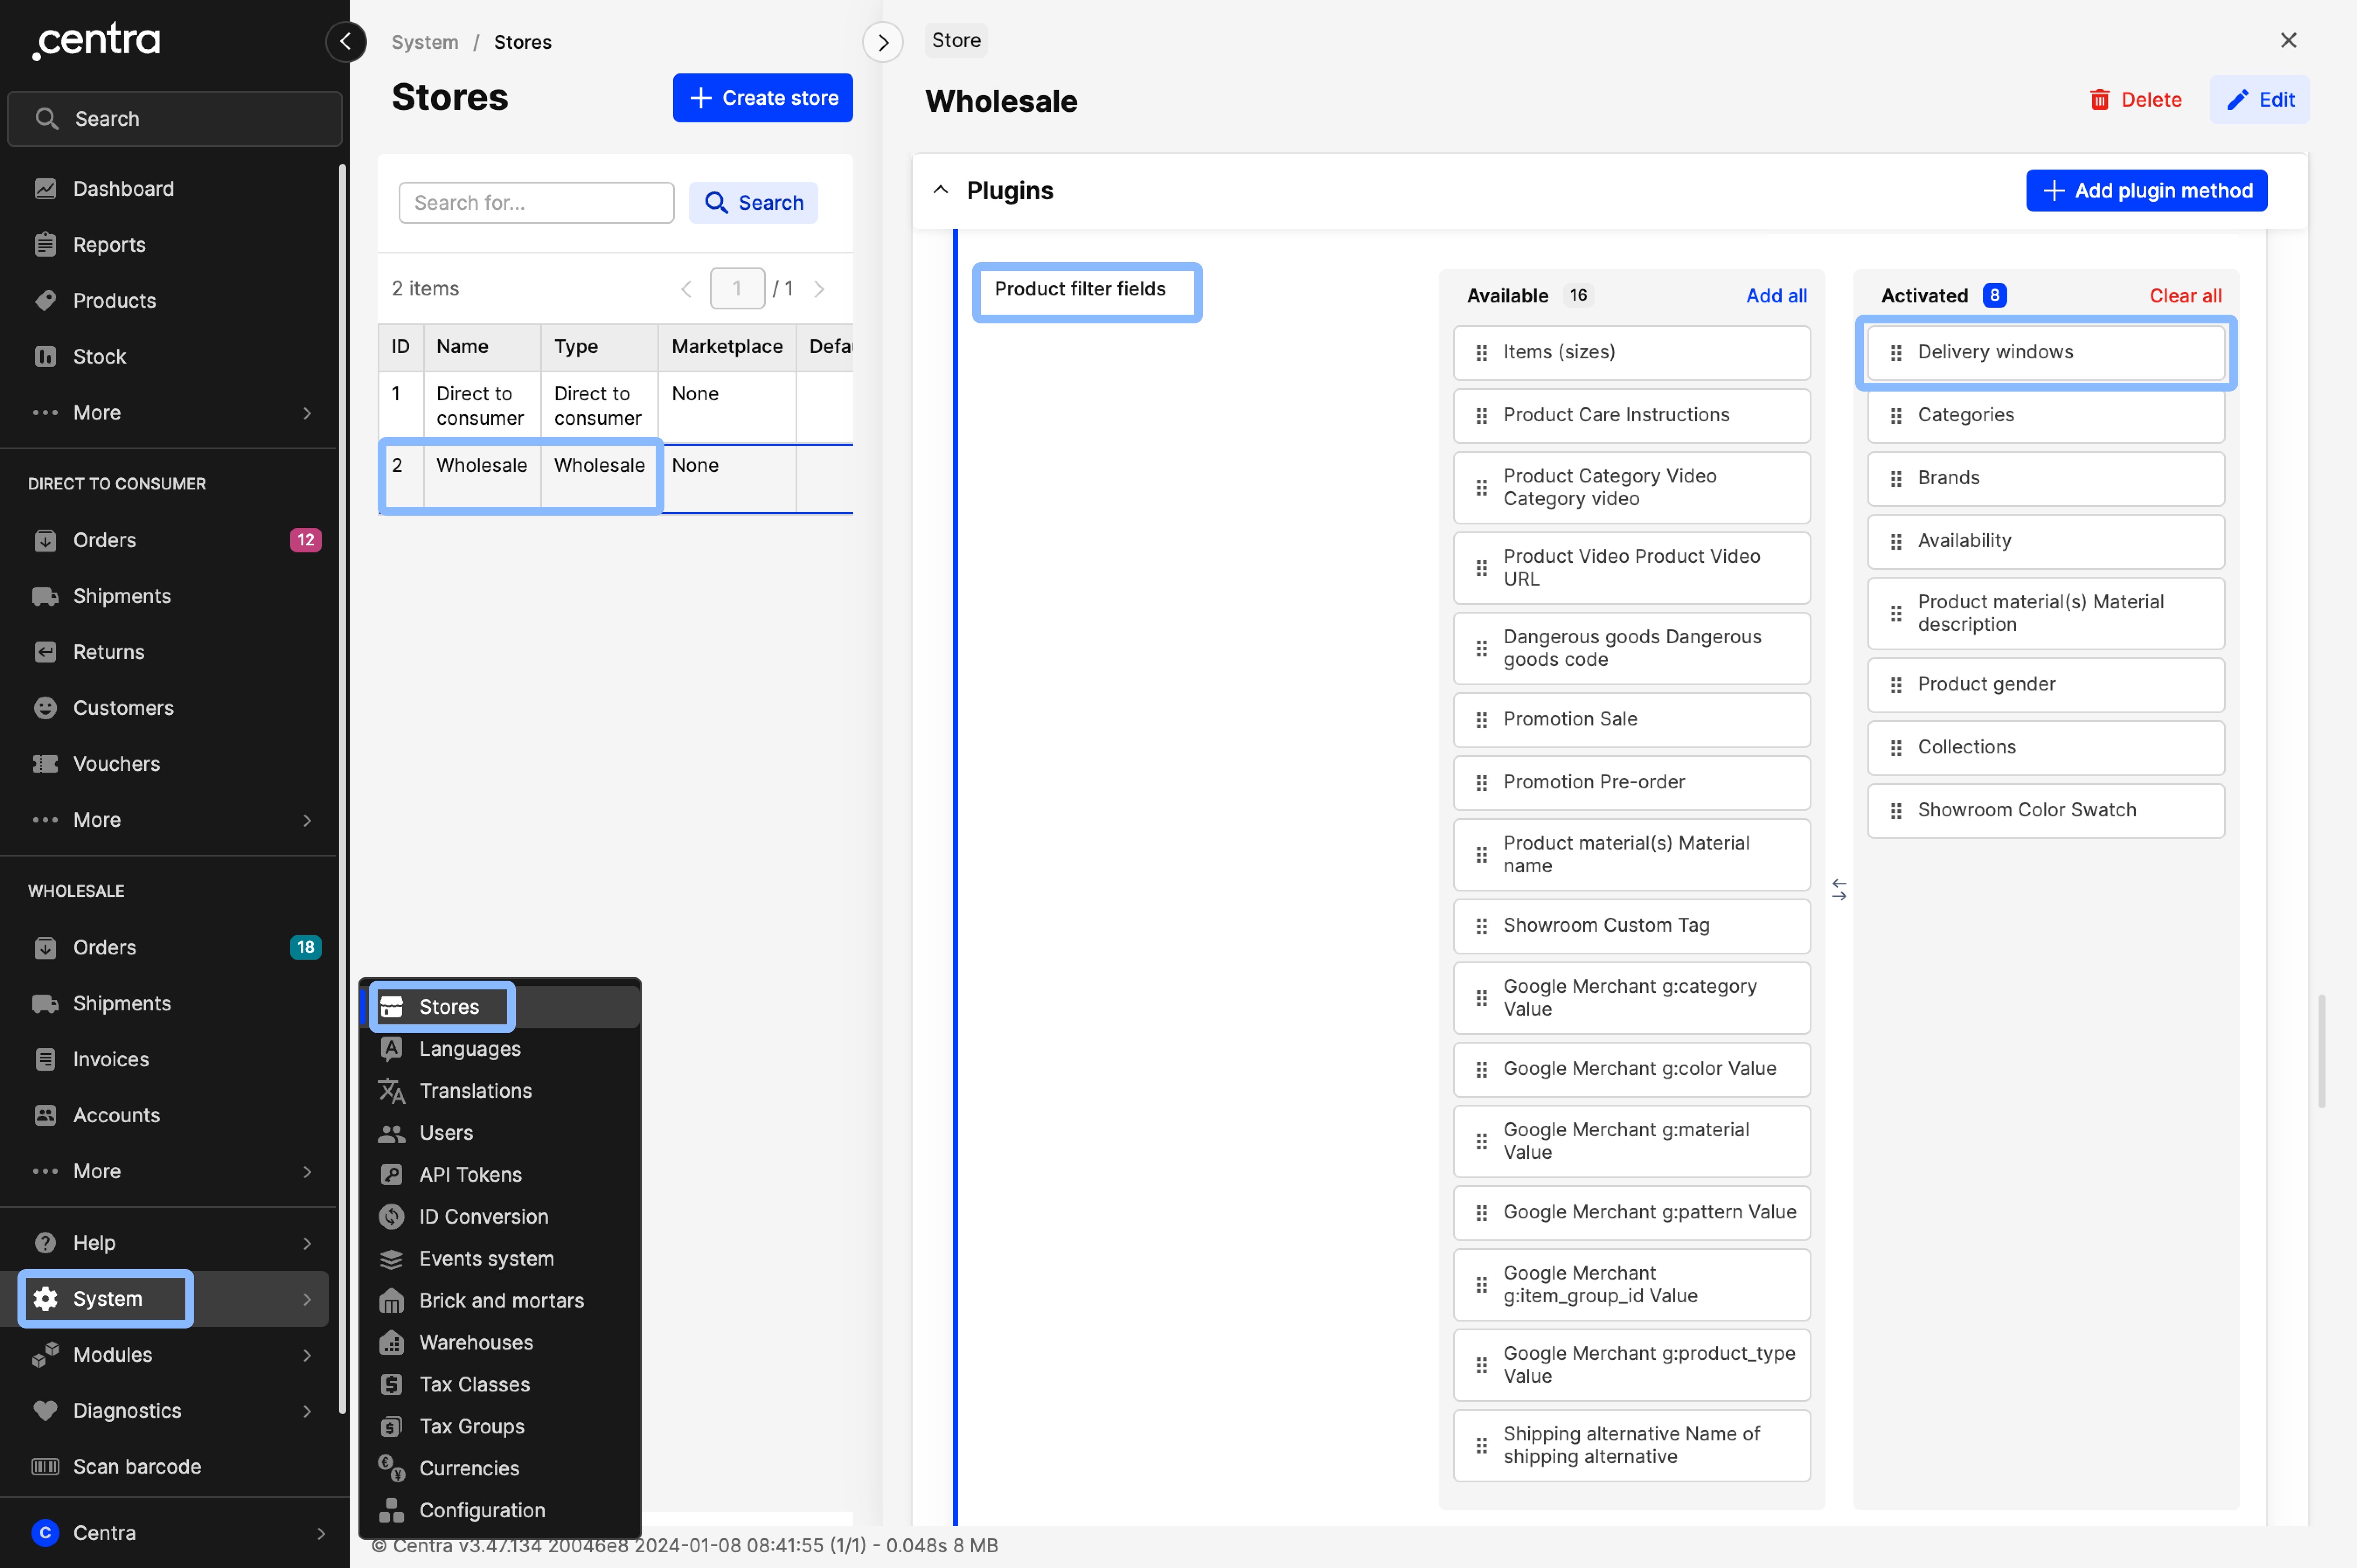
Click on ‘System’, ‘Stores’ and select the ‘Wholesale’ store
-
Scroll down to ‘Plugins’ and select the Showroom plugin
-
Ensure that in the ‘Product filter fields’, the ‘Delivery windows’ is moved to the Activated column as seen below:
-
Click ‘Save’.
Note that mutations that allow you to manage the groups (create, delete, add delivery windows to them, change group, rename) are also available through the GQL API.