How to create a Lookbook in Centra Showroom
About this article
The article will guide you through creating a Lookbook in the Centra Showroom. A Lookbook can be used to showcase seasonal collections to your current customers and prospects without the need for a dedicated login.
Activating the Lookbook feature in Centra
To access this feature in your Showroom, you must first activate it in Centra. Go to Stores Management > Stores > Wholesale > Plugins: Showroom, scroll to the bottom, set ‘Lookbook’ to ‘Enabled,’ and click Save

Once enabled, the ‘Lookbook’ option will appear in the hamburger menu in the top left corner.
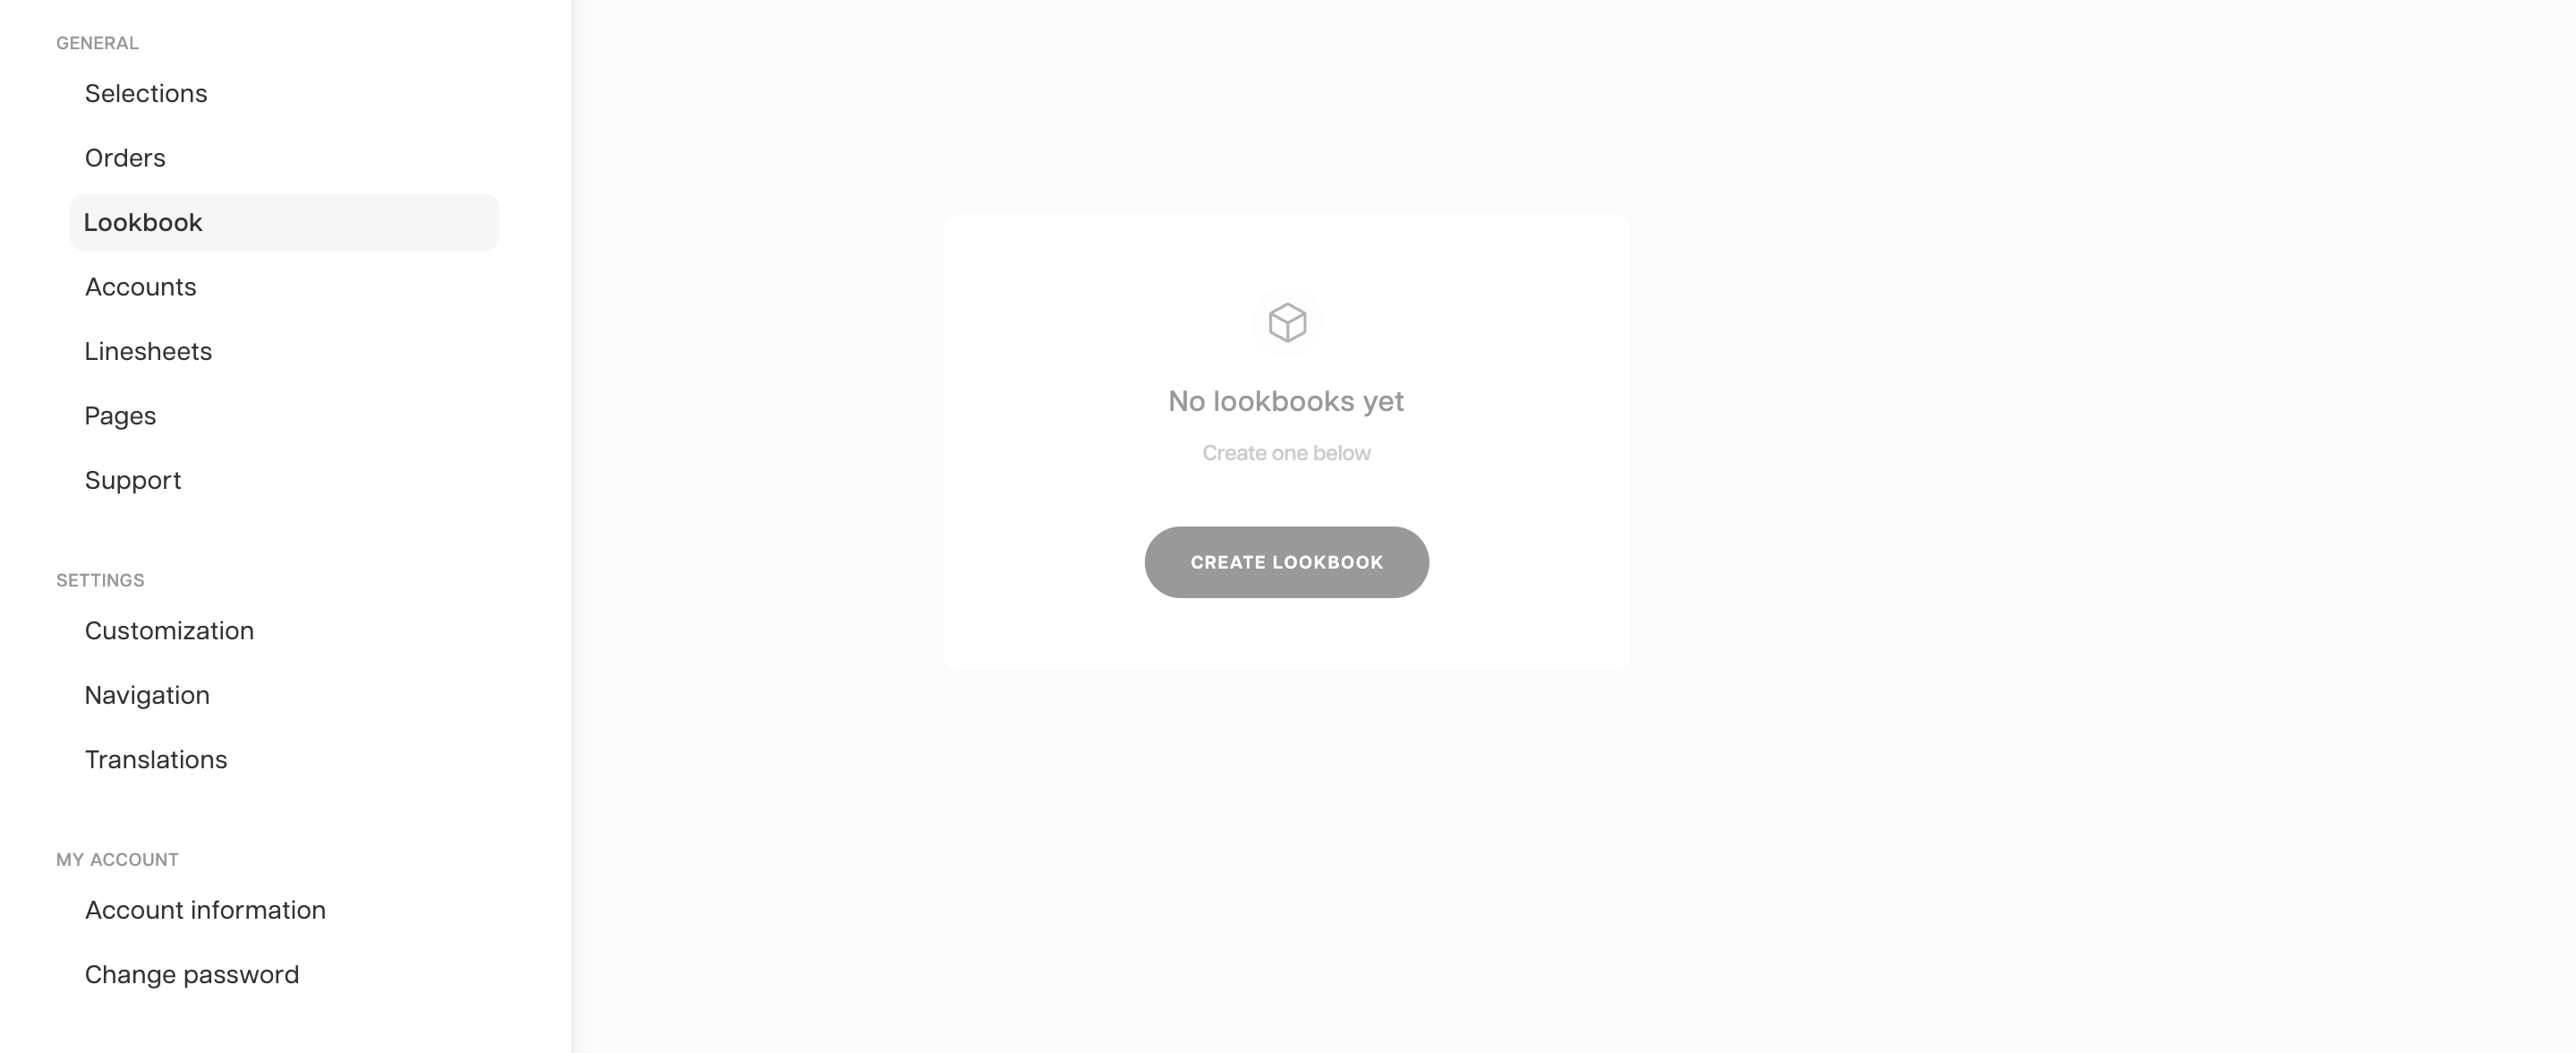
Creating a new Lookbook

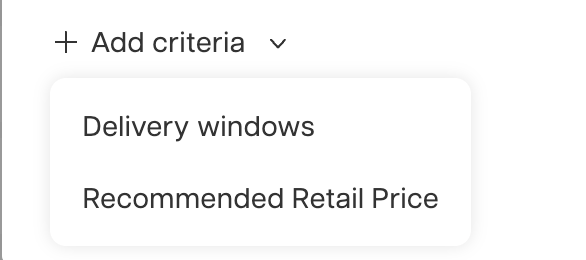
You must first select a market that you are creating a Lookbook for, which will pull all available items. From there, you can proceed with all products or narrow your selection by:
-
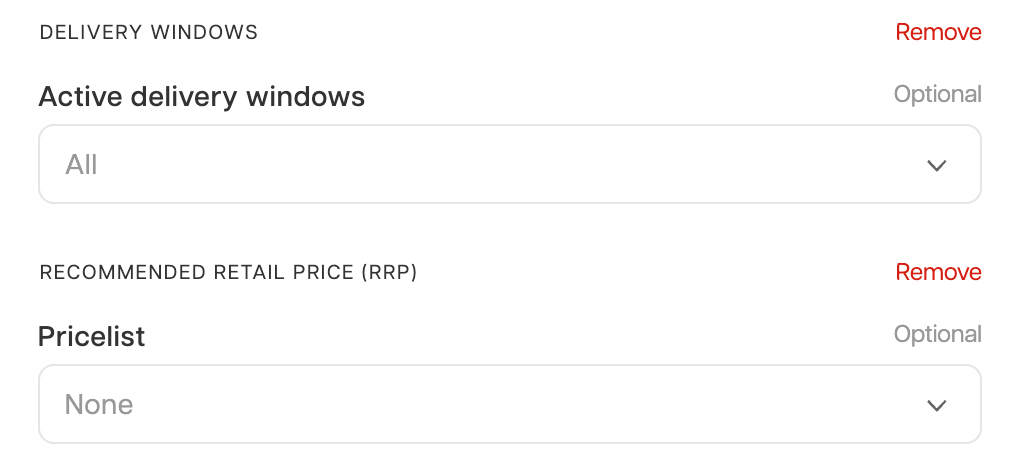
Active Delivery Windows: Only products with valid, non-expired delivery windows will be selected (example At once and Selected date range).
-
Visible Products: Products hidden from the frontend will not be included in the Lookbook.
-
Narrowing Product Selection: by clicking + add Critera, you can filter products based on criteria like delivery windows and more.
-
Recommended Retail Price (RRP): If you want to display the RRP in your Lookbook, you can choose from all the available pricelists for that specific market. If you choose more than one: in the Lookbook, the Pricelist selector will appear, showing all selected options, each labeled with the pricelist name and currency suffix. Users can easily switch between the different pricelists to view the RRP in various currencies, offering greater flexibility and clarity for customers.
If the currency suffix is the same as the pricelist name, the value in parentheses will be hidden to prevent redundant information.
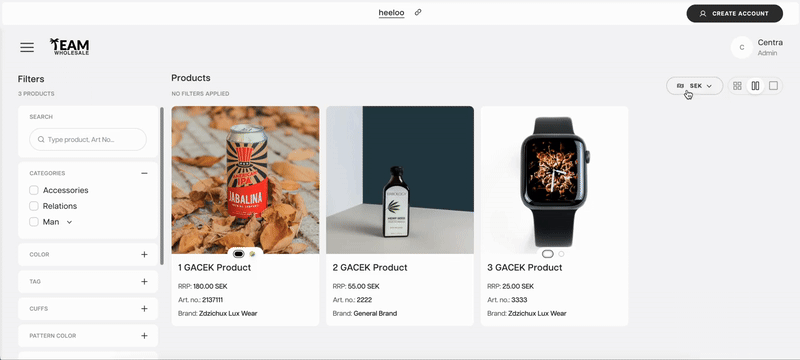
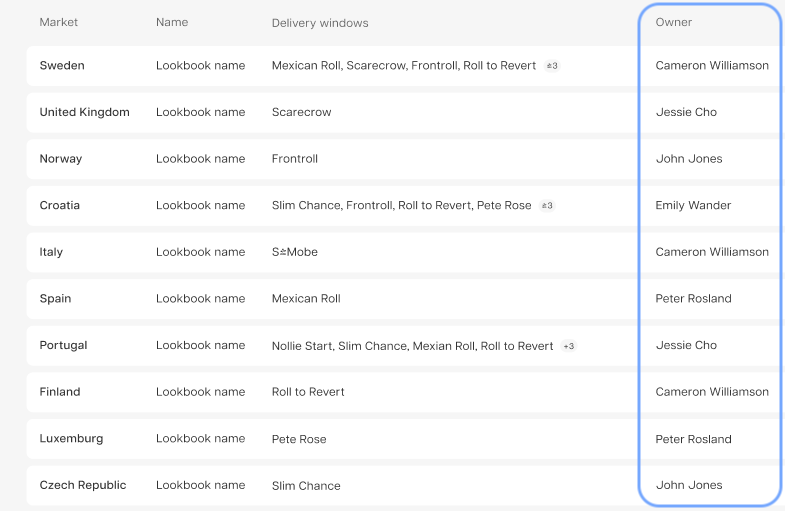
Lookbook listing
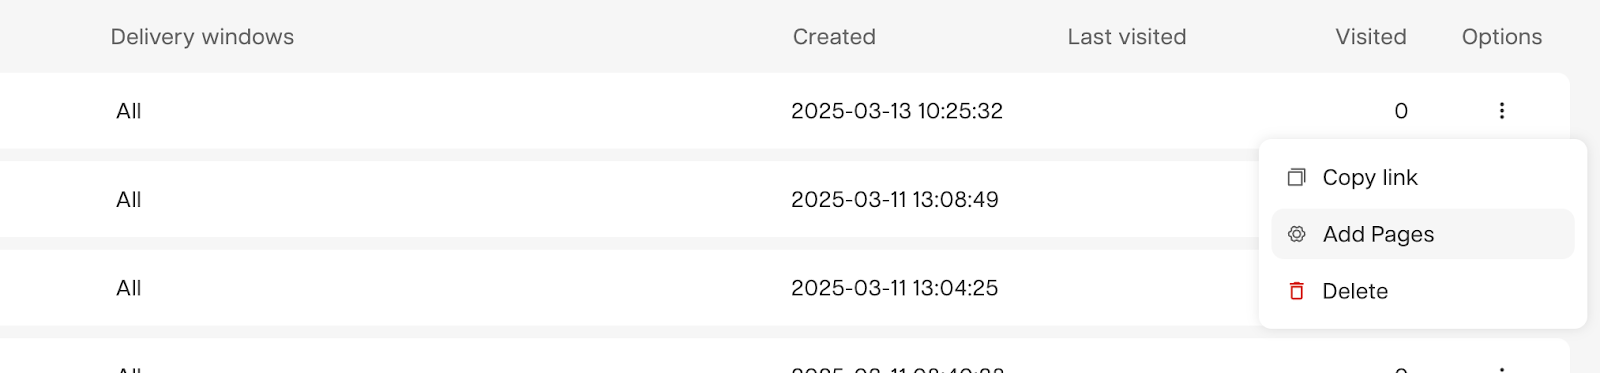
Once your Lookbook is created, it will show up in the Lookbook listing.
- Owner Column: A new column shows the name of the user who created the Lookbook, making it easier to track who created it.
Lookbook pages
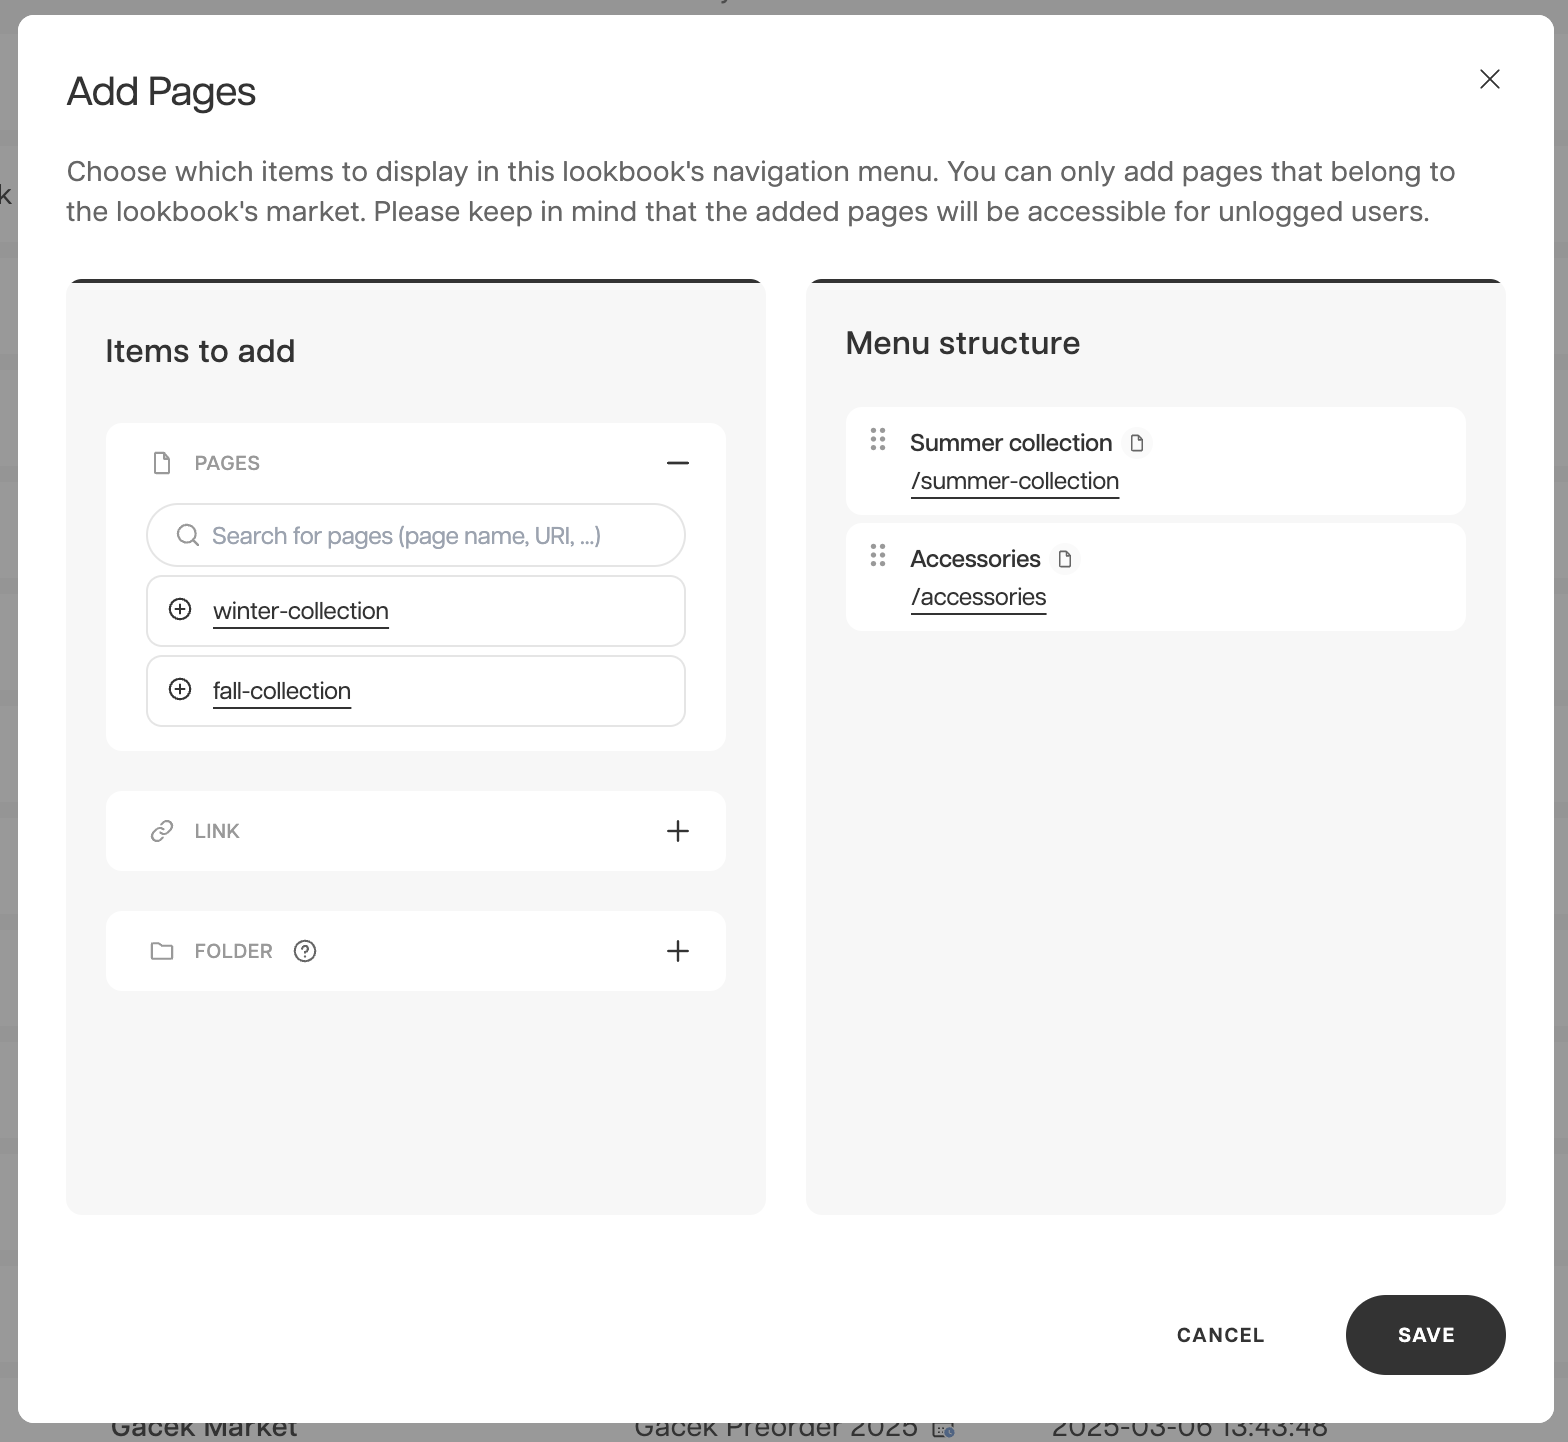
You can add CMS pages to your Lookbook, which will appear above the product listings to give it more structure.
-
Adding Pages:
- Open the menu in the Lookbook row.
- Click Add Pages to create a new page that appears at the top of your Lookbook.
Pages added to the Lookbook must be available in the Lookbook’s market to ensure they’re relevant.
Menu structure
The Lookbook’s menu structure is similar to CMS navigation, which gives you flexibility in organizing your pages.
- Add external links or create folders to organize items
-
Edit the order of your menu structure by dragging and dropping items
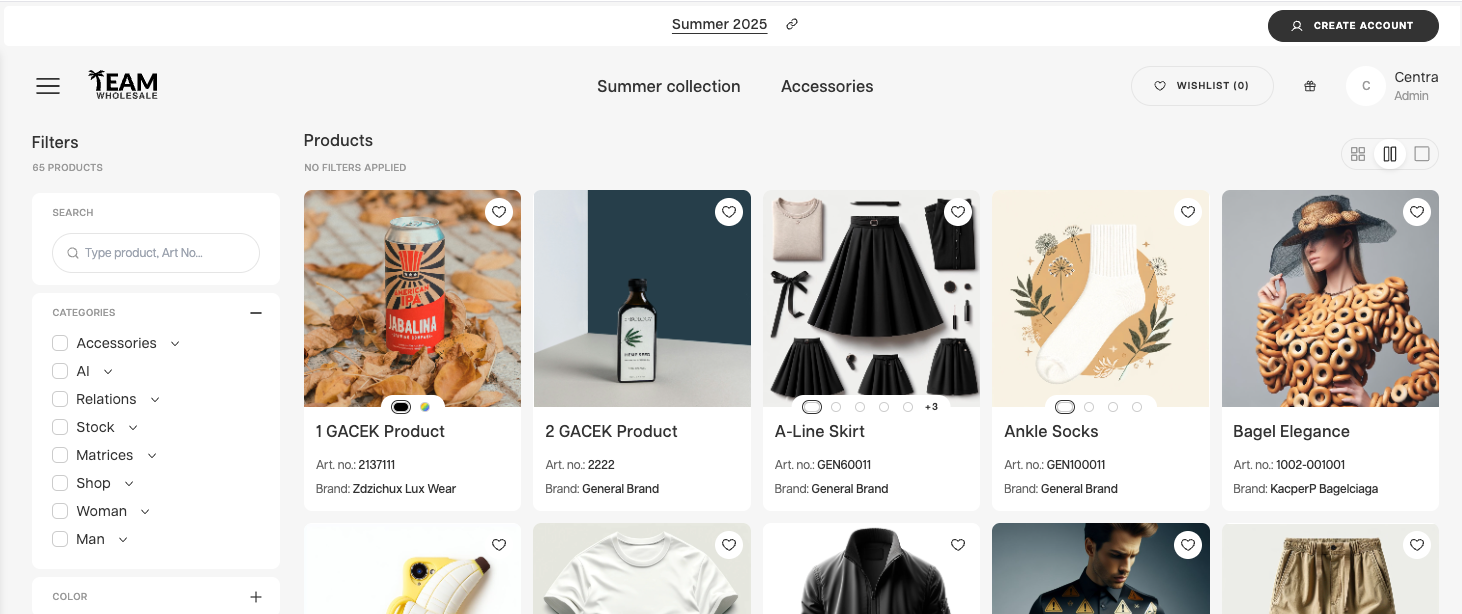
Products and sections displayed on the page added to a Lookbook will correspond with the market selected during Lookbook creation. If a page added to the Lookbook contains product blocks or hotspots, they will link to products in the Lookbook, not in the shoppable Showroom.