Connecting warehouses to markets through Allocation rules
About this article
This article will help you connect your warehouse to your markets, delivery windows and accounts, where you can control from which warehouse customers/countries will place their orders.
Setting up Allocation rules
To set up your Allocation rules, follow these steps:
-
Go to 'Stores management' > 'Warehouses'
-
Click 'Allocation rules' in the upper-right corner
-
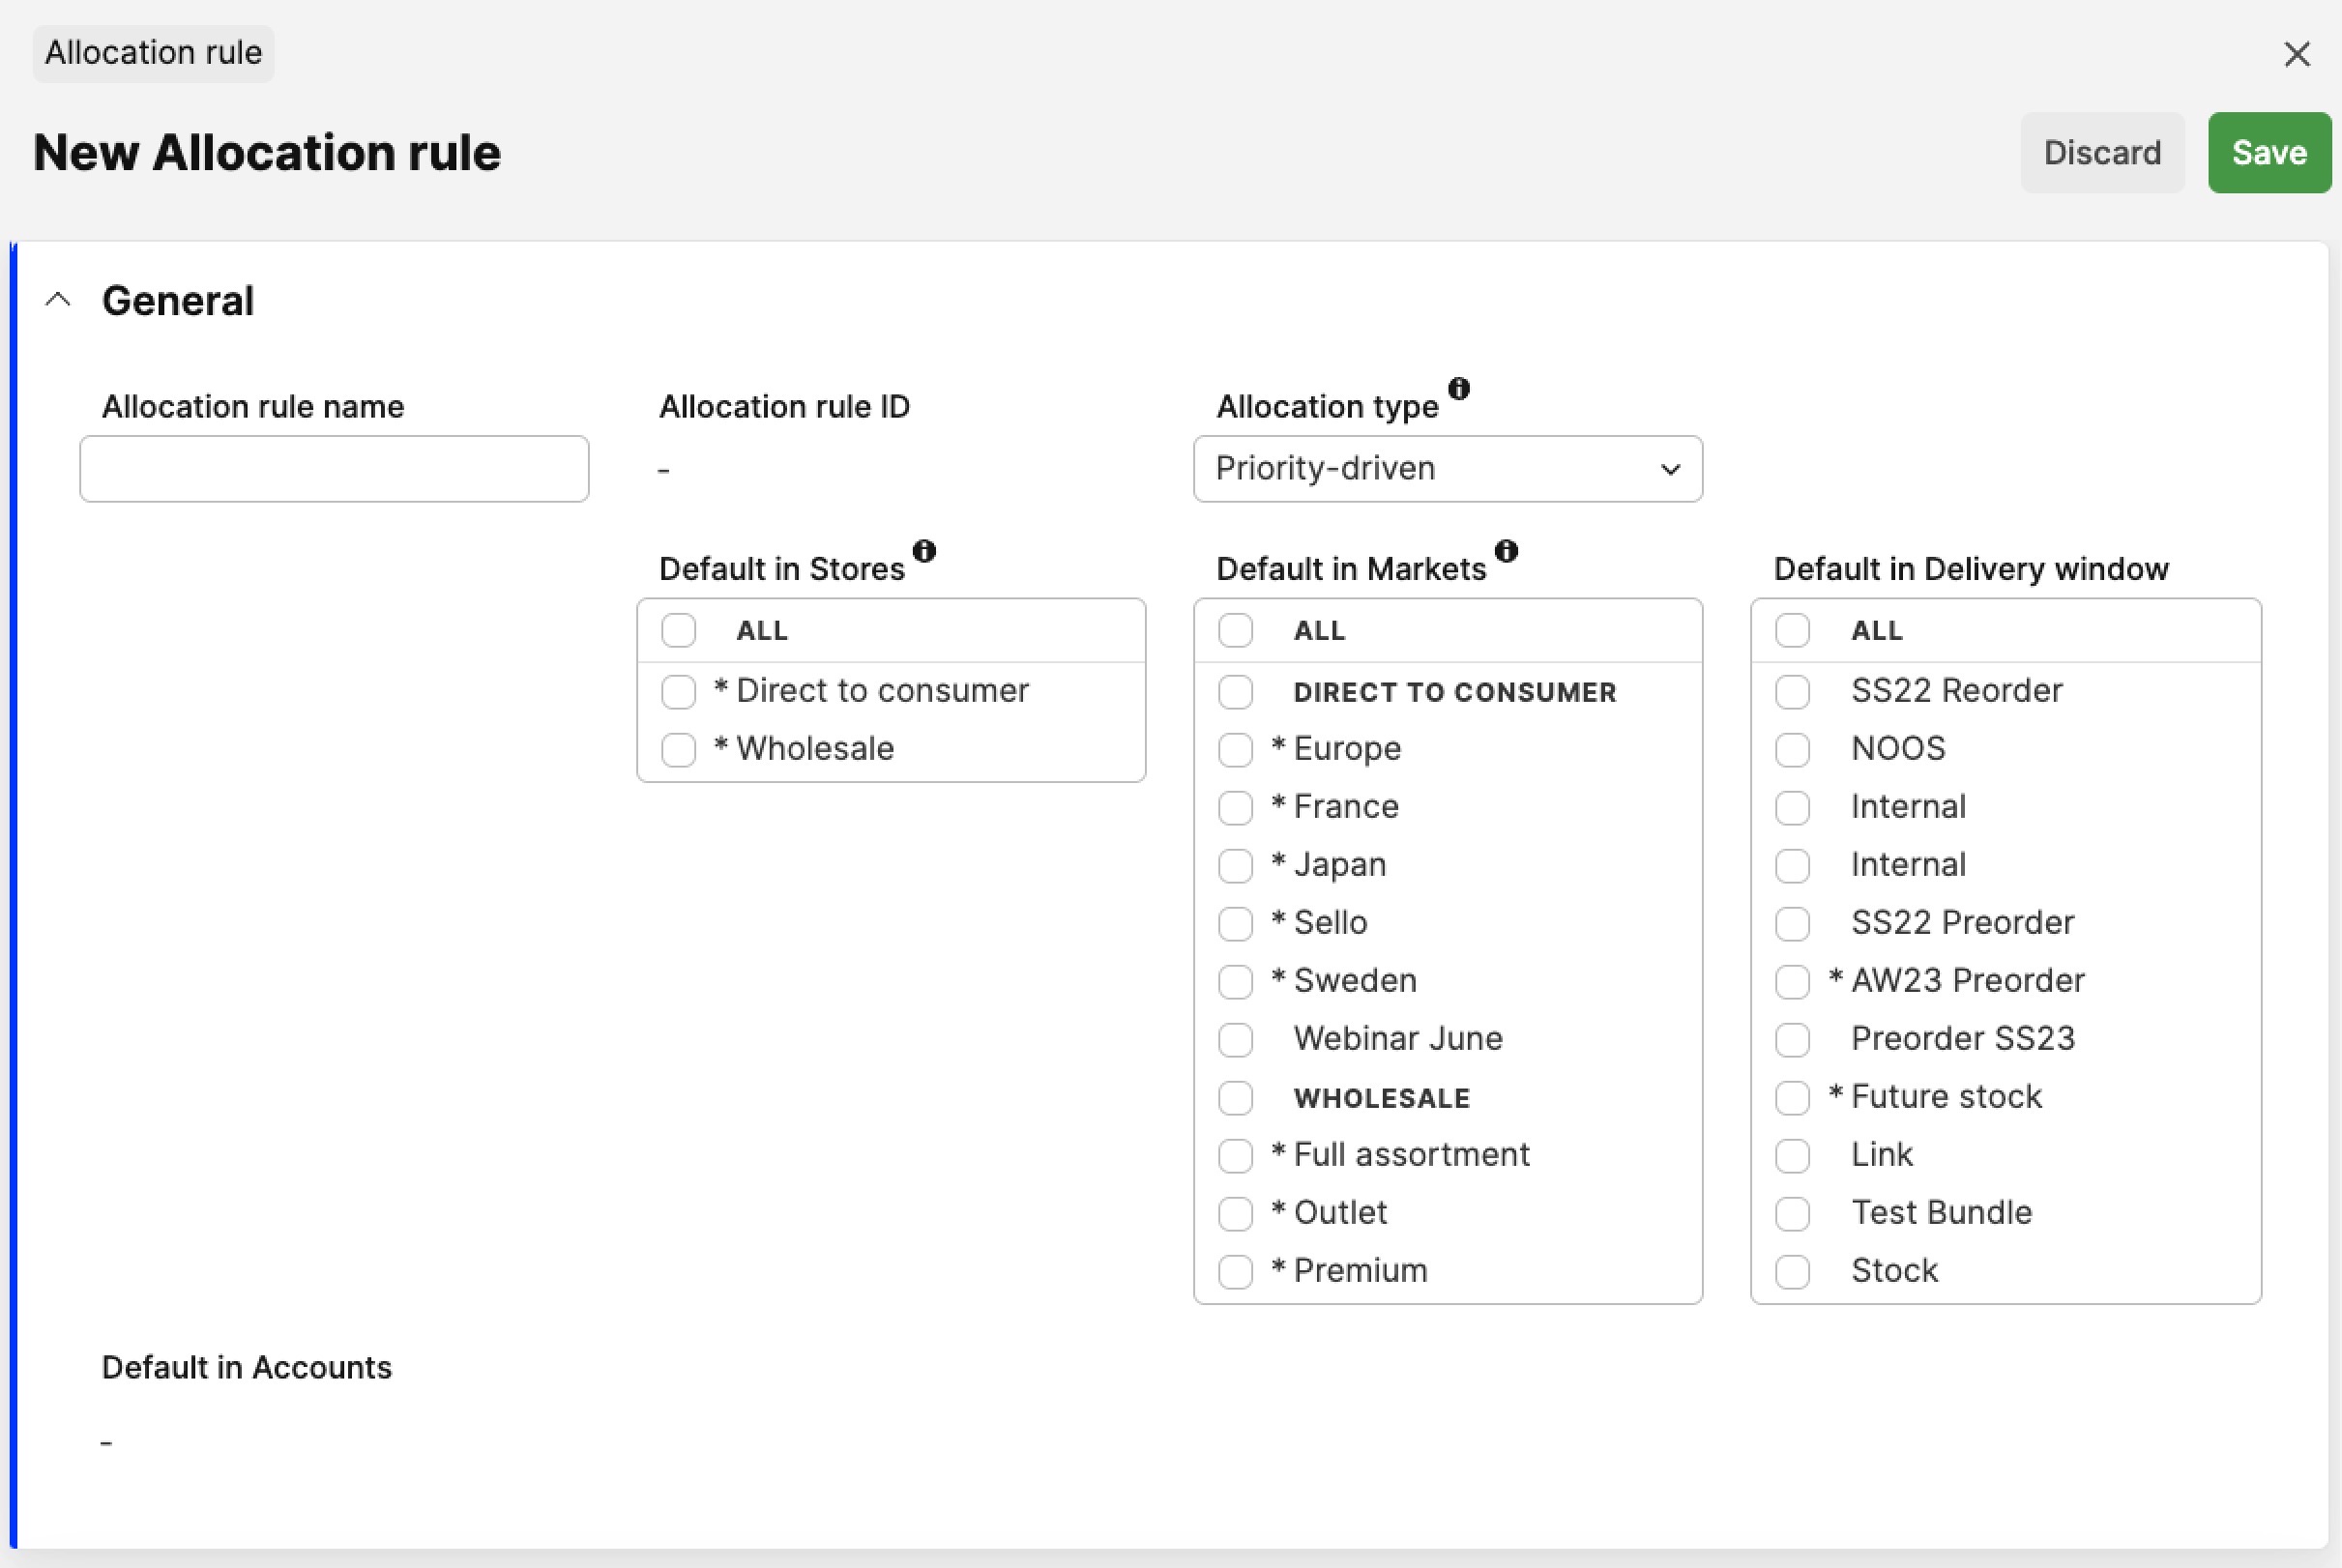
Open an existing group from the list by clicking it or create a new one by clicking '+ Add allocation rules' in the upper-right corner and you will be redirected to this view:
-
In this view, you can fill out the following fields:
- Allocation rule name - Name your Allocation rule
- Allocation rule ID - Unique ID for the Allocation rule. This cannot be changed and is automatically generated by the system after saving the allocation rule
-
Allocation type - This setting controls whether the order should be split between warehouses or not, based on their stock availability. This optimizes shipping costs by ensuring that stock allocations happen from a single warehouse whenever possible, rather than distributing it across multiple warehouses. The following two settings are available:
-
Priority-Driven Allocation: This is the default allocation logic, which relies on the warehouses' priority setting in the Geography Priorities section discussed below. If an ordered product cannot be fully allocated from a higher priority warehouse, the system splits the allocation and searches for availability in lower-priority warehouses
-
Optimization-Driven Allocation: This type prioritizes stock allocation optimization. It first checks if it's possible to fulfill the entire order from one warehouse, irrespective of its priority. If possible, all products are allocated from that single warehouse. However, when it is not possible to fulfill the entire order from a single warehouse, the system optimizes stock allocation to minimize the number of warehouses used and shipments created. Note that there are exceptions to this in cases with a complex allocation rule setup and number of warehouses. You can find more information here, explaining how this feature behaves in different scenarios.
In cases of unavoidable split, where two or more warehouses have the same quantity of the ordered product available or can fulfill the remaining part of the order, the system allocates stock from the warehouse with a higher priority.
- Default in Stores - Choose if this Warehouse should be default in one of your stores
-
When a new market is created it will be automatically added to the Allocation rule which has the respective store selected as Default in stores
- Default in Markets - Choose which Markets these warehouses should be connected to. This helps you regulate which stock (i.e. from which warehouse) would be shown to customers of these Markets
- Default in Delivery windows - Here you can choose which Delivery windows these warehouses should be connected to. This helps you regulate which stock (i.e. from which warehouse) would be shown to customers that select this particular Delivery window
This is optional. If not set, the Allocation rule will be chosen based on the Market selected. If chosen, the Market settings will be overridden for these specific Delivery windows
Only available in Wholesale. You can also view this under Wholesale > Delivery window > Select the delivery window in question > Allocation rule
- Default in Accounts - Choose which Accounts these warehouses should be connected to. This helps you regulate which stock (i.e. from which warehouse) would be shown to the selected Account(s). To edit this please click on “Edit Accounts”
- Edit Accounts - This will redirect you to a pop up window, which shows all available Accounts. Here you can tick and untick each account to decide which are selected in this Allocation rule
This is optional. If not set, the Allocation rule will be chosen based on the Market if selected. Otherwise, if the Delivery window is selected, this will be prioritized instead of the Market (as explained in the notes of the previous fields). If Accounts are defined, then the Market and Delivery window settings will be overridden for these selected Accounts
Only available in Wholesale. You can also view this under Wholesale > Accounts > Select the account in question > Allocation rule
-
Click ‘Save’ or continue to the next section to configure the ‘Geography Priorities’.
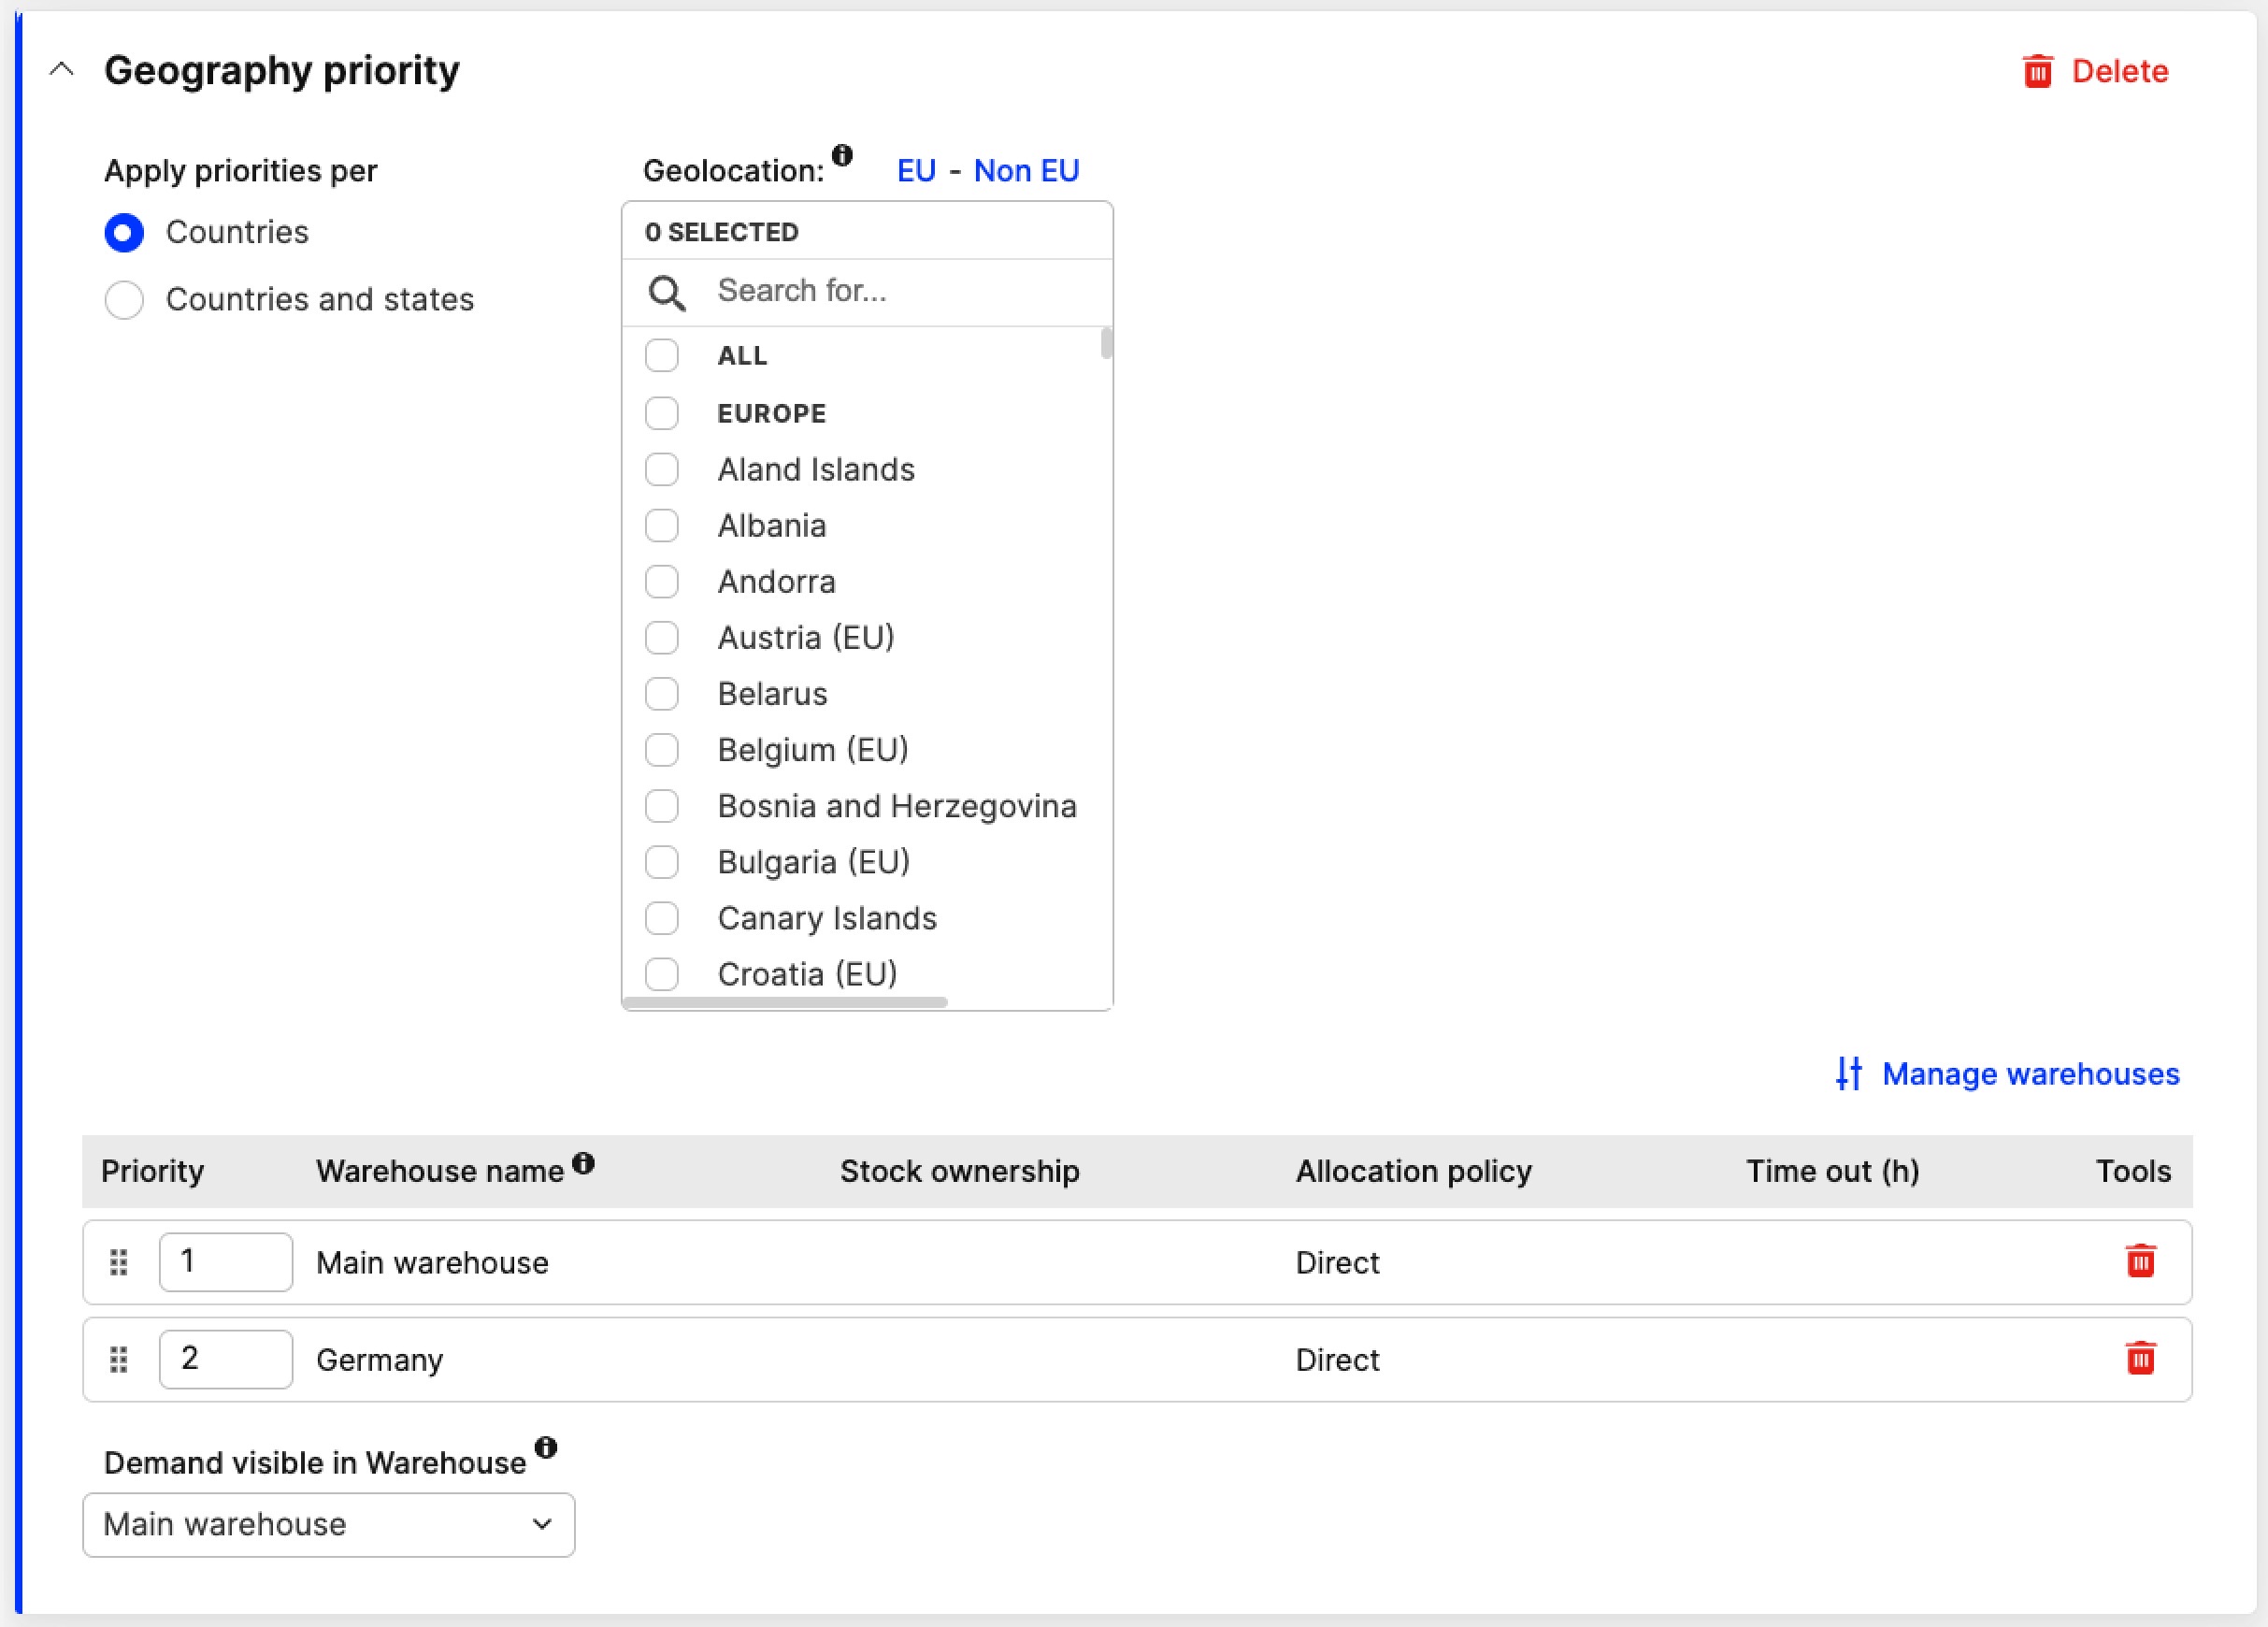
Adding Allocation rule Geography Priorities
You can also add so-called “Geography priority” to your Allocation rule. If you have several warehouses added in the Geography priority section of your Allocation rule, you can choose how these warehouses should be prioritized within different countries. To do this, follow these steps:
-
Click '+Geography priority' in the upper-right corner of your Allocation rule
-
Choose whether you wish to have a Country or Country/state selector
-
Select countries in the list by using cmd+click (on Mac) and ctrl+click (on Windows)
-
To add a warehouse to the Geography priority table or edit already added warehouses, click on 'Edit warehouses'. In the pop-up you can do the following:
- Choose which Warehouse(s) you want to be added to this Geography priority by ticking the boxes on the left hand side of the pop-up window
- If you wish to remove a warehouse from the list, please untick the box
- Click 'Save' when you are done in the pop-up
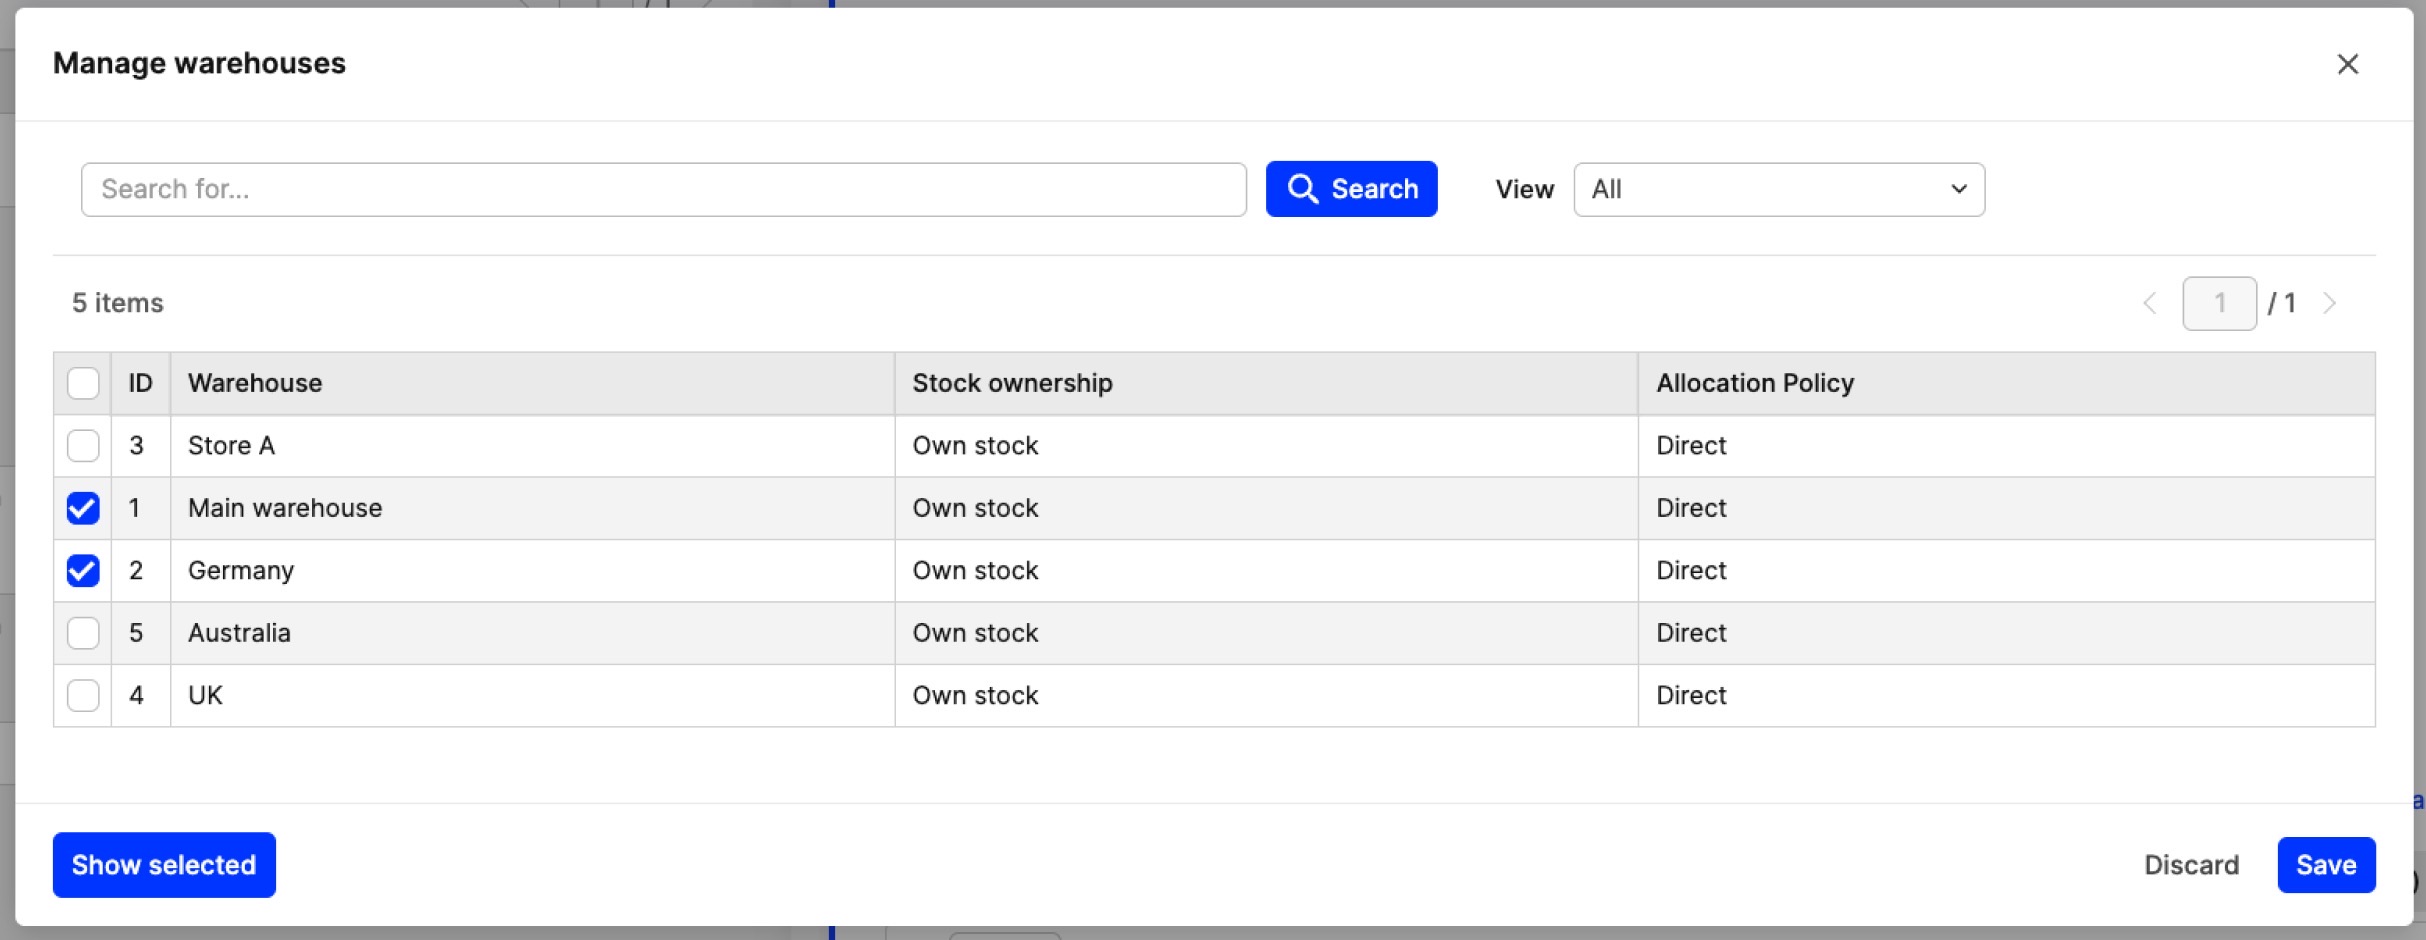
When one or more warehouses are added, the priority assigned to all of them will be 0. Please review these and change them accordingly before clicking “Save”, ensuring that all warehouses have a priority value other than 0
-
Then prioritize the warehouses in the Geography priority table. This table includes the following information per warehouse:
-
Priority - You can set this by adding a priority number to showcase which warehouse will be used first for allocations. Note, that you can also use the drag and drop functionality to change the priority
Check first" warehouses can share the same priority. However, this is not available for "Direct" warehouses. Once two or more "Check first" warehouses share the same priority, a request will be sent to all at the same time to see which warehouse can fulfill the order first. If you want to read more about the "Check first" logic please follow the link
- Warehouse name - Name of selected warehouse
- Stock ownership - Set on warehouse level. Read more here
- Allocation policy - Set on warehouse level. Read more here
-
Timeout - Set a timeout to control how much time the "Check first" warehouse has to respond with an accept or reject for stock allocation
The timeout is set in hours and is only available for "Check first" warehouses
- Tools - You can remove the warehouse from the prio list by clicking the respective button
-
-
Demand visible in Warehouse: From the list of selected warehouses from the above field, choose which warehouse should be used for demand calculations
The timeout is set in hours and is only available for "Check first" warehouses
-
Click 'Save' when you are done.
Good to know
- If you have different warehouses that ship to different countries or even states, you can create multiple “Geography priorities” sections and separate this setup accordingly. For example, if you have a warehouse that ships to Sweden, and another warehouse that ships to Germany, you could create a separate section for each, and choose only the respective countries and warehouses.
- The Allocation rules are now immutable. Any changes you make to the Allocation rules will create a new version with a new ID. We also save the Allocation rule on the order level too, at the order summary section. This means that when you make changes to your Allocation rule, the old version will be saved on the order and you can click on the hyperlink to view the old state of the Allocation rule in the pop-up. Within the pop up you can also see information about the latest Allocation rule and click on it to view it in more detail. It could look something like this:
