Creating an order in your Supplier Module
About this article
This article will walk you through how to create an order with your supplier or suppliers. We will cover how to configure your supplier list in a separate article. We will also cover the final step, creating deliveries from your suppliers, in a further article.
The Supplier Module
To go to the Supplier Module, follow the steps below:
- Click 'Modules' in the main menu to the left
- Click 'Suppliers' and you will be redirected to a list of all your suppliers.
Selecting a Supplier by Demand
- In the supplier list view, you will see the country location of your suppliers, the number of orders that have been placed with each supplier, and Demand in units.
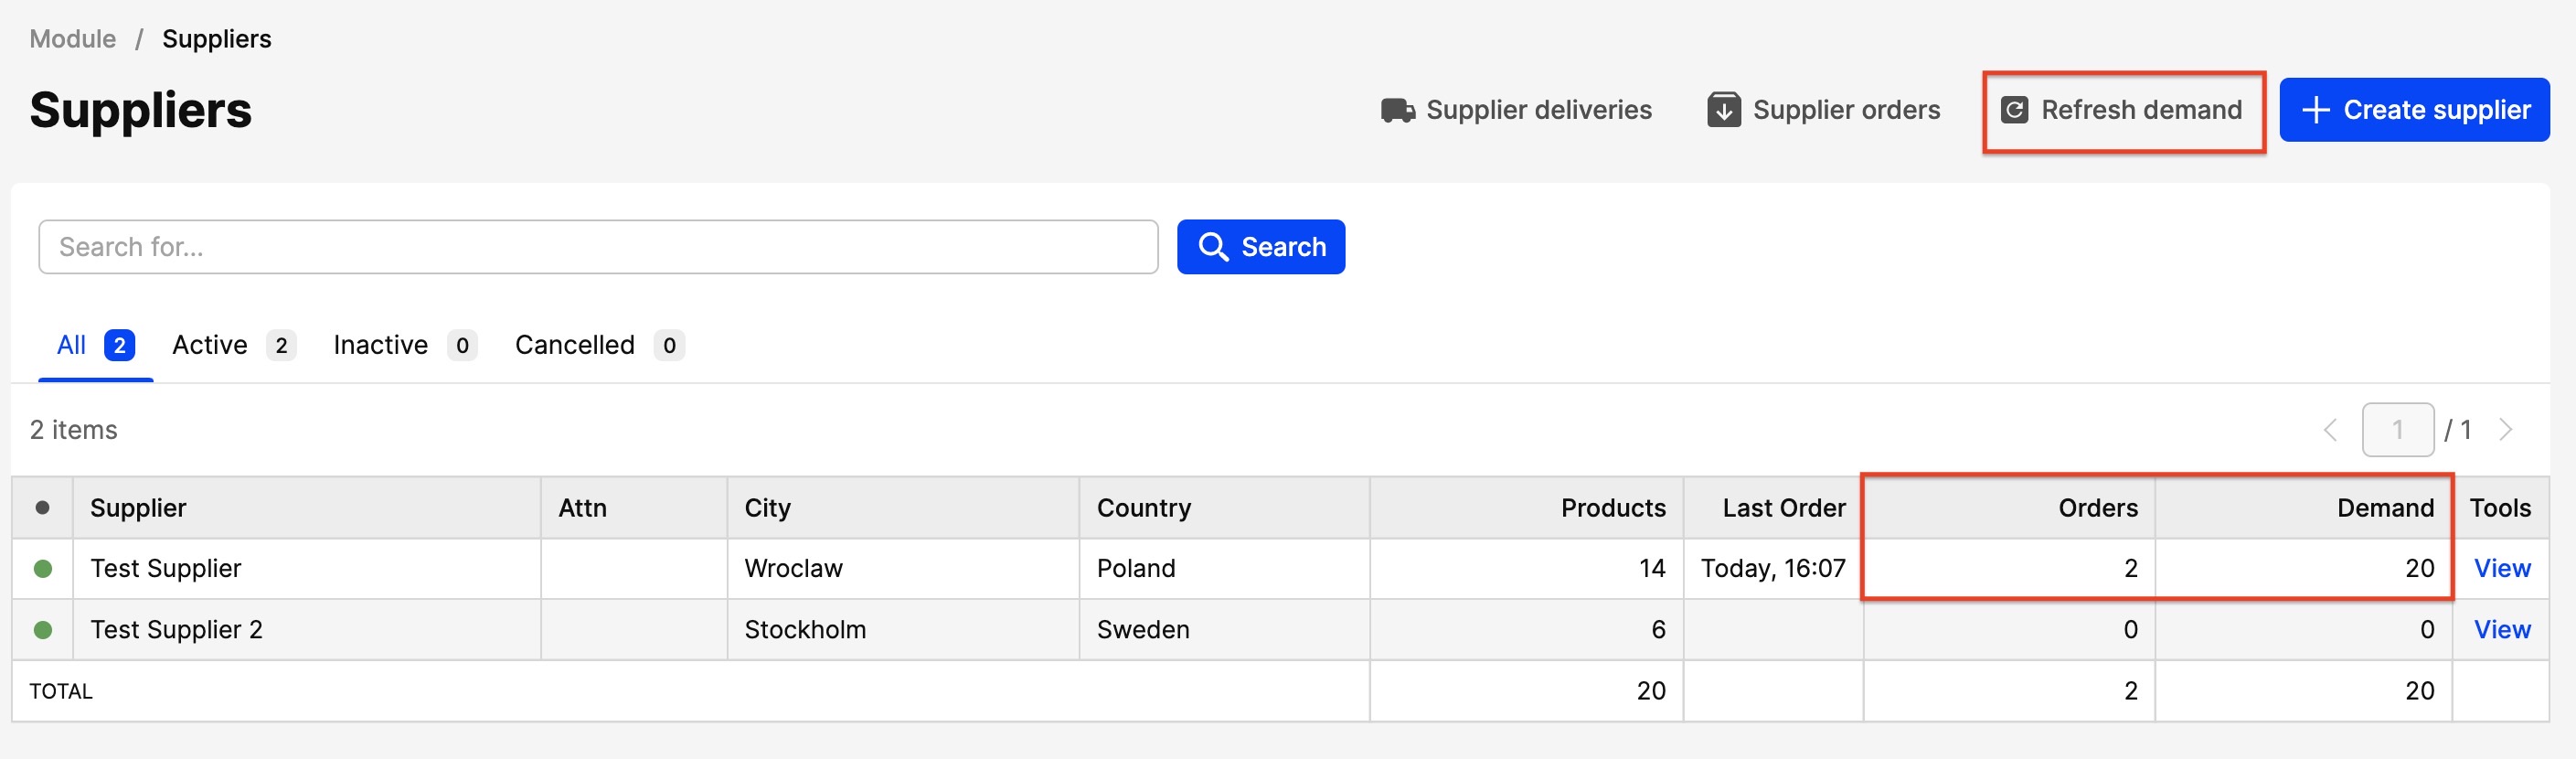
Demand is when you have had an order from your customers that has generated demand, but you have not yet placed that order with a supplier. This is an outstanding order that you need to place.
For example, a retailer has placed a pre-order with you for 458 items to be delivered for the winter season, but you have not yet ordered these from your suppliers. This number will appear in the column beside the supplier who can provide you with this item. If you have more than one supplier who can make this item, you will see the ‘demand’ number beside each relevant supplier’s name
-
When you are in this view, it’s a good idea to refresh the demand, since it’s normally updated once per day if you have not updated it manually. You do it manually by pressing 'Refresh demand' button in the upper-right corner.
-
Click on the name of the supplier from whom you wish to order goods. You will see a new screen with the details of that supplier. These are the details you entered when you configured your suppliers.
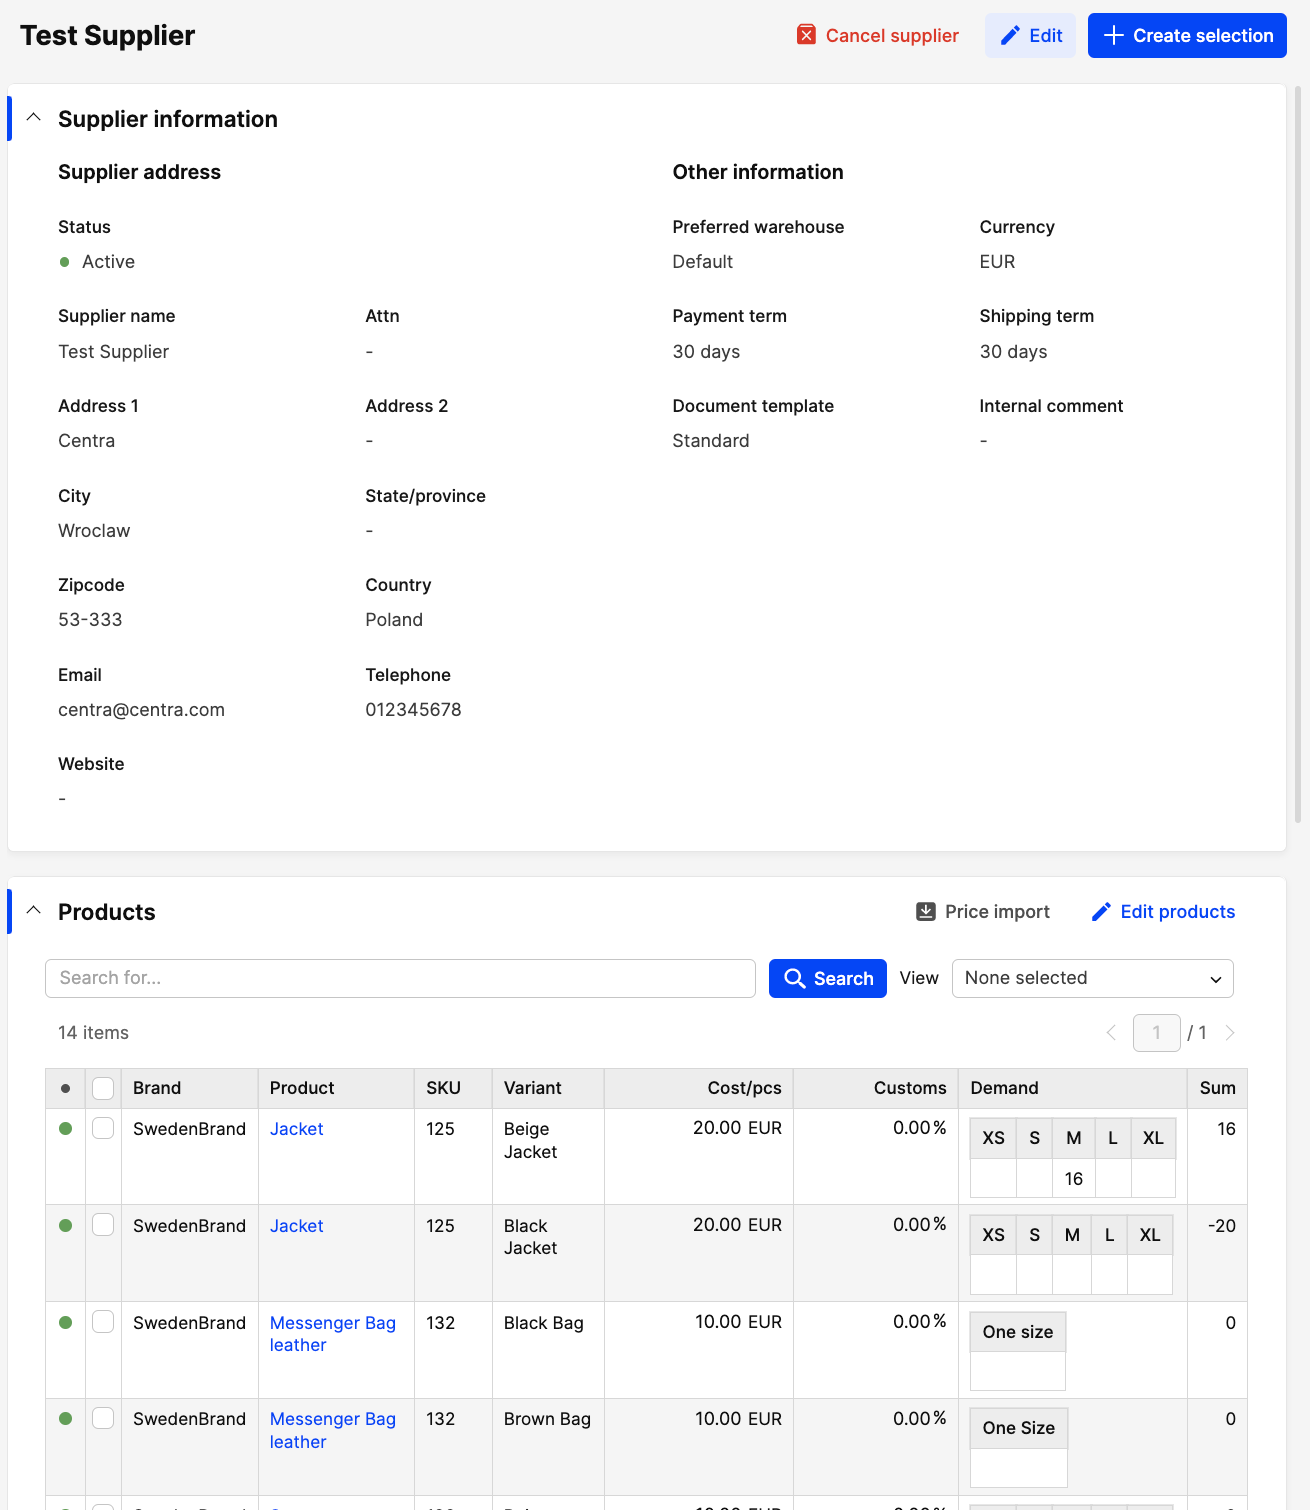
Below the address and basic supplier information, you will see a list of all of your products that are connected with this supplier. Each variant is listed as a separate row.
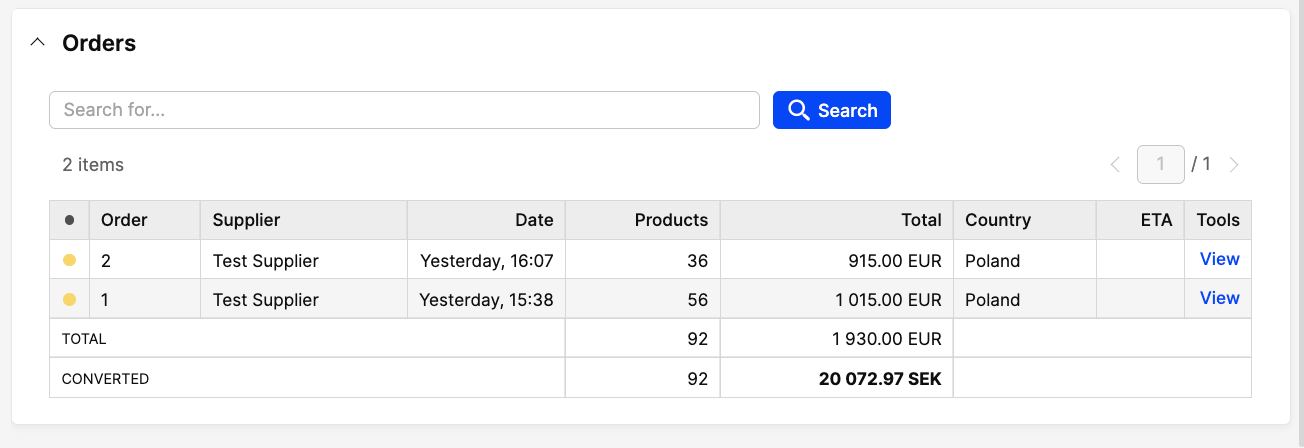
At the bottom of the screen, you will see the history of previous orders that you placed with this supplier, including any information you entered manually for each of these orders (this is why you should configure in detail).
Edit products within the Supplier
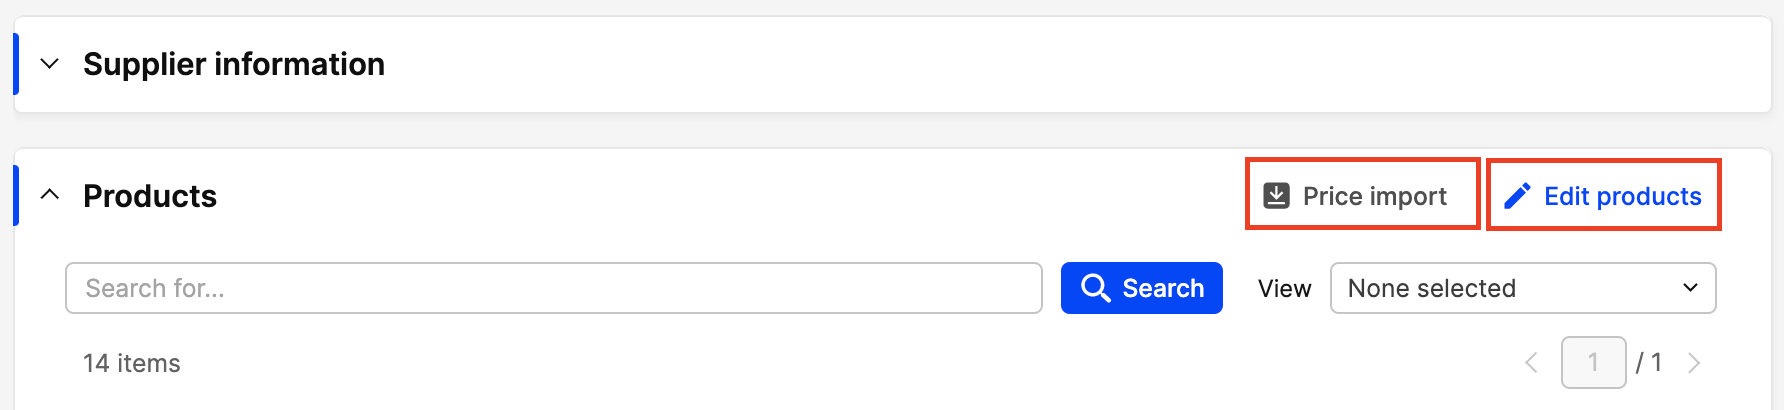
In the list of products, you may or may not see the price for each item -- this depends if you manually entered it when configuring the supplier.
-
If you want to order an existing item, you need to make sure you have a price on this product. This can be done with an import -- by clicking 'Price import' in the top-right corner of this section and following the instructions in the dialog box. Or you can enter it manually. Do this by clicking 'Edit products', also in the top-right corner.
When doing this, it’s important to also add the customs fees associated with ordering these products from this supplier. This will allow you to easily calculate the landed cost for each item.
- You can also add or remove products from this supplier. Click 'Edit products' and you will see a dialog box showing your list of products in your Centra product database. Choose the product you want to add to this supplier and then click 'Save changes'

Create a Supplier order
- If you want to order based on demand or a manual forecast, click 'Create selection' at the top of the supplier information window
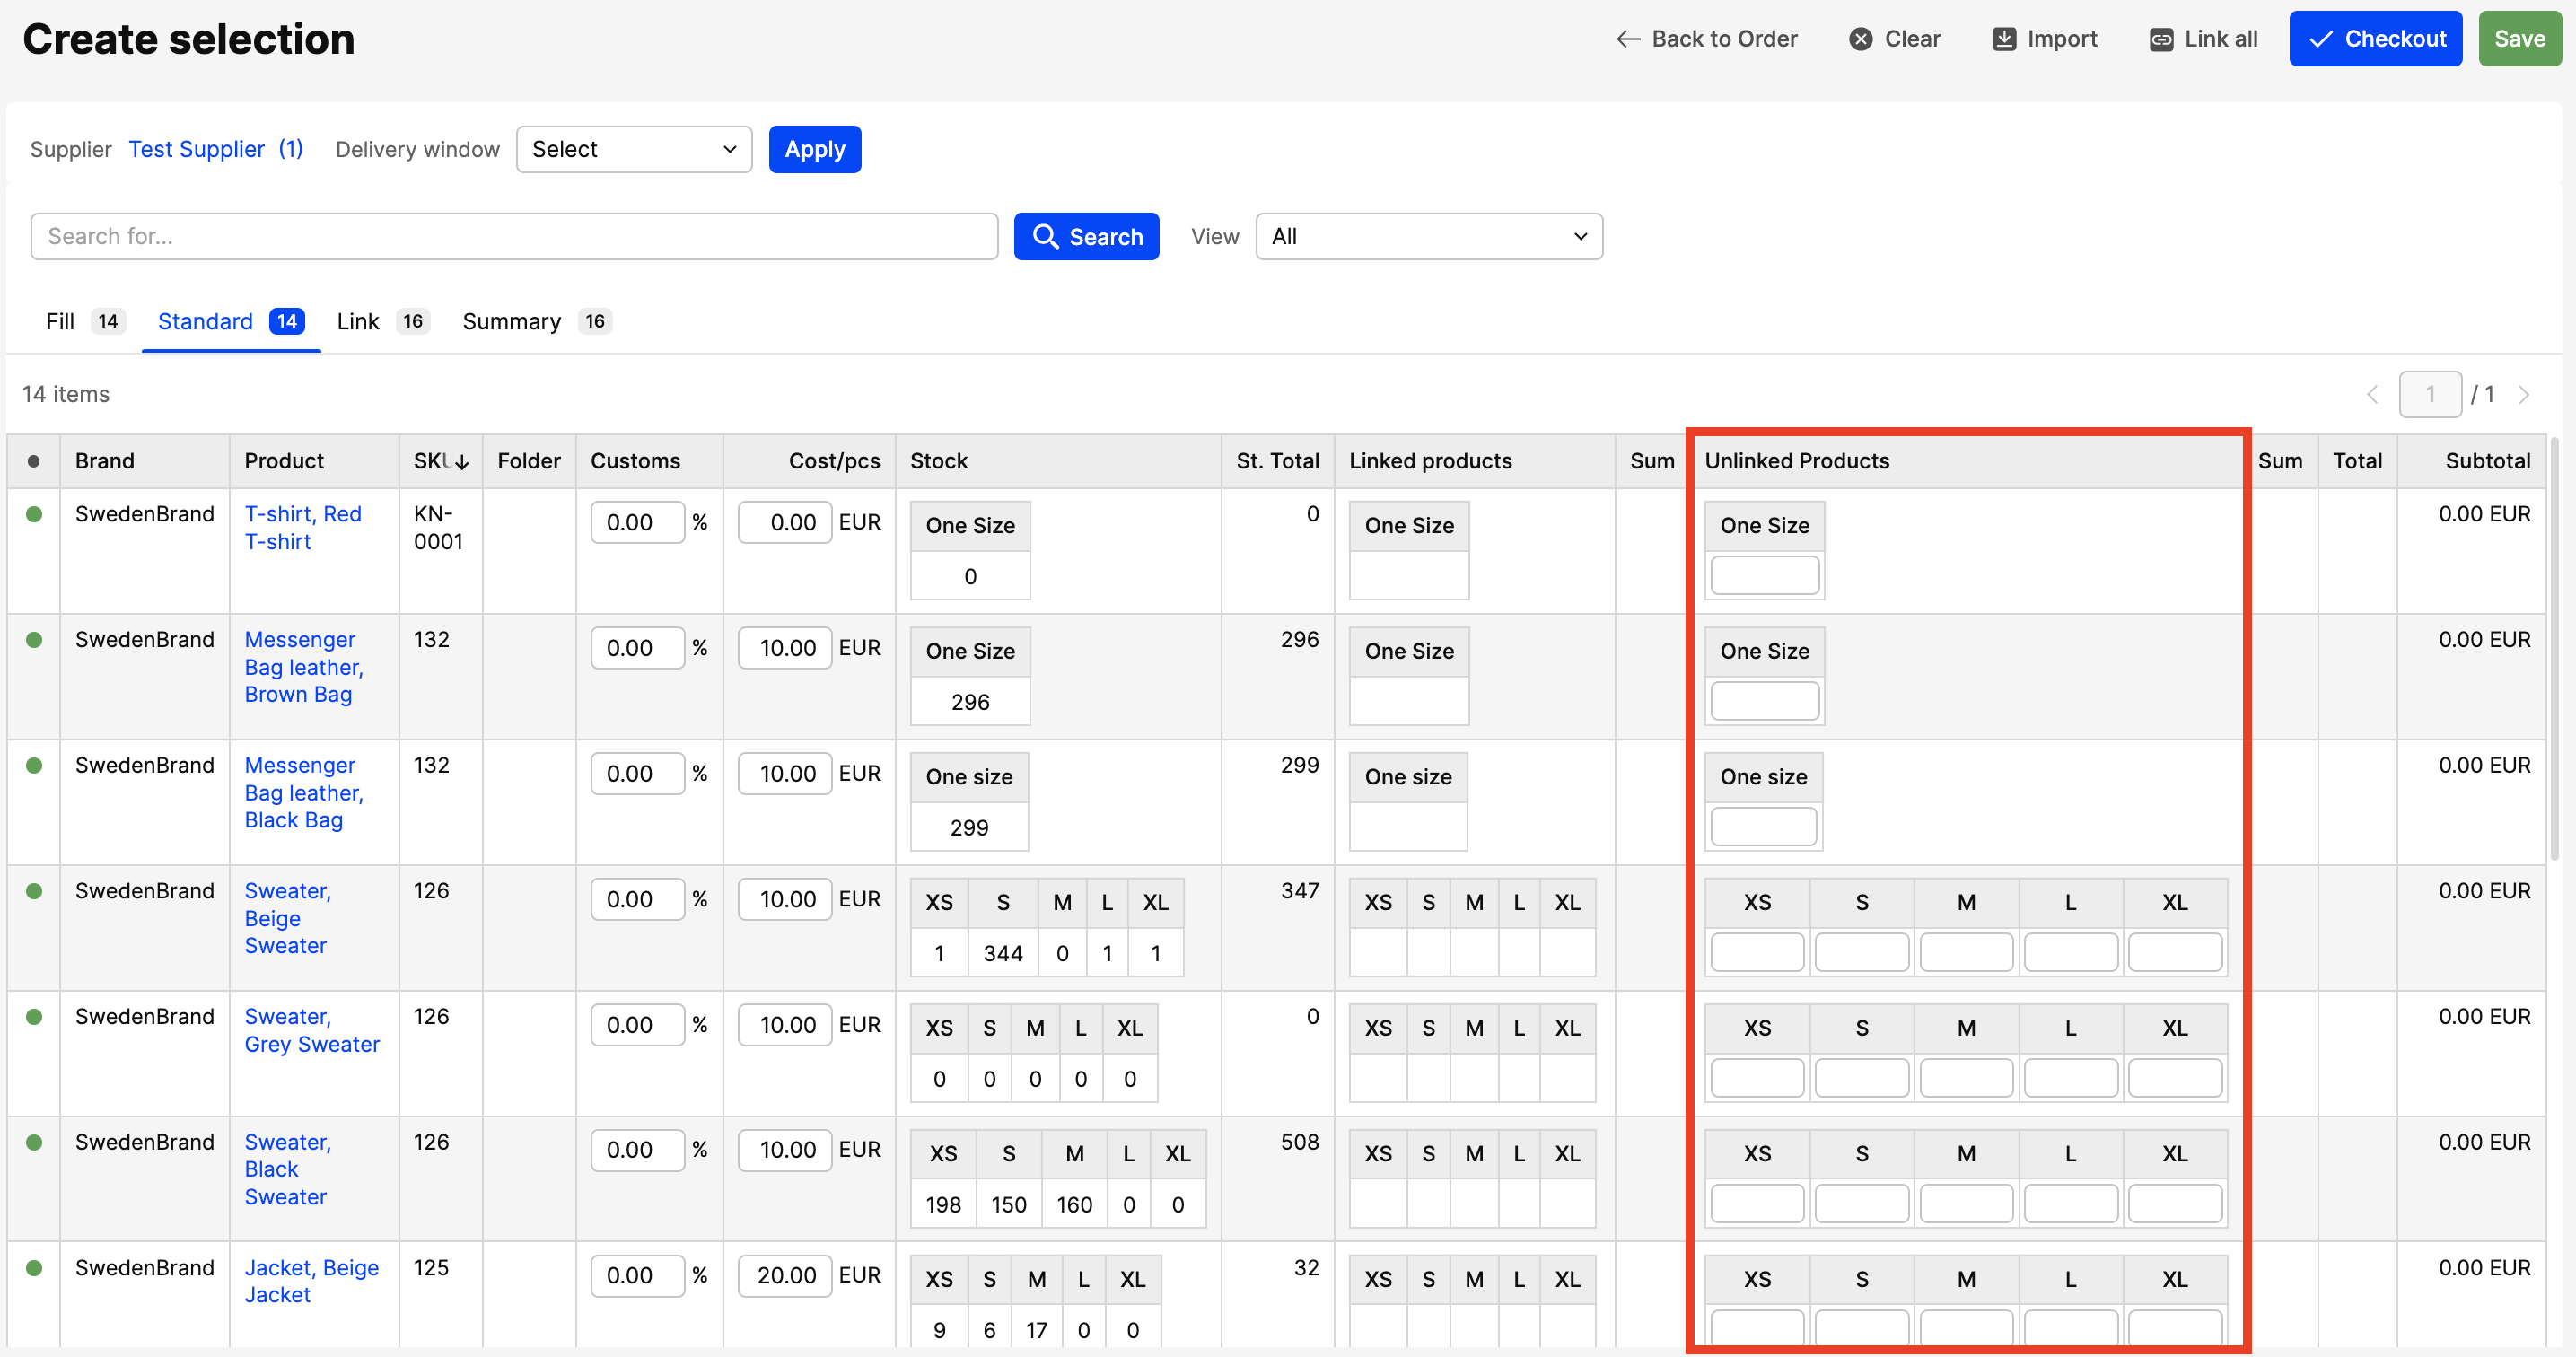
- In the 'Create selection' screen, this is where you create your order. If you want to order new products, enter the quantity in the 'Unlinked products' size chart field for each product or variant in your order. Click 'Save' when you have done this
- If this is sufficient for you, you can go to 'Checkout', by clicking the blue button in the top-right corner
- If you want to order from your supplier based on what your customers have ordered, click the 'Link' tab under the search bar, and you will see the list of orders that have generated your demand and are for products connected to this supplier
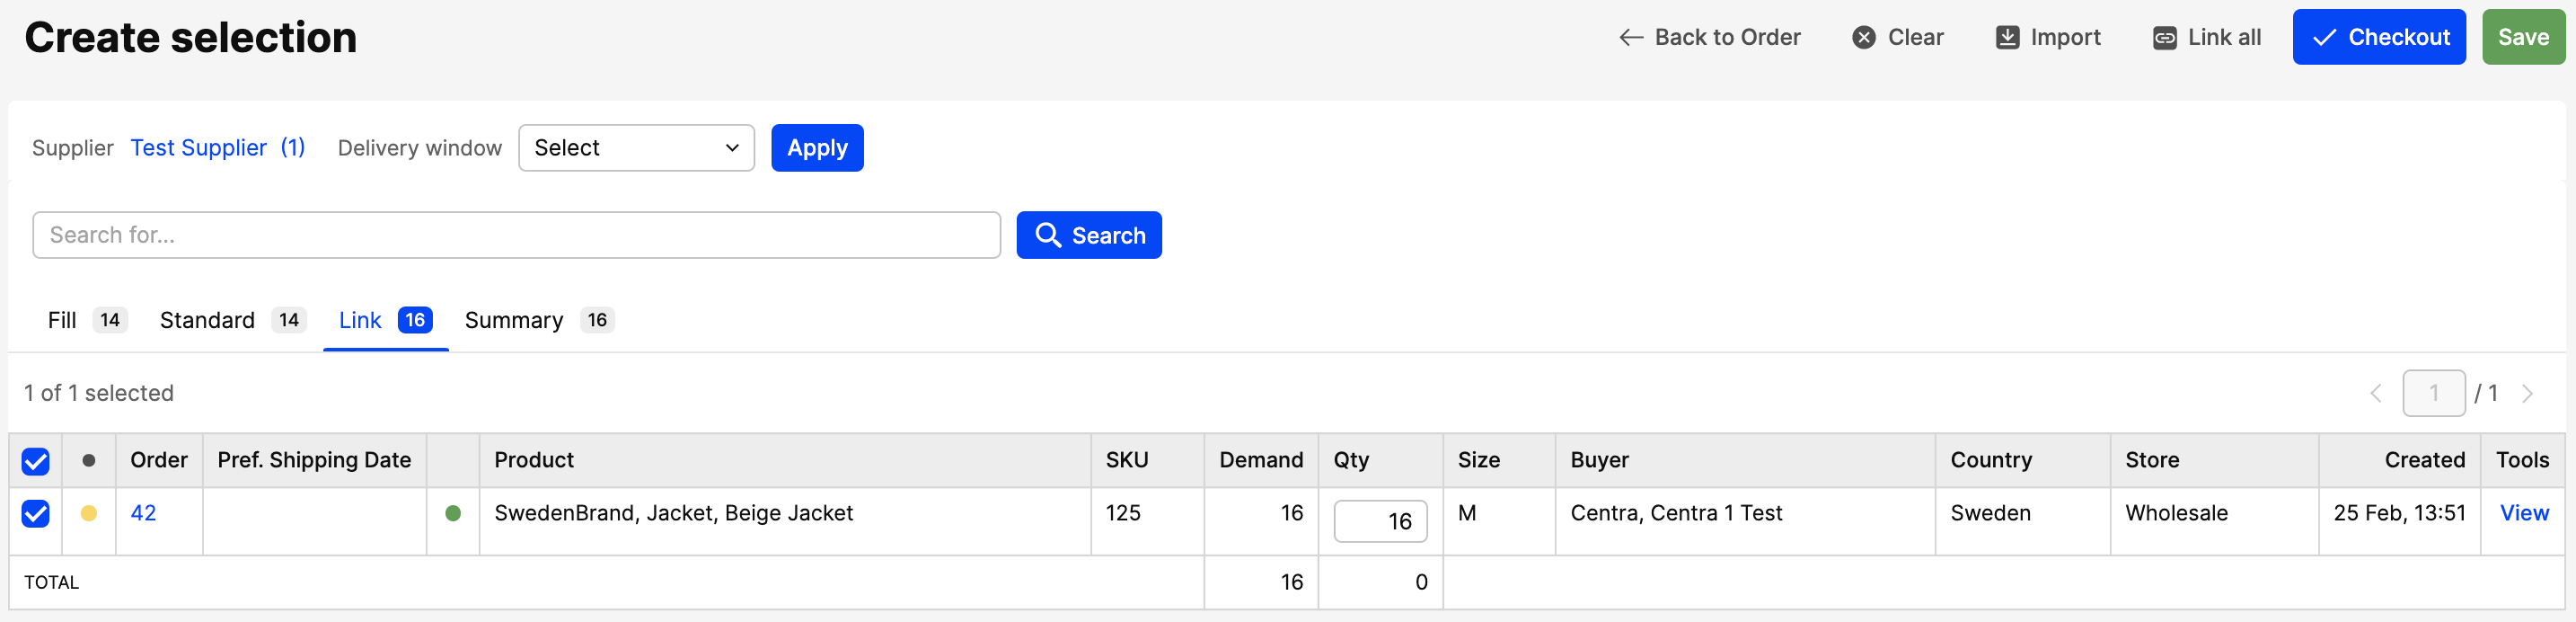
- Select the orders you want to add to your existing selection
- Click 'Save' to save your selection
-
Go to 'Checkout'.
Now you will see the supplier address and the delivery address options. If you have entered delivery addresses previously, they will be available as options from the dropdown menu i the top-right of this window.
 If you haven’t added any or you wish to add a new one, fill in the delivery address.
 Below this, you will see estimated time of arrival (ETA), preferred warehouse, payment, shipping and reference, which you need to fill in once you know this information. You may already know the arrival date, or you may need to go back and add it once you have confirmation from the supplier.
This information is important because, for example, having the ETA available makes it possible for you to ensure prompt delivery for your customers, or offer orders via delivery windows and sell off of incoming stock.
- When you have finished this, click 'Create order' and your order is created
- Before you finish, you need to confirm your order. Just click the 'Confirm order' button, and you’re done. Now click 'Export' to export your order in whichever format you use with your suppliers.