Creating accounts in B2B
About this article
An Account is the set of information needed to create a customer order. Centra organizes account information primarily in an account card composed of a general account address, an invoice address, and a shipping address. Additionally, in Centra, you can add buyers to each account. Buyers can have their own set of address/contact information for direct contact purposes. Furthermore, each buyer can have their own login to the front-end showroom and will be able to place their own order without interfering with other buyers.
Creating an account
To create an account, follow the steps below:
-
Click 'Accounts' under WHOLESALE in the main menu to the left and you will be redirected to a list of all activated accounts. In this list, you can see the name of an account and buyer. If this account has any discount, what market and pricelist it is using, What country it is connected to, how many orders that have been placed from the account and the account was last logged in.
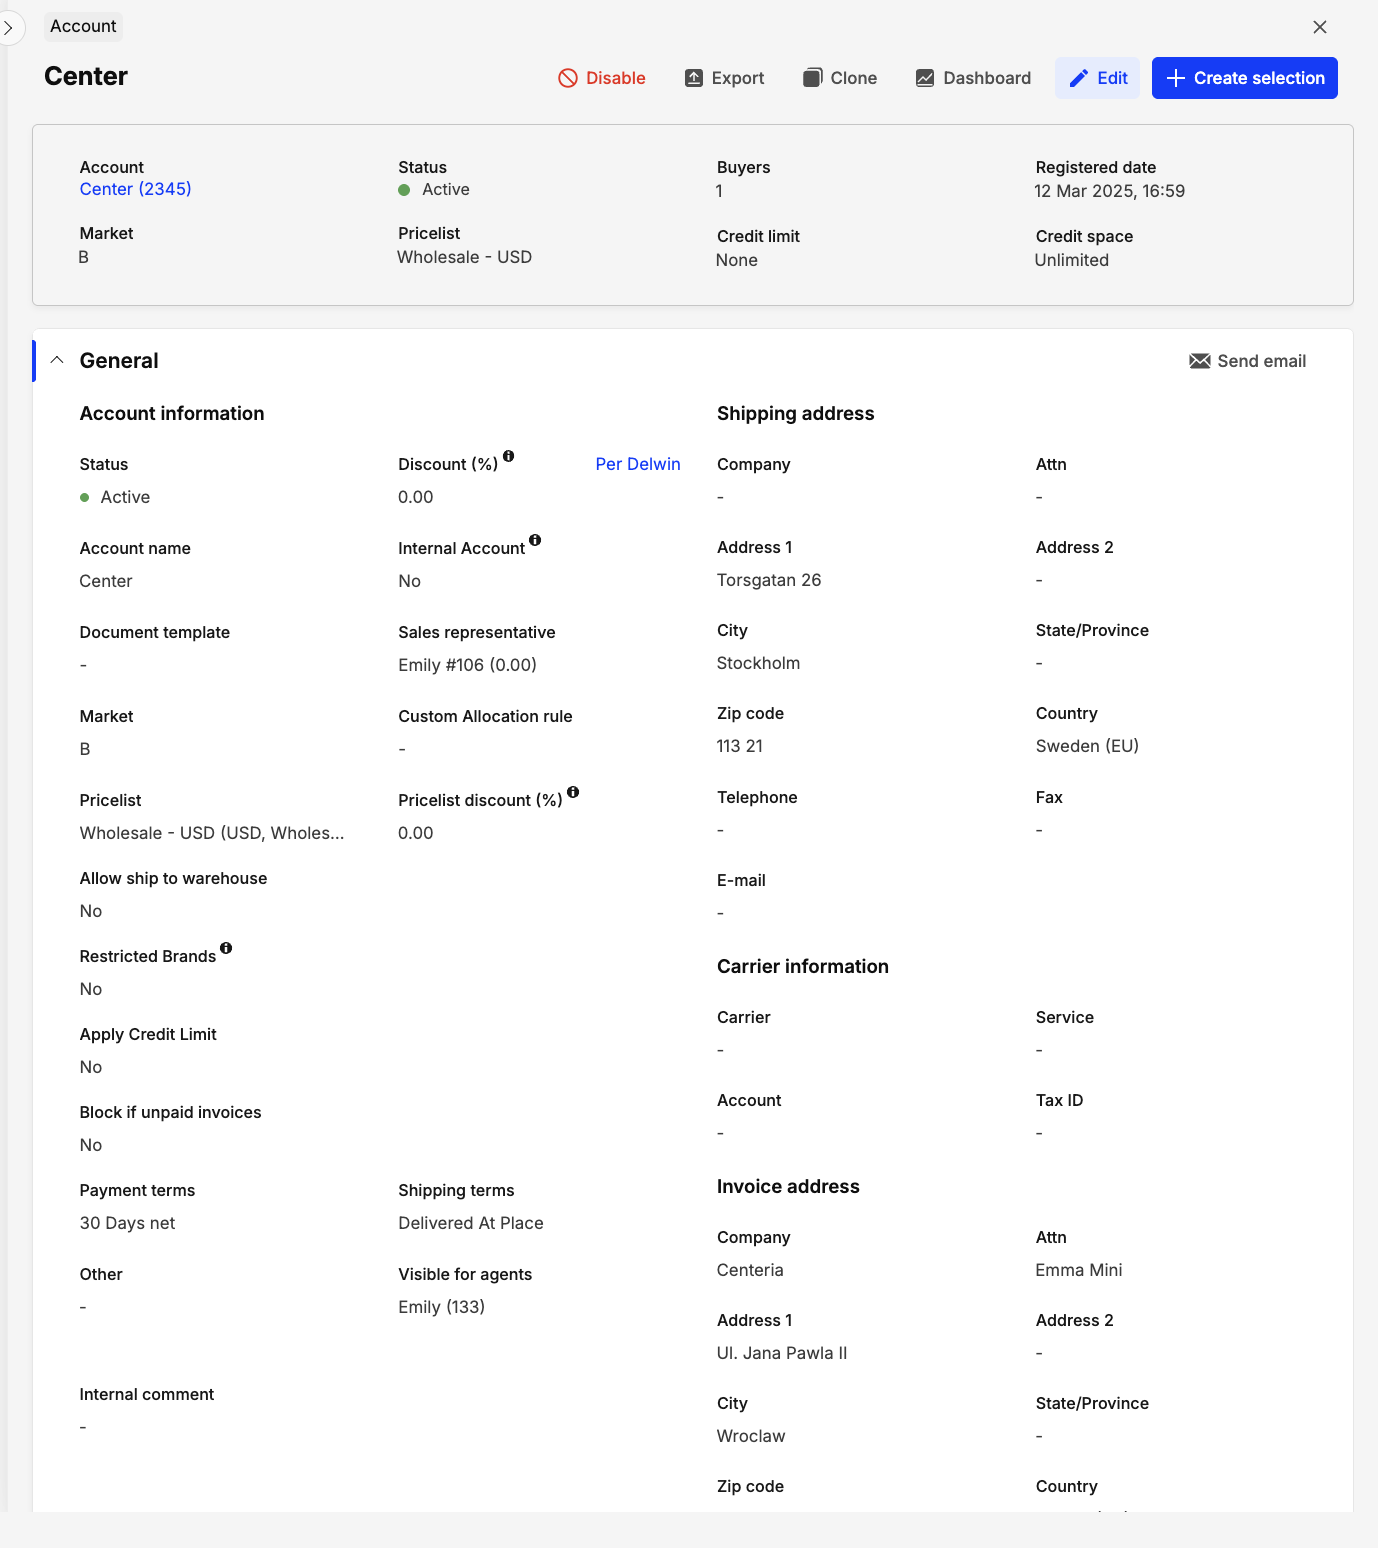
If you click either 'View', under tools to the right of the window, or click the name of an account or a buyer and you will be redirected to this view of information about the account.
-
Now click '+Create account' in the upper-right corner and you will be redirected to this view:

-
Enter the following information:
- Account name - For example, name of the store or company
- Invoice templates - To read more about Invoice templates, click here
- Market - To read more about markets, click here
- Pricelist - To read more about Pricelists, click here
- Payment Terms - To read more about payment terms, click here
- Shipment terms - To read more about shipment terms, click here
- Sales Rep. - If used. To read more about Sales Rep, click here
- Other - If you have other necessary information
- Visibility for agents - To read more about sales agents and how to add one, click here
- Shipping Address - Enter the shipping address
- Invoice Address - Enter the invoice address
- Carrier Information - The customers preferred shipping carrier company
- Discounts - you can read more here about Account, Pricelist, and Delwin discounts
-
Scroll down and continue to enter information about the account:

- Account Address
-
When you have entered all the information, click 'Save' in the upper-right corner.
Creating an account from Showroom
Your Sales Representatives or Administrators can also create accounts from the Showroom. They do not need to access Centra’s backend to create accounts and fill in all details, ensuring a faster process when showcasing products. Shipping terms and Payment terms can be directly assigned during the Account creation on Showroom. Follow the steps below to create accounts directly from Showroom:
-
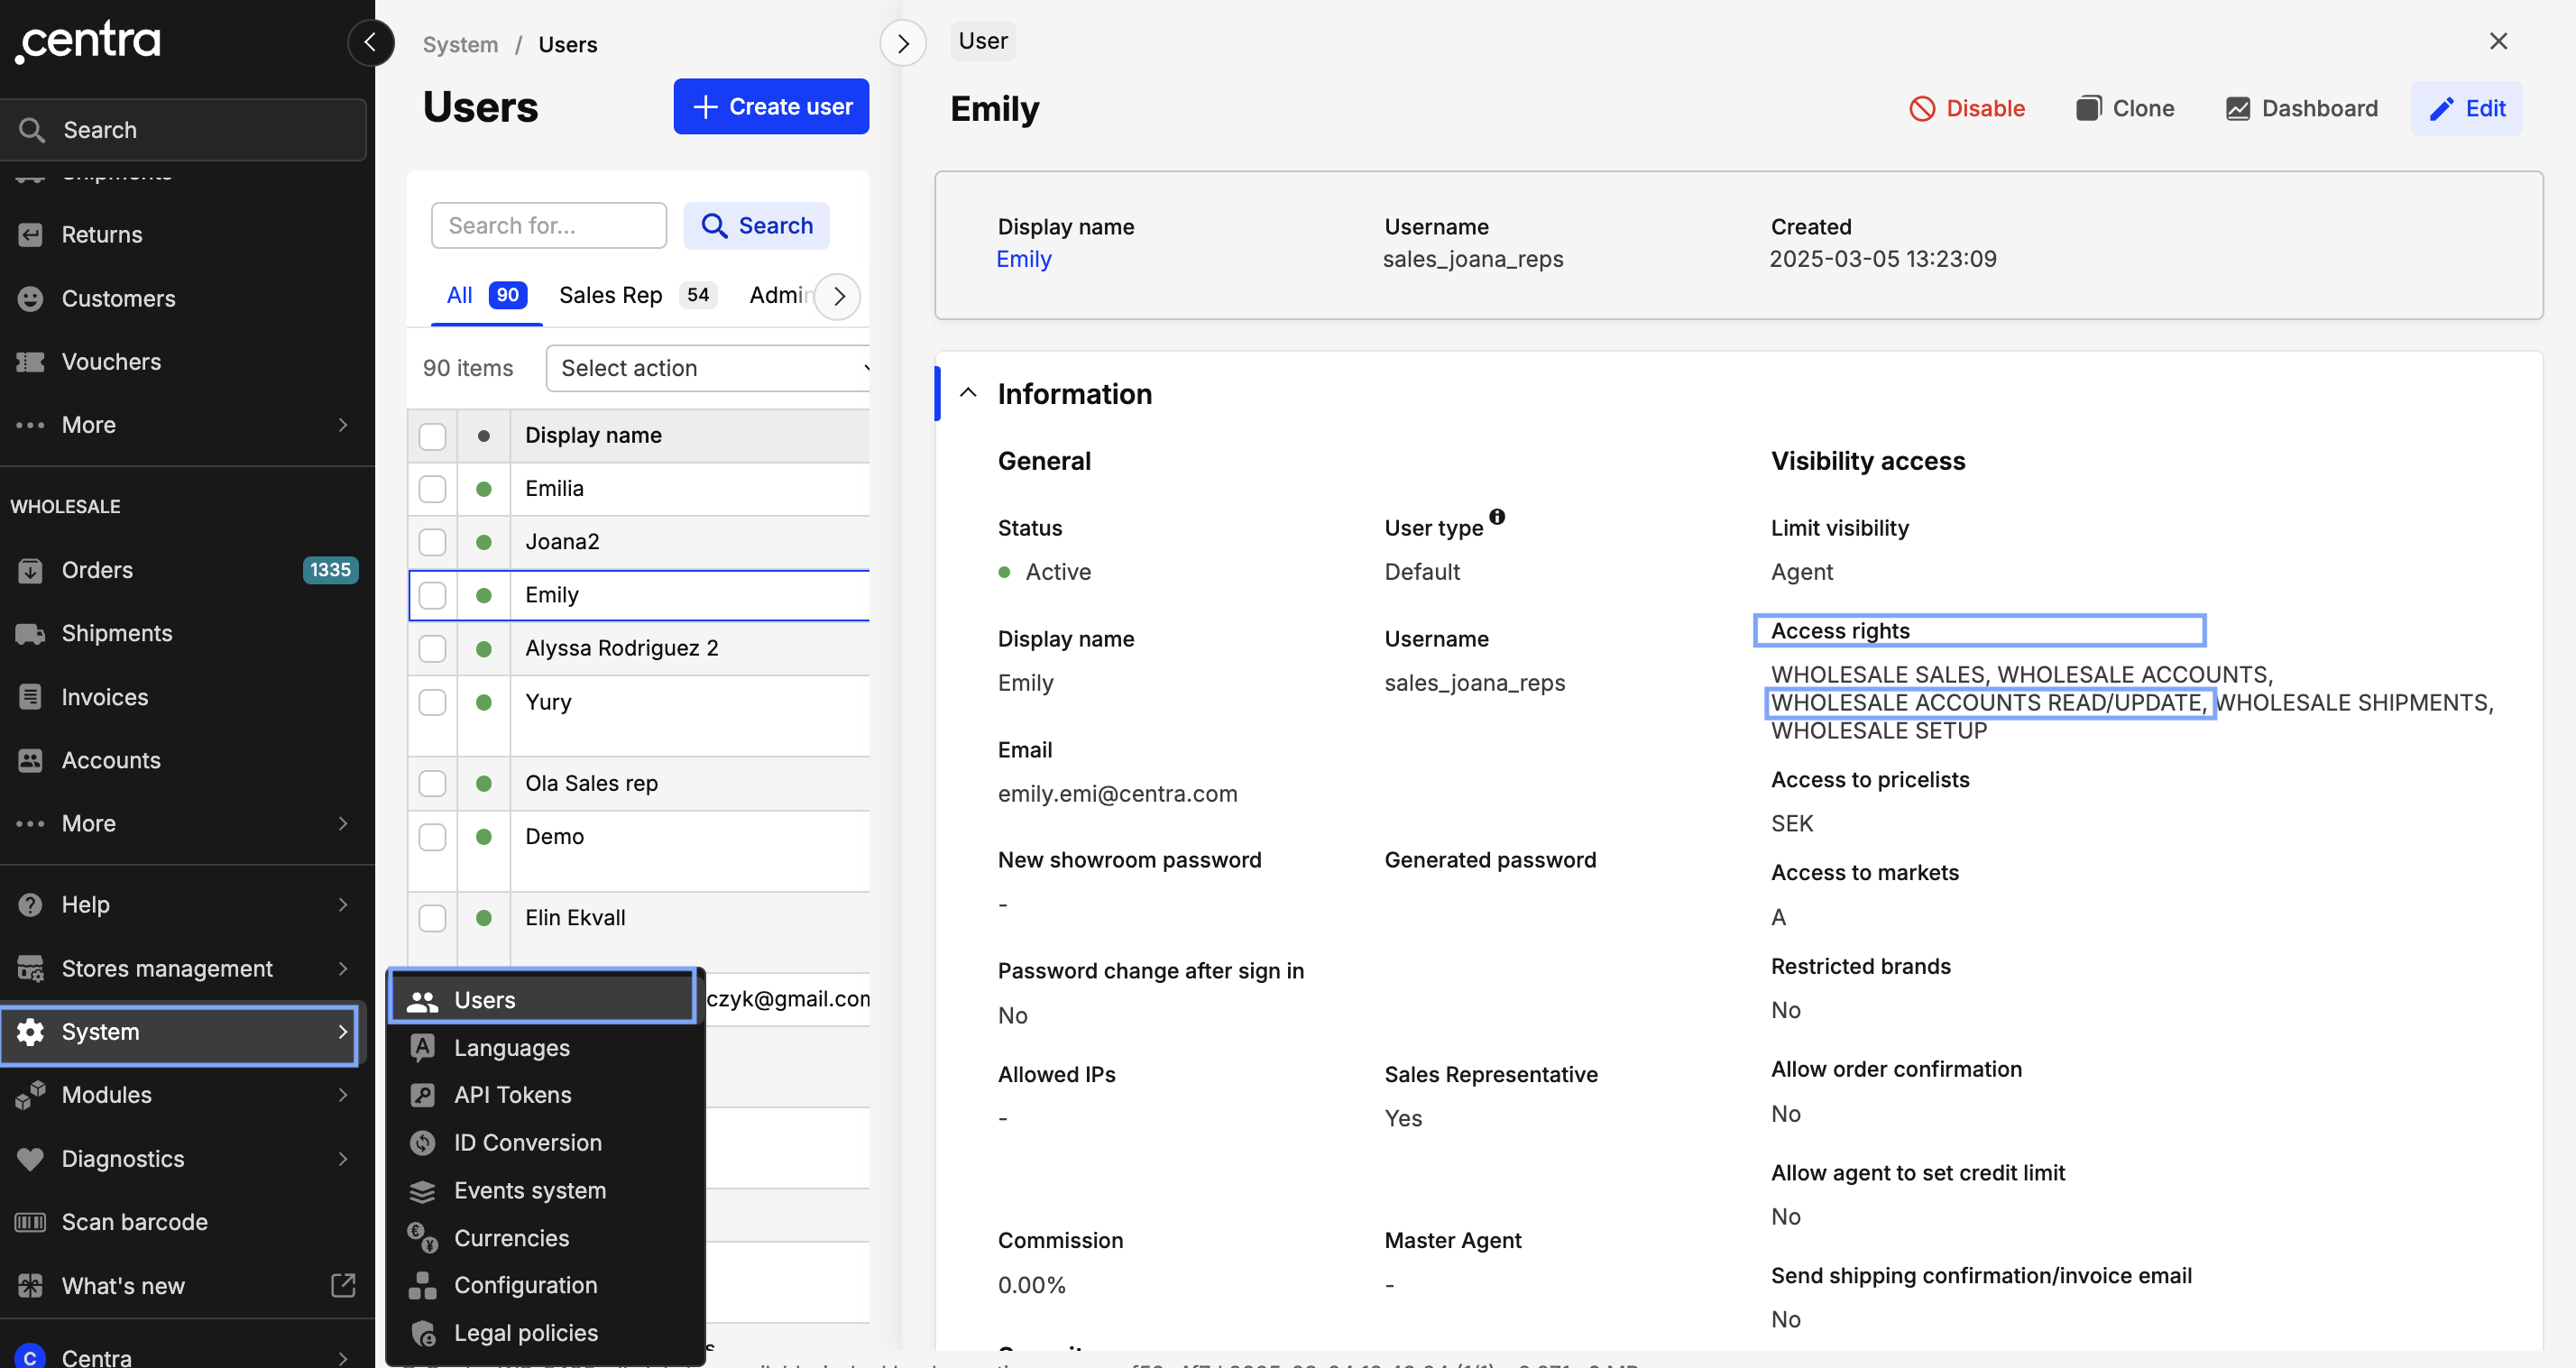
Your Sales Representatives or Administrators need to have the ‘Wholesale Accounts Read / Update in their user’s Access Rights. You can enable this by going to System > Users > select the user > Edit > Access Rights: Wholesale Read / Updates
-
Login as a Sales Representative or Administrator in Showroom > click the hamburger menu > Accounts
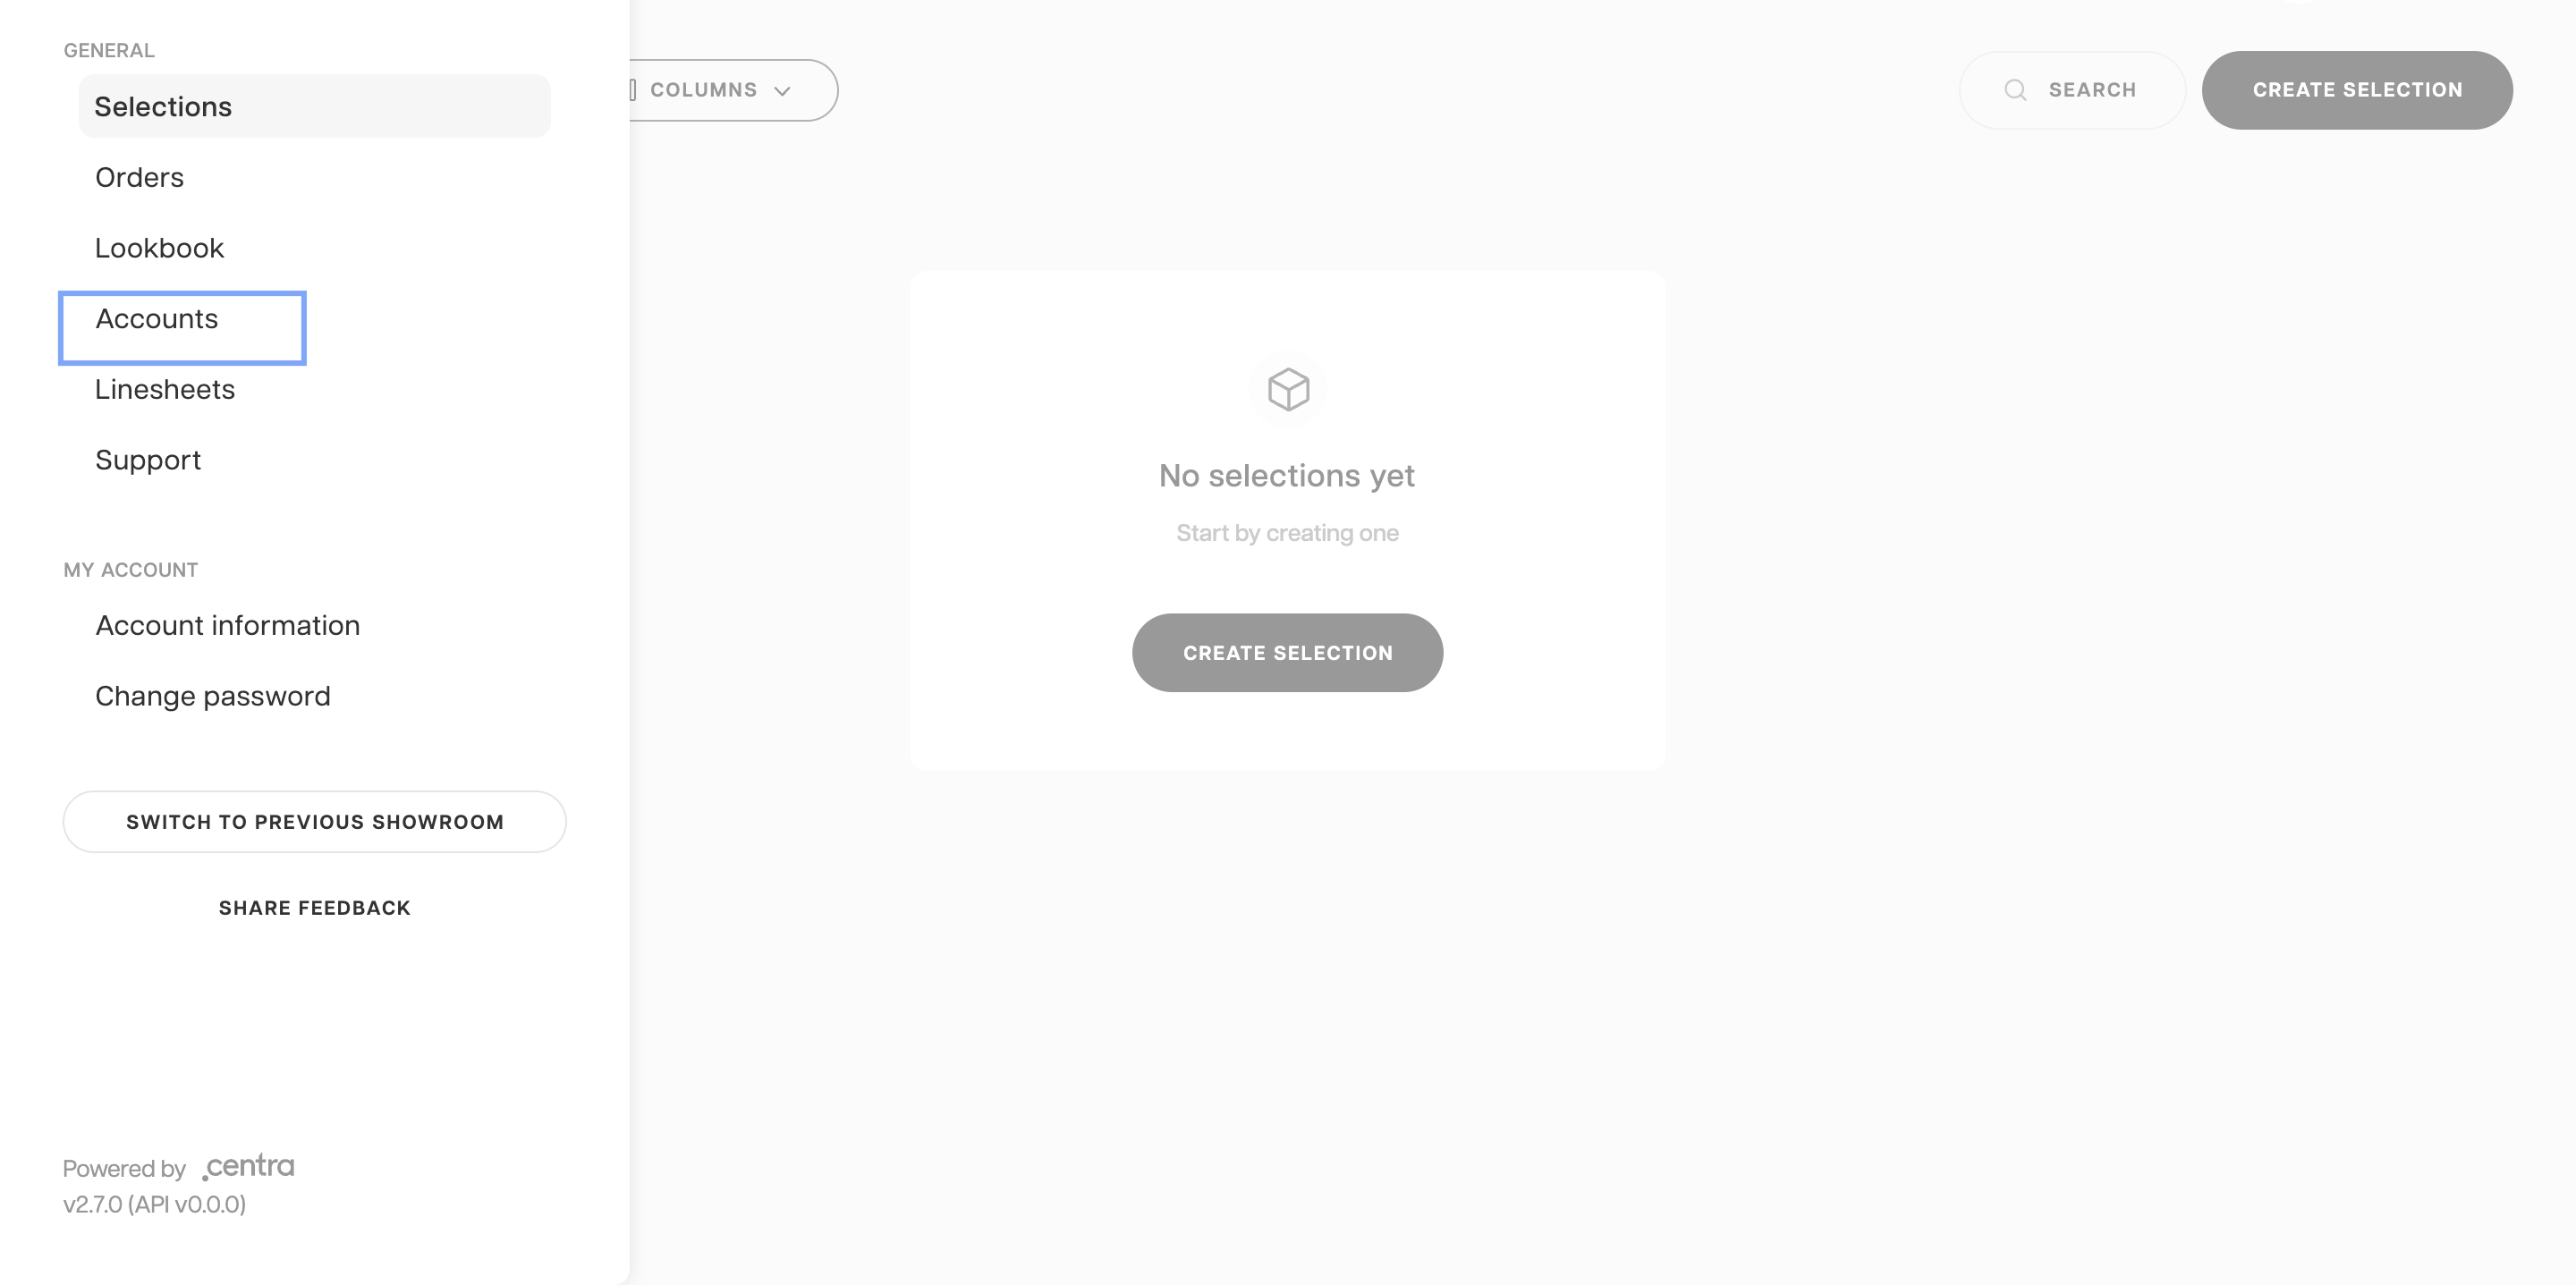
-
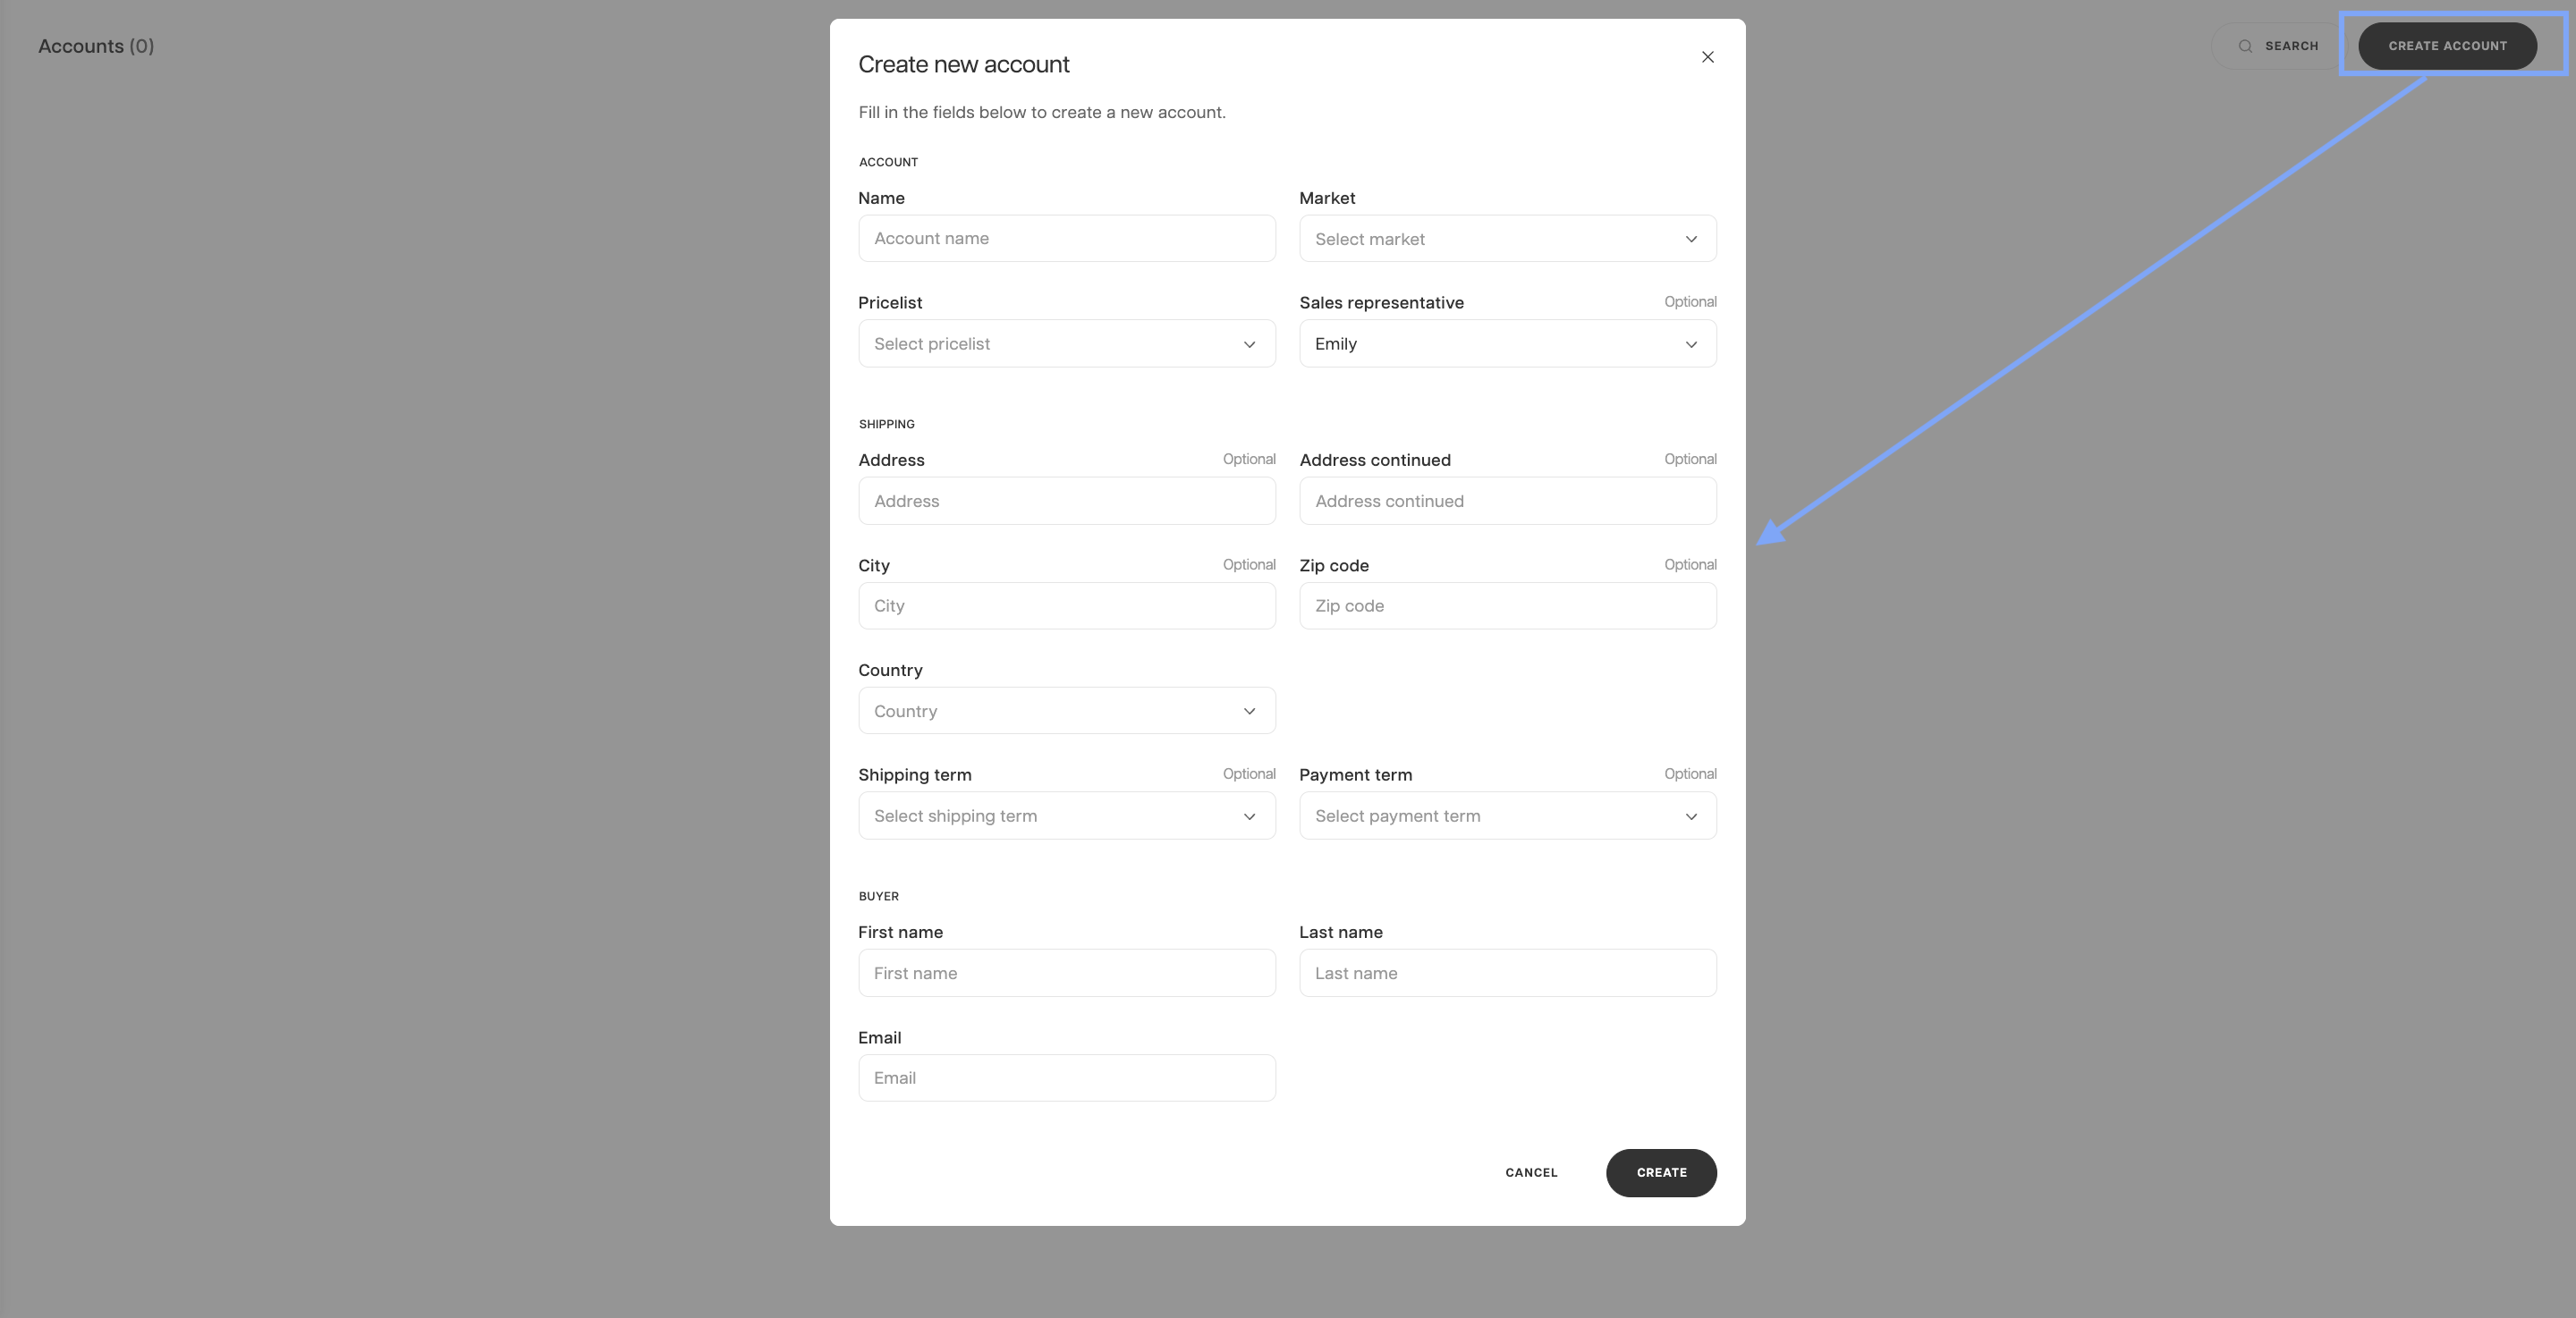
Click on the Create Account button and a pop-up window with Account details will show up
-
Fill in the following information
-
Account:
- Name
- Market
- Pricelist
- Sales Representatives - By default, the account will be automatically assigned to the Sales Representative who created the account.
-
Shipping:
- Address
- City
- Zip Code
- Country
- Shipping Term - If the Account should be assigned to a specific Shipping Term
- Payment Term - If the Account should be assigned to a specific Payment Term
-
Buyer:
- First Name
- Last Name
When creating Accounts from the Showroom, the Buyer section must be filled in. -
-
When all information is filled in, click on the ‘Create’ button
-
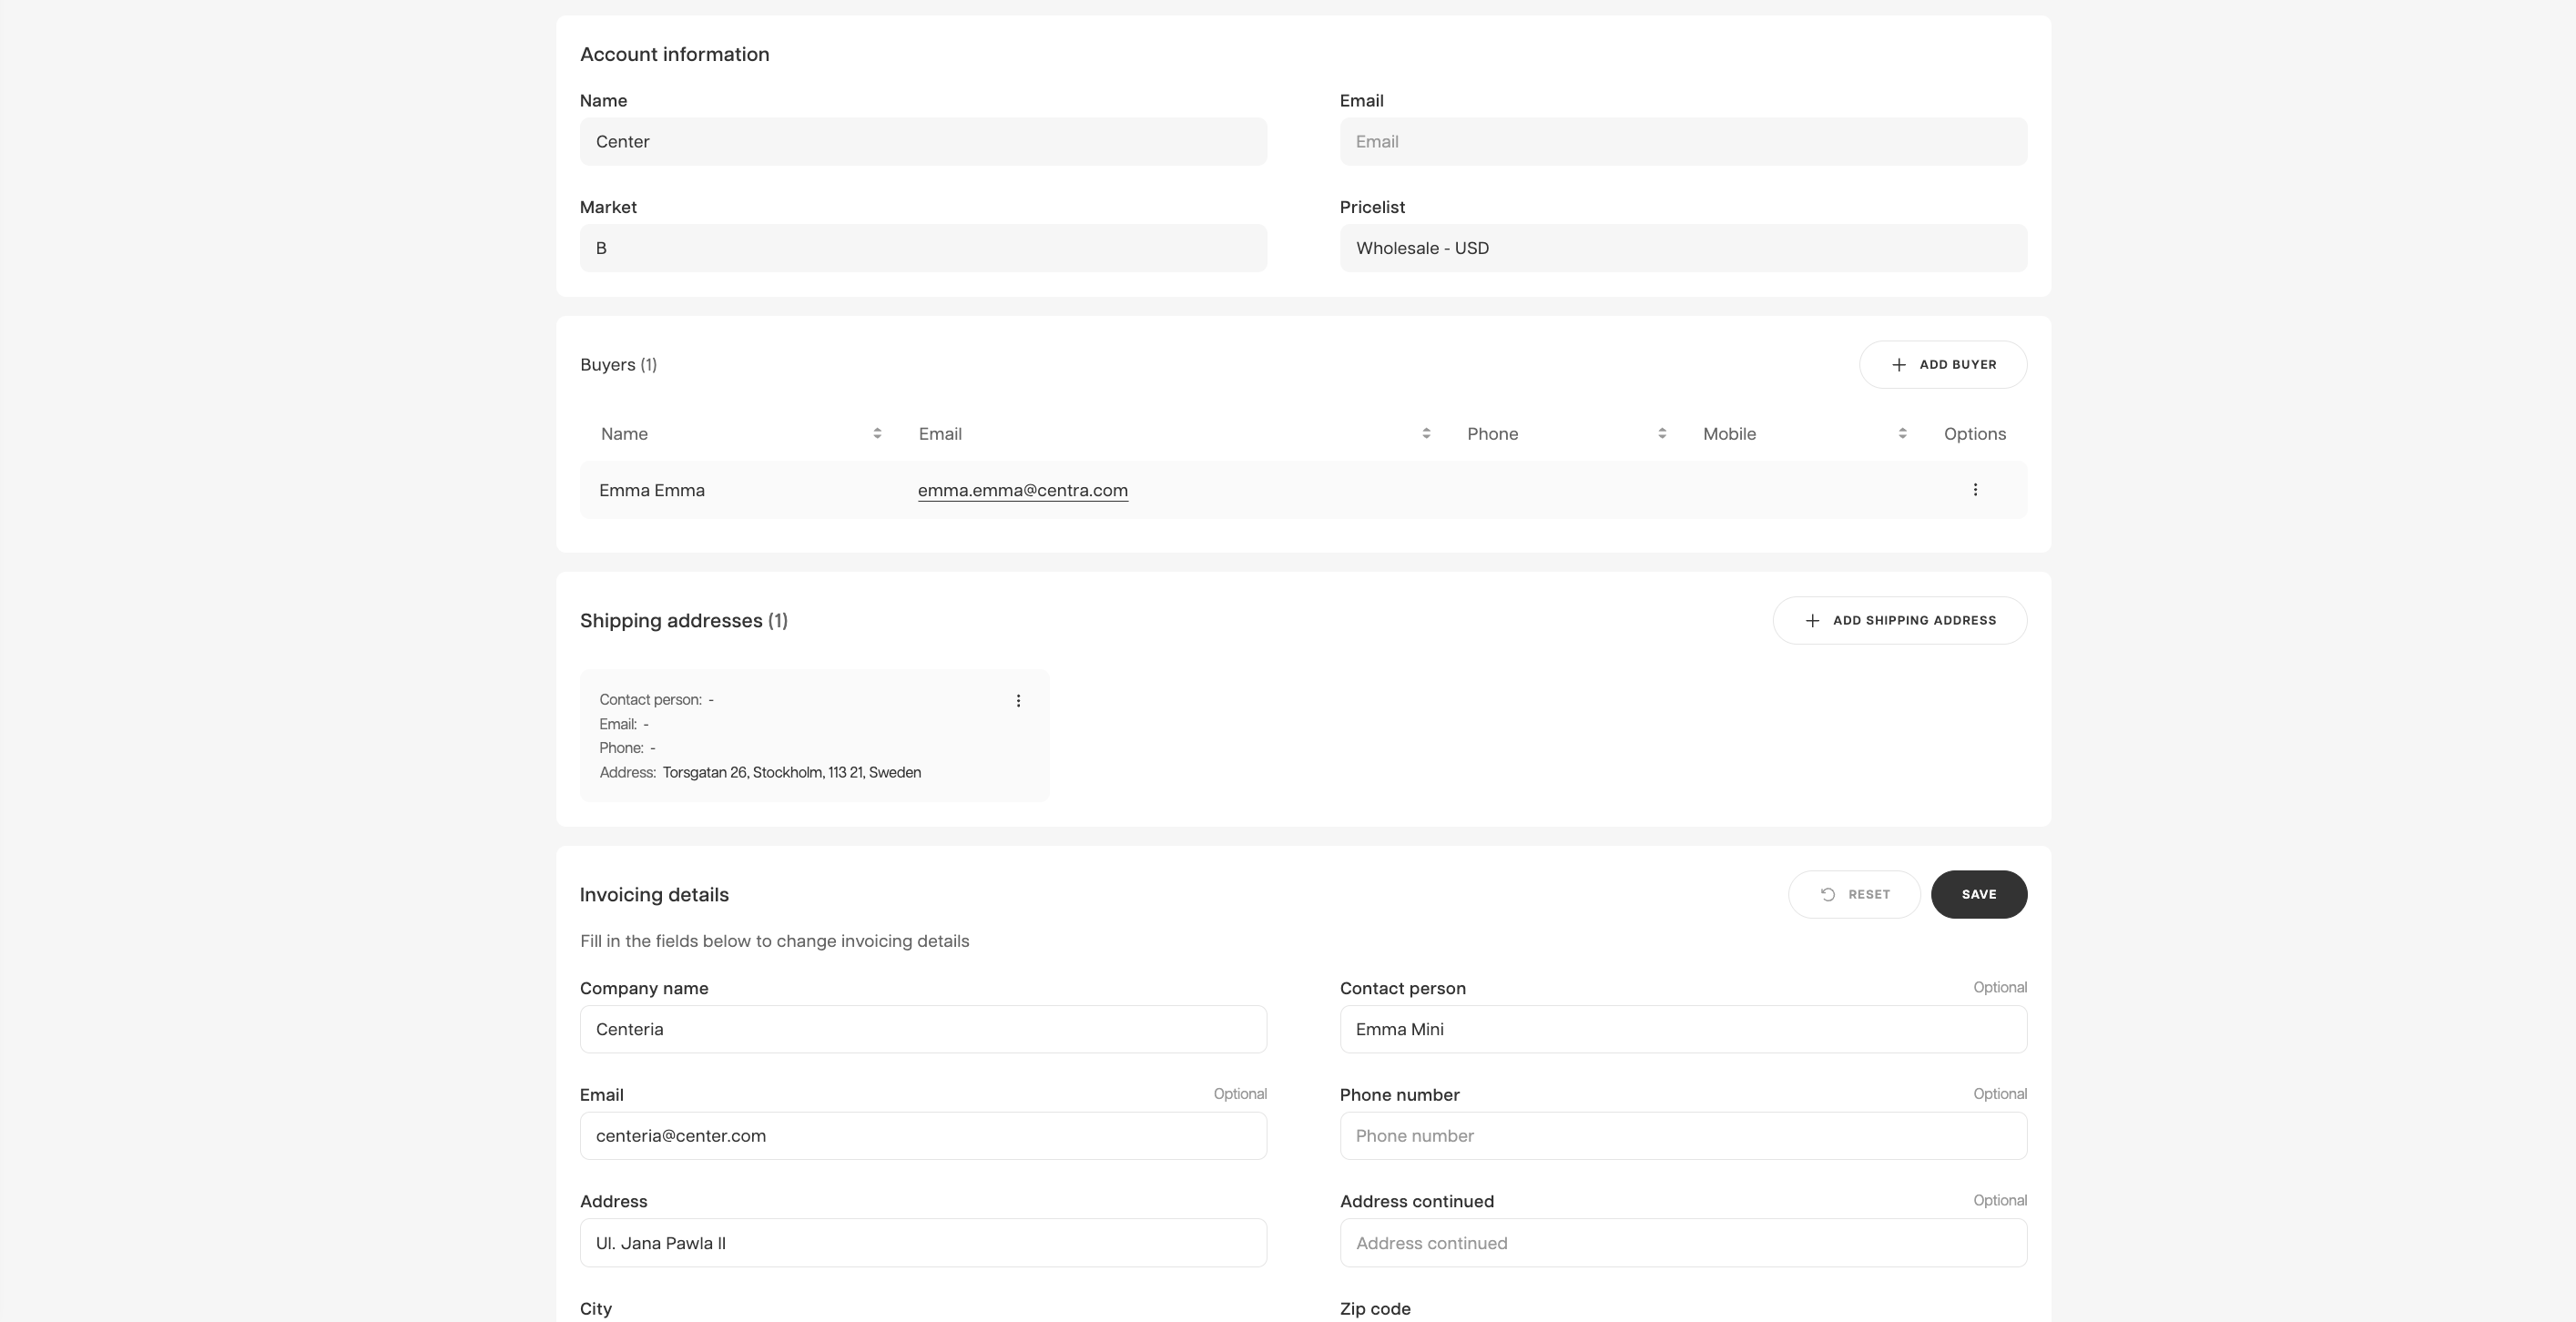
Once the account is created, you can update the Account’s information by adding invoicing details or shipping address
-
In Centra backend, the Account and Buyer’s statuses will be immediately set as ‘Active’
-
Sales Representatives or Administrators can make adjustments in Centra by clicking on ‘Edit’.
Next step
You may choose to add a buyer at this state by entering the Buyer information. You may also finish your account and create your buyer later. To create a buyer, click here.