Bulk media import
About this article
If you wish to add media to your products, you can do this in bulk through the media import instead of uploading media to individual products manually. This article discusses how to prepare for the media import, how to conduct it, and what elements to pay attention to.
Catalog import how-to: Quick guide for Media Import
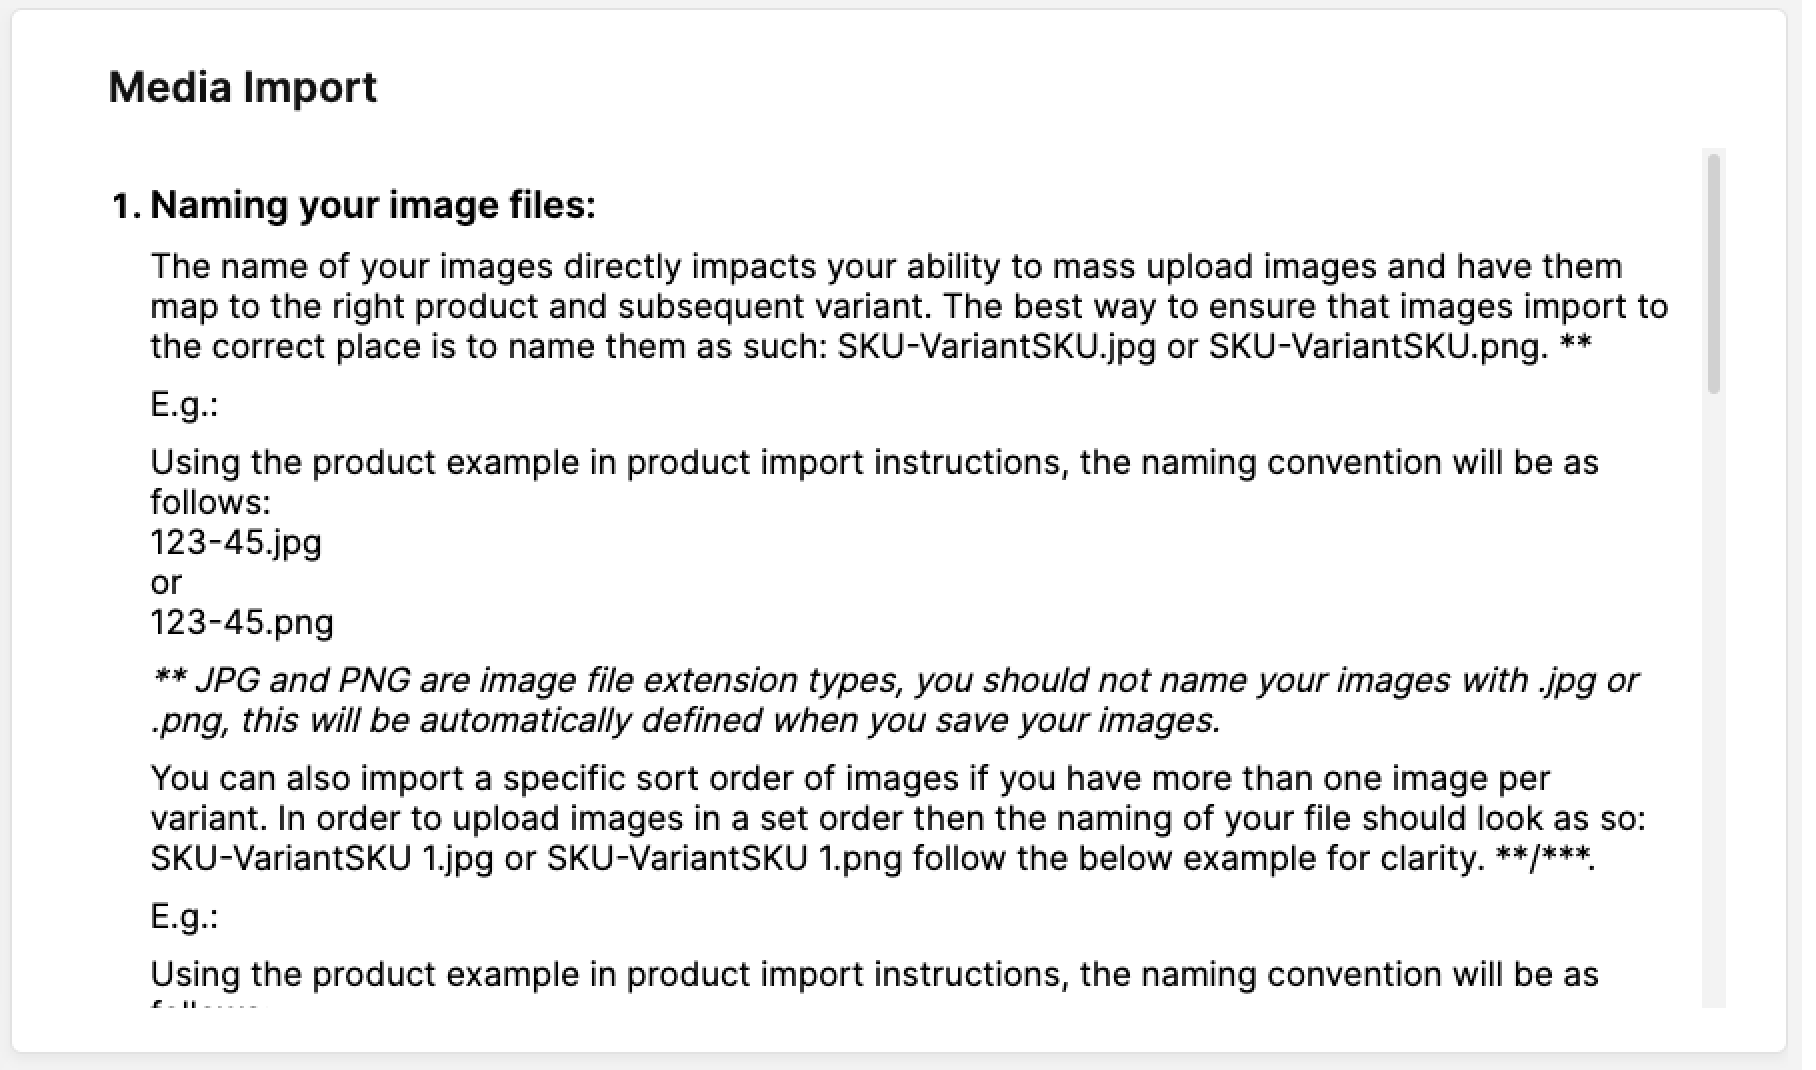
Some additional information that can help you with the Media import can also be found on the right side of the Media import:
Preparing the media files
Before you move forward with your bulk media import, make sure all files you plan to import are prepared correctly. There are three critical steps:
- File naming
- Media formats
- Creating a ZIP file
Let’s discuss those in more detail below:
File naming
This is the most crucial step, because it allows you to connect your media to the desired variants. Also, if multiple media are imported into one variant, you can set the order of the images using the file naming.
Important elements for file naming are the Product and Variant numbers (or SKUs). The screenshot below shows where these can be found on the product level:

Files should be named in the following manner: productnumbervariantnumber. Using the example above, the file should be named 341542W7-B01123
Product and variant number is the same term from product and variant SKU.
If you plan to import more than one media file to the same variant, you can add numbers at the end of the file names to set the order of the images, as follows:
- 341542W7-B01123-1 (first)
- 341542W7-B01123-2 (second)
- 341542W7-B01123-3 (third)
Do not use underscores (_) in the file name, as the media import will fail.
Media formats
Supported file formats for media are: JPG, GIF, PNG.
Create a ZIP file
Once you have named all the media you wish to import, please compress the files into a single ZIP-file. This is then used to upload to Centra. The maximum size of the ZIP-file is 250MB per import.
Select all individual image files and compress them into the ZIP file. Do not add the images to a folder and compress the folder into the ZIP file. Centra can not process zipped folders in the media import.
Importing media in bulk
Once you have prepared the ZIP files, follow the steps below to perform the import:
- Go to 'Products' in the main menu to the left and click 'Import'
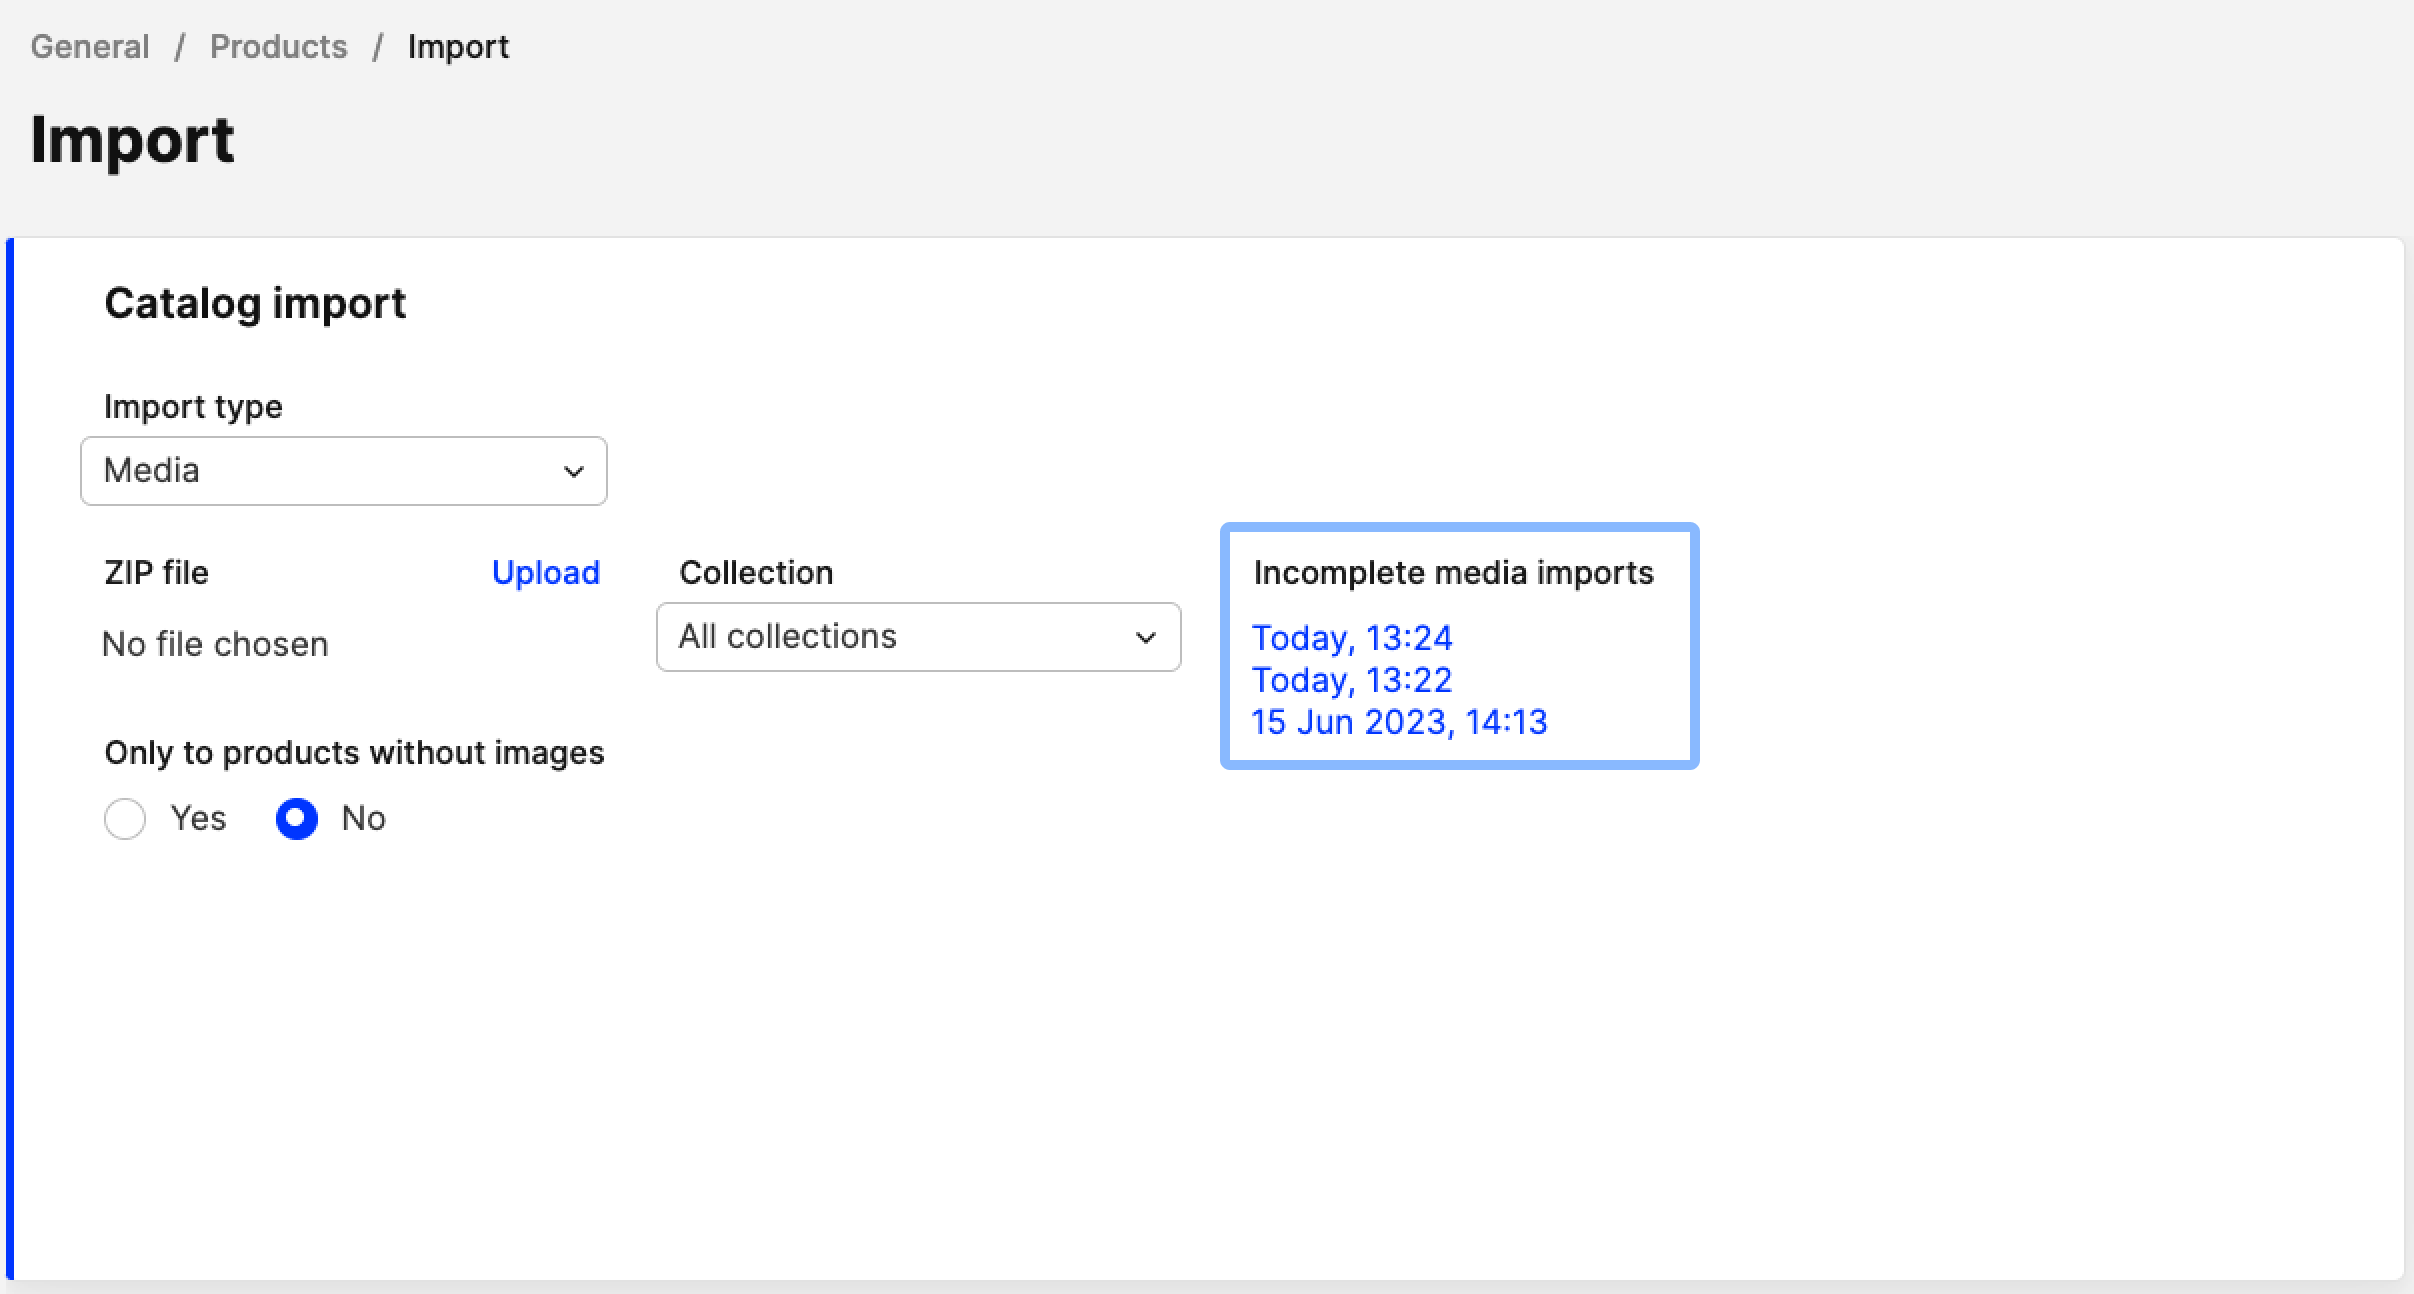
- In the ‘Import type’ drop-down menu, select 'Media', and you are redirected to this view:
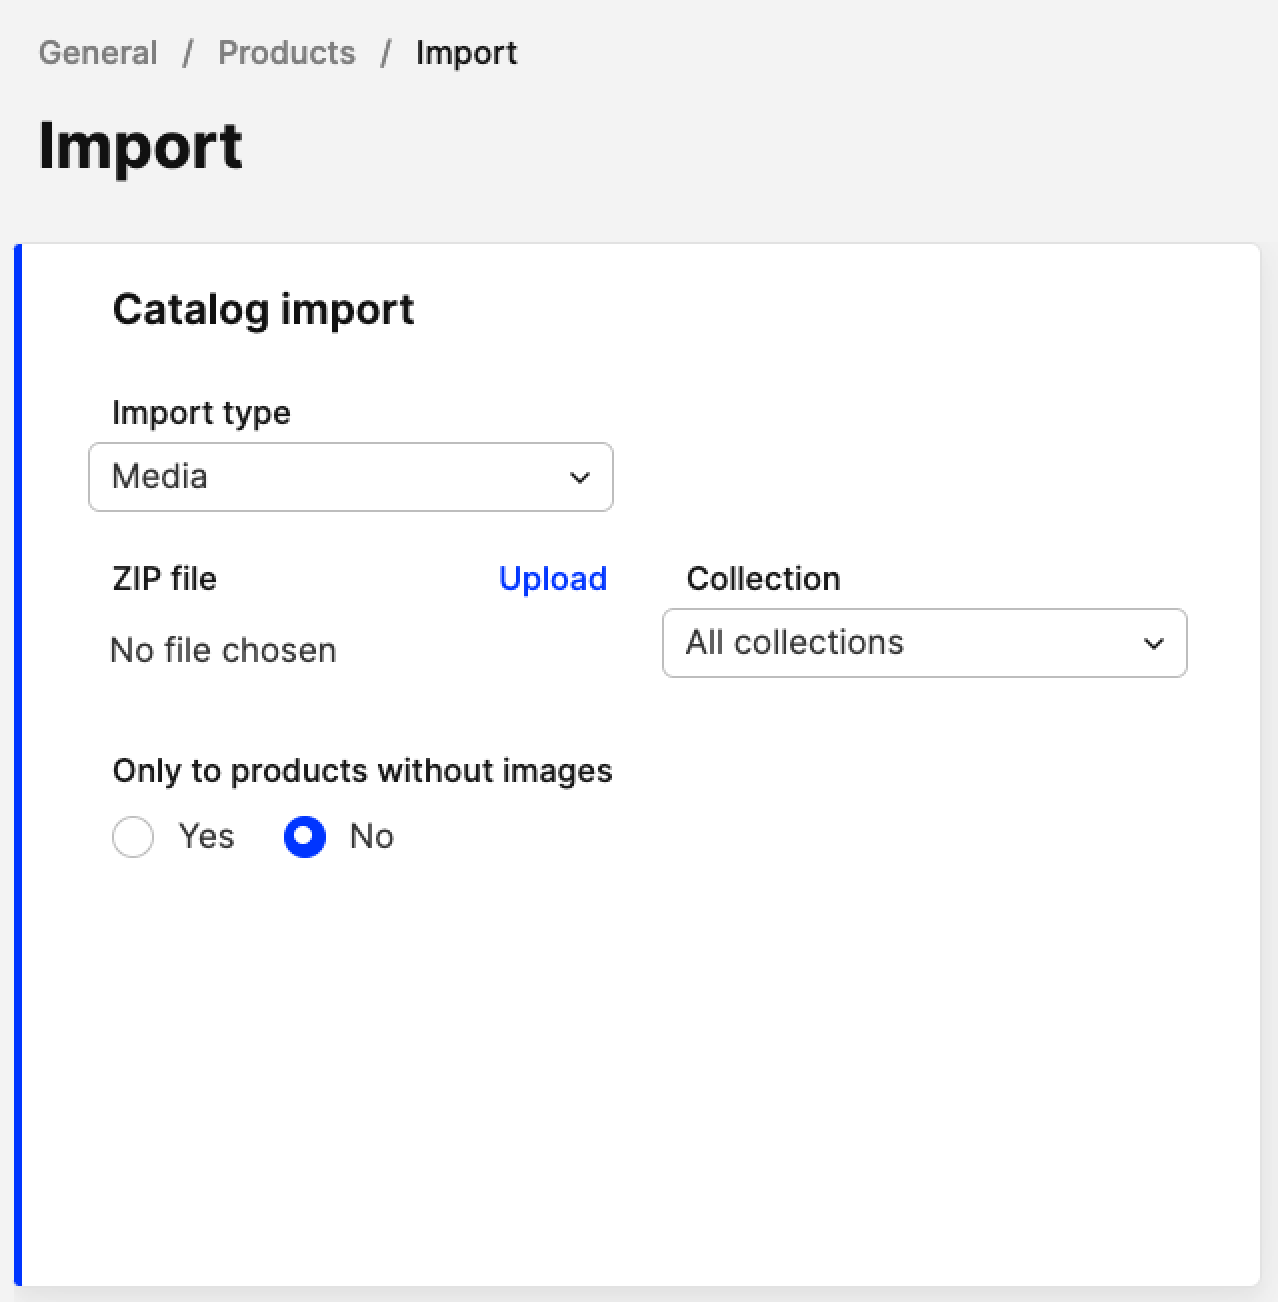
- Choose 'Collection' in the drop-down menu. If you are uploading media to products from different collections, select 'All collections'.
- If the products you are uploading media to already have media and you want to skip uploading images to these products, select 'Yes' in the 'Only to products without images' field. Otherwise, select 'No'.
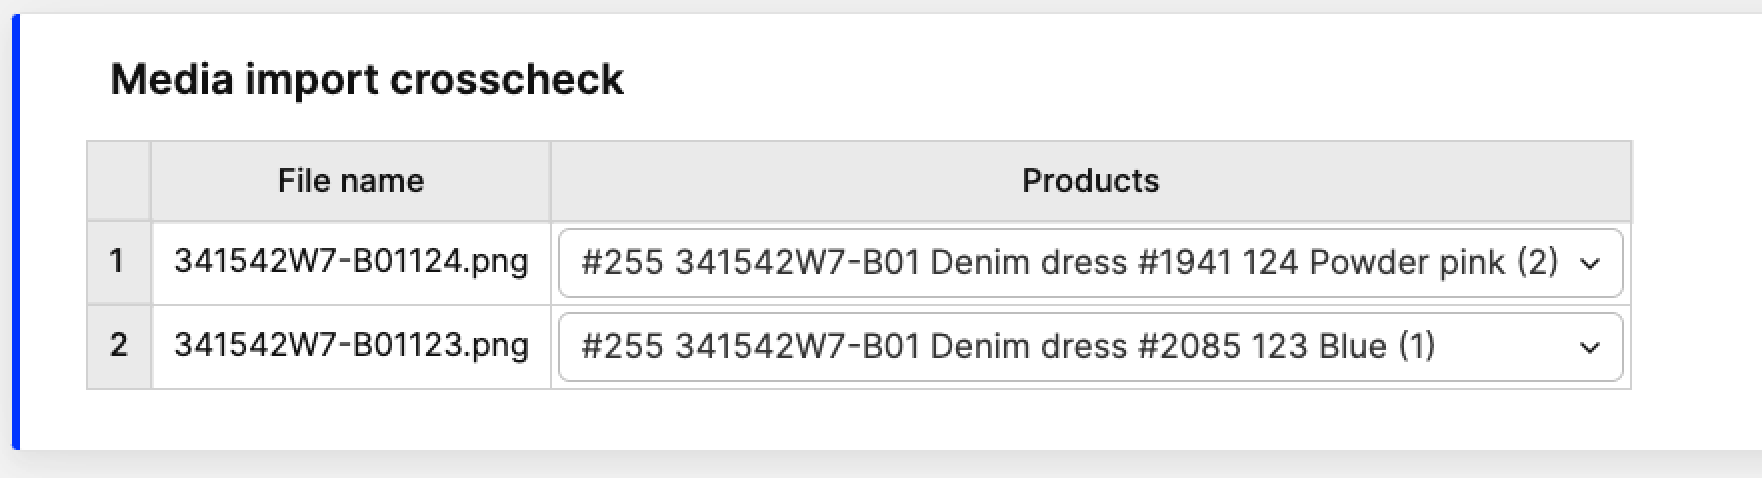
- The 'Media import crosscheck' section appears once the ZIP file is successfully uploaded. In this section, you can review all data, ensuring the media has been connected to the right variants.
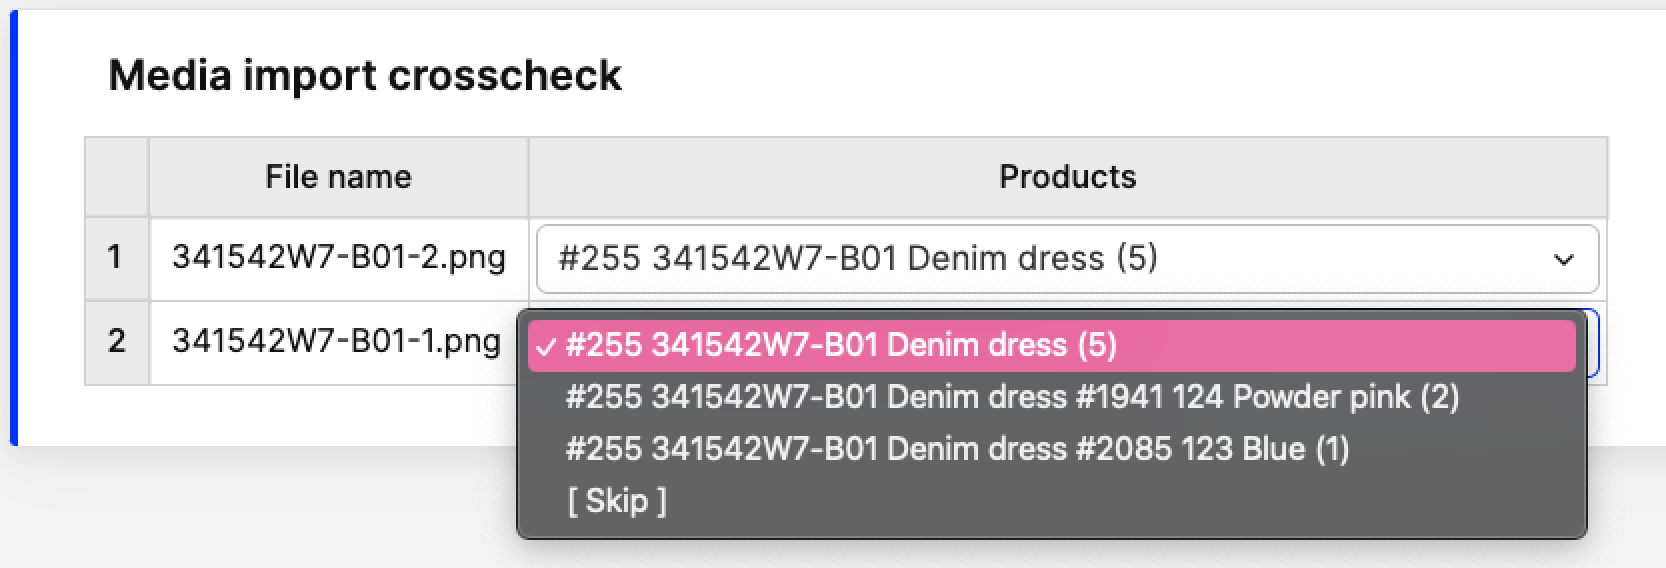
Note that at this step, if the wrong variant is selected, you can select a different one in the drop-down menu, or select to skip it as shown below:
- Click 'Save' in the top-right corner of the 'Media import crosscheck'
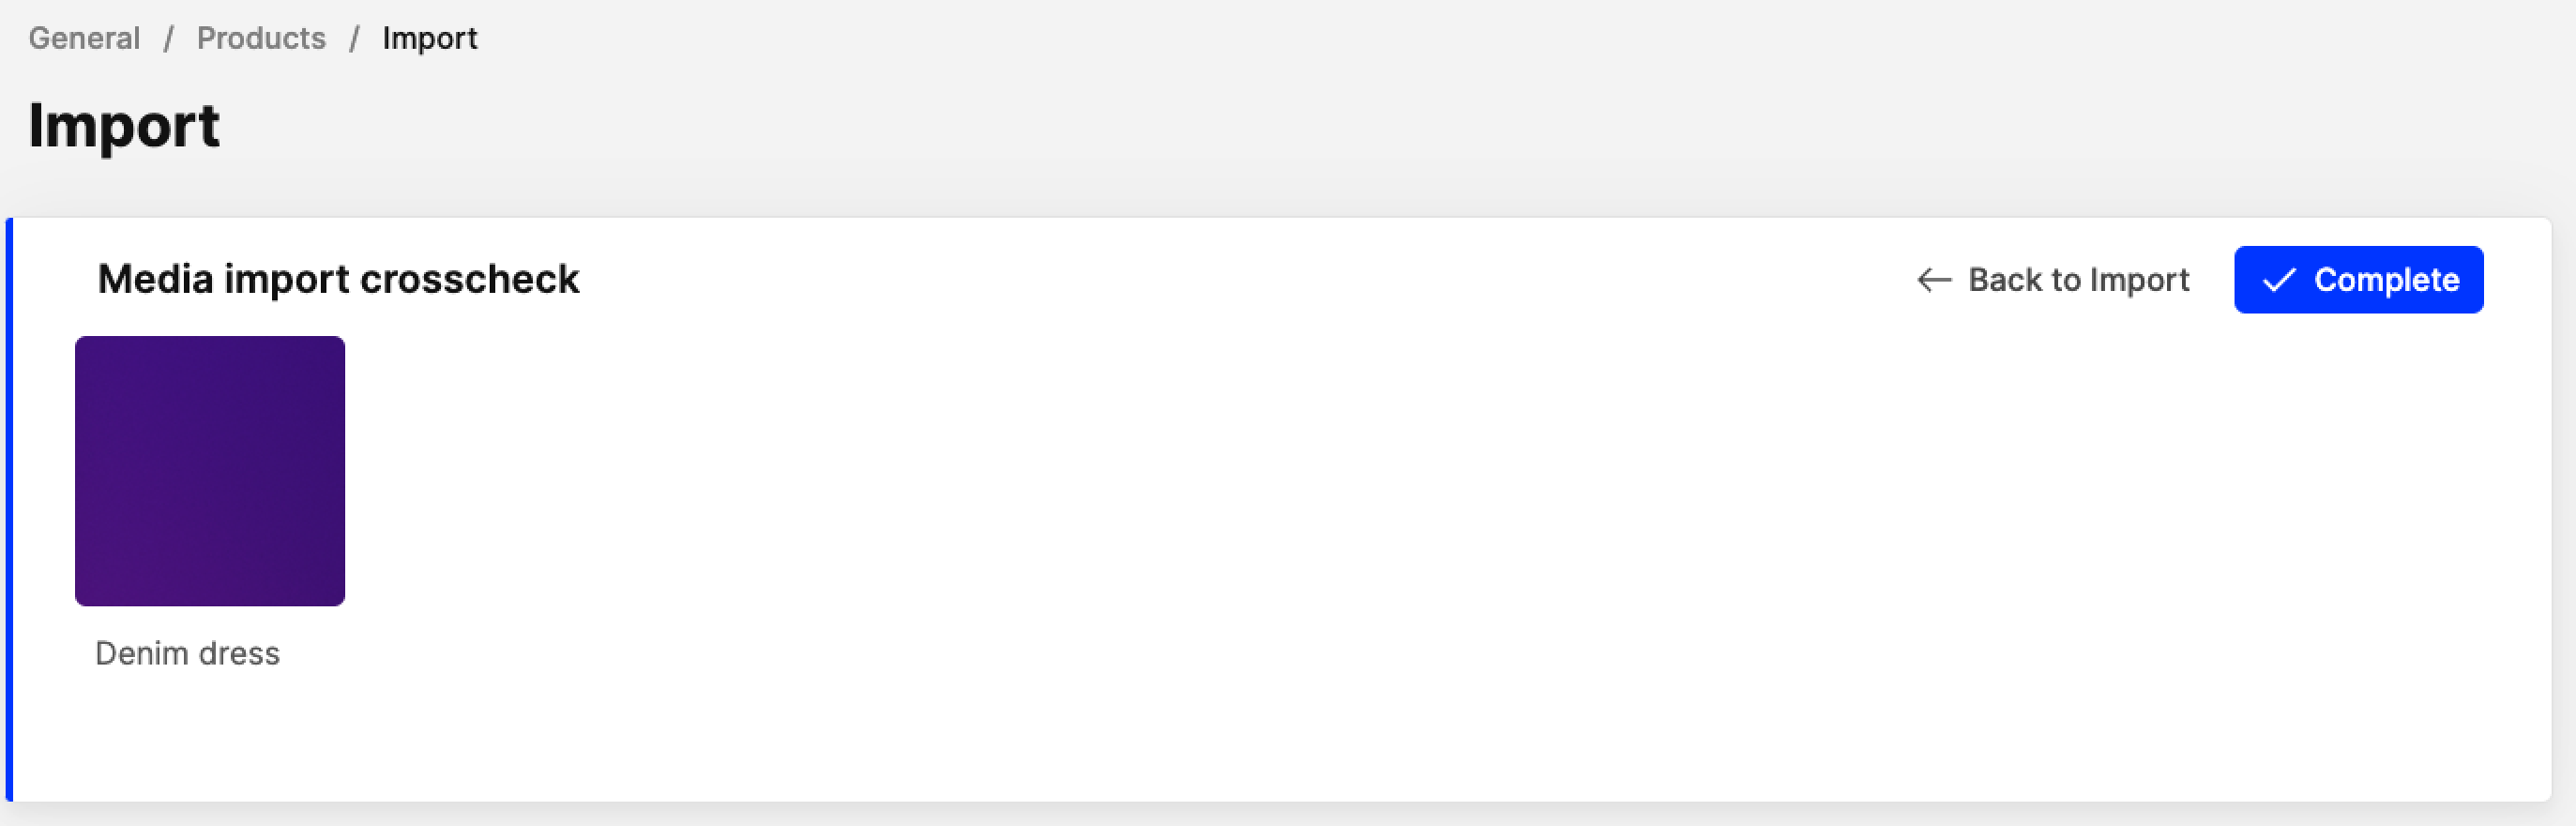
- Your media starts to upload in an additional crosscheck view. This might take some time if the file is large. When all images are uploaded, click 'Complete' in the top-right corner to finalize the media import of your ZIP file.
Incomplete media imports
If you started a bulk media import but the import was interrupted, note that Centra keeps a registry of incomplete media imports, as seen below:
 All entries of incomplete media imports are hyperlinked. Clicking them uploads the file again and performs the first step of the import, taking you to the Media import crosscheck step. There you can review the files and products they were connected to, and either click 'Save' to import or 'Discard' to cancel the import. Clicking ‘Discard’ also removes the saved attempt in the 'Incomplete media imports' registry.