Edit stock in stock view
About this article
This article will show how to edit stock levels using the Stock View. The main difference from using the Stock Editor for editing stock levels is that the Stock View allows you to set new levels by overriding the current numbers. You may also add and/or edit your stock inventory in the Product view. To read about how to add/edit stock in the product view, click here
Edit stock levels from the Stock page
To edit your stock using the Stock page, follow the steps below:
- Click on 'Stock' in the main menu to the left
- Choose a product that you wish to edit. You can open this product in two different ways. Either click anywhere on the product row, or click 'Open' under the Tools menu, and the product stock details will unfold:

- Here you can see information about the stock in a variety of ways which are described here.
Remember that when Stock master is marked as External, the stock values are handled by a third party (i.e. Ongoing, Sitoo etc.), and therefore cannot be edited in Centra. These fields will only be readable.
- Editing stock levels in the Stock View is done using the principle of setting new stock levels. In the Warehouses section, the fields for Physical and FTA values can be edited. Example: If your current stock level for a certain product is 7 pcs in size XS but you would like to change that to 10 pcs, you simply do so by typing 10 in the XS field in the respective warehouse. More scenarios are described in the section below.
- Click 'Save' in the top-right corner once you are finished processing the stock changes. If you have made changes to more than one product, you can click on 'Save all' at the top-right corner.
Which value should I edit, Physical or FTA
To answer this question, it is best to familiarize yourself with these two stock types, which you can do here. The difference between these two values is that ‘FTA’ (Free to allocate) excludes the pieces that are ‘reserved’ on orders that are not yet shipped, whereas ‘Physical’ includes them, and therefore showcases the number of pieces on the shelf in the warehouse. See an example below:
 This product has 61 pieces of ‘Physical’ stock. This is the amount found in your warehouse. However, one piece has been ‘Allocated’ to orders that are being processed. Therefore, 60 pieces are currently available for purchasing on your website (FTA).
Overall, we recommend editing the Physical values. However, depending on the reason why you are making your edits, this might be different. We have, therefore, listed a few example scenarios below to help you. These also showcase how the functionalities on this page work.
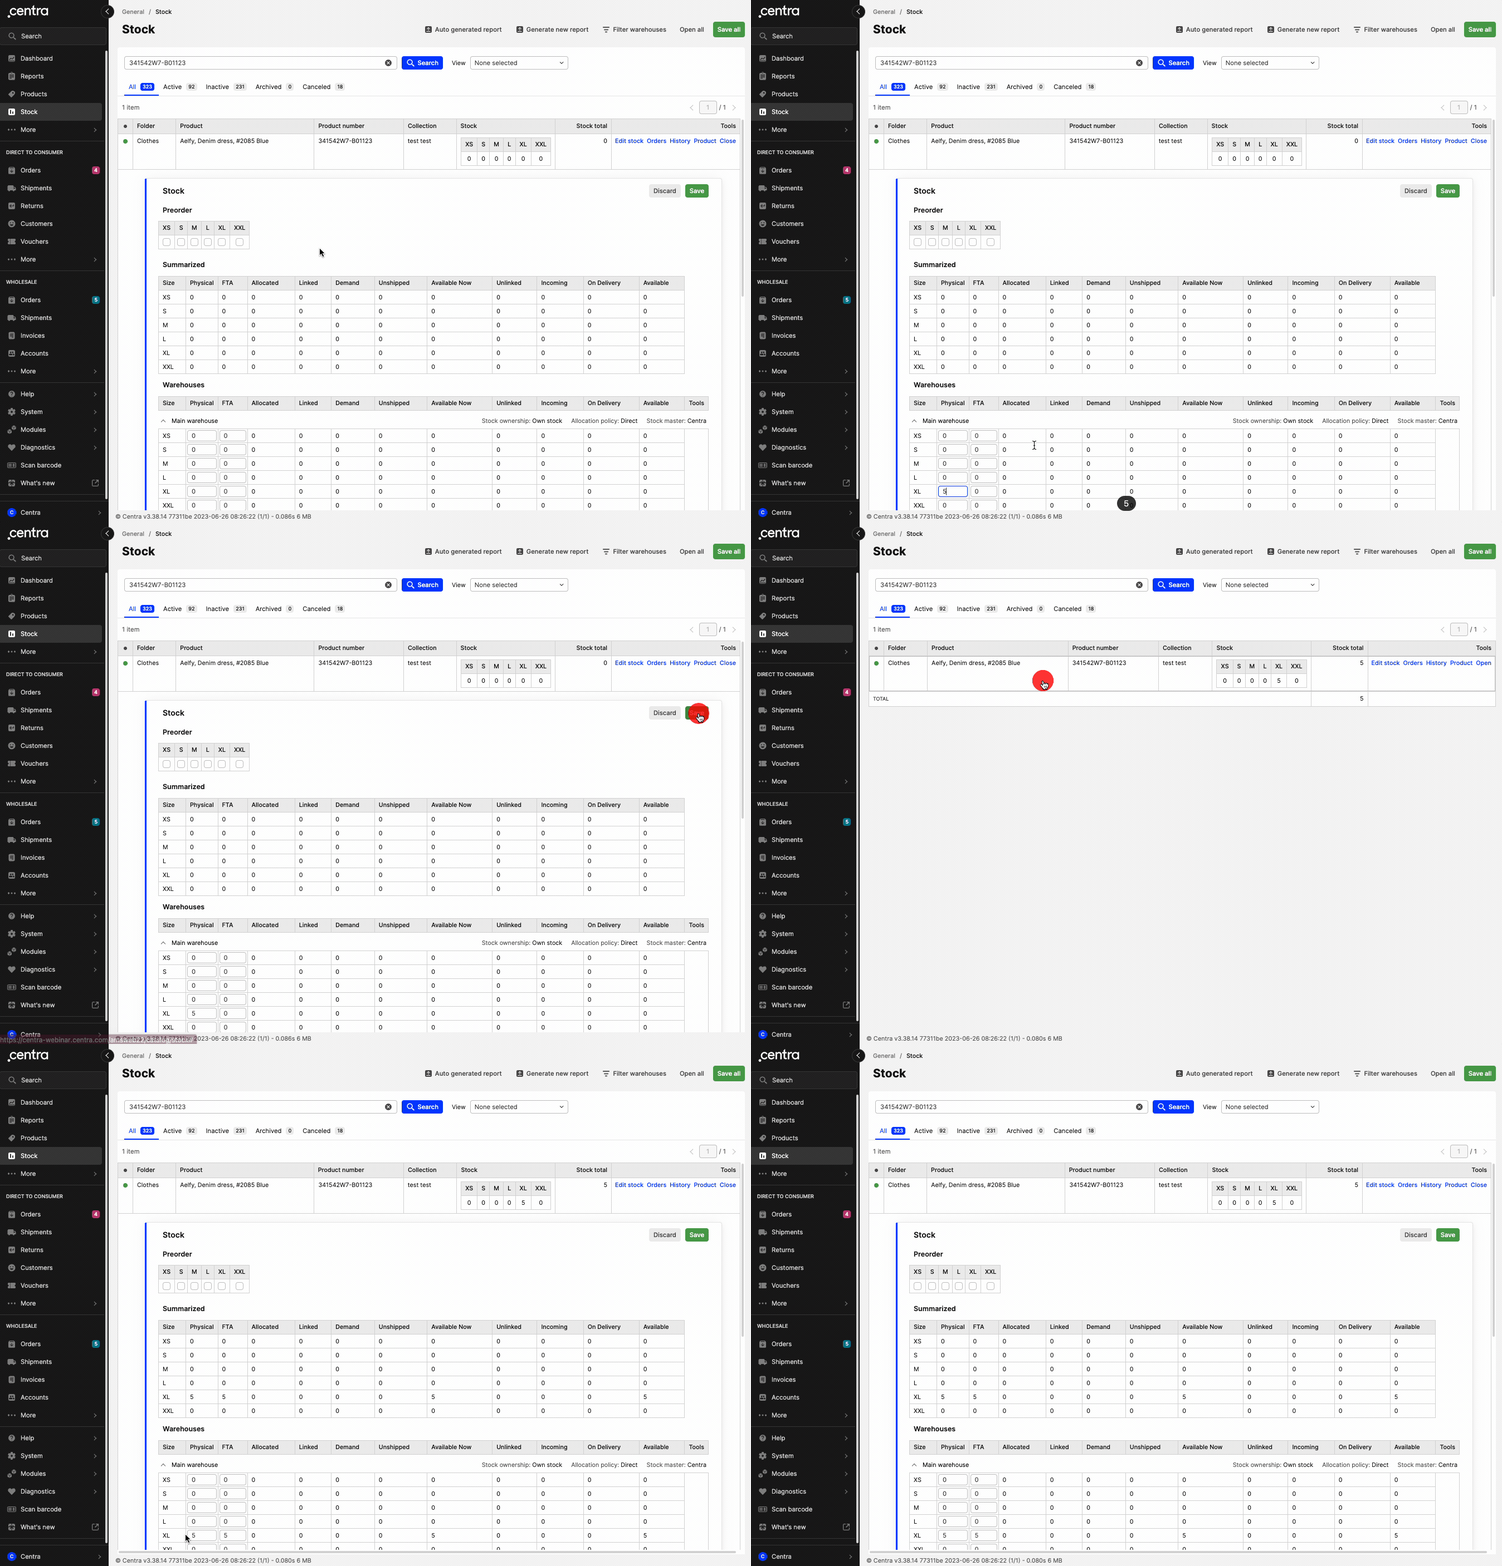
Scenario 1: The product has no stock and I want to add the correct amount
This product has no pieces in size XL. If we want to add 5 pieces, we can do so by inserting the number 5 into either the Physical or FTA field of that size. Once we click 'Save', both fields will be updated with this stock value:

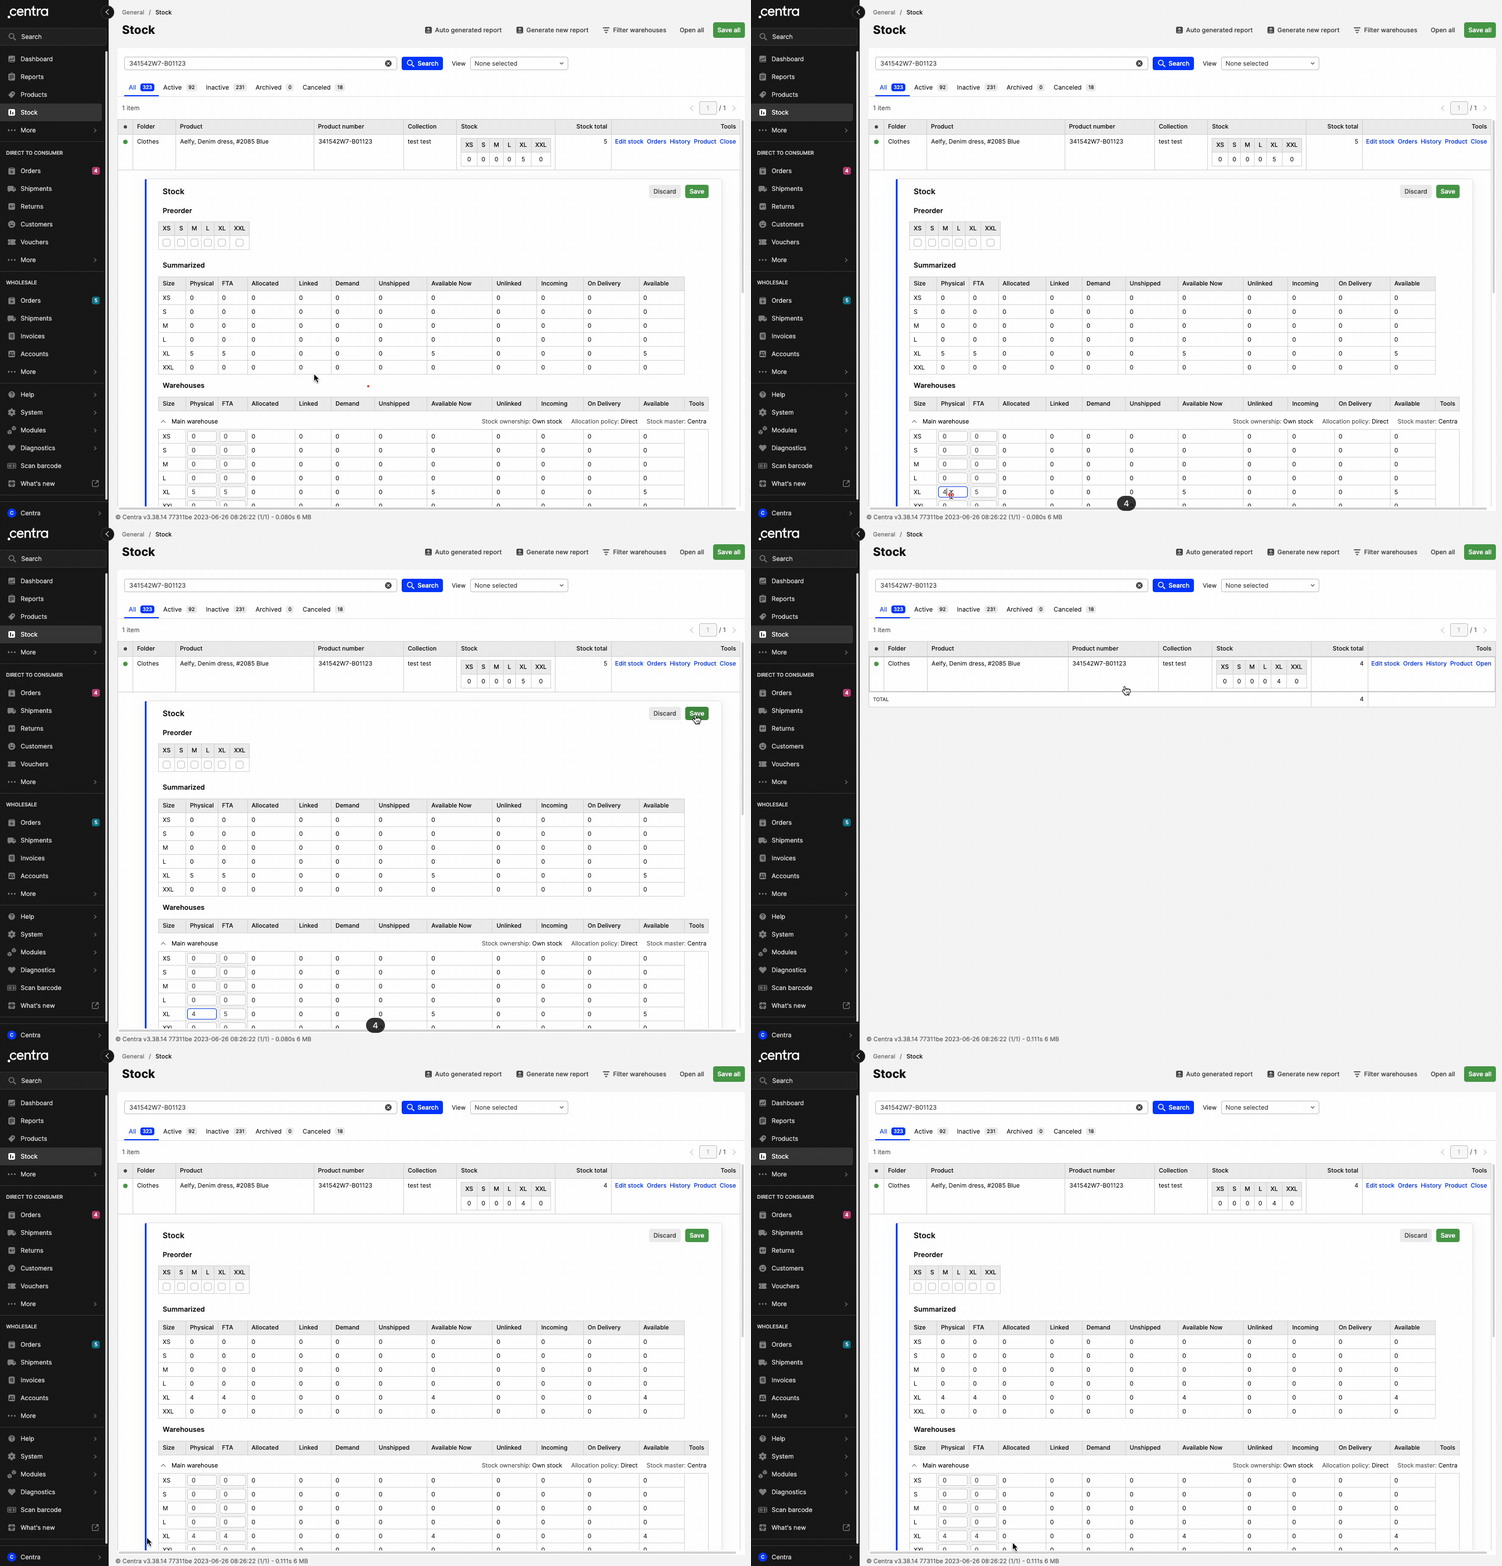
Scenario 2: I would like to remove stock
We can focus on the example above where size XL has 5 pieces. Let’s say that we’ve made a mistake and the amount should be 4 instead of 5. In this case, we need to insert the number 4 in either the Physical or FTA field for that size. The amount on both fields will then be updated once 'Save' is clicked.

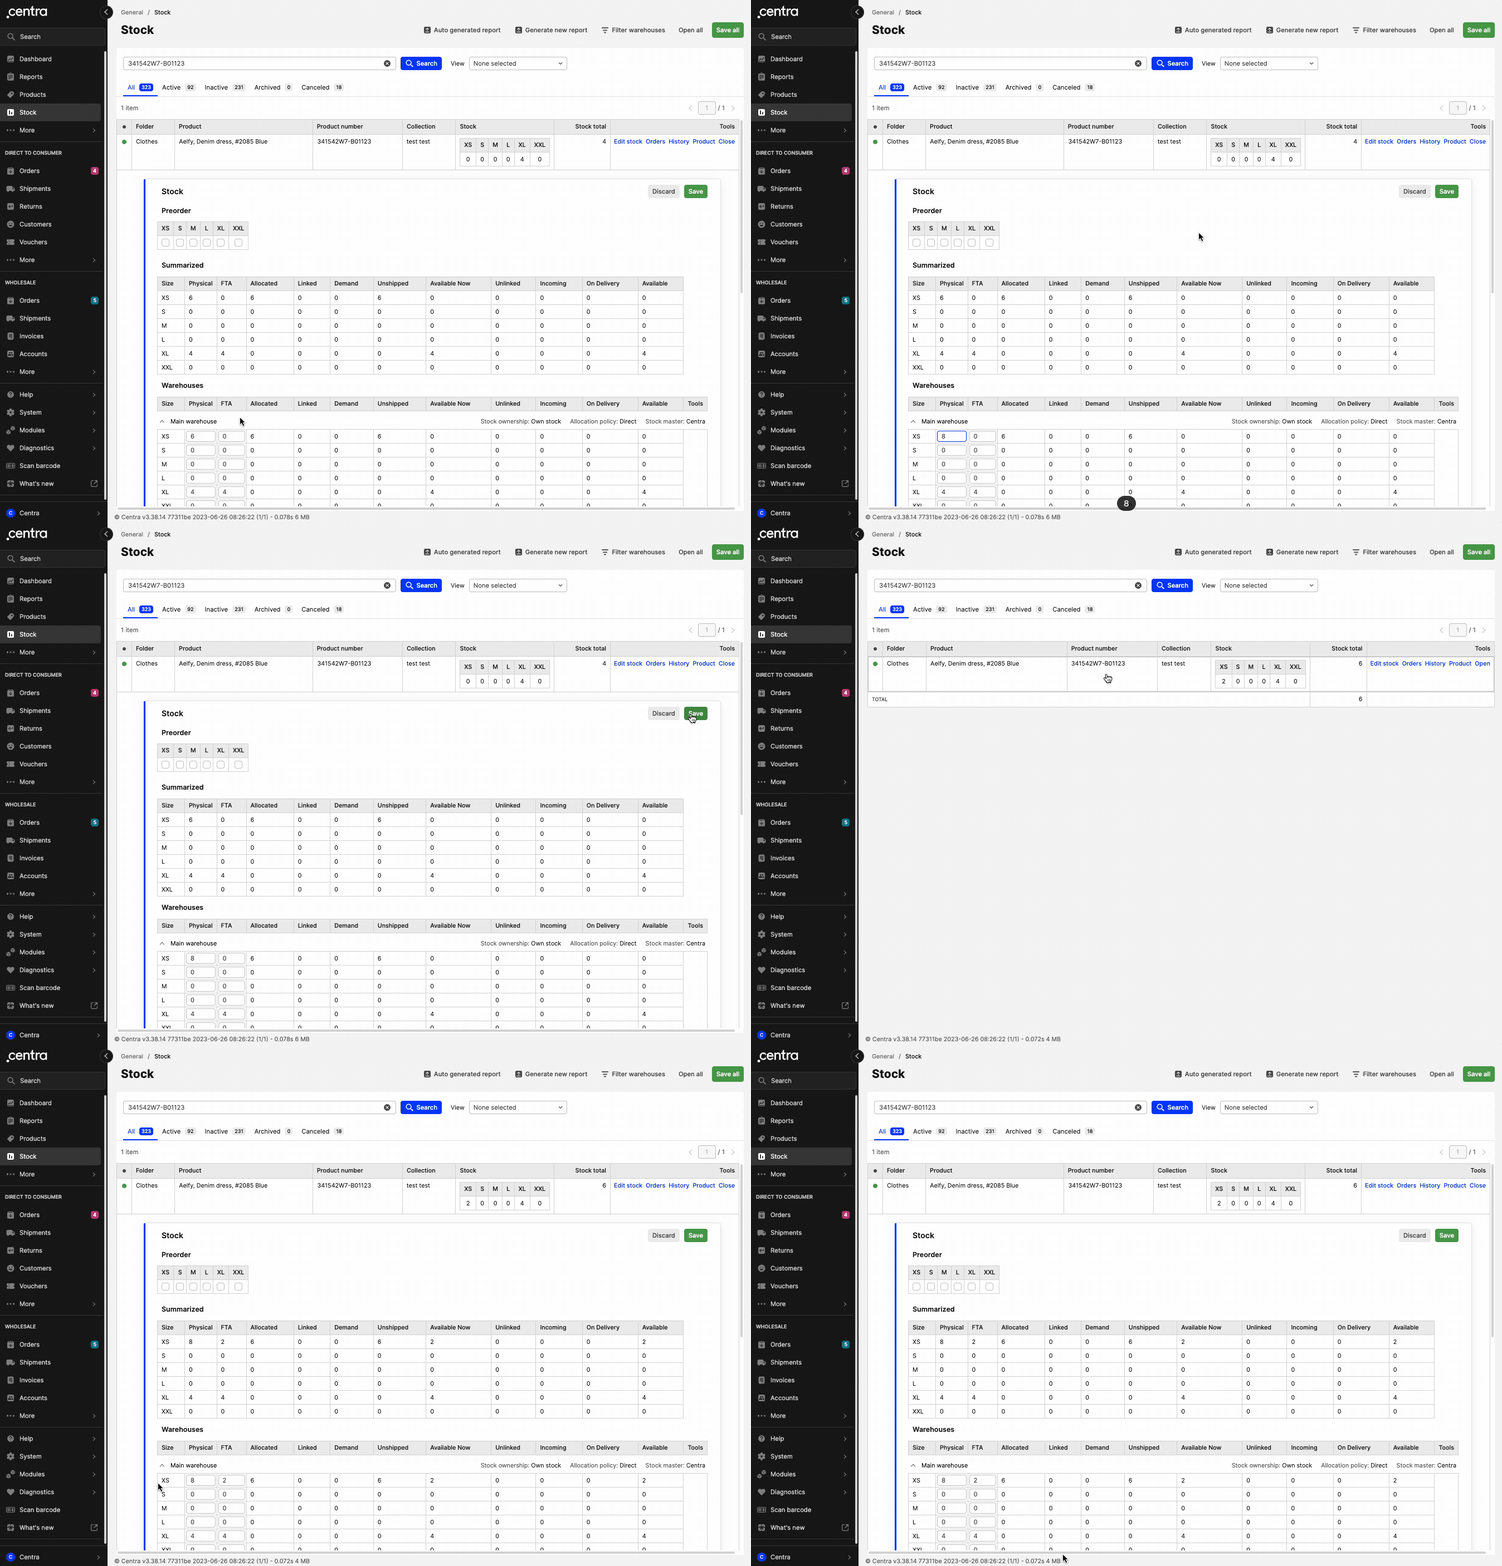
Scenario 3: I’d like to edit the stock values, but I see that some stock is allocated to orders
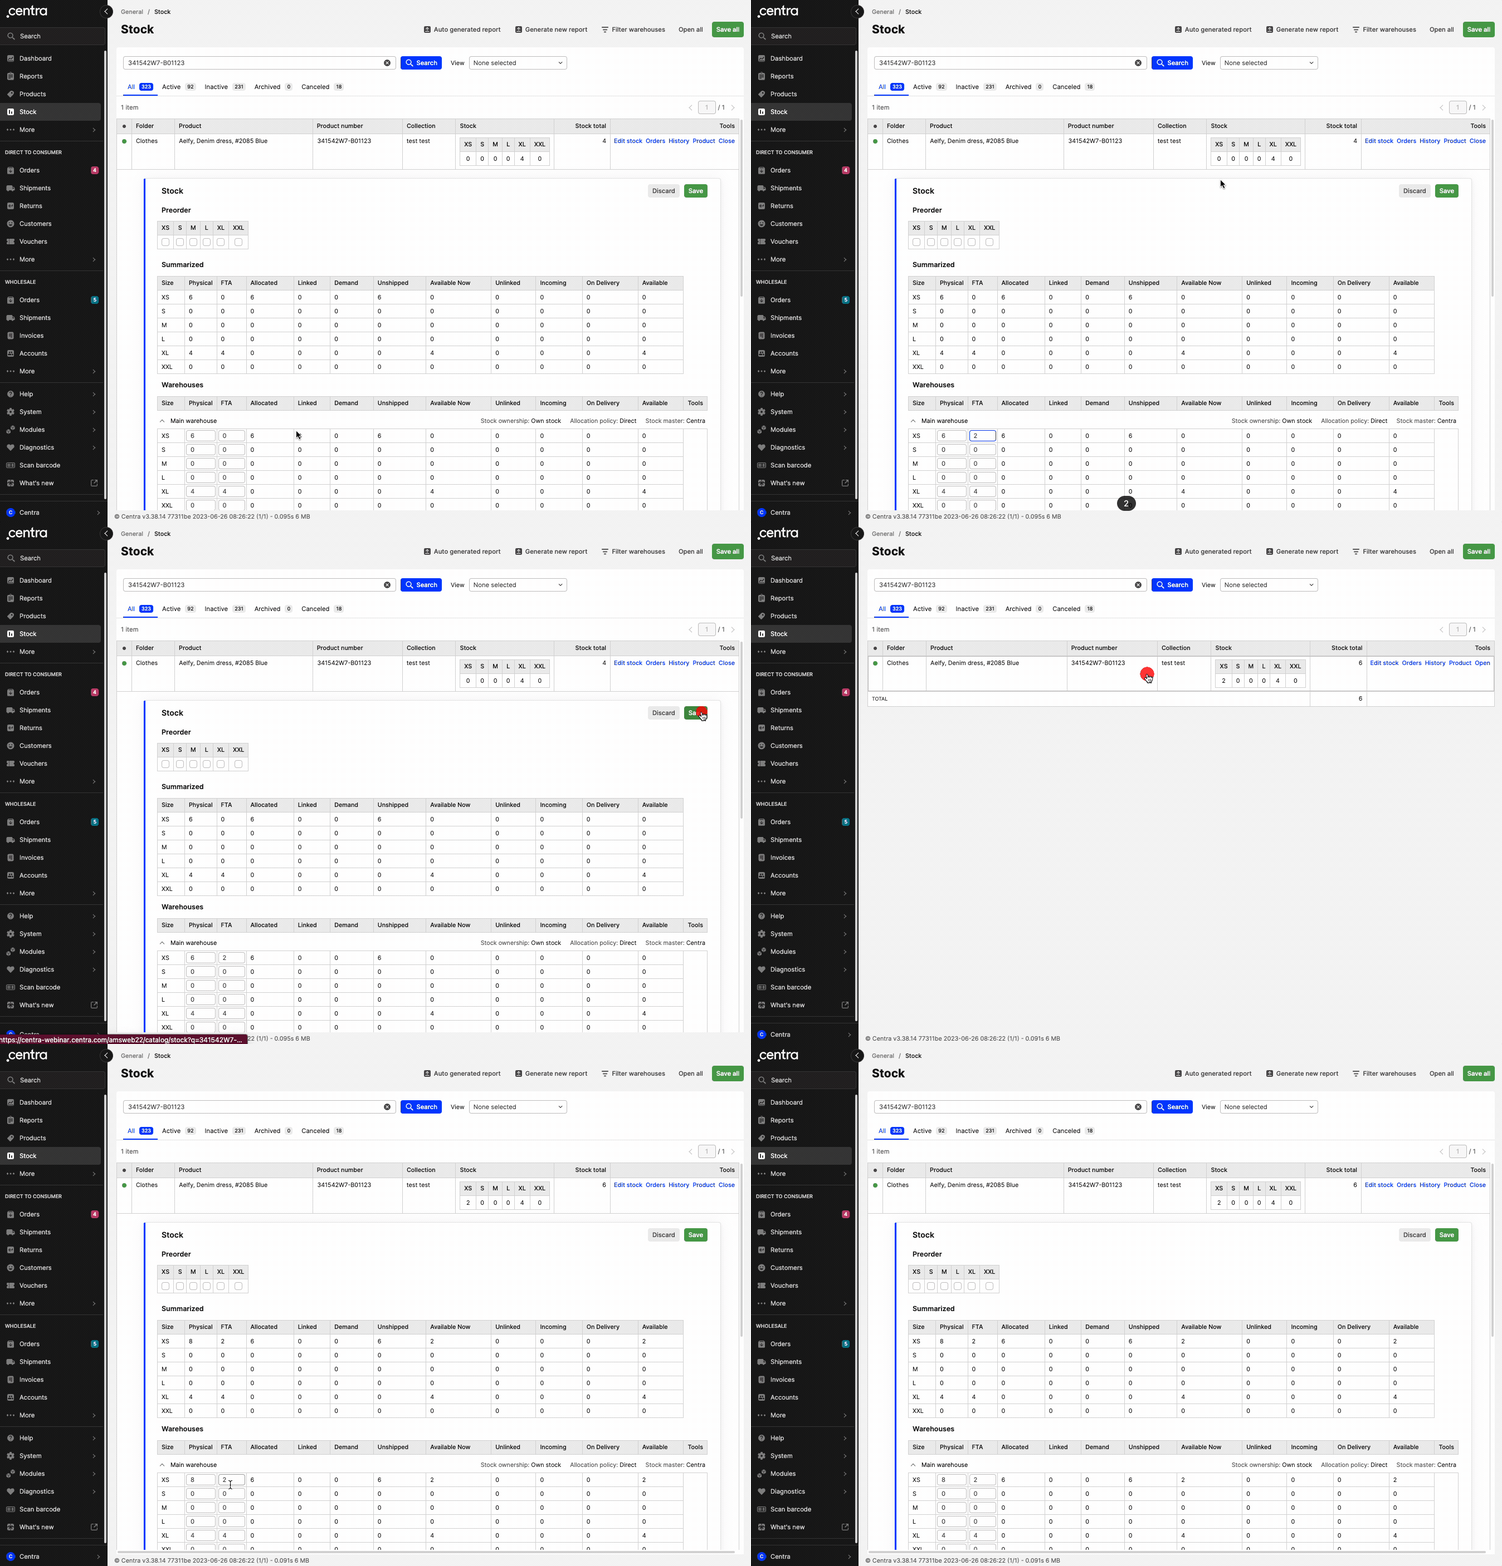
In the example below, size XS has the following values: Physical - 6, FTA - 0 and Allocated 6.
 However, let’s say we know that the warehouse has 8 pieces available. This means that the Physical stock should be 8, and that 2 more pieces need to be added. In this case, you can either change the value of Physical to 8, or the value of FTA to 2, as seen below:


Next steps
To view stock history of the product, click 'History' in the bottom-right corner To read more about stock history click here