Media on product level
About this article
The media bank is where you manually add images to your product. In this article, you can learn how to add images to a product and connect them to specific variants.
How to add media on product level
- Click on 'Products'
- Select a product you’d like to add images to
- In the Variants section of the product, click on '+Upload media'

- The following pop-up will appear:
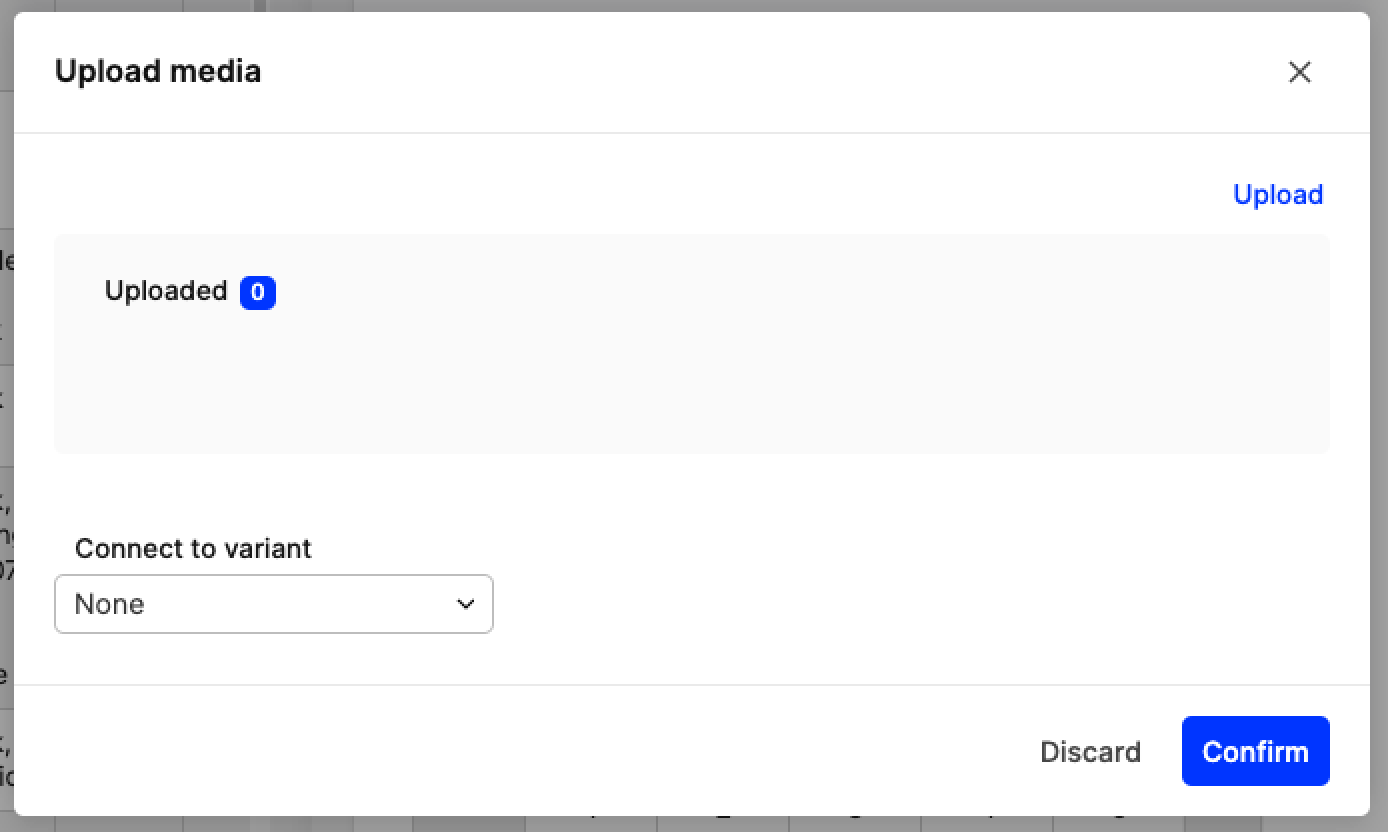
- Click the 'Upload' button and choose the image from your files. Valid image formats are JPG, PNG, and GIF.
Image-size requirements are set individually for each Centra environment. Please consult your front-end partner to learn about your optimal image settings.
- Connect the image to a variant by selecting the variant in the drop-down menu
- Click 'Confirm' in the bottom-right corner.
Overview of media information
In the General part of a product, within the Variants section, media can appear in different places depending on whether they are connected to a variant or not. Below you can view all possibilities and differences between them:

- Variant-specific image - When media are connected to a variant, you can see them directly under their corresponding variant, as in the screenshot above for variants Blue and Powder pink.
- If no media is connected to the variant, you see a section called 'Media' under the variant with information 'No media', as for the Black variant
- Product-specific image - When media are not connected to any variants, they will be shown under the section 'Not connected media'
How to make changes to existing media
There are two ways to make changes to existing media:
- Clicking on the image
- Tick the box of the image
These are described in more detail below.
Click on the image to make changes
One way to make changes to existing media is to click on the image itself. The following pop-up appears:
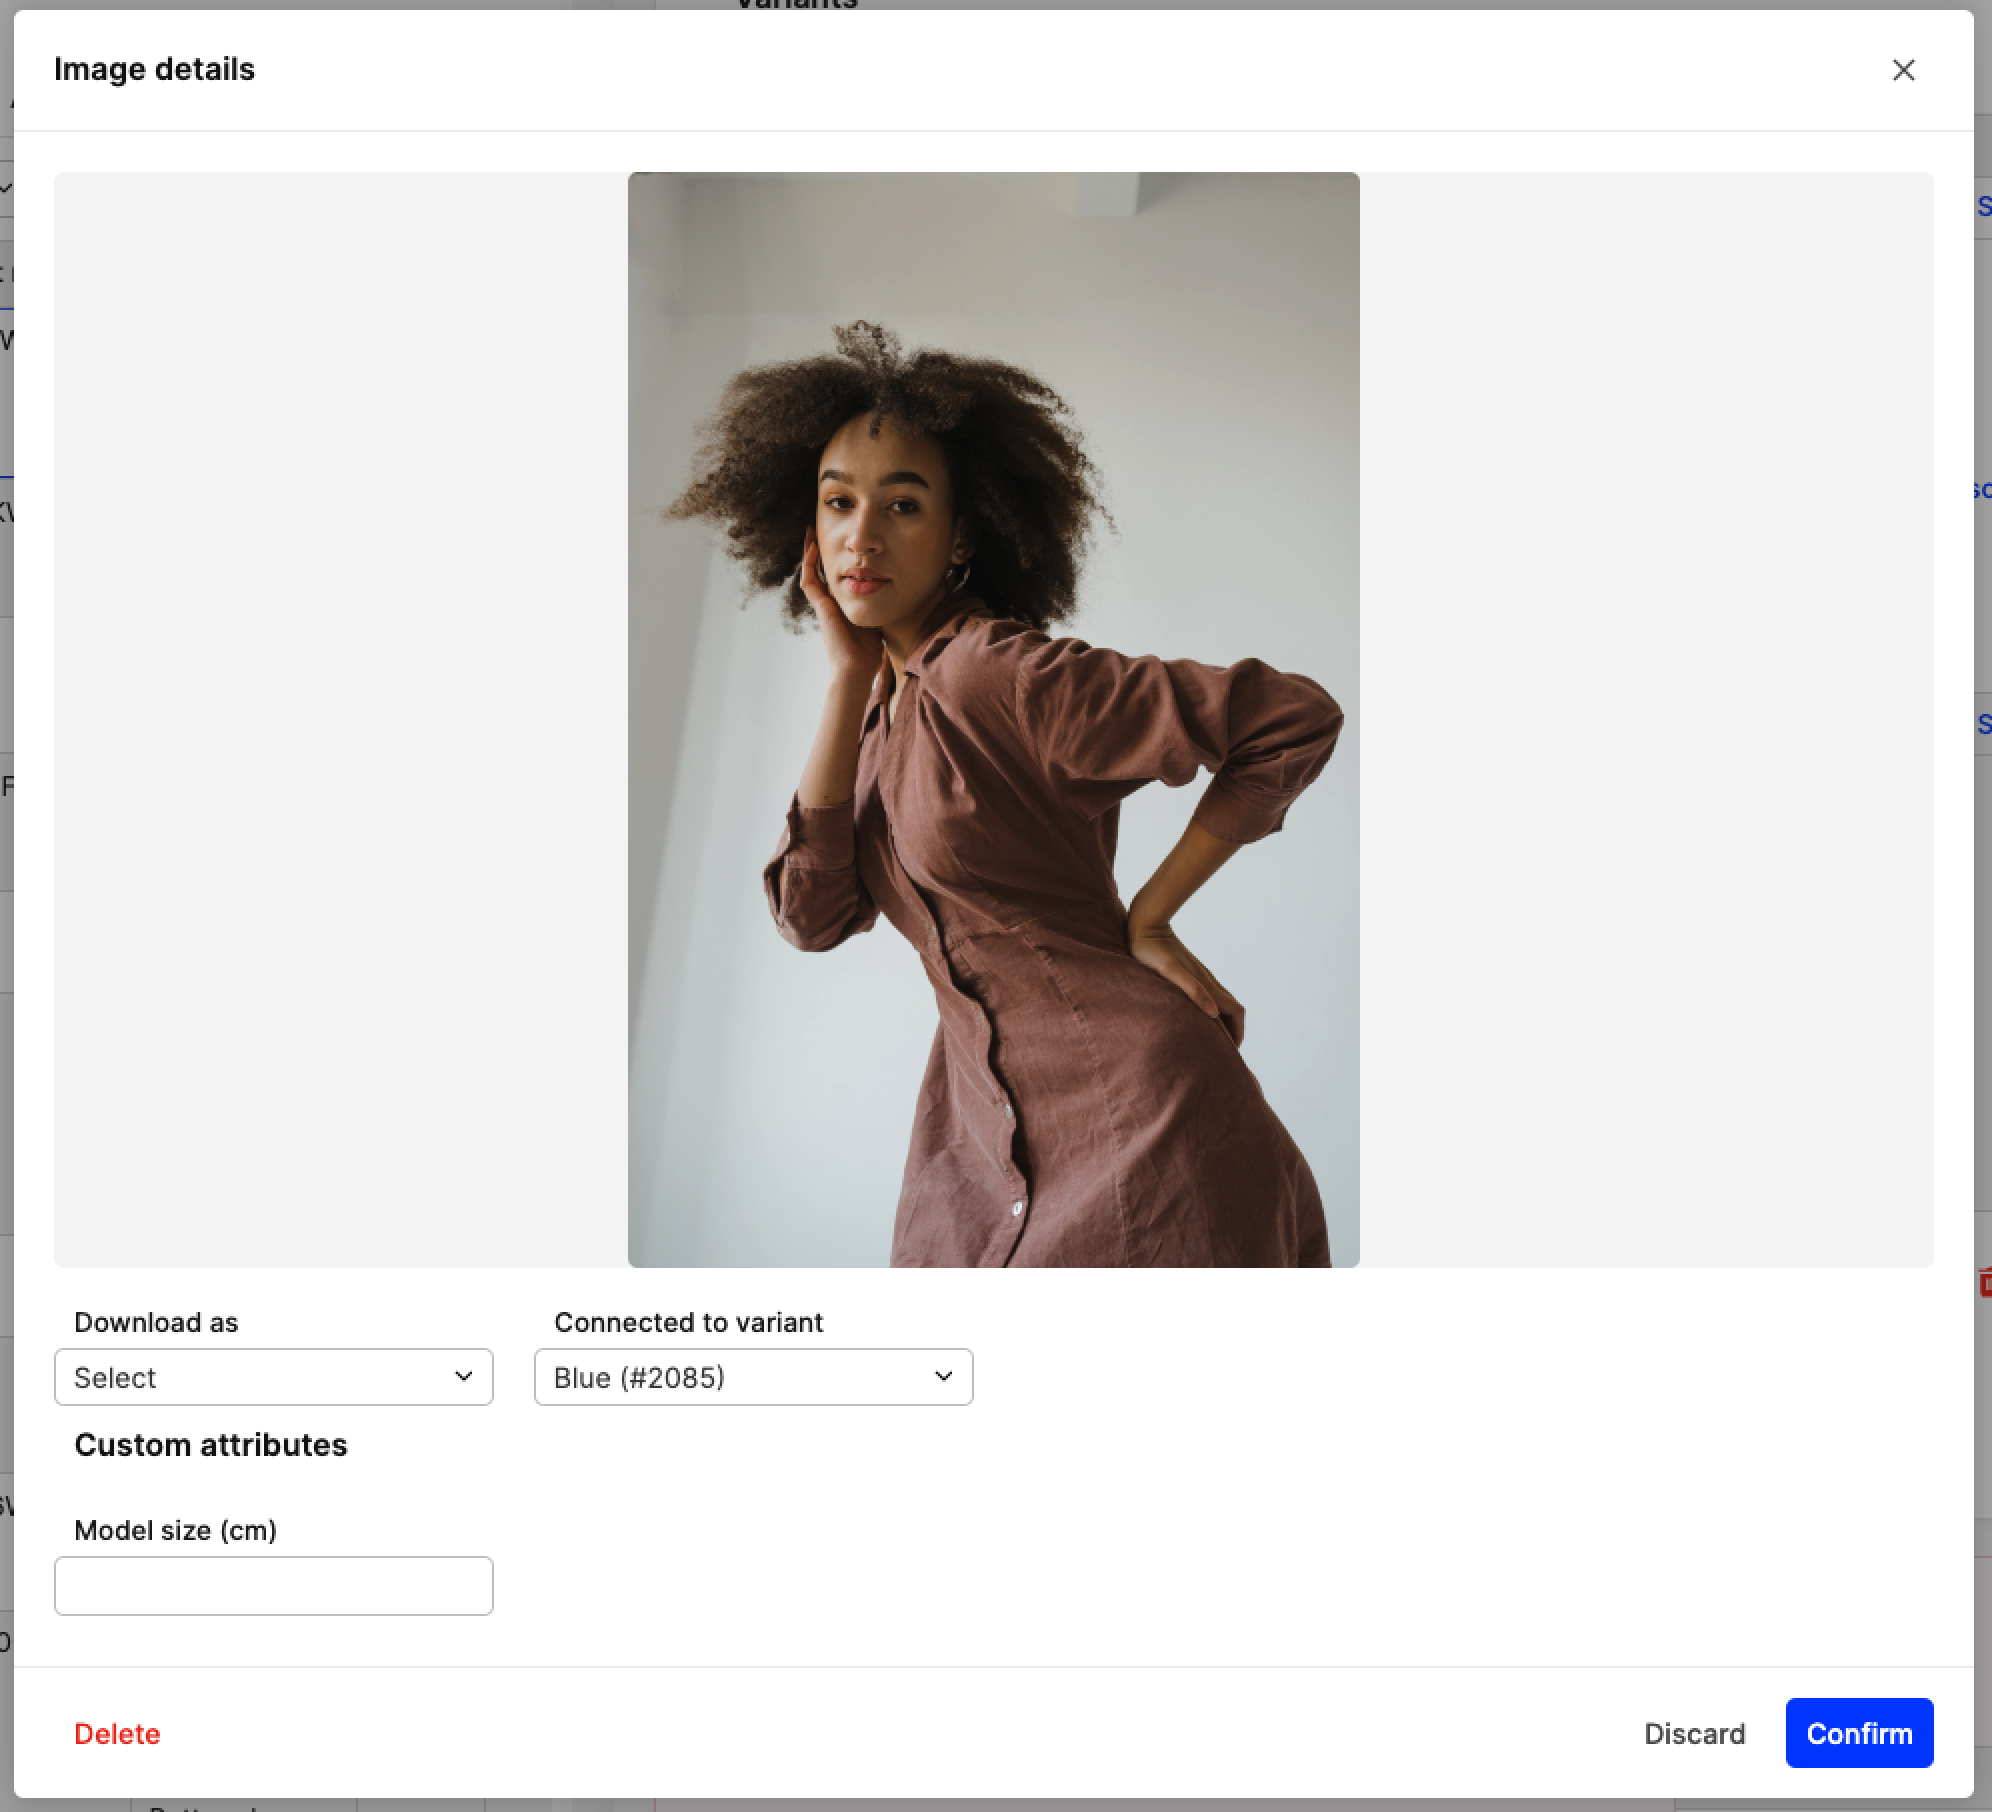
Here you can take the following actions:
- Download as - This can be used to download the media. In the dropdown menu you can choose the resolution of the media. The choices include: Hi-res (Original size), Med-res (Resized), Lo-res (Resized). Once a resolution is selected, a 'Download' button appears at the bottom of the pop-up. Click on this to download the media
- Connected to variant - This can be used to connect the image to a specific variant. It is the same action as the 'Connect' option described in the section below. If the media is already connected to a variant, you see the respective variant selected in the dropdown menu. Otherwise, if no connection to a variant has been made, you can click on the dropdown menu and choose a variant from the list. The same applies if a variant is already selected and you want to change it to another one
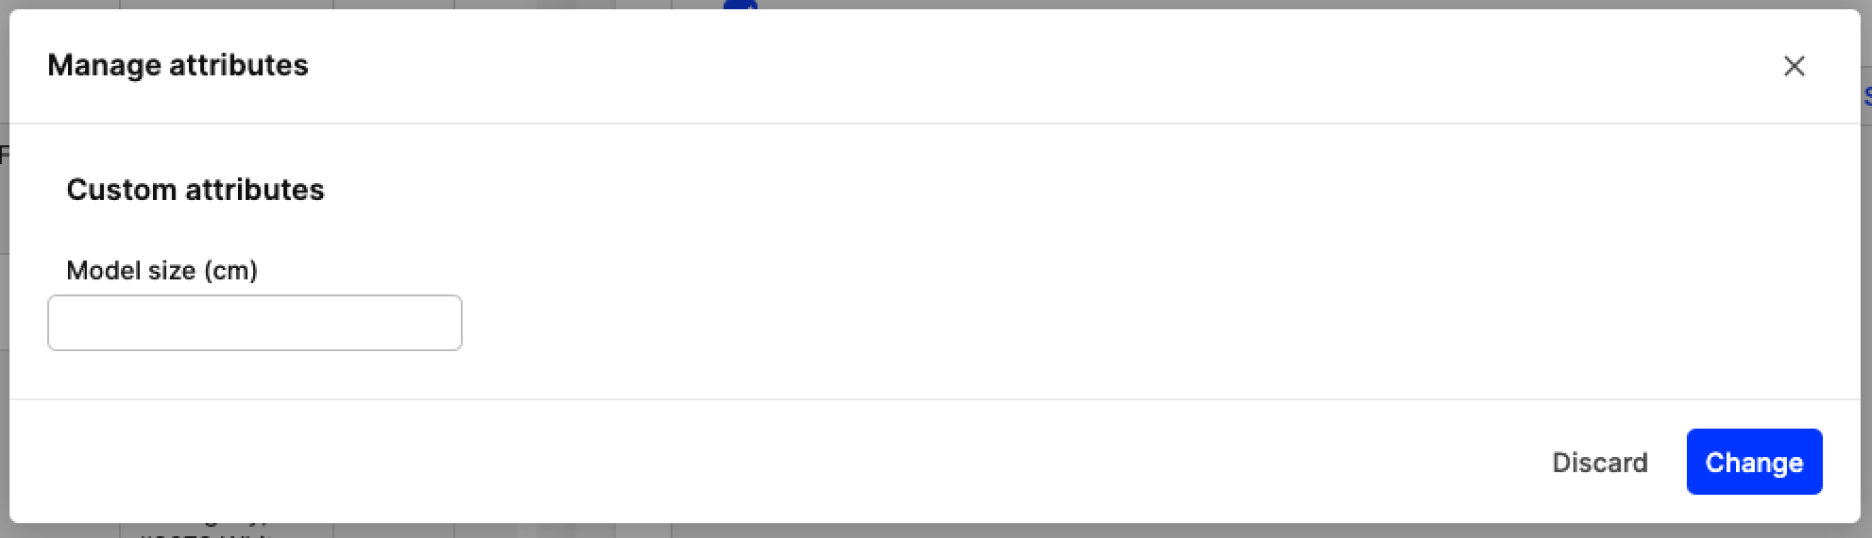
- Custom attributes - Custom attributes created on the media level appear here. In this example, we have a text-based attribute called 'Model size (cm)'. It is used to describe the size of the clothes the model is wearing in the picture.
Media-specific custom attributes are only supported in DTC. These cannot be imported through the Product import.
Tick the box of the image to make changes
The other way to make changes to media is by ticking the box of the respective image. The options vary between product-specific and variant-specific images. They are described below separately:
For media connected to a variant (Variant-specific media):
Tick the box of the image(s) on the variant you would like to make changes to. The following buttons appear:
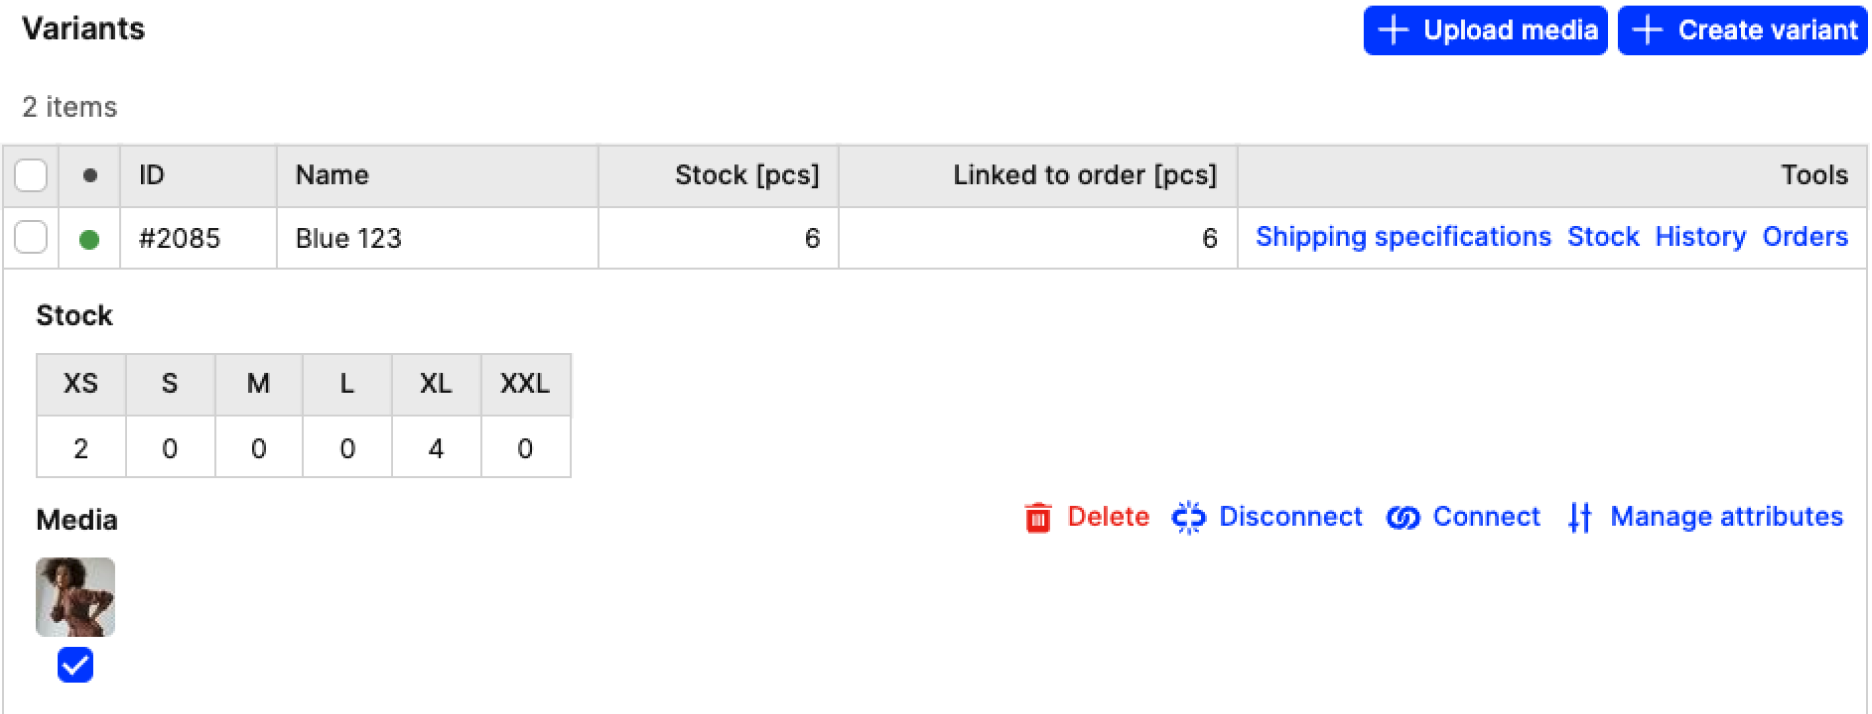
- Delete: This allows you to delete the selected media. Be careful as there is no warning pop-up, and once you click 'Delete' the media is removed
- Connect: This brings up the 'Connect media' pop-up, so you can connect the media to another variant
- Disconnect: You can use this to disconnect the media from the current variant. This will move the media to the section 'Not connected media' below. No warning pop-up comes up here either, so please use this with care: when you click 'Disconnect', the selected media is moved to that section
- Manage attributes: This allows you to enter Custom attributes specific to the image. Read more in the 'Custom attributes' section above. When you click on 'Manage attributes', a pop-up appears where all available Media attributes come up.
For media not connected to a variant (Product-specific media)
Select the checkbox of the media you would like to make changes to. The following buttons appear:

- Delete: This removes the selected media. Again, use this with care, since the media are removed immediately after 'Delete' is clicked
- Connect: The 'Connect media' pop-up comes up where you can select which variant the chosen media should be connected to
- Manage attributes: Similar to above.