How to delete Categories that are a Canonical Category
About this article
In this article you will learn all the steps that you can take to delete Categories that are selected as the Canonical Category on products.
How to find which products has the category, you would like to delete, selected as the canonical category
In Centra when attempting to delete a disabled or empty category, this error message might be displayed:
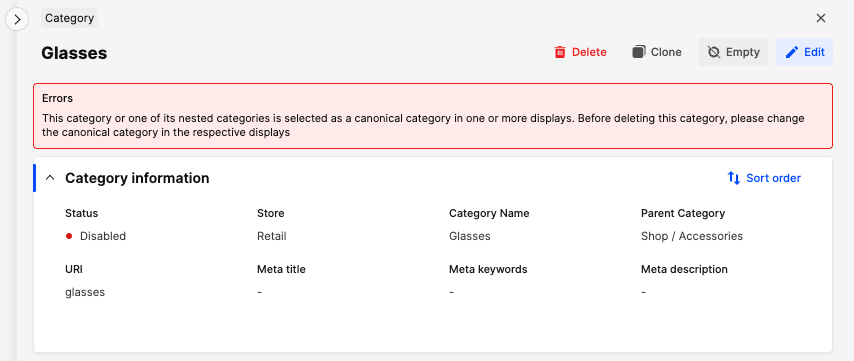 When you set up your products in Centra you can select a canonical category as well as categories on the display level. If you do not select any canonical category, Centra will pre-select the first active sub-category in the list of categories you’ve selected on your product. So to be able to delete a category completely you need to first make sure that category is not selected as a canonical category on any of your products first. As Centra will not automatically remove the canonical category just because you decide to delete the category itself.
To find which product displays still contains the canonical category, please follow the steps below:
When you set up your products in Centra you can select a canonical category as well as categories on the display level. If you do not select any canonical category, Centra will pre-select the first active sub-category in the list of categories you’ve selected on your product. So to be able to delete a category completely you need to first make sure that category is not selected as a canonical category on any of your products first. As Centra will not automatically remove the canonical category just because you decide to delete the category itself.
To find which product displays still contains the canonical category, please follow the steps below:
- Go to Products in the main menu to the left
- Click 'Export' in the top right corner and you will be directed to the following pop-up:
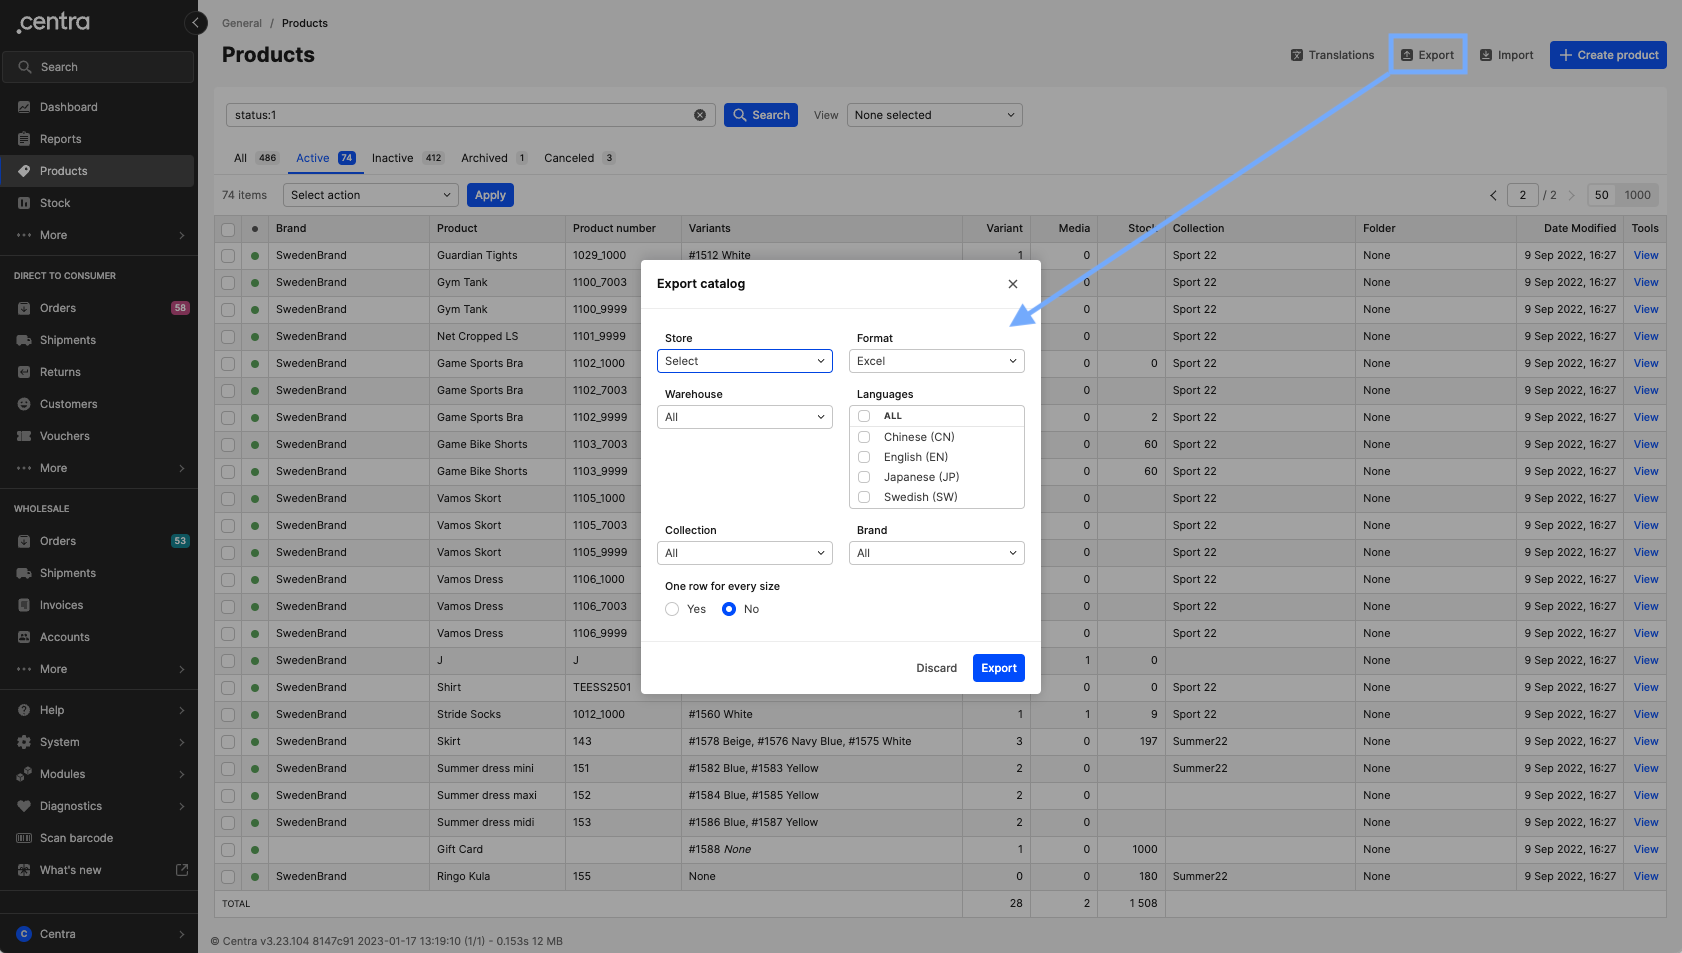
- In the pop-up you can filter in order to export specific catalog, once selected the desired options, click 'Export'
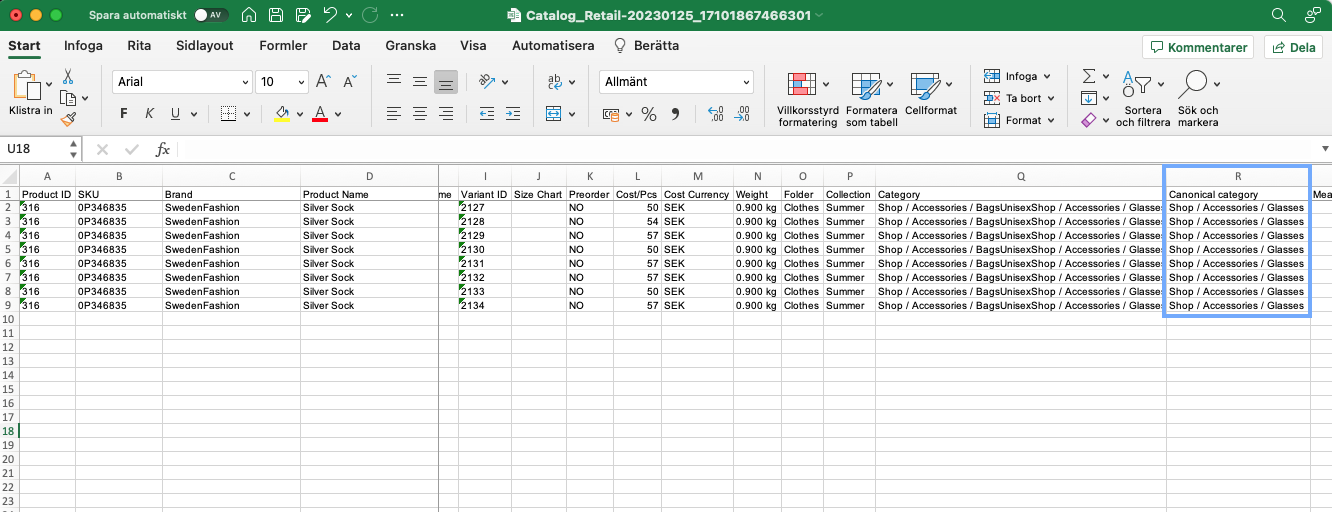
- Open the file, filter by the canonical category within the file that you wish to delete the category for. Make sure, all displays containing canceled canonical categories are found
Canonical category logic in Centra
Centra cannot show the previous selected Canonical category. So if you have one selected on the product then mark that category as canceled, when you try to delete the category itself. That category can no longer be a Canonical category. So when you go to a product in Centra and open the Display and watch what is in the Canonical category field. What you see then is just a "preview", what the new best option would be, not what was selected before as the previous category got canceled. This is the tricky part, so to actually see what is selected on the Display you need to export the product catalog like described in the previous section of this article. If you want to save the preview of what Centra thinks is the best suited Canonical category then you just hit 'Save' on the Display and the previewed Canonical will be stored on the Display and in the database of that product.
How to change canonical category on a product to be able to delete the category:
There are two ways to change the canonical category on products:
Manually in Centra
- Go to the Product that has a canonical category that you would like to change
- Open the product Display
- Set a new canonical category (if there is a canonical category already selected in the preview, click 'Save') and 'Save'

In bulk via Import
You can set a new canonical category with a product import, to update the canonical category on multiple products at once. To do so, go to Products in the main menu to the left and click on Import, select Products and your file saved as a csv format. You can read more about product import here. Make sure to at least keep the following columns in the import file to be able to update the canonical category field: Product ID, Variant ID, Category and Canonical category. When performing the import, it is important to test the import in your QA environment before proceeding in Production.
After completing one of the steps above, you should be able to delete the Category.